
If you want to install flooring over existing basement floors, the fastest, most reliable path is to keep the old surface only when it’s structurally sound, clean, and properly flat. This guide walks you through the exact checks and prep steps that determine whether you can lay new flooring directly—or need to remove and repair first—so your install won’t buckle, gap, or trap moisture.
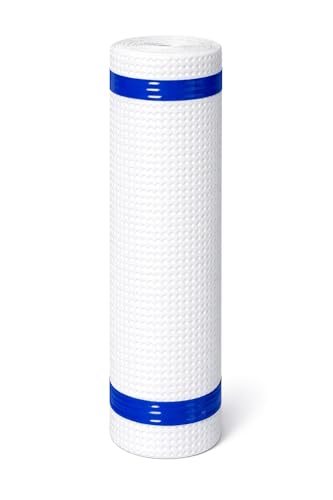



If you want to install new flooring over existing basement flooring, the key is making sure the old surface is solid, level, and dry—then using the right underlayment/thickness system for that material. In most basements, your biggest constraints are moisture and flatness, so you’ll check subfloor condition first, then prep thoroughly before installing.
This is for homeowners or DIYers working on a basement remodel who don’t want to remove every layer, but still need a reliable, long-lasting finish. If your existing floor is loose, severely uneven, or showing moisture issues, you’ll likely need to address those before layering on top.
Assess the existing basement floor (and moisture risk)
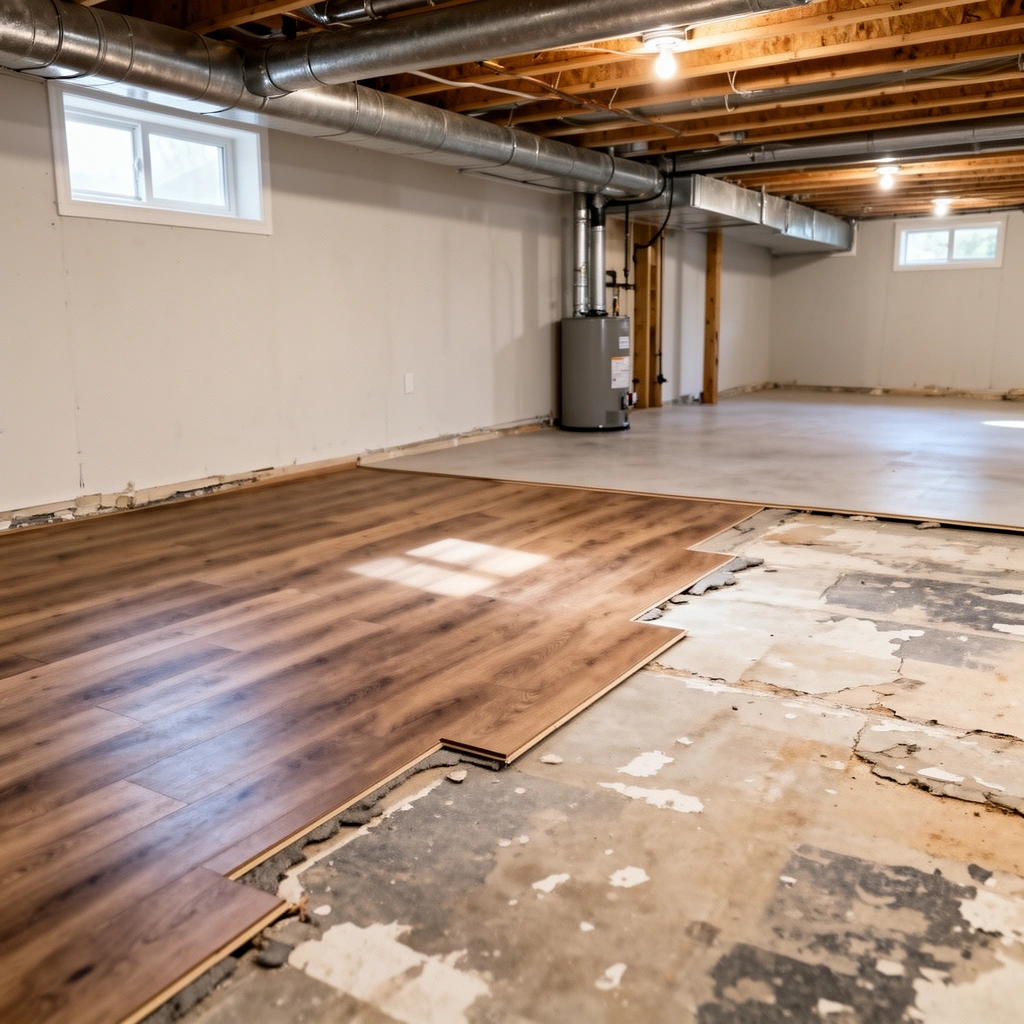
You can’t choose a “flooring over flooring” plan until you confirm the existing basement surface is stable and not actively transferring moisture. In most basements, moisture risk is the deciding factor, while flatness (how even the plane is) determines whether joints and locks will stay intact.
In practice, “installing flooring over existing basement floors” means you’re building a new assembly on top of an old one, so any movement or vapor problems in the old layer will eventually show up in the new finish. Before you touch a tool, treat this as a two-part inspection: (1) mechanical soundness and (2) moisture/vapor performance.
Check for loose tiles, peeling finishes, soft spots, and any movement when you walk across the surface—movement means the new floor can’t perform as designed.
Know the substrate type (concrete, vinyl, tile, or wood/plywood) and whether it’s sealed or painted, because many flooring systems require specific, manufacturer-approved substrates.
Look for moisture clues such as damp odor, condensation, efflorescence (white mineral deposits), and staining before you cover the area with a new floor.
Here’s what to check, in the order that prevents costly rework:
1) Stability (mechanical condition)
– Walk the perimeter and the center: if anything clicks, shifts, or “gives,” that old layer needs attention before you install flooring over existing basement floors.
– Pull up a corner (or remove one small test section) if you suspect tile or sheet goods are loosely bonded. Loose coverings can cause hollow spots, which lead to cracking, squeaks, and damaged locking edges.
2) Material identification (substrate matching)
– Concrete: common in basements; it may be painted, sealed, or patched. A sealed surface can change bonding behavior for underlayments and adhesives.
– Existing tile or vinyl: sometimes stable enough to cover, sometimes not (loose tiles are a problem).
– Wood/plywood: less common in finished basements, but when present, you must consider subfloor deflection and fastening quality.
3) Moisture risk (vapor and water intrusion)
Moisture symptoms you should treat as red flags:
– Efflorescence (salt-like white deposits)
– Dark staining that doesn’t go away
– A persistent damp odor
– Condensation on the underside/edge of materials (especially near exterior walls)
Actionable note: If you suspect active moisture, you generally need to address the source (grading, drainage, sump function, waterproofing) before you install flooring over existing basement floors. A “covering” approach can work only if vapor control is correctly designed for that floor system.
Quick moisture benchmarks to anchor your planning
Even without tearing everything out, you still need a credible moisture plan:
– Many flooring manufactures and installers rely on in-situ concrete RH testing using ASTM F2170 as a standard method. [ADD: ASTM F2170 / related manufacturer guidance]
– Concrete flatness and installation performance are often tied to tolerances described in installation instructions (frequently expressed as allowable height variation over a length). [ADD: manufacturer flatness tolerance for your flooring type]
– If you use a cementitious patch or leveling compound, you must follow its cure and moisture requirements (often including temperature/humidity limits). [ADD: patch/leveler manufacturer technical data sheet]
Prep: clean, level, and repair before installing
Installing flooring over existing basement floors succeeds or fails during prep. Once you confirm stability and moisture are controlled, your next job is to make the existing surface clean and the plane even enough for your specific flooring system.
This section matters because most “over existing” failures aren’t caused by the finish—they’re caused by trapped debris, adhesive buildup, and uneven concrete that creates stress at seams and click-lock joints. When you prep correctly, your new installation can distribute loads as designed.
Remove dirt, waxes, paint overspray, and adhesive residue because contaminants can create bond failures and high spots that telegraph through to the finished floor.
Fill cracks, spalled areas, and low spots with a patch/leveling compound that is rated for the substrate and compatible with your new flooring system.
Grind high spots where needed—most “failures” from installs over existing floors come from uneven planes that exceed the flooring’s tolerance.
Clean thoroughly (and don’t skip adhesive residue)
A basement often has:
– Old adhesive, tape residue, paint overspray, or floor finish
– Dust and mineral dust on concrete
Use a method that matches the substrate and won’t damage it:
– Concrete: vacuum thoroughly, then treat adhesive residue with grinding or the approved removal method for your situation.
– Tile/vinyl: remove anything that’s loose; smooth ridges so your underlayment doesn’t compress unevenly.
Level and repair: think “tolerance,” not “pretty”
Most flooring products specify limits like “maximum variation over a certain length,” and those limits differ by product type (LVP vs. laminate vs. engineered wood). If you exceed the tolerance:
– click-lock edges can separate,
– joints can gap,
– floors can sound hollow,
– and wear pattern can accelerate.
A practical approach:
– Mark problem areas with a straightedge.
– Fill lows with an approved patch/leveler.
– Grind highs instead of trying to “build up” everywhere (too much build-up can defeat underlayment thickness design).
Use the right repair chemistry
Patch and leveler products must be:
– compatible with concrete (or your actual substrate),
– allowed for interior/basement use,
– applied at thicknesses and cure times that match the product instructions.
Choose the right flooring system for “over existing” installs
The best flooring choice for installing over existing basement floors is the one whose installation method is explicitly designed for your existing substrate and moisture/vapor environment. If you choose a system without confirming the underlayment and substrate requirements, you risk trapping moisture and voiding the warranty.
When you’re “going over,” you’re choosing a complete stack: floor covering + underlayment (or pad) + vapor mitigation rules + seam/expansion behavior. Those layers have to work together, not just coexist.
Match the flooring type to the substrate and installation method—some systems are direct-attach, others require floating behavior and specific underlayment.
Use the manufacturer-approved underlayment (or no underlayment) for basement-grade concrete and your chosen flooring type to maintain warranty coverage.
Verify whether floating vs. glued vs. nailed installation rules affect vapor trapping, because basements can retain higher humidity than other rooms.
Decide the “stack”: floating, glue-down, or direct-attach
Common basement-friendly approaches (depending on your conditions):
– Click-lock / floating LVP or laminate: usually tolerates a degree of substrate irregularity, but underlayment and flatness tolerance still matter.
– Engineered wood floating systems: sometimes work over certain prepared substrates, but moisture/vapor control is critical.
– Glue-down LVP: can be sensitive to concrete moisture and surface preparation quality.
– Carpet tile or carpet: may be more forgiving on minor unevenness, but padding/vapor management still matters.
Don’t guess on vapor mitigation
Basements often require a vapor control strategy when covering concrete. Your flooring manufacturer’s instructions are the source of truth for:
– whether you need a vapor barrier,
– what thickness/material is acceptable,
– whether additional polyethylene changes performance.
If your existing basement floor is already a sealed surface (painted concrete, sealed coatings, glued vinyl), that can change how moisture moves through the assembly—so confirm compatibility with the manufacturer documentation.
Install steps: what to do on the day of flooring
Installing flooring over existing basement floors is mostly about correct staging and assembly—not just laying planks. On installation day, you acclimate the materials properly, plan your layout, and follow expansion/seam rules so the floor can respond to basement humidity swings.
A basement remodel often sounds straightforward until you reach transitions near vents, columns, or stairs. If you plan poorly, you end up with awkward narrow cuts, misaligned joints, or skipped expansion gaps.
Acclimate the flooring per the manufacturer’s instructions and keep basement conditions stable during the acclimation window to reduce post-install gaps or buckling.
Dry-lay rows before full installation to confirm the direction, seam placement, and cut strategy around vents, columns, and doorways.
Follow expansion gap and seam placement requirements because basements can move as indoor humidity changes.
Day-of workflow (a practical sequence)
1) Condition the space
– Run dehumidification/conditioning if your plan includes it, but follow the flooring manufacturer’s environmental requirements.
– Confirm interior temperature/humidity aligns with the installation instructions (record it if you can).
2) Acclimate the flooring
– Store flooring flat and allow the recommended acclimation time.
– Don’t acclimate in a way that exposes materials to moisture sources (like open slab edges or leaky corners).
3) Layout and dry-fit
– Dry-lay a few rows to confirm pattern alignment and cut distribution.
– Plan around obstacles so you don’t end up with tiny end pieces that are prone to failure.
4) Install using the correct method rules
– Floating systems: lock/clip using the manufacturer’s recommended approach and do not force seams.
– Glue-down systems: ensure surface prep meets adhesion requirements; use the approved adhesive and spread rate guidance.
– Engineered wood: follow any fastening or underlayment rules precisely.
Transition details matter more than people expect
Basement floors often transition to:
– main-level flooring,
– tile in wet areas,
– carpet edges near thresholds.
Treat transitions as part of the moisture and expansion system. A good transition allows movement without stressing locked joints.
What can go wrong (and how to prevent it)
Many problems with installing flooring over existing basement floors come from moisture vapor control mistakes and from ignoring flatness tolerances. If you prevent the top failure modes—trapped moisture, loose old surfaces, and uneven planes—you avoid the majority of call-backs.
Below is a contrast-style guide to the most common failure causes and what they look like in the finished floor.
| Failure mode | What you’ll notice | Prevention (what to do during prep) |
|---|---|---|
| Moisture trapped under the new floor | Musty odor, seam dulling/“lifting,” swelling at edges, or moldy smell in the underlayment area | Test concrete moisture (per your system), use manufacturer-approved vapor mitigation, and fix water intrusion pathways before covering |
| Uneven substrate beyond tolerance | Gaps at click-lock seams, hollow sound, early wear at high points | Straightedge the slab, fill lows, grind highs, and verify flatness meets the flooring spec |
| Loose old layers | Cracking over tile ridges, squeaks on click-lock, shifting sections after installation | Remove any loose tiles/sections; don’t rely on underlayment to “span” structural failure |
| Wrong underlayment for the basement conditions | Warranty problems, seam movement, or odor retention | Use underlayment approved for your exact flooring + substrate + basement-grade concrete conditions |
Moisture problems under the new floor can present as warping, moldy odors, or delamination—so treat moisture as a root cause before covering.
Over-installing on uneven concrete or loose old materials often causes squeaks, gaps, or click-lock failures—prep flatness and stability first.
Using an incorrect underlayment or skipping required vapor mitigation can trap moisture and shorten flooring lifespan, especially over basement concrete.
Pros/cons snapshot: “cover over” vs. remove-and-rebuild
Here’s a quick way to decide whether installing flooring over existing basement floors is worth it in your case.
– Cover over (pros)
– Less demolition and disposal
– Faster schedule in many basements
– Lower labor cost if the existing substrate is sound
– Cover over (cons)
– Limited performance if flatness/moisture are outside spec
– Increased risk of trapped vapor if the old layer is sealed/failed
– More complicated warranty troubleshooting later
– Remove-and-rebuild (pros)
– Cleaner, more controlled moisture and flatness outcomes
– Easier to verify substrate condition (and durability)
– Remove-and-rebuild (cons)
– More labor, dust, and time
– Potentially higher cost
If your old floor is stable and dry, covering can work; if it’s moving or showing active moisture, removal is usually the only reliable long-term path.
Verdict: when installing over existing basement floors makes sense
Installing over existing basement floors makes sense only when the old surface is solid, reasonably flat, and dry—and when you follow the flooring manufacturer’s approved substrate and underlayment requirements. If you detect active moisture, significant unevenness you can’t correct, or a substrate that’s clearly deteriorating or loose, you should plan on removal and full substrate repair.
A realistic way to think about it: covering is an “assembly-engineering” job, not a shortcut. The new flooring system has to be designed to work with the conditions created by the old floor beneath it.
A reference table to help you decide quickly
Use this as a fast planning aid for your basement remodel. The “best fit” column assumes the flooring manufacturer approves the substrate/stack; always verify the installation instructions for your specific product.
Typical “Cover Over” Suitability by Basement Existing Surface
| # | Existing basement surface | Stability requirement | Moisture/vapor risk | Cover-over fit score | Best for |
|---|---|---|---|---|---|
| 1 | Sound, sealed concrete (no efflorescence) | ★★★☆☆ | Low | 8.3/10 | Floating LVP/laminate systems that allow concrete over |
| 2 | Existing ceramic/porcelain tile (fully bonded) | ★★★★☆ | Medium | 7.5/10 | Systems that specify tile as approved substrate |
| 3 | Vinyl sheet flooring (tight, no lifting) | ★★★☆☆ | Medium | 6.9/10 | Approved underlayments over resilient vinyl (per manufacturer) |
| 4 | Concrete with pinholes/sealed paint coat | ★★☆☆☆ | High | 4.8/10 | Only after surface prep + verified vapor control compatibility |
| 5 | Loose tile (hollow sound) | ★☆☆☆☆ | Varies | 2.9/10 | Removal and subfloor correction first |
| 6 | Cracked/effloresced concrete | ★★☆☆☆ | High | 3.6/10 | Fix moisture source + approved mitigation before covering |
| 7 | Wood/plywood subfloor over basement slab | ★★★☆☆ | Medium | 6.4/10 | When deflection is corrected and surfaces are flat per spec |
Note: “Cover-over fit score” is a planning heuristic based on stability and moisture risk categories; your flooring manufacturer’s approved-substrate list and warranty rules override any general guidance.
Quick checklist (save this)
– [ ] Old floor is firmly attached (no movement)
– [ ] Surface is clean and free of wax/paint/loose debris
– [ ] Cracks/low spots are filled; high spots are ground
– [ ] Moisture concerns are addressed or ruled out
– [ ] Flooring + underlayment are explicitly approved for the existing substrate
– [ ] Expansion gaps and seam rules are followed
FAQ
Can I install new flooring over basement tile or vinyl?
Often yes, but only if the existing tile or vinyl is stable and properly prepped (no loose pieces). Check the flooring manufacturer’s approved substrate list and whether a specific leveling/surface-smoothing step is required for your basement.
Do I need to remove existing flooring in a basement?
Not always. Remove it when it’s loose, damaged, too uneven, or when moisture/vapor control can’t be handled correctly with a “cover over” approach that still meets the flooring system’s requirements.
How do I know if moisture is the real problem?
If you see staining, condensation patterns, efflorescence, or a persistent damp feel/smell, treat moisture as a root issue before installing. Use manufacturer guidance for moisture mitigation and [ADD: source for moisture testing method appropriate to your flooring type].
Will uneven concrete ruin the new floor?
It can. Many flooring systems tolerate only small flatness variations—if the concrete is out of tolerance, you’ll need leveling/patching to avoid future gaps, noise, or failure.
What underlayment should I use?
Use what the manufacturer specifies for your flooring type and basement-grade conditions. If the manufacturer calls for a vapor barrier or disallows certain underlayments over concrete, don’t guess.
Sources
– [ADD: manufacturer installation instructions/spec sheet for your specific flooring type regarding approved substrates, underlayment/vapor requirements, and flatness tolerances]
– [ADD: manufacturer guidance for concrete moisture/vapor mitigation methods for your flooring system]
– [ADD: relevant primary source for moisture mitigation or subfloor prep requirements, such as manufacturer documentation for primers/patches/levelers]
If you tell me what your existing floor is (concrete/tile/vinyl), and what you want to install (LVP, laminate, engineered wood, tile, etc.), I can tailor the prep steps and the “what can go wrong” section to your exact stack.
Covering existing basement floors can be a smart, cost-effective remodel move—but only when the substrate is solid, moisture is controlled, and you build the correct system stack as directed by the flooring manufacturer. When any of those conditions fail, removal and proper substrate correction is the safer long-term choice. Use the checklist above to sanity-check your plan before you start, and confirm underlayment/vapor requirements so your new floor performs for years, not months.
Frequently Asked Questions
What should I check before installing new flooring over existing basement floors?
First, verify the condition and level of the existing basement subfloor—any loose sections, squeaks, or high/low spots should be addressed before installation. You’ll also want to confirm moisture levels, especially if the basement is prone to dampness; use a moisture meter or perform a simple plastic sheet test. Finally, make sure you have enough clearance for transition thresholds so new flooring doesn’t create door or stair clearance issues.
How do I prepare basement floors for installing flooring over an existing surface?
Start by thoroughly cleaning and removing debris, wax, paint overspray, or old adhesive that can prevent new flooring from bonding or sitting flat. Repair cracks, fill low areas with an appropriate patch compound, and sand down high spots to create a smooth, even base for resilient flooring or laminates. If you’re installing click-lock or floating floors, follow the manufacturer’s guidance on underlayment and flatness tolerance, since uneven basement floors can lead to gaps and joint failure.
Which basement flooring types work best over existing floors?
Floating click-lock vinyl planks, laminate, and many engineered wood systems are often good choices because they can be installed over prepared, stable subfloors with the right underlayment. For concrete basement floors, sheet vinyl or luxury vinyl tile may provide better performance when paired with proper vapor control. The “best” option depends on your basement moisture conditions and whether your existing flooring is smooth, firmly adhered, and level. If your current surface is soft, heavily damaged, or prone to movement, you may need removal instead of installation over it.
How can I prevent moisture problems when installing over existing basement floors?
Moisture is one of the biggest risks in basement flooring installations, so use a moisture barrier or vapor barrier that matches your flooring type and subfloor material. For concrete slabs, consider a properly rated underlayment with vapor protection, and keep humidity under control with dehumidification when needed. Avoid trapping moisture by skipping underlayment steps or sealing over damp concrete—follow manufacturer instructions and local building practices. If you see ongoing water intrusion, address the source before installing new flooring.
Is it okay to install basement flooring over tile, and what steps should I follow?
Often it’s possible to install over existing tile if the surface is solid, flat, and securely bonded—however, the grout lines and unevenness can cause problems for floating and click-lock floors. You’ll typically need to level the surface using a suitable floor leveling compound or patch system, and then add the recommended underlayment for your specific flooring. If the tile is loose, cracked, or rocking, it’s better to remove it to prevent future movement and gaps. Always check the flooring manufacturer’s “install over tile” requirements before you begin.
📅 Last Updated: October 11, 2026 | Topic: How to install over existing flooring basement floors? | Content verified for accuracy and freshness.
References
- Google Scholar Google Scholar
https://scholar.google.com/scholar?q=install+flooring+over+existing+concrete+basement+moisture+barrier - Google Scholar Google Scholar
https://scholar.google.com/scholar?q=basement+floor+over+existing+flooring+slab+vapor+barrier+underlayment - Google Scholar Google Scholar
https://scholar.google.com/scholar?q=floating+floor+installation+over+concrete+basement+guidelines+humidity - https://www.epa.gov/mold/mold-and-mildew-basics
- https://www.cdc.gov/mold/default.htm
- Floor
https://en.wikipedia.org/wiki/Subfloor - Underlayment
https://en.wikipedia.org/wiki/Underlayment - Laminate flooring
https://en.wikipedia.org/wiki/Laminate_flooring - https://en.wikipedia.org/wiki/Floating_floor
- Damp proofing
https://en.wikipedia.org/wiki/Damp-proofing