
To install Coreluxe flooring, first, prepare the subfloor by ensuring it is clean and level. Then, lay the underlayment and begin installing the flooring planks using a click-lock method.
Benefits Of Installing Coreluxe Flooring
Coreluxe flooring offers numerous benefits that make it a popular choice for homeowners. One of its standout features is its durability and longevity. With its strong construction and wear-resistant surface, Coreluxe flooring is designed to withstand heavy foot traffic and everyday wear and tear, ensuring that it will last for years to come.
In addition to its durability, Coreluxe flooring also boasts easy maintenance. Unlike other types of flooring that require special care and cleaning products, Coreluxe flooring can be easily cleaned with regular sweeping and mopping, making it a convenient and low-maintenance option for busy households.
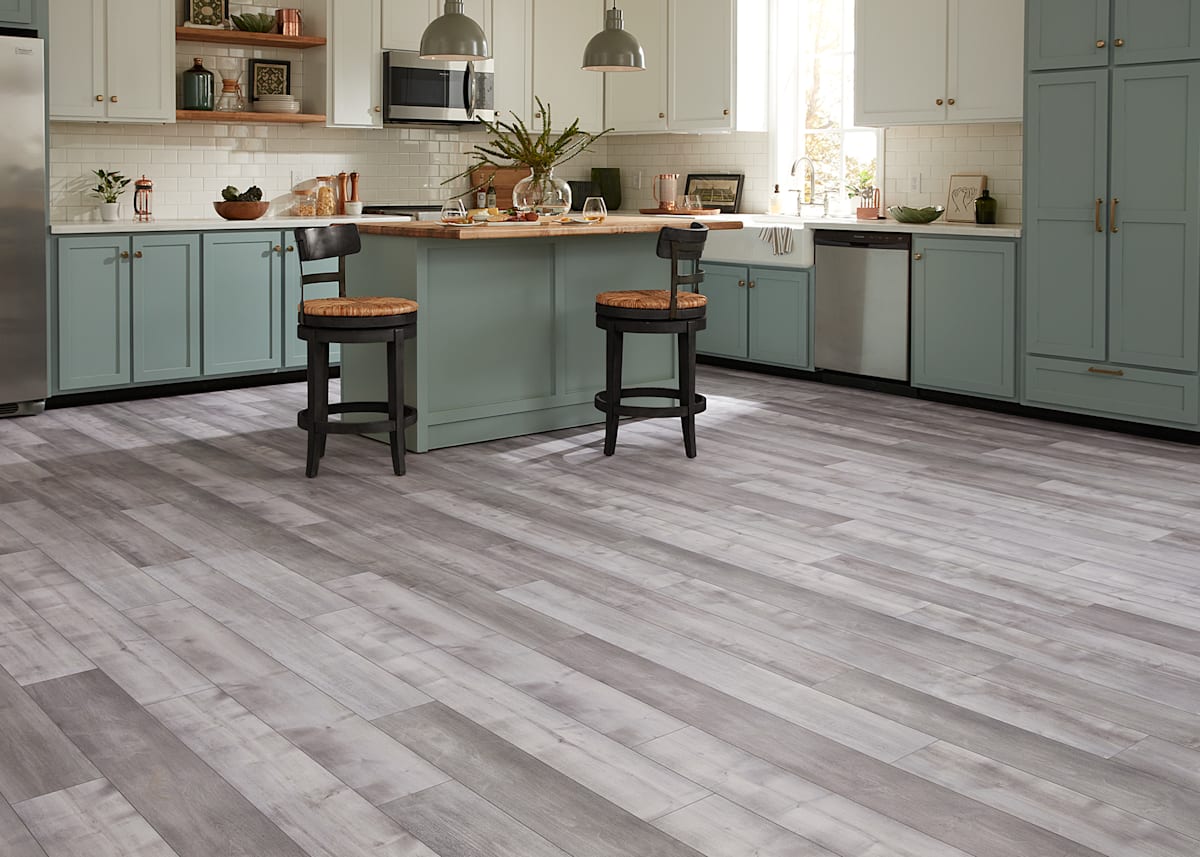
Furthermore, Coreluxe flooring offers a wide variety of designs and styles to choose from. Whether you prefer the look of hardwood, tile, or stone, Coreluxe flooring can provide the aesthetic appeal you desire. Its realistic design options allow you to achieve the look of natural materials without the high cost and maintenance associated with them.
Lastly, Coreluxe flooring is known for its cost-effectiveness. Compared to other flooring options, Coreluxe flooring offers great value for its price. Its long lifespan, easy maintenance, and affordable installation make it an excellent investment for any homeowner.
Tools And Materials Required
To install Coreluxe flooring, you will need several tools and materials. These include a hammer, measuring tape, utility knife, underlayment, Coreluxe flooring planks, and spacers. The hammer will be used to secure the flooring planks in place. The measuring tape is essential for ensuring accurate measurements during installation. A utility knife will come in handy for trimming the flooring planks as needed. Underlayment is necessary to provide a smooth and stable surface for the flooring. Coreluxe flooring planks are the main material that will be installed. Lastly, spacers will help maintain consistent spacing between the planks for a professional finish.
Preparing The Subfloor
Preparing the subfloor is a crucial step in the installation of Coreluxe flooring. Before starting the process, it is important to clean the subfloor surface thoroughly. Remove any debris, dust, or dirt using a broom or vacuum cleaner. This will help in achieving a smooth and even surface for the new flooring.
Next, ensure that the subfloor is level. Use a level tool to check for any unevenness. If you notice any low or high spots, they will need to be addressed before installing the flooring. Depending on the severity of the unevenness, you may need to use a self-leveling compound or plywood to level the subfloor.
It is also essential to inspect the subfloor for any damages. Repair any cracks, holes, or other imperfections using a suitable patching compound or filler. This will help in creating a stable and durable base for the Coreluxe flooring.
By following these steps and properly preparing the subfloor, you can ensure a successful installation of Coreluxe flooring. Remember to always refer to the manufacturer’s guidelines for specific instructions tailored to your flooring type.
Acclimating The Coreluxe Flooring
Bringing the flooring into the room and allowing the planks to adjust to the room’s temperature and humidity is an important step when it comes to installing Coreluxe Flooring. This process ensures that the flooring will acclimate properly and reduce the risk of gaps or buckling after installation.
Acclimating the flooring allows it to expand or contract based on the room’s conditions, minimizing the chances of future issues. By bringing the planks into the room where they will be installed, they have the opportunity to adapt to the moisture level and temperature. This is especially crucial if you will be installing the flooring in a room with fluctuating humidity levels, such as a bathroom or basement.
Place the sealed boxes of Coreluxe Flooring in the room where they will be installed. Make sure to store the boxes away from direct sunlight and HVAC vents. Leave them for at least 48 hours, allowing the planks to adjust to the current room conditions. Keep the temperature and humidity levels similar to those that will be present after installation. This process will help ensure a smooth and stable installation of Coreluxe Flooring.
1. Start With A Proper Layout Plan
Installing Coreluxe flooring can be done with proper planning and measurements. Begin by creating a layout plan, which includes measuring the room dimensions, determining the layout pattern, and estimating the required number of flooring planks.
Start by measuring the room to determine the length and width. This will help you calculate the total square footage needed for the project. Next, consider the layout pattern, such as running the planks parallel or perpendicular to the longest wall, or creating a diagonal pattern for added visual interest.
Once you have determined the layout pattern, calculate the number of planks needed for the installation. Take into account any waste factors, such as cuts or irregular shapes. You can consult the manufacturer’s guidelines or use an online calculator to estimate the quantity.
By following these steps and properly planning the installation, you can ensure a successful and smooth process for installing Coreluxe flooring.
2. Install Underlayment
Choosing the right underlayment material is crucial for a successful Coreluxe flooring installation. The underlayment acts as a base for the flooring and helps to provide soundproofing and moisture barrier.
When selecting underlayment, consider the type of flooring and the subfloor condition. For concrete subfloors, a vapor barrier underlayment is recommended to prevent moisture seepage. For plywood or OSB subfloors, foam or cork underlayment can add cushioning and reduce noise.
Once you have chosen the underlayment material, it’s time to cut and lay it on the subfloor. Measure the dimensions of the room and cut the underlayment accordingly, leaving a 1/4-inch gap around the perimeter for expansion. Use a utility knife or scissors to cut the underlayment and ensure a precise fit.
Starting from one corner of the room, roll out the underlayment, making sure it is aligned with the wall. Use staples or adhesive to secure the underlayment in place, following the manufacturer’s instructions. Trim any excess underlayment along the edges.
By properly installing underlayment, you create a stable and durable foundation for your Coreluxe flooring, enhancing its longevity and performance. Follow these steps carefully to ensure a successful installation.
3. Begin Installing The First Row
Learn how to install Coreluxe flooring by beginning the process with installing the first row. This step is crucial in ensuring a successful and seamless installation of your new flooring.
Starting from the left corner of the room, ensure the first row of the Coreluxe flooring installation is straight and aligned. Use spacers to maintain proper gaps between the planks, creating an aesthetically appealing look and allowing for expansion and contraction. This step is crucial to achieve a professional finish for your flooring project.
Start by placing the first plank snugly against the wall, using the spacers to leave an appropriate gap. Continue installing subsequent planks, interlocking them firmly along the length and width, until you reach the end of the row.
Make sure to check the alignment throughout the process, adjusting the planks as necessary. This attention to detail will ensure a seamless appearance and prevent any issues with the rest of the installation. Continue following the manufacturer’s instructions and repeat the process for subsequent rows.
4. Continue Installing The Remaining Rows
To complete the installation of Coreluxe flooring, you need to continue connecting the planks using the tongue and groove system. Make sure to offset each row for a staggered look, which will add visual appeal to your floor. Start by placing the first plank of the next row at a slight angle, inserting its tongue into the groove of the previous row. Then, gently press the plank down to secure the connection. Repeat this process for the rest of the planks in the row.
Throughout the installation, it’s crucial to check for levelness regularly. If you notice any unevenness, use a tapping block and a mallet to gently tap the planks into place. This will ensure a snug fit and a seamless appearance. Remember to maintain a consistent expansion gap along the walls to allow for natural movement. Once you’ve completed the remaining rows, you’ll have successfully installed your Coreluxe flooring.
5. Finishing Touches And Floor Maintenance
To achieve a seamless finish, trimming the last row may be necessary. Measure and mark the planks using a square and a pencil, then use a saw to make precise cuts. Remember to wear protective goggles and gloves. After the flooring installation, installing baseboards and trim will provide a polished look. Use a measuring tape, miter saw, and nail gun to secure the moldings in place. Pay attention to corners and ensure the cuts are accurate for a professional finish. Once all the installation is complete, it’s important to clean up any excess adhesive or debris. Use a damp cloth to wipe away any adhesive residue, paying extra attention to the edges and corners. Regularly sweep and vacuum the floor to remove dirt and grit that could potentially scratch the surface. By following these finishing touches and maintenance tips, your Coreluxe flooring will not only look beautiful but also last for years to come.
Tip 1: Measure Multiple Times, Cut Once
Accurate measurements are crucial when installing Coreluxe Flooring to minimize waste and errors. Before cutting the planks, take the time to measure multiple times to ensure accuracy and avoid unnecessary mistakes. Double-checking your measurements will help in reducing the risk of wasted material or ill-fitting pieces that can delay your installation process.
Tip 2: Maintain Even Spacing
When installing Coreluxe flooring, maintaining even spacing is crucial to achieving a professional and visually appealing result. Using spacers consistently throughout the installation process helps ensure that the planks are properly aligned and there are no gaps or unevenness between them. This not only enhances the overall look of the floor but also improves its functionality and durability.
By placing spacers between each plank during installation, you create a uniform gap that allows for expansion and contraction of the flooring as needed. This is particularly important in areas with fluctuating temperature and humidity levels. Without proper spacing, the flooring may buckle or warp over time.
It is recommended to use spacers of the same size to maintain a consistent gap between all planks. These spacers can be easily removed once the flooring is installed, leaving behind a neat and seamless finish. With attention to detail and the use of spacers, you can ensure a successful and visually pleasing installation of your Coreluxe flooring.
Tip 3: Gradual Acclimation Is Key
Allowing the flooring to acclimate for at least 48 hours is crucial in preventing any issues such as buckling or warping after installation. Coreluxe flooring, like any other flooring material, needs time to adjust to the temperature and moisture levels of the environment where it will be installed. This process of acclimation allows the planks to expand or contract to their natural state, minimizing the chances of any problems down the line.
To ensure successful acclimation, here are some steps to follow:
- Leave the boxes of Coreluxe flooring in the room where it will be installed.
- Keep the room at a temperature of 65-85°F and humidity levels between 35-55%.
- Open the boxes, remove the plastic wrapping, and loosely stack the planks in the room.
- Leave a small gap between each stack to allow for proper air circulation.
By following these guidelines, you can ensure that your Coreluxe flooring will acclimate properly, leading to a smooth and long-lasting installation.
Frequently Asked Questions Of How To Install Coreluxe Flooring
Does Coreluxe Need Underlayment?
CoreLuxe flooring does not require underlayment. Its rigid core construction provides stability and eliminates the need for additional padding. Enjoy the convenience and durability of CoreLuxe flooring without the extra step of underlayment installation.
Does Coreluxe Ultra Need Underlayment?
No, CoreLuxe Ultra does not require underlayment. It is designed with a built-in backing, providing a cushion and soundproofing layer.
Does Coreluxe Need To Acclimate?
Yes, CoreLuxe flooring needs to acclimate before installation. Acclimating allows the flooring to adjust to the temperature and humidity of the room, preventing issues like warping or buckling. It is recommended to acclimate the flooring for at least 48 hours prior to installation.
Do You Have To Glue Down Lvp Flooring?
No, LVP flooring does not have to be glued down. It can be installed as a floating floor using the click-and-lock method, making it easier and quicker to install. However, some circumstances may require gluing down the flooring for added stability and to prevent movement.
Conclusion
To sum up, installing Coreluxe flooring is a simple and rewarding process that can transform the look and feel of your space. By following the step-by-step guide provided in this blog post, you can confidently tackle the installation with ease.
Remember to prepare the subfloor, acclimate the planks, and use the appropriate tools for a seamless finish. With Coreluxe flooring, you can enjoy durable, stylish, and easy-to-maintain floors for years to come. Embrace the opportunity to upgrade your home’s aesthetic effortlessly.
Happy installing!


