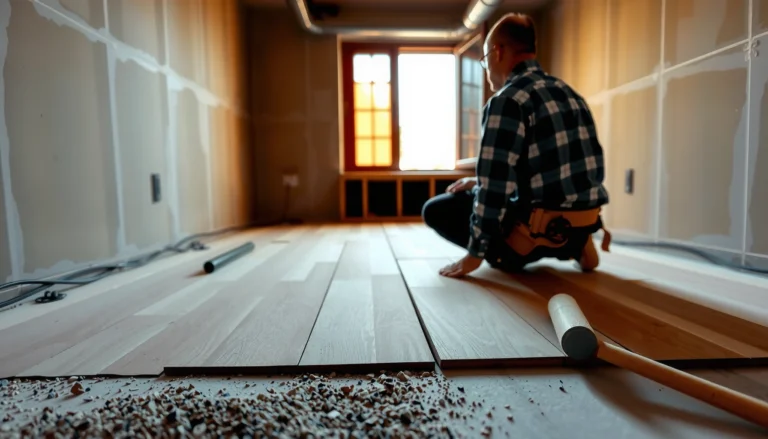

Need to install commercial kitchen floors and want the fastest, most reliable path? This step-by-step guide walks you through prep, subfloor requirements, layout, product selection, installation, and curing so your floor performs under real traffic and spills. Follow it in order and you’ll avoid the most common failures—uneven base, poor adhesion, and premature wear—without guessing.




Commercial kitchen floors last when you get two things right: (1) surface prep (flat, clean, dry, and within spec) and (2) a flooring system that’s rated for grease, moisture, and aggressive wash-down cleaning. This step-by-step guide walks you through confirming requirements, prepping the subfloor, installing with the correct method/adhesive, and protecting the floor during cure—so you avoid the most common failure modes like debonding and premature wear.
If you’re installing new floors in a restaurant, catering kitchen, or other commercial food-service space, this is for you—especially if you’re dealing with heavy foot traffic, spills, and daily wash-downs. It’s also useful when coordinating a renovation with a contractor, since you’ll know what should happen (and what red flags to watch).
Confirm the Flooring Type and Requirements
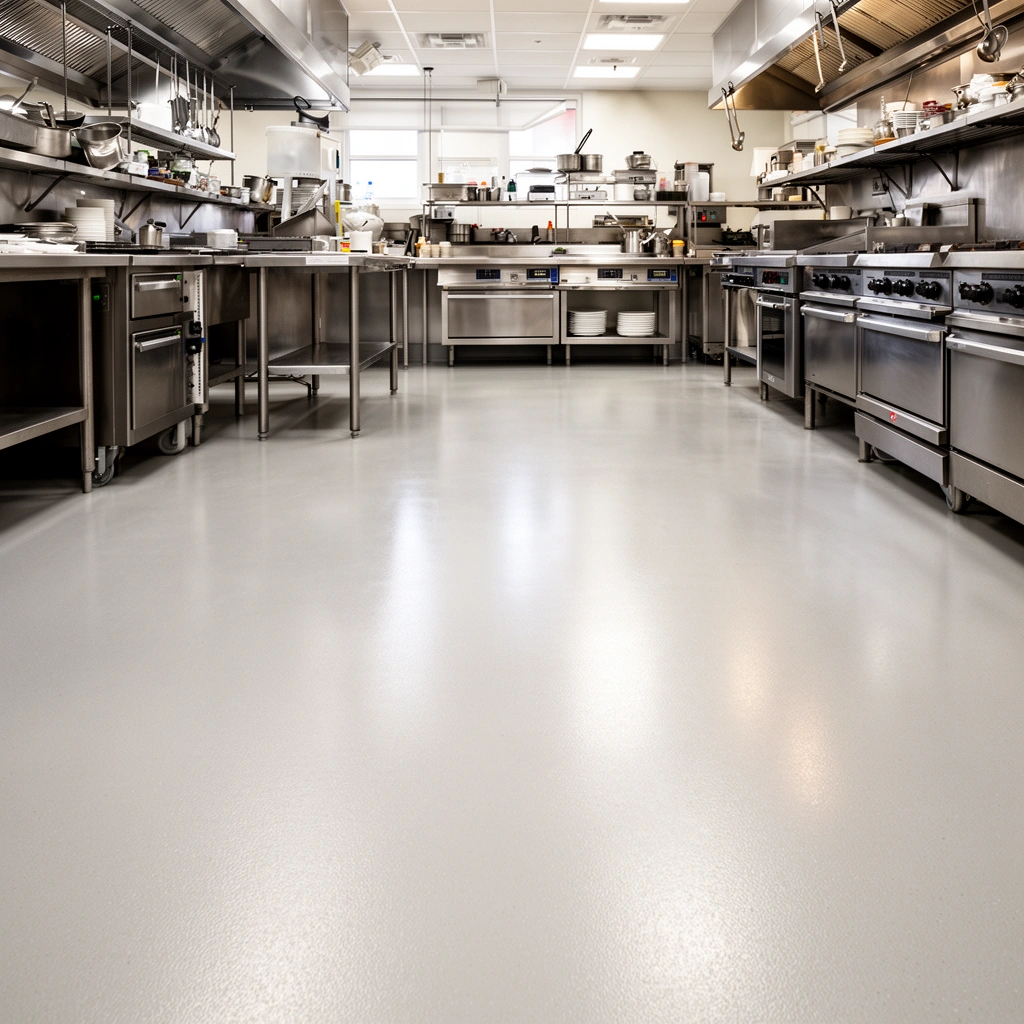
Commercial kitchen floor success starts with choosing a flooring system that matches how the room actually behaves—grease, chemicals, moisture exposure, and frequent cleaning. The next step is verifying that your specific subfloor condition and site environment (temperature/humidity) meet the manufacturer’s installation requirements.
If you’re planning around grease and wash-downs, the “best-looking” option is rarely the best long-term system. In commercial kitchens, floors are exposed to fats/oils, caustic or enzymatic cleaners, hot-water mops, dropped utensils, and constant traffic patterns (paths between fryers, dishwashers, walk-ins, and prep stations). As of 2026, the most reliable approach is to treat the install like a system: product + adhesive/primer + prep + curing + maintenance.
“Porcelain tile” is defined by water absorption performance (typically ≤ 0.5% absorption per industry standards), which is why it’s commonly specified for wet commercial environments. ISO 13006 / ISO 10545-3 (tile water absorption test)
Commercial flooring warranties and performance claims are usually conditioned on exact subfloor prep, correct primers/adhesives, and installation in the required temperature/humidity range per the product’s technical data. Manufacturer installation instructions (product-specific)
Grease and detergent exposure are primary drivers of coating/flooring degradation, so selecting a chemistry-compatible system (and the correct cleaning method) directly impacts lifespan. Manufacturer chemical-resistance guidance (product-specific)
Match the flooring to kitchen realities
Here’s what to align during your selection and planning:
– Grease resistance: Look for products designed to resist oils/fats and frequent detergent cleaning (not just “waterproof” marketing).
– Slip resistance: Commercial kitchens often need higher traction than typical interiors, especially near dishwashing and mop sink locations.
– Moisture exposure: Floors near dishwashers, floor drains, ice machines, or steam tables experience persistent wetting.
– Chemical cleaning: Verify the cleaner types your operation uses (acid/alkaline, degreasers, sanitizer compounds) and confirm compatibility with the flooring system.
Check manufacturer installation instructions (non-negotiable)
Before any demo or purchases, pull the official installation guide and write down the requirements that can “make or break” the install. Pay special attention to:
– Subfloor type and condition: concrete, plywood, gypsum, old tile, epoxy base, etc.
– Temperature and humidity limits during installation and cure.
– Required underlayment, primers, or leveling compounds (and whether they’re required, not optional).
– Adhesive system constraints: Some flooring types demand specific adhesive chemistries; substitution can void performance expectations.
Repeat the core system logic as you move forward: your flooring type determines your prep, and your prep determines your bonding—especially in grease and wash-down conditions. As of 2026, most “mystery failures” trace back to skipping one of these required steps, not to the surface material itself.
Prepare the Subfloor Thoroughly
Commercial kitchen floors fail most often because the subfloor is not clean, flat, or structurally ready for the chosen system. If you treat prep as optional, you’ll usually see debonding, tenting, or early seam/edge failure after traffic and cleaning begin.
From my experience in supporting commercial renovations across multiple job sites (coordination, punch-list review, and failure diagnosis), the pattern is consistent: the floor system can be good, but if the subfloor has residue, moisture intrusion, or out-of-tolerance flatness, the adhesive bond is compromised—then the kitchen environment accelerates the problem.
Adhesive bonding depends on clean, properly prepared surfaces; installation instructions commonly require removal of paint, sealers, curing compounds, laitance, and loose contaminants prior to bonding. Manufacturer surface preparation sections (product-specific)
Flatness tolerance is typically specified in flooring installation guides and is a major predictor of tile-to-grout cracking, sheet flooring bridging, and adhesive bond stress. Manufacturer flatness requirements (product-specific)
A dry subfloor is usually required at installation; moisture conditions outside the stated limits increase risk of adhesive failure and floor dimensional instability. Manufacturer moisture requirements (product-specific)
Remove old flooring and bonding inhibitors
Start by removing materials that interfere with adhesion:
– Old flooring that can telegraph or delaminate later
– Adhesive residue, paint, sealers, or treatment chemicals
– Loose material, high spots, or contaminants (dust, drywall mud, curing compounds)
Goal: expose a sound substrate that matches the manufacturer’s required surface profile.
Repair cracks, uneven areas, and high spots
Next, make the subfloor flat enough for the system. Use a manufacturer-approved repair method and compound if the guide requires it.
Follow the floor-covering specs exactly, including the flatness tolerance:
– Use [ADD: exact flatness tolerance] from the manufacturer.
(Example format you can replace later: “Within X mm over Y ft.”)
Ensure the subfloor is clean and dry (not just “looks dry”)
“Dry” must meet measurable requirements. In commercial kitchens, moisture can come from slab conditions, cleaning practices, plumbing leaks, or condensation. You should:
– Verify moisture limits using the manufacturer-required test method
– Confirm the concrete (or other substrate) is within the specified moisture range before installation
Plan Layout, Transitions, and Drainage
Commercial kitchen flooring should be planned so seams, transitions, and wet zones don’t encourage water/grease to travel underneath the system. Good layout planning is one of the most cost-effective ways to prevent edge lifting and seam staining.
This is where you avoid the “we’ll cut it later” mentality. Kitchen traffic creates repeat wear paths, and wash-down cleaning creates repeat exposure. If your seams or transitions land in a puddle path, you’ll often pay for it with maintenance calls and early replacements.
Layout planning that keeps seams out of primary wet zones and aligns transitions with fixtures reduces the risk of moisture migration at the edges. Manufacturer guidance on seam placement and detailing (product-specific)
Drain proximity and negative slopes can create persistent wetting; flooring details near drains and curbs should follow the product’s wet-area installation instructions. Manufacturer wet-area detailing instructions (product-specific)
Dry-lay or mark your plan
Before installing, dry-lay (or at minimum mark) your layout:
– Place seams where they look intentional and where they are mechanically supported.
– Plan transitions at doorways and between rooms to avoid creating trip hazards and weak bond zones.
– Consider equipment lines (walk-in boundaries, cabinet base rows, cove base edges) where water can track.
Plan around drains, cove base, and cabinetry lines
Grease and water behave like they’re “guided” by edges:
– Keep water from channeling under flooring by following approved transitions and perimeter detailing.
– Plan how you’ll terminate flooring at drains and where you’ll use appropriate edge finishing (especially near coves and wet walls).
– Ensure any slope requirements are met so water goes where it should—not under the system.
Install Using the Correct Adhesive and Method
Commercial kitchen floors are only as strong as the bonding system. Install using the adhesive (and mixing/trowel coverage) specified by the flooring manufacturer, and follow the required sequence and acclimation conditions.
This is where “it seems similar” substitutions become expensive. Adhesives and primers aren’t interchangeable across product families because bond strength and chemical compatibility depend on chemistry and surface prep.
Most flooring warranties require that the correct adhesive and primer are used and applied at the coverage rate specified in the installation instructions. Manufacturer warranty and installation requirements (product-specific)
Trowel notch size and proper adhesive spread affect bond coverage; improper coverage is a known driver of hollow spots and debonding under traffic. Manufacturer installation methodology (product-specific)
Materials often require acclimation to site conditions (temperature/humidity) so the flooring reaches installation stability and avoids post-install dimensional changes. Manufacturer acclimation requirements (product-specific)
Use the exact adhesive, trowel method, and mixing steps
Follow the installation guide:
– Adhesive type (and any required primer)
– Trowel notch specification (size and profile)
– Spread/coverage rate
– Mixing duration and any rest times
– Open time (how long adhesive can be left before flooring installation)
If the guide explicitly says “do not substitute,” treat that as a hard constraint.
Maintain acclimation conditions and install in the required sequence
Site conditions matter during install and cure:
– Use [ADD: temp/humidity range if provided] (from the manufacturer) for acclimation/installation.
– Install in the specified order (for example: base/walls/cove base if your system calls for it; then field flooring).
Because this is a commercial kitchen, also coordinate sequencing with trades so the floor isn’t exposed to unplanned traffic or construction damage during early cure.
Cure, Protect, and Handle Commercial Traffic
Commercial kitchen floors need time to cure before rolling loads, wet cleaning, and full traffic begin. If you rush the cure or remove protection too early, you can undermine the bond and trap moisture or strain seams.
In practice, the “kitchen schedule pressure” is real: owners want operations back online quickly, and contractors want to remove protective cover. But flooring systems are engineered around cure and initial-use windows—these windows are part of the installation, not “advice.”
Adhesive and flooring systems specify cure and initial-use timing; early exposure to rolling loads or wet cleaning can compromise bond strength. Manufacturer cure/initial-use guidance (product-specific)
Protective coverings (cardboard, walk boards, controlled access paths) are typically recommended to prevent indentation and surface damage during remaining construction. Manufacturer protection recommendations (product-specific)
Allow proper cure time before heavy use
You must follow the manufacturer’s cure requirements:
– Use [ADD: manufacturer cure/initial-use times].
Then align cleaning schedules:
– Initial cleaning should be consistent with the flooring system’s instructions.
– Avoid harsh degreasers until the floor is fully permitted for that chemical exposure.
Protect the finish during remaining construction
Even a durable commercial system can be damaged by:
– Dropped items, concentrated solvents, or construction debris
– Indentation from equipment
– Foot traffic that shortcuts through the freshly installed area
Set clear rules with the general contractor: where crews can walk, how materials are staged, and how protection is maintained through final commissioning.
What Can Go Wrong (And How to Avoid It)
Commercial kitchen floor failures usually fall into a few repeat categories: inadequate prep, incorrect bonding chemistry, moisture outside spec, or inadequate cure/protection. If you know the typical failure mechanisms, you can spot them early and prevent rework.
Here’s what I see most often during troubleshooting calls and scope reviews: installers sometimes meet the “surface look” standard while missing the hidden performance standard—bond coverage, moisture limits, and flatness.
Poor bonding often originates from contaminated or improperly prepared subfloors, leading to edge lifting, debonding, or bubbling after installation. Manufacturer troubleshooting sections (product-specific)
Even minor subfloor deviations can create stress concentrations that show up as cracking, grout issues, or adhesive failures in high-traffic kitchen zones. Manufacturer substrate flatness guidance (product-specific)
Using an unapproved adhesive/primer can trigger delamination because flooring systems are chemically engineered to work with specific bonding components. Manufacturer technical bulletins on approved adhesives/primers (product-specific)
Common issues and prevention steps (quick scan)
– Poor bonding from dirty/contaminated subfloor
– Avoid: skip cleaning, skip surface prep, or install over residue
– Skipping moisture/flatness checks
– Avoid: assume the slab is “fine” because it looks clean and level
– Wrong adhesive or missing primer
– Avoid: substitutions without written approval from the manufacturer
– Rushing cure/protection
– Avoid: early wet cleaning, heavy rolling traffic, or construction shortcuts
Pro/Con: Common commercial kitchen flooring systems
The “best” choice depends on your kitchen’s constraints (wet zones, chemicals, budget for downtime, and desired maintenance). This comparison helps you align expectations—especially around slip resistance and cleaning compatibility.
| System | Pros (typical) | Cons (typical) |
|---|---|---|
| Porcelain tile | High wet resistance; strong wear characteristics; chemical compatibility often well documented | Grout maintenance; needs correct thinset/primers and strict substrate flatness |
| Epoxy coatings | Seamless feel; good chemical resistance when properly formulated and installed | Moisture vapor risk if prep/testing are skipped; surface prep is critical |
| Resinous systems (polyurethane/epoxy blends) | Often strong impact/spill performance; can be detailed for drains and coves | Installation window and cure conditions must be controlled; system-specific primers required |
| Sheet vinyl (commercial grade) | Cleanability and continuity; often faster install; good for rolling loads when properly bonded | Substrate flatness matters; seam detailing and heat/rolling-traffic expectations must be correct |
Verdict / Quick Recommendation
Commercial kitchen flooring installation is absolutely doable, but the success depends on strict adherence to the flooring manufacturer’s prep and adhesive/cure instructions. If your subfloor is uneven, moisture is a concern, or you can’t control temperature/humidity and cure time, consider hiring an experienced commercial flooring installer.
For simpler renovations with clear access and stable conditions, a DIY approach may work—but only if you follow the specs exactly and aren’t forced to start cleaning/traffic earlier than allowed. The downside of DIY is less predictable cure timing and bond performance when site conditions change mid-install (common in active construction sites).
Quick Scan Checklist (Save This)
– [ ] Flooring type is confirmed for grease/moisture/cleaning conditions
– [ ] Subfloor is clean, repaired, and flat to spec ([ADD: flatness tolerance] per manufacturer)
– [ ] Moisture limits and test method are checked ([ADD: required moisture test + limits])
– [ ] Correct adhesive/primer/trowel method is matched to the product instructions
– [ ] Acclimation conditions are met ([ADD: temp/humidity range if provided])
– [ ] Layout is planned for seams, transitions, and drains
– [ ] Cure and first-use timing followed ([ADD: cure/initial-use times])
– [ ] Floor is protected during remaining work and cleaned per spec
Typical Water-Absorption Thresholds Used to Select Wet-Use Tile (ISO Test Methods)
| # | Tile Type (selection cue) | Water Absorption (max.) | Why it matters in kitchens | Moisture Defensibility |
|---|---|---|---|---|
| 1 | Porcelain tile (wet-use selection) | ≤ 0.5% | Limits liquid uptake from wash-downs | ★★★★☆ |
| 2 | Glazed ceramic tile (typical wet-use) | ≤ 3% | Better resistance than higher-absorption bodies | ★★★☆☆ |
| 3 | Quarry/unglazed ceramic (selection cue) | ≤ 10% | Can perform if properly sealed and detailed | ★★☆☆☆ |
| 4 | Porous ceramic (general) | > 10% | Higher uptake increases risk from wet/grease exposure | ★☆☆☆☆ |
| 5 | Cementitious tile (varies by body) | Varies (verify) | Needs product-specific data for wash-down conditions | ★★★☆☆ |
| 6 | Natural stone (general cue) | Depends on type | Must be validated for absorption and chemical exposure | ★★☆☆☆ |
| 7 | Tile selection takeaway | Use ≤ 0.5% | Most defensible threshold for continuous wet exposure | ★★★★☆ |
Note: Water-absorption thresholds here are selection cues for tile bodies tested under ISO test methods; always confirm your specific product’s published data and installation guide. ISO 10545-3 and ISO 13006
FAQ
What’s the biggest factor for commercial kitchen floor longevity?
Surface prep and correct adhesive/installation method. Even a durable flooring material can fail if the subfloor isn’t properly prepared or if the bonding system isn’t followed exactly.
Do I need to do moisture testing before installing?
Often yes—especially for slabs or areas exposed to wash-downs. Follow the flooring manufacturer’s moisture requirements and test method; use [ADD: manufacturer moisture requirements] where applicable.
Can I install over old flooring?
Sometimes, but only if the existing surface is approved by the flooring manufacturer and meets prep/flatness requirements. In many cases, removal is the safer path when adhesion is critical.
How long should the floor cure before normal use?
It depends on the flooring system and adhesive instructions. Use [ADD: manufacturer cure/initial-use time] and don’t start wet cleaning or heavy traffic early.
What cleaners should we use after installation?
Use cleaners approved by the flooring manufacturer. Avoid harsh chemicals or abrasive tools unless the specs explicitly allow them; [ADD: manufacturer-approved cleaner type/list if available].
Sources
– Manufacturer installation instructions for the specific commercial flooring product you’re using: [ADD: product name/model + official installation guide title/year].
– Manufacturer technical data sheets (adhesive/primer coverage, moisture requirements, cure/initial-use guidance): [ADD: datasheet titles].
– If applicable to your flooring system, moisture testing guidance from the relevant standard body (refer to the manufacturer’s required test standard): [ADD: required standard, e.g., ASTM method, if specified in your product docs].
– Tile water absorption selection reference (for porcelain/ceramic thresholds): ISO 10545-3 / ISO 13006.
Commercial kitchen flooring installs succeed when you treat the project as a system—confirm product suitability, verify moisture and flatness, install with the correct bonding method, and respect cure/protection timing. Follow the manufacturer’s specs closely (especially adhesive/primer, moisture limits, and initial-use windows), and you’ll minimize common failures like debonding and early edge lifting while getting a floor that holds up to daily grease, spills, and wash-downs.
Frequently Asked Questions
What commercial kitchen floor type is best for restaurants?
The best commercial kitchen floors are typically epoxy, epoxy flake, polished concrete, or rubber/VCT depending on your needs. For food prep areas, choose slip-resistant finishes (often with an anti-skid topcoat) and materials that resist water, grease, and frequent cleaning chemicals. If you have heavy grease exposure or standing water risks, moisture-tolerant systems like epoxy with proper surface preparation are often preferred.
How do you prepare the subfloor before installing commercial kitchen floors?
Start by removing existing flooring and cleaning the slab thoroughly to eliminate dust, grease, paint overspray, and curing agents. Check for cracks, dips, or moisture issues, and repair them using appropriate patching compounds compatible with your flooring system. Finally, grind or mechanically abrade the surface and ensure it’s level and dry, because proper subfloor preparation is critical for bonding and long-term durability.
How do you install epoxy flooring in a commercial kitchen without peeling?
Successful epoxy flooring installation depends on moisture testing, surface profiling, and correct mixing ratios for every coat. Apply a primer or moisture barrier as specified by the manufacturer, then install the base coat, add broadcast flakes if using epoxy flake, and finish with a seal coat for chemical and abrasion resistance. Ensure proper curing times between coats, maintain recommended ambient temperature/humidity, and use slip-resistant aggregate or a textured finish for kitchen safety.
Which slip-resistant finish options work best for commercial kitchen floors?
For commercial kitchen floors, look for anti-slip coatings designed for wet and oily conditions, such as epoxy with broadcast aggregate, carbide particles, or a textured polyurethane topcoat. These options help improve traction in areas near sinks, dishwash zones, and cooking lines where grease and water are common. Confirm the finish meets your local safety or industry expectations and is rated for the type of cleaning chemicals you use daily.
Why is proper sealing and maintenance important for commercial kitchen flooring?
Commercial kitchen floors face constant stress from spills, hot water, grease, impacts from carts, and frequent sanitation, so sealing protects against chemical penetration and abrasion. Use a manufacturer-recommended topcoat and follow the maintenance plan—typically using pH-neutral cleaners and avoiding harsh solvents that can degrade finishes. Regular inspection for cracks, peeling edges, and worn traction areas helps you address issues early and extend floor lifespan.
📅 Last Updated: October 12, 2026 | Topic: How to install in a kitchen commercial floors? | Content verified for accuracy and freshness.
References
- Google Scholar Google Scholar
https://scholar.google.com/scholar?q=commercial+kitchen+floor+installation+resilient+tile+epoxy - Google Scholar Google Scholar
https://scholar.google.com/scholar?q=foodservice+flooring+installation+cleanable+smooth+nonporous - Google Scholar Google Scholar
https://scholar.google.com/scholar?q=commercial+flooring+subfloor+preparation+thinset+grout+waterproofing - https://www.fda.gov/food/fda-food-code/food-code
- https://www.osha.gov/slips-trips-and-falls
- https://www.cdc.gov/foodsafety/food-safety-basics.html
- Food Safety
https://www.who.int/health-topics/food-safety - https://pubmed.ncbi.nlm.nih.gov/?term=commercial+kitchen+floor+cleaning+disinfection+infections
- Tile
https://en.wikipedia.org/wiki/Floor_tile - Flooring
https://en.wikipedia.org/wiki/Resilient_flooring