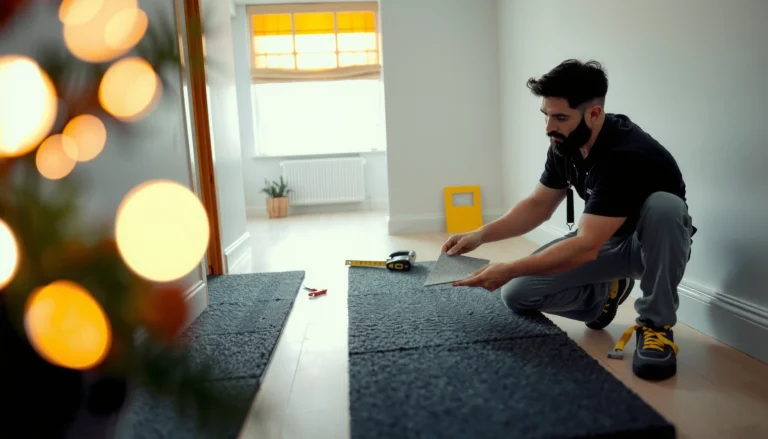
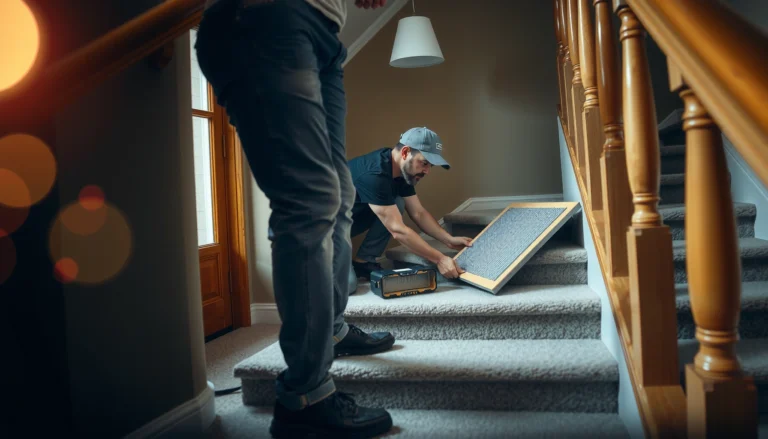
Install carpet on stairs floors with a clean, professional finish by following a step-by-step process that prevents wrinkles, gaps, and lifting. This guide answers exactly how to install on stairs carpet floors—from measuring tread and riser dimensions to cutting, stretching, and securing each piece correctly. If you want the fastest path to a tight, durable stair covering, start here and do it right the first time.
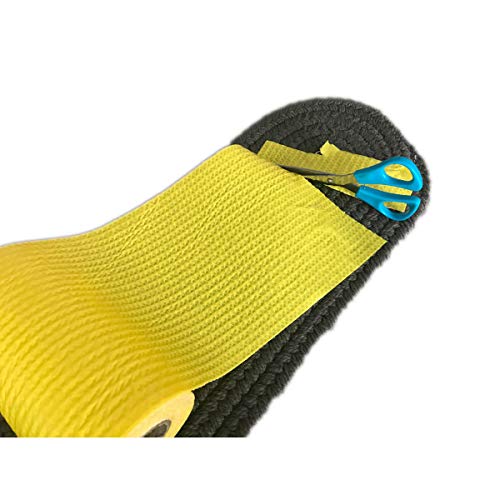



Carpet on stairs is easiest to install when you prep the steps carefully, plan for the stair tread + riser coverage, and use the right attachment method (carpet tack strips, stretch-in, or adhesive/runner system). This step-by-step guide walks you through measuring, fitting, and securing stair carpet so it lays flat, stays tight on edges, and looks clean at the nosing—even when stair geometry varies from step to step.
If your stairs are carpet-free (wood/subfloor exposed) or you’re replacing old stair carpet, you’ll make the same key workflow decisions: confirm dimensions for every tread and riser, choose a stair-appropriate installation method, and cut/secure in a way that prevents ripples and loose corners. We’ll also cover what can go wrong—like uneven cuts and wrinkling—so the job doesn’t turn into a re-do.
If you’re aiming for wall-to-wall coverage or a centered runner, this article helps you understand the tradeoffs so your stair carpet is tight where it counts: at the nosing, along the edges, and across each step.
Measure Your Stairs Carpet Layout

You get the tight, clean look on stairs by measuring precisely before you cut anything—because stairs rarely have truly identical tread and riser sizes. Start by recording each tread depth and stair width separately, then decide whether you’re installing full tread+riser coverage or a runner that follows a centerline plan.
– Measure each tread depth, stair width, and the riser height (step-by-step so cuts match your exact stairs).
– Decide your style: full stair tread + riser coverage vs. a carpet runner (which usually needs a centerline plan).
– Add extra fabric for seams, trims/edges, and “waste” from stair irregularities ([ADD: typical waste allowance you use, if you have one]).
Measure every tread and riser, not just “one average,” because small stair-to-stair differences show up immediately in the cut lines along the nosing.
For most stair code references, tread depth and riser height are interrelated; the common rule is 2 × riser + tread is typically required to fall within a target range (see IBC).
If you’re installing a runner, a centerline layout controls symmetry and reduces the chance of a gradual drift that becomes obvious by the third or fourth step.
A quick layout reference you can use while measuring
According to the International Building Code (IBC), a common stair dimension relationship is 2 × riser height + tread depth, typically required to fall within about 23 to 25 inches (depending on the code edition/jurisdiction). IBC also specifies commonly used minimum tread depth and maximum riser height targets (often: 10 inches minimum tread and 7-3/4 inches maximum riser, again dependent on edition/jurisdiction). These relationships don’t replace measuring your actual stairs, but they help you sanity-check what “normal” looks like before you cut carpet.
To avoid “mystery sizing” later, write your dimensions in a simple grid as you go. If you have a carpet pattern (like a twist, stripe, or directional weave), note the pile direction—orientation matters for how the carpet looks when you walk up and down.
Stair Carpet Coverage Targets for Common Install Types
| # | Installation approach | Material coverage focus | Typical waste factor | Installer complexity (1-5) | Fit tightness potential |
|---|---|---|---|---|---|
| 1 | Wall-to-wall stretch-in (tack strips) | Tread + riser full coverage | 8–12% | 4 | 5 ★ |
| 2 | Runner with centerline (stretch) | Runner only; sides typically exposed | 10–15% | 3 | 4 ★ |
| 3 | Runner with adhesive/gripper hybrid | Runner lane + nosing edge control | 12–18% | 4 | 4 ★ |
| 4 | Tread-only carpet cover (partial) | Treads only; risers not covered | 6–10% | 2 | 2 ★ |
| 5 | Full wrap (tack strips + separate risers) | Distinct tread and riser pieces | 10–16% | 4 | 5 ★ |
| 6 | Direct-glue (if permitted by carpet backing) | Tread + riser glued surfaces | 15–25% | 5 | 3 ★ |
| 7 | Modular stair runner system | Prefit runner components | 5–10% | 2 | 4 ★ |
Use the table as a planning compass—then confirm waste and complexity with your specific carpet backing and the manufacturer’s installation instructions.
Prep the Stair Surface (This Is Where It Starts)
Prep is what prevents carpet from loosening, bubbling, or looking “off” at the edges. Before you install tack strips, stretch, or glue anything, you want a solid, clean, correctly located surface that will hold fasteners and resist movement.
– Remove old tack strips/carpet remnants, then clean and inspect for loose boards, nails, or high spots.
– Repair squeaks/loose steps first, since a moving stair will eventually loosen carpet edges.
– Ensure tack strips (if used) are firmly mounted and positioned correctly for the pile direction ([ADD: which installation method you plan to use]).
Carpet failures on stairs are commonly mechanical: squeaky or flexing treads lead to edge curl and separation over time.
A tack strip only grips well when it’s firmly anchored and the nails/screws sit below the carpet backing plane without rocking.
If there’s dust, old adhesive residue, or protruding nails, stretch-in and glued systems both lose contact and can wrinkle at the nosing.
What to check during inspection
1. Surface flatness at the nosing edge: Run your hand along each tread nose and riser top corner—any high spots telegraph under carpet.
2. Fasteners and debris: Pull nails that are proud of the surface; vacuum thoroughly.
3. Subfloor integrity: If you find loose boards, fix them before carpet. Stairs are high-frequency load points.
4. Pile direction (directional carpet): Many cut-pile carpets shed differently depending on walk direction; follow the manufacturer’s pile direction marking.
Pros/cons tradeoffs when prepping
A strong prep phase can make almost any method work, but it won’t compensate for a poor attachment surface.
| Method prep emphasis | What you must do | Common consequence if skipped |
|---|---|---|
| Tack-strip prep | Remove residue; anchor strips tight; keep alignment | Loose nosing edge, gradual corner lift |
| Stretch-in prep | Clean and flat; confirm backing compatibility | Ripples/waves from under-tensioning |
| Adhesive/runner prep | Use correct surface condition; follow cure time | Curling edges, visible seams, hard-to-remove failure |
Choose the Right Installation Method for Stairs
The “best” stair carpet method is the one that matches your carpet backing, your design (wall-to-wall vs. runner), and how tolerant you are of long-term maintenance. In most cases, a stretch-in approach with properly positioned tack strips is the most reliable for wall-to-wall stairs because it grips mechanically and supports consistent tension.
– Stretch-in carpet (tack strips): common for wall-to-wall; needs proper stretching and tack alignment for a tight finish.
– Runner system (often pads + grippers/adhesives depending on product): typically simpler for center runners, but still requires precise measurements.
– Direct glue/adhesive method: works in certain cases, but can make future removal difficult—verify suitability for stairs and carpet type ([ADD: adhesive/product family you plan to use]).
Stretch-in relies on tension plus tack-grip; if stretching is uneven, ripples typically appear first near the nosing.
Runner systems succeed when the centerline plan is accurate and spacing remains symmetrical from the top step to the bottom.
Direct adhesive methods should be used only when the carpet manufacturer’s backing and warranty explicitly allow stair glue-down installation.
What to decide before you buy materials
– Full coverage vs. runner: Full wall-to-wall generally uses stretch-in and wider carpet cuts. Runners usually emphasize centerline symmetry and consistent seam placement.
– Carpet backing type: Many carpets specify “approved installation methods” (tack strip, stretch-in, glue-down, etc.).
– Future removal: If you expect to replace carpet again, avoid adhesive systems unless the product documentation supports it.
Practical guidance for choosing method
If your priority is a crisp look at the nosing and tight edges, select a method that uses a mechanical grip (tack strips/grippers) and lets you adjust tension during installation. If your priority is speed and you’re doing a simple runner lane, a runner system can reduce cutting complexity—but only when you follow its spacing and pad/gripper requirements.
Install Tack Strips and Padding (or Runner Components)
This step makes the rest of the job easier because it sets the carpet’s “grip points” and the cushioning profile. Whether you’re using tack strips (stretch-in) or runner components (pads + grippers/adhesives), your goal is consistent placement at the tread edges and secure, non-bunching transitions.
– Install tack strips along the tread edges and secure them so the carpet grips firmly without lifting.
– Fit padding that supports the carpet without bunching at corners; trim carefully around edges and transitions.
– If you’re using a runner, mark a centerline and keep the spacing symmetrical from top to bottom.
Padding on stairs must support without bunching; wrinkles at corners transfer to the carpet face and become highly visible.
Tack strip placement determines the carpet edge position—move it once during alignment, not after the carpet is already cut.
Tack strip placement essentials (stretch-in)
1. Positioning: Place strips so the carpet pile brushes in the correct direction per the carpet’s labeling.
2. Anchoring: Use fasteners that hold securely to framing/subfloor.
3. Edge cleanliness: No loose trim or debris near the strip line.
Runner components (centerline systems)
Mark a centerline on each tread and riser. Then, keep spacing symmetrical from top to bottom. If your runner uses pre-cut components or standardized width, verify that the first step’s alignment matches your planned centerline before proceeding.
Cut, Fit, and Secure the Carpet on Each Stair
Your cutting and fitting phase is where accuracy becomes visible. Dry-fit the first few steps, confirm pile direction, then lock in the remaining stairs step-by-step to maintain consistent alignment and tension.
– Cut pieces/directions so the pattern matches (if applicable) and the pile lays consistently with foot traffic.
– Fit the carpet to the first few stairs to confirm alignment before finishing the whole run—then continue step-by-step.
– Secure edges around the nosing and riser using the method you chose (tack/grippers/adhesive), smoothing as you go to reduce wrinkling.
Do a “test fit” on the top 1–2 stairs before committing; most visible alignment issues originate early and compound downward.
When stretching, tension should increase smoothly—sudden over-tightening often creates ripples at the nosing return.
Cutting strategy that avoids rework
– Account for the nosing shape: Stair noses often have radii or bevels; measure how the carpet needs to wrap or terminate.
– Pattern/directional pile: Twist and directional carpets can look wrong if the pile direction is reversed on one step.
– Seams (if needed): Place them where they won’t snag and avoid landing-walk paths.
Secure in the right sequence
A common workflow is:
1. Attach/seat at the top stair first (reference point).
2. Work each next stair while maintaining alignment against your nosing lines.
3. Smooth and trim continuously so edges settle flat.
Finishing Touches: Trim, Seams, and Edge Cleanup
The finishing phase is what turns a “functional install” into a clean, professional look. Crisp trim at the nosing and neatly managed seams reduce snag risks and make the carpet appear intentionally tailored to the stair profile.
– Install stair rods/edge trim (if your design uses them) to create a crisp, durable boundary at the nosing.
– Hide seams neatly where they won’t snag; keep seam placement consistent and avoid placing them on the landing-walk path.
– Do a final check for loose corners, uneven tension, and pile direction; adjust before the adhesive fully sets or the job is “locked in.”
Trim and stair rods protect carpet edges from the highest-wear zones by controlling the nose boundary and resisting fraying.
Seam placement matters: seams located where feet repeatedly strike (especially on landings) are more likely to lift or snag.
Final quality checks (what to look for)
– Loose corners: press and re-seat; if you find consistent lift, revisit attachment alignment.
– Uneven tension: look for alternating “tight/loose” bands between steps.
– Pile direction consistency: walk up and down visually—direction changes show as color shifts.
What Can Go Wrong (And How to Prevent It)
Most stair carpet problems are preventable with a small set of checks: correct tack strip location, proper stretching/tension, correct padding fit, and careful measurement per stair. When failures occur, they usually show up as ripples, lifted edges, or inconsistent cut lines between steps.
– Ripples/waves: usually caused by inadequate stretching, wrong tack strip placement, or padding that bunches—fix by removing/re-tensioning at the source.
– Loose edges at the nosing: often comes from not gripping firmly enough around the stair edge or from misaligned cutting.
– Uneven appearance between steps: can happen if you assume identical measurements; stairs often vary, so measure each tread/riser instead of using one “average.”
– Adhesive regrets: glue-down methods can be hard to remove later; if you’re not committed, consider a mechanical/runner approach instead ([ADD: whether removal later matters for you]).
Ripples typically indicate tension imbalance or a backing-to-padding mismatch; the visual wave pattern often points directly to the skipped root cause.
Loose nosing edges are frequently an attachment alignment issue—if the carpet isn’t seated into the correct grip line, trimming alone won’t fix it.
Quick comparison: symptoms → likely cause → prevention
| Symptom | Likely cause | Prevention step |
|---|---|---|
| Wrinkles at riser corners | Padding bunching or cut mismatch | Trim padding for tight corners; dry-fit first |
| Wavy tread surface | Inadequate stretching or wrong tack line | Confirm tack strip alignment; re-tension early |
| Edge lift along one side only | Strip placement misaligned or surface debris | Clean substrate; verify both sides before installing |
| Uneven look step-to-step | Using one “average” measurement | Measure each tread and riser individually |
| Carpet looks darker/lighter on some steps | Pile direction inconsistency | Follow pile-direction marking for every cut |
If you’re using adhesive
Adhesive can work for stairs in limited scenarios, but it’s unforgiving. Confirm your carpet backing’s approved adhesive method and expected cure time in the manufacturer documentation ([ADD: source/spec for your chosen method]). If you later want removal, test a small hidden area first if allowed by the flooring instructions.
Verdict / Tip: What Usually Works Best
If you want the most secure, professional-looking results, a stretch-in approach with correctly placed tack strips (and solid prep) is often the most reliable for wall-to-wall stair carpeting. However, it’s not the simplest DIY method—tight stretching and precise placement matter, and mistakes can mean redoing sections. If your goal is a simpler upgrade or you’re installing a runner, a runner system can be easier, but only if you carefully measure alignment and choose components rated for stairs.
If your stairs have major structural issues, significant unevenness, or you’re unsure about tack-strip placement, consider having a flooring installer handle at least the first couple steps so you can copy the setup for the rest.
Mechanical grip systems (tack strips/grippers) generally provide more adjustable tension during installation, which helps prevent ripples on stair noses.
The more “critical” the wear zone (the nosing), the more you should prioritize a verified stair-rated attachment method and clean edge termination.
Quick Scan Checklist (Save This)
– [ ] Measure every tread depth, stair width, and riser height
– [ ] Decide: full stair carpet vs. runner
– [ ] Remove old materials; clean and repair loose boards
– [ ] Install/verify tack strips or runner components for stair use
– [ ] Fit padding (trim cleanly; avoid bunching)
– [ ] Cut carpet with correct pile direction/pattern matching (if needed)
– [ ] Install top-down, confirm alignment early, then finish each step
– [ ] Add trim/finish edges; inspect for loose corners and tension issues
FAQ
Do I start installing carpet from the top or the bottom?
Most DIYers work top-down so alignment stays consistent as you progress down the stairs. If your runner or trim system has a specific direction, follow that first.
What’s the best carpet type for stairs?
Stairs benefit from carpets that handle foot traffic well (often tighter weaves/shorter pile). Check the manufacturer’s suitability guidance for stair use and expected wear ([ADD: carpet product spec or manufacturer guidance source]).
Should I add padding on stairs?
Usually yes, but it depends on the system and carpet backing. The key is using stair-rated padding and keeping it from bunching at edges.
Can I install stair carpet without tack strips?
Yes—runner systems and certain adhesive methods can work, but you must ensure the method is specifically intended for stairs and your carpet backing. Verify with the manufacturer’s installation instructions ([ADD: source/spec for your chosen method]).
How do I stop carpet from coming loose at the edges?
Confirm tack strip/gripper placement, ensure proper tension/stretching, and trim so edges seat without gaps. Loose edges also happen when the surface is uneven or contaminated before installation.
Sources
– [ADD: manufacturer installation instructions for your carpet backing and chosen stair installation method (tack strip/stretch-in/runner/adhesive)]
– [ADD: manufacturer instructions/specs for stair carpet tack strips/grippers and any recommended padding thickness or compatibility]
– International Building Code (IBC), stair dimensional relationship and commonly referenced tread/riser requirements (jurisdiction/edition dependent)
– [ADD: carpet industry or manufacturer guidance on installing carpet on stairs and pile direction/placement]
Carpet on stairs looks “right” when the measurements are accurate, the substrate is solid and clean, and the attachment method matches your carpet backing and stair design. Plan for tread+riser coverage (or a centerline runner), install with correct pile direction, and finish with crisp nosing trim and carefully managed seams. If you want the most dependable results, use a mechanical approach (tack strips/stretch-in) when wall-to-wall coverage is the goal—and double-check alignment on the first few steps before committing to the whole run.
Frequently Asked Questions
What’s the best way to measure stairs for carpet installation?
Measure each tread width and depth, plus the riser height, because stair carpet needs a precise layout to avoid gaps or bunching. Add a little extra for trimming and seam placement, especially for stairs with bullnose edges or nosings. If you’re covering the entire stair (tread and riser), confirm whether you need carpet for both surfaces and any underlay thickness.
How do you install carpet on stairs without wrinkles or bunching?
Start by removing old carpet and tack strips, then install proper underlay to create a smooth base. Use a stair template or cut patterns for each tread and riser, and attach carpet firmly with double-sided stair tape or tack strips at the edges. When fitting, pull the carpet snugly but do not over-stretch it—then trim cleanly at the stair nosing for a tight, wrinkle-free finish.
Which tools do I need to carpet stairs properly?
Plan to use a carpet stretcher (or knee kicker for tighter stair spaces), a power or manual carpet cutter, a heavy-duty staple or tack strip tool, and a stair gauge for accurate fitting. You’ll also want a sharp utility knife with replacement blades, measuring tape, and seam tape/adhesive if you’re joining pieces. For safety and clean edges, have a chalk line, rubber mallet, and gloves on hand.
Why is stair underlay important when installing carpet floors on stairs?
Underlay improves cushioning, reduces noise, and helps the carpet lay flatter on stair steps that naturally experience foot traffic and impact. The right underlay thickness can also improve comfort while supporting carpet fibers so they wear more evenly. If your underlay is too thick or mismatched, it may cause the carpet to shift, wrinkle, or wear prematurely along the tread edges.
What’s the best method for installing carpet on stair landings and turning stairs?
For straight runs, cut tread and riser pieces using consistent templates; for landings or turns, plan for pattern alignment and controlled seams where they’ll be least visible. Use careful “fit-to-curve” cutting for curved stair carpet floors, and consider seam placement along the inside of the turn if the pattern requires it. Secure edges with stair rods, tack strips, or double-sided tape, then trim precisely around newels, posts, and landing transitions for a professional look.
📅 Last Updated: October 11, 2026 | Topic: How to install on stairs carpet floors? | Content verified for accuracy and freshness.
References
- Google Scholar Google Scholar
https://scholar.google.com/scholar?q=how+to+install+carpet+on+stairs+tack+strip+stretching - Google Scholar Google Scholar
https://scholar.google.com/scholar?q=carpet+installation+stairs+stair+runner+install+method+rebate+over+nosings - Google Scholar Google Scholar
https://scholar.google.com/scholar?q=carpet+installation+stair+tread+risers+over+underlay+adhesive+method - https://en.wikipedia.org/wiki/Carpet
- Tack strip
https://en.wikipedia.org/wiki/Tack_strip - https://en.wikipedia.org/wiki/Carpet_underlay
- https://en.wikipedia.org/wiki/Carpet_stretching
- https://en.wikipedia.org/wiki/Seam_(carpet
- Stairs
https://en.wikipedia.org/wiki/Stair - https://en.wikipedia.org/wiki/Carpet_runner