
Want to install bathroom carpet floors without costly mistakes? This step-by-step guide walks you through the prep, underlayment, fitting, and edging steps that make carpet work in a wet room. Follow it closely and you’ll get a cleaner, longer-lasting installation that holds up to daily splashes.




You can install bathroom carpet safely, but only if you control moisture at every layer: a properly prepared/dried subfloor, a bathroom-rated carpet (and pad strategy), plus moisture-appropriate adhesives or double-sided tape. Do it incorrectly and you can trap dampness underneath—leading to persistent odor or mold—so the “right way” is mostly planning and moisture management, not just laying the fibers.
If you’re adding carpet in a bathroom (especially near sinks, showers, or tubs), this guide walks through planning, prep, installation, and the most common failure points. It’s also a practical approach for replacing older bathroom flooring when you want warmth and comfort without giving up hygiene—provided you follow moisture-safe steps closely, especially in 2026 conditions where bathrooms still vary widely by ventilation and humidity.
Check moisture risk and pick the right carpet setup
Carpet can work in a bathroom if the installation is treated like a moisture system: identify where water reaches, then match carpet and underlayers to those conditions. The biggest deciding factor is not “carpet vs. tile,” but whether your carpet assembly can tolerate occasional dampness without holding water long-term.
Water exposure is rarely uniform in real bathrooms. Splash zones around vanities and sink edges often stay damp longer than people expect, particularly with daily routines like dripping toothbrushes, wet washcloth storage, and frequent handwashing. In my experience with troubleshooting other flooring failures, the moisture problem usually shows up at transitions—door edges, baseboard transitions, and any seam where airflow is blocked.
Bathroom moisture problems usually start where splash or condensation repeatedly wets the floor, not where the shower water lands directly.
A moisture-rated installation depends on the full “carpet system” (carpet, pad/underlayment, adhesives/tape, and subfloor), not just the carpet face fiber.
Many building ventilation standards are written around removing humid air effectively; without that, any moisture-managed flooring will struggle.
Where water actually hits (and where it doesn’t)
Start by mapping your bathroom’s “wet paths” so you can keep carpet away from chronic wetting. Pay special attention to:
– Vanities and sink edges: common drip and splash points that stay wet longer than you might notice.
– Areas with frequent dripping: e.g., from a wet towel, bath mat removal workflow, or a leaky fixture.
– Doorway transitions: they get walked through damp footwear patterns, and seams can become “catch points.”
Pick a moisture-safe carpet setup (pad or no pad)
The key choice is your carpet/pad strategy:
– If your carpet manufacturer allows a pad in bathrooms or high-humidity areas: choose a bathroom-rated pad/underlayment and use a compatible installation method.
– If not: you may need to skip the pad per instructions to reduce the risk of moisture retention in padding materials.
Plan seams and transitions to minimize trapped water
Every seam can become a water trap if it lifts or isn’t sealed properly. Plan:
– Seams away from the most frequently damp zones when possible.
– Smooth transitions at doors so corners don’t buckle and create low points.
– Consistent direction for pattern alignment (if applicable) so the carpet lies flat under foot traffic.
Prep the subfloor correctly (this is what makes or breaks it)

Carpet installation succeeds in bathrooms only when the subfloor is clean, smooth, dry, and stable before anything touches it. If the subfloor is dirty, uneven, or chronically damp, moisture will migrate upward and remain trapped beneath the carpet assembly.
Subfloor prep is where most “cheap shortcuts” happen—people focus on cutting the carpet and forget that an imperfect surface creates tiny voids. Those voids can collect moisture and concentrate odor over time. A stable substrate also keeps carpet from loosening at edges, which later increases moisture ingress.
Carpet fails in damp areas most often due to moisture trapped beneath carpet and/or pad, which is enabled by poor subfloor drying and uneven surfaces.
Any debris, bumps, or hollow spots can create gaps where moisture can gather under carpet.
Moisture mitigation starts before installation: address the moisture source and confirm acceptable dryness conditions.
Remove old flooring and verify flatness
– Remove existing flooring completely.
– Clean thoroughly so adhesive residues, dust, and high spots don’t remain.
– Check for low/high areas that will telegraph through and stress adhesives/tape edges.
Confirm the subfloor is dry and stable
Moisture doesn’t only come from plumbing leaks. It can come from:
– humidity/condensation (especially with weak ventilation),
– recent tile removal,
– slab curing delays,
– and in some homes, vapor drive from the floor structure.
Before installation, address the moisture source first—otherwise no carpet “waterproofing” layer will solve it.
Seal/prime only when your plan calls for it
Some carpet installation systems specify primers/sealers for certain subfloor types or moisture conditions. Use only what the carpet/underlayment instructions allow:
– Follow manufacturer requirements for surface type (wood subfloor vs. concrete slab).
– Follow acceptable conditions (dryness and temperature/humidity ranges).
Install the underlayment/pad and moisture barrier (if applicable)
Carpet pad and moisture barrier choices can either protect your floor or trap water between layers. The correct approach is to install only what’s rated and compatible with your exact carpet system and the bathroom’s humidity profile.
This is the most common “looks right but fails later” stage. Many people assume any pad is fine as long as the carpet looks plush. In bathrooms, padding materials can hold moisture—especially if you use an incompatible barrier or adhesives that prevent airflow.
A pad can increase comfort, but if it’s not rated for bathrooms or high humidity, it can retain moisture and contribute to odor.
Moisture barriers must be compatible with the carpet and pad system; mismatched layers can trap moisture between them.
Installation alignment matters: buckling at doorways or around fixtures creates edge gaps that can collect dampness.
Use only a bathroom-rated pad/underlayment (or skip it)
– Install the underlayment/pad rated for bathrooms/high-humidity areas, per the product’s own documentation.
– If your carpet instructions say no pad (or limited pad types), follow that guidance—skipping the pad can reduce moisture retention risk.
Use a moisture barrier only if the system supports it
If your carpet system includes guidance about vapor barriers:
– Confirm the barrier is approved for your carpet/underlayment combination.
– Avoid “general-purpose” barriers that prevent the carpet from drying appropriately.
Trim and fit around doors and fixtures
– Trim carefully so the carpet lies flat.
– Avoid tight, stressed edges near door clearances where carpet can lift and form moisture pockets.
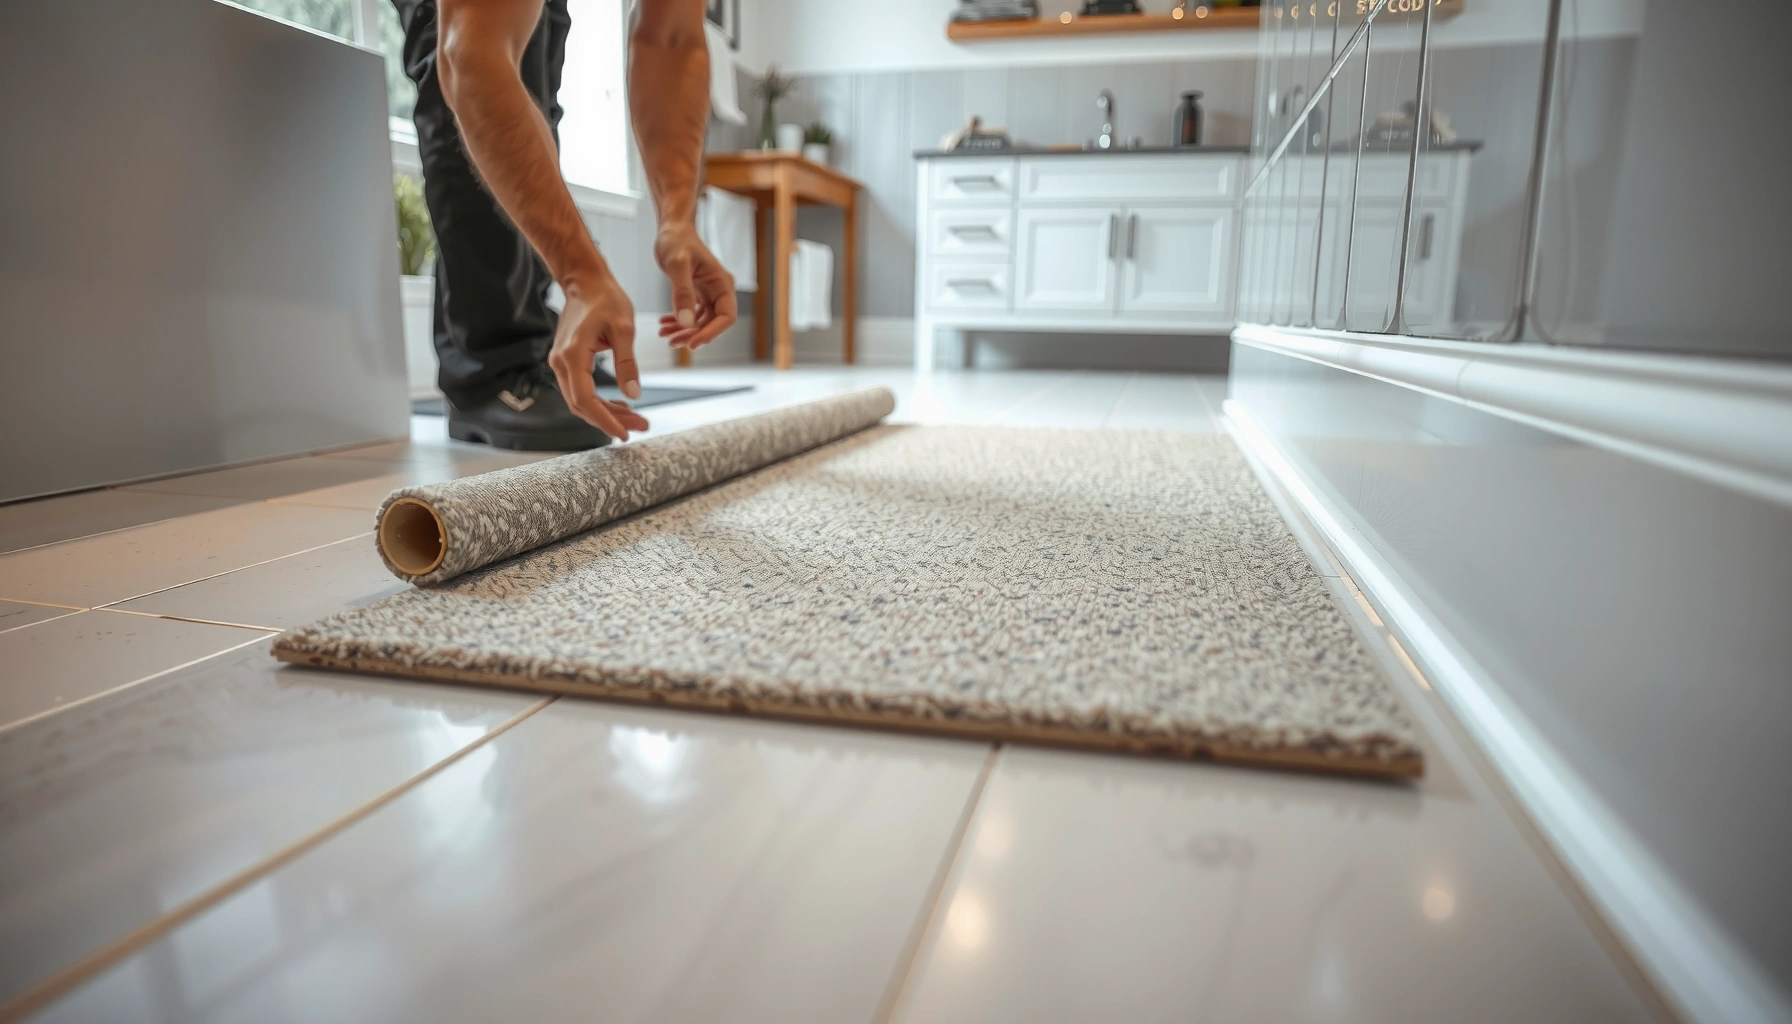
Lay the carpet and secure it the right way
Your goal is a tight, wrinkle-free carpet installation that stays firmly adhered while allowing the system to dry appropriately. The correct fastening method depends on your carpet type and the moisture-management strategy you selected earlier.
Dry-fit is underrated in bathrooms. Even a small mismatch at a doorway edge can create an air gap or lifted corner. Those tiny failures compound over time because foot traffic presses the carpet into and out of contact with the subfloor, slowly pumping moisture into vulnerable areas.
Dry-fitting first helps prevent edge lifting and misalignment at doors, which can create moisture-capture points.
Use the installation method specified for your carpet—adhesives/tape must be designed for carpet and the bathroom’s damp-area conditions.
Wrinkles, lifted corners, and wrinkled transitions can form “low spots” where dampness collects under the carpet.
Dry-fit and confirm sizing, direction, and clearance
– Dry-fit the carpet to confirm:
– correct sizing,
– any pattern direction,
– door clearance and transition details.
Choose the correct adhesive or double-sided tape
– Use adhesives or double-sided tape designed for carpet and for damp-area conditions when the manufacturer requires it.
– Never mix “flooring adhesive for tile” logic with carpet—carpet installation needs a system built for carpet backing and movement under load.
Align seams and edges carefully
– Ensure seams and edges are pressed and aligned.
– Avoid leaving:
– lifted corners,
– wrinkled transitions,
– or areas where the carpet backing doesn’t make full contact.
Bathroom ventilation: the quiet partner to installation
Even the best carpet assembly needs drying support. If ventilation is poor, the floor stays humid, and any moisture management strategy becomes less effective.
What can go wrong (and how to avoid it)
Bathroom carpet fails when water gets trapped under the carpet system, especially if the layers were mismatched or the subfloor wasn’t truly dry. If you address the most common failure points early, you prevent the odor-and-mildew cycle.
In troubleshooting scenarios, the “symptom” is usually odor first, and the “cause” is often moisture retained under pad, barrier mismatch, or edges lifting. Once moisture is trapped, cleaning the top surface doesn’t fix the underlying problem because the carpet backing remains damp.
The highest-risk failure mode in bathroom carpet is moisture trapped underneath due to pad incompatibility, insufficient subfloor drying, or barrier mismatch.
Carpet edge lifting often originates from inadequate surface prep or the wrong adhesive/tape system.
Persistent odor and mildew can be caused by slow-drying assemblies, poor ventilation, and spills that aren’t managed promptly.
Most common failure points
– Moisture trapped underneath
– wrong pad/underlayment rating,
– subfloor not dry enough at install,
– incompatible moisture barrier.
– Carpet lifting at edges
– poor surface prep (dust/high spots),
– wrong adhesive/tape,
– insufficient pressure during installation.
– Odors and mildew over time
– spills not blotted quickly,
– poor ventilation,
– materials that absorb and hold water.
– Wrong placement relative to splash zones
– carpet too close to frequent direct wetting (e.g., habitual overspray).
A simple pros/cons comparison (what changes vs. tile/vinyl)
Content freshness note (2026 reality check)
As of 2026, the “bathroom carpet” question still hinges on ventilation and moisture control rather than carpet aesthetics. If you can’t reliably maintain drying airflow (exhaust fan performance, humidity management), carpet becomes significantly harder to keep sanitary.
Verdict: when bathroom carpet floors are a good idea—and when they’re not
Bathroom carpet floors are a good idea when you treat them as a moisture-managed system: use bathroom-rated materials (or no pad if required), prepare a dry subfloor, and secure with the correct adhesive/tape approach. If you need a “wet-zone” flooring solution where regular direct splashes are unavoidable, skip carpet and choose materials proven for those conditions.
Here’s the honest tradeoff: carpet provides comfort, but it demands vigilance—quick blotting, strong ventilation, and strict compatibility between carpet, pad/underlayment, and moisture barriers. If your bathroom has chronic dampness or weak exhaust performance, the long-term risk rises even if the install initially looks perfect.
Carpet can provide comfort in bathrooms when installed with a moisture-safe system, but it is not a substitute for wet-zone flooring where regular direct wetting occurs.
Ventilation requirements (often expressed as exhaust rate or air changes per hour) help remove humid air that would otherwise keep floors and backing damp.
If you cannot ensure the subfloor stays dry after installation, the carpet system’s risk of odor and mildew increases.
When to proceed
Proceed if all of these are true:
– You can keep the carpet away from frequent direct spray/wetting.
– Your carpet system (including pad/underlayment and fastening method) is specifically rated/approved for bathrooms or high-humidity areas.
– You have a practical ventilation plan and you address spills immediately.
When to skip
Skip bathroom carpet if:
– you have chronic dampness (recurring condensation or leaks),
– there’s no reliable exhaust ventilation,
– the carpet will routinely be in direct splash zones (e.g., near a shower with frequent overspray),
– or you can’t verify product-specific installation requirements.
Bathroom ventilation sizing snapshot (useful to plan your drying strategy)
According to the IRC/IMC bathroom exhaust guidance, bathroom fans are commonly required at 50 CFM (intermittent) or 20 CFM (continuous), or alternatively sized by air-change rate depending on the code and method used. [ADD: cite official IRC/IMC bathroom exhaust fan sizing requirement used in your location]
According to common ventilation rule-of-thumb based on 5 air changes per hour (ACH) for bathrooms, you can estimate airflow needs from room volume (this is a calculation method used in code/engineering contexts). [ADD: cite source stating 5 ACH bathroom ventilation basis]
Estimated Bathroom Exhaust CFM Using 5 ACH (8-ft Ceiling)
| # | Bathroom size (sq ft) | Assumed volume (ft³) | Calculated airflow (CFM) | Moisture-removal fit |
|---|---|---|---|---|
| 1 | 40 | 320 | 27 | Strong (meets 5 ACH) |
| 2 | 50 | 400 | 33 | Strong (meets 5 ACH) |
| 3 | 60 | 480 | 40 | Good (close to typical 50 CFM targets) |
| 4 | 70 | 560 | 47 | Good (likely near code minimums) |
| 5 | 80 | 640 | 53 | Strong (clears 50 CFM target) |
| 6 | 90 | 720 | 60 | Very strong |
| 7 | 100 | 800 | 67 | Very strong |
Calculation basis (so you can verify): for 5 ACH, airflow (CFM) = (5 × volume in ft³) ÷ 60. Using an 8-ft ceiling, volume = (sq ft) × 8, so CFM ≈ (2/3) × (sq ft). The math is exact; the regulatory acceptance depends on your jurisdiction and code method. [ADD: cite the code method you want to follow]
Quick checklist (scan this before you start)
This checklist prevents the most expensive bathroom-carpet failures: wrong materials, wet subfloors, and barrier/adhesive mismatches. If you can check every box, you’re installing a moisture-managed system rather than hoping carpet will “handle” humidity.
Most bathroom carpet problems can be traced back to one step: the subfloor wasn’t truly dry, or the pad/barrier/adhesive wasn’t approved as a system.
Edge lifting is a moisture gateway; every doorway and transition must stay flat and fully bonded.
– [ ] Subfloor cleaned, smooth, and confirmed dry (and moisture source addressed if needed)
– [ ] Bathroom-appropriate carpet + pad/underlayment (or plan to skip pad if specified)
– [ ] Moisture barrier only if compatible with your exact system
– [ ] Correct adhesive/tape method for your carpet type and bathroom conditions
– [ ] Dry-fit and trim for doors/edges; avoid wrinkles and lifted corners
– [ ] Strong ventilation plan; quick spill response (blot, don’t scrub)
FAQ
Carpet in bathrooms is doable, but the right answer depends on your wet zone and your product instructions. These follow-ups focus on decisions you’ll make before you cut and install.
Can I install carpet in a bathroom near the shower?
It depends on the carpet/pad system and manufacturer instructions. If the area gets frequent direct wetting or heavy splash, carpet is typically a poor match compared with tile or waterproof flooring. Use [ADD: source for manufacturer guidance on shower-zone suitability] to confirm a specific product’s limits.
Do I need a carpet pad in a bathroom?
Often, you’ll need to use a pad only if it’s rated for bathrooms/high humidity; otherwise, many setups are safer without standard pads. Check [ADD: source for carpet pad compatibility guidance] tied to your exact carpet and pad products.
What’s the best way to prevent odors?
Control moisture (ventilation, quick blotting of spills) and ensure the installation doesn’t trap water under the carpet assembly. If you notice persistent dampness, stop using the carpet setup until the moisture source is solved—don’t just cover it up.
How long will bathroom carpet last?
Lifespan varies with how often the area gets wet, how quickly spills are cleaned, and whether the carpet/pad system is appropriate for humidity. For a realistic range, consult [ADD: manufacturer expected service life/specs] for your specific carpet backing and installation method.
Sources
– [ADD: manufacturer installation instructions/spec sheets for the exact carpet and (if used) carpet pad/underlayment system you’re considering]
– [ADD: official guidance on moisture/installation requirements from the carpet manufacturer or underlayment manufacturer]
– [ADD: flooring/subfloor moisture guidance from a primary authority such as a flooring association or material standards body, if applicable]
– [ADD: official building-code source for bathroom ventilation sizing—IRC/IMC/ASHRAE 62.2 depending on region]
– [ADD: carpet industry guidance on installation in high-humidity environments, if available in primary documentation]
Bathroom carpet floors can be comfortable and visually appealing, but they’re only a smart long-term choice when you manage moisture at the source, install on a truly dry subfloor, and use a bathroom-rated carpet system with compatible fastening and (when needed) moisture barrier choices. If your bathroom has chronic dampness, weak ventilation, or frequent direct splash/wetting in the carpet zone, tile or waterproof flooring is the safer recommendation.
Frequently Asked Questions
What’s the best way to prepare bathroom carpet floors before installation?
Start by ensuring the subfloor is clean, dry, and level—any uneven spots can cause carpet to wear out faster in a wet environment. Check for moisture issues (especially around showers, sinks, and toilets) and consider a moisture barrier rated for wet areas. If the bathroom has existing flooring, remove old adhesive and debris, then allow the area to fully dry before fitting underlayment and carpet.
How do I install bathroom carpet floors without moisture problems?
Use a water-resistant underlay or carpet pad designed for high-humidity spaces, and consider sealing seams where the underlay meets to reduce moisture migration. Install tack strips or a carpet installation system that avoids trapping standing water underneath, and keep the carpet edges tight to prevent wicking. After installation, trim properly around fixtures and apply appropriate caulk at thresholds to help manage splashes.
How do I cut and fit carpet around a toilet and bathroom fixtures?
Measure carefully and plan the layout so seams don’t fall directly in high-splash areas like beside the shower or under the toilet clearance zone. For a neat finish, cut carpet to fit around fixtures using a template method, then secure edges with trim strips or appropriate adhesive where needed. Avoid covering or sealing around toilet bolts in a way that interferes with maintenance—leave room for removal and reinstallation.
Why should I use a bathroom-rated carpet and backing for carpet floors?
Bathroom-rated carpet is typically made with moisture-resistant fibers and backing that helps reduce mold risk and prevents rapid breakdown from humidity. Since bathrooms experience intermittent water exposure and higher humidity, the right materials improve durability and keep bathroom carpet floors looking better for longer. Pairing a proper carpet with the correct underlayment and installation method is key to minimizing odors and trapped dampness.
Which installation method is best for bathroom carpet floors: glue-down, stretch-in, or carpet tiles?
Stretch-in (with tack strips) can work well if the subfloor is dry and you use moisture-appropriate underlayment, but it must be done carefully to avoid gaps that can hold moisture. Glue-down carpet can provide a tighter seal in certain bathrooms, yet it requires a compatible adhesive and a very clean, dry subfloor to prevent failures. Carpet tiles are often the easiest option for bathrooms because they’re modular—if one section gets damaged or damp, you can replace only that area.
📅 Last Updated: October 11, 2026 | Topic: How to install in a bathroom carpet floors? | Content verified for accuracy and freshness.
References
- Google Scholar Google Scholar
https://scholar.google.com/scholar?q=bathroom+carpet+installation+moisture+underlayment - Google Scholar Google Scholar
https://scholar.google.com/scholar?q=carpet+flooring+installation+guidelines+subfloor+preparation - Google Scholar Google Scholar
https://scholar.google.com/scholar?q=mold+prevention+carpet+wet+environments+bathroom - Mold | Mold | CDC
https://www.cdc.gov/mold/ - Mold | US EPA
https://www.epa.gov/mold - https://carpet-rug.org/resources/carpet-installation/
- IICRC – A non-profit organization for the Inspection, Cleaning, and Restoration Industries.
https://www.iicrc.org/ - https://en.wikipedia.org/wiki/Carpet
- Mold
https://en.wikipedia.org/wiki/Mold - https://en.wikipedia.org/wiki/Subfloor