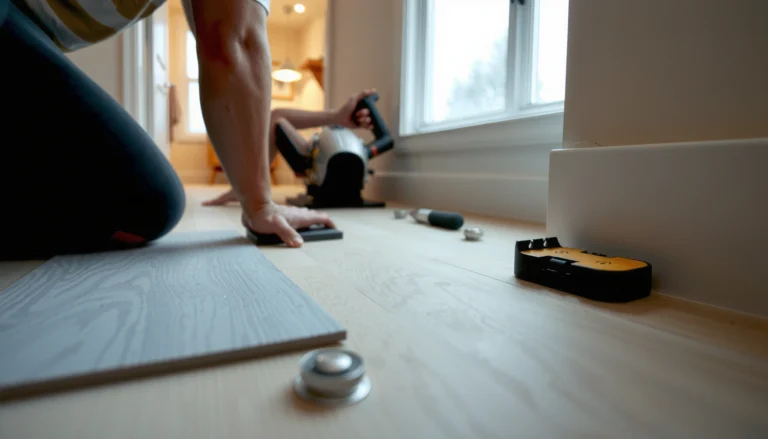

Install baseboards over wood-look tile floors without cracking, gapping, or misaligning the edges—here’s the step-by-step method that works. You’ll get the exact process for prepping the tile surface, choosing the right baseboard and fastening approach, and cutting and fitting clean corners. Follow these steps and you’ll end with straight, tight trim that looks built-in from day one.




Installing baseboards on wood-look tile is all about planning for the tile edge and using a flexible sealing method at the perimeter. Nail or screw the baseboard to the wall (not the floor), keep a controlled gap at the tile edge, and fill that gap with the right flexible caulk so the floor can move without cracking grout or popping trim—an approach that still holds true in 2026 as tile movement and perimeter-joint requirements remain a core concern in tile systems. This guide walks you through prepping the tile edge, fastening correctly, cutting cleanly around grout lines, and avoiding the most common failure points.
This guide is for DIYers (and remodelers) adding wood-look tile floors and then realizing the baseboards need to match the new height and finish. It’s especially relevant if your tile edge and grout lines aren’t perfectly flat or your room has expansion/joint areas that you need to respect.
Plan the baseboard height and transition points first
Plan your baseboard height early so your trim doesn’t conflict with door jambs, transitions, or the tile perimeter joint you must honor. The goal is a baseboard line that looks crisp while leaving enough room for movement at the tile edge—without turning grout joints into “rigid anchors” for trim. As of 2026, most tile failures around trim aren’t caused by the baseboard itself; they’re caused by rigid bonding that prevents the floor assembly from responding to thermal and substrate movement.
“Movement at the tile perimeter is expected, so the perimeter joint should be treated as a joint—not filled with rigid grout or cement.” TCNA Handbook, EJ171 (movement joints/perimeter considerations)
ASTM C920 sealants are rated by total movement class (commonly 12.5%, 25%, or 50%), which is why flexible caulk matters at baseboard-to-tile edges. ASTM C920/C920M
– Measure from the finished tile surface upward and confirm your baseboard height won’t cover door jamb cuts or create awkward transitions.
– Plan for perimeter gaps: tile installations typically need allowance for movement at edges, so don’t “lock” the baseboard to the tile with rigid material.
– Mark reference lines on the wall (use a level) so you’re not chasing lippage or minor tile irregularities while lining up trim.
Concrete targets that help you avoid rework
According to the TCNA Handbook’s movement-joint guidance, the perimeter movement joint is commonly detailed with a minimum clearance of about 1/4 in (6 mm) (exact requirements still depend on the tile assembly and product specifications). TCNA Handbook, EJ171 In practice, your baseboard should not be forced flush to the tile. Instead, you maintain contact with the wall plane consistently and reserve the tile edge gap for flexible sealing.
Also, when you’re planning transitions (to carpet, hardwood, or a different tile height), don’t rely on “eyeballing” the last 10–12 ft. Use your measured reference line and confirm that the baseboard top matches the same visual height across both sides of a doorway or hallway. Wood-look tile floors often have subtle height changes from subfloor prep and thinset thickness, so a single measurement strategy prevents uneven baseboard “steps” that become obvious once trim is painted.
Prep the tile edge and wall so the trim sits correctly

Prep the tile perimeter and wall face so your baseboard rests on the wall consistently, not on grout ridges or thinset humps. This is the part that determines whether your caulk line ends up neat and uniform—or thin, stretched, and prone to cracking. When you prep correctly, baseboards look intentional even on imperfect grout lines.
In tile systems, grout ridges and thinset lumps can create voids behind trim; shimming or selective back-trimming of the baseboard is often needed to keep the baseboard plane consistent. TCNA Handbook (setting/installation principles)
ANSI A108 standards treat bond-critical surfaces as must-be-clean; dust and residue reduce adhesion for mortars and compatible sealants. ANSI A108 (ceramic tile installation standards)
– Check the tile perimeter edge: if grout ridges or thinset lumps create gaps behind the baseboard, plan to shim or sand/trim the back of the baseboard where appropriate.
– Clean the tile and the wall face where adhesive/caulk will go (dust and drywall compound can prevent good bond).
– If the wall is out of plane, expect to cope/scribe or shim behind the baseboard—tile floors can be installed level, but walls often aren’t.
How to deal with “uneven” grout lines without forcing trim
Wood-look tile frequently has micro-variations at the perimeter: a slightly proud grout ridge here, a thinset ridge there, or a small lippage near the cut edge. If you clamp a baseboard hard to these irregularities, you’re effectively bridging movement points with rigid material—then the caulk line has to work harder than it should.
Instead:
– Dry-fit first: hold the baseboard in place and look for rocking. Mark any contact points that cause the baseboard to bow.
– Plan for shims or sanding: small adjustments behind the baseboard help keep the visible edge straight.
– Avoid “pinning” the trim to the tile: you want the wall to carry the trim; the perimeter seal finishes the appearance.
If you’re working near movement joints (for example, where the tile installer left an intentional joint), confirm you’re not accidentally filling that joint with rigid material. That joint is designed to move, and baseboards should respect it.
Choose the fastening + sealing approach that won’t crack anything
Choose a two-part strategy: mechanically fasten baseboards to the wall (studs/anchors), then seal the perimeter gap to the tile using a flexible caulk designed for joint movement. The wrong approach is thinking adhesive or rigid bonding “locks” the system in place. With tile, that often transfers movement into grout edges and causes failure at the perimeter.
Keep mechanical fastening in the wall plane; TCNA movement-joint details emphasize honoring joints so tile can move without being constrained by rigid materials. TCNA Handbook, EJ171
ASTM C1193 guidance (joint sealant selection/use) supports designing caulk joints with correct sealant depth/width relationships so the material can stretch and recover. ASTM C1193
– Fasten the baseboard to the wall using finish nails or screws where you can hit studs (or use an appropriate anchor in drywall). Avoid relying on fasteners that try to “hold” the trim to the tile.
– Use construction adhesive as a helper—not the only hold—especially where the wall is uneven.
– Seal the perimeter with a flexible caulk method (commonly a bead where baseboard meets tile). Use a caulk type compatible with your tile and paint plan (and follow the manufacturer’s compatibility guidance).
Fastener/sealant choices: what to do (and what to avoid)
Below is a quick comparison of common approaches for baseboards at wood-look tile edges.
| Approach | Pros for baseboards | Cons / failure risk |
|---|---|---|
| Nail/screw into studs (wall) | Most stable trim retention; minimizes stress at tile edge | Requires stud locating and careful nail placement |
| Construction adhesive only | Quick fit for minor gaps | High risk of trim creep/looseness and perimeter stress transfer |
| Rigid bonding to tile edge | Looks tight initially | Increases likelihood of cracked grout or popped trim as the floor moves |
| Wall fastening + flexible caulk perimeter | Best match for tile movement; caulk handles micro-movement | Requires clean gap spacing and careful caulk tooling |
Sealant design basics you can use immediately
ASTM C1193 includes the concept that sealant performance depends on joint geometry; a common planning ratio is that sealant depth is about half the joint width (exact values depend on the product). ASTM C1193 This matters because if you overfill or underfill the tile-to-baseboard gap, the caulk can tear instead of stretching.
Also remember ASTM C920’s total movement classes—sealants aren’t “paintable filler” by accident; they’re engineered to stretch and recover within a defined movement range. ASTM C920/C920M For baseboards at tile edges, you generally want the caulk to be rated for joint movement, not just cosmetic appearance.
Cut, dry-fit, and install baseboards along wood-look tile
Cut and install baseboards in a controlled sequence so the trim line respects tile geometry while staying visually straight. The most common DIY issue here is “forcing” a baseboard to sit flush on an uneven tile edge; your baseboard should follow the wall plane and simply seal the perimeter gap. In 2026, the cleanest-looking installs still come from dry-fitting corners and grout-line crossings before you commit to final fastening.
Dry-fitting trim before fastening prevents over-tensioning a baseboard to a grout ridge, which is a frequent trigger for cracked joints at the perimeter. TCNA Handbook, EJ171
Sealant joints perform based on joint shape and movement capacity, so install baseboards securely first, then tool a consistent perimeter bead after the piece is stable. ASTM C1193
– Cut long runs first, then dry-fit sections to confirm your cuts land on grout lines without forcing the baseboard tight to the tile.
– Use coping (or mitering with careful testing) for inside corners, and miter outside corners only if your walls meet square enough to avoid visible gaps.
– During installation: set the baseboard so it contacts the wall consistently, shim where needed, then apply adhesive sparingly and run the perimeter caulk line after the piece is secured.
Clean corner strategy: cope inside corners, test outside corners
Inside corners rarely stay perfectly 90° once you account for wall waviness and tile edge irregularities. Coping inside corners with a sharp profile typically hides small angular differences better than trying to force a miter. For outside corners, miters can look excellent, but only if your walls are close to square. If you find a gap at a dry-fitted outside corner, stop and reassess rather than “fixing it” with thick caulk; thick caulk can look messy and may not hold the joint shape under movement.
Sequencing that reduces mistakes
A reliable sequencing workflow for baseboards on wood-look tile:
1. Mark the wall reference line and confirm the baseboard height matches your door jambs.
2. Dry-fit the first long run and note where tile grout ridges create visible proximity issues.
3. Adjust with shims behind the baseboard where needed, keeping the baseboard plane consistent.
4. Fasten to the wall, then add construction adhesive only as a helper where the wall is uneven.
5. Tool the perimeter caulk line last, so the final seal matches the final, installed gap.
What can go wrong (and how to prevent it)
Expect three categories of problems: perimeter cracking from rigid bonding, visible gaps at grout lines from poor fit, and loose baseboards from fastening errors. If you design the system as “wall-supported trim + flexible perimeter seal,” you eliminate most failure modes. From there, it’s all about measurement discipline and careful corner/caulk execution.
Rigid bonding between tile edges and trim converts expected floor movement into stress on grout and tile joints, increasing cracking risk. TCNA Handbook, EJ171
Sealant failure commonly comes from incorrect joint geometry (too much or too little depth), which ASTM C1193 addresses through sealant depth/width guidance. ASTM C1193
– Cracked grout or a “hard” perimeter: If the baseboard is forced tight and caulk/adhesive is too rigid, movement can stress tile edges and joints. Keep the approach flexible and avoid rigid bonding between tile and trim.
– Visible gaps at grout lines: Uneven tile edges or slight wall waviness can create narrow openings. Dry-fit, shim, and consider scribing/coping so the baseboard follows the wall—not the tile imperfections.
– Nail pops or loose trim: Driving nails too far from studs (or using the wrong fastener for drywall/plaster) can loosen baseboards over time. Nail into studs when possible; otherwise use anchors rated for trim weight.
– Water/cleaning seepage at the base: If you have a high-splash area, avoid relying on paintable caulk alone—use a compatible, moisture-tolerant sealing product as directed by the caulk manufacturer.
– Corners that open up: Even small angle errors at miters show up once the caulk line is too thin. Test cuts on scrap first and correct wall angle before committing.
A quick “gap math” reality check
If your perimeter gap is bigger than expected, you’ll be tempted to overfill with caulk. That’s a cosmetic and performance problem. Caulk is designed for controlled joint geometry and movement—overfilling changes how the material stretches.
Use the scan-friendly table below to sanity-check how bead size affects coverage when you’re sealing baseboards to the tile perimeter.
Estimated Caulk Coverage for Baseboard Perimeter Seals (10 fl oz nominal cartridge)
| # | Target bead size (W×D) | Cartridge volume used | Estimated coverage | Change vs 1/8×1/4 |
|---|---|---|---|---|
| 1 | 1/16 in × 3/16 in | 296 mL (≈18.07 in³) | 128.5 linear ft | +166% |
| 2 | 1/8 in × 3/16 in | 296 mL (≈18.07 in³) | 64.3 linear ft | +33% |
| 3 | 1/8 in × 1/4 in | 296 mL (≈18.07 in³) | 48.2 linear ft | 0% |
| 4 | 3/16 in × 1/4 in | 296 mL (≈18.07 in³) | 32.1 linear ft | -33% |
| 5 | 1/4 in × 1/4 in | 296 mL (≈18.07 in³) | 24.1 linear ft | -50% |
| 6 | 1/8 in × 5/16 in | 296 mL (≈18.07 in³) | 38.6 linear ft | -20% |
| 7 | 3/16 in × 5/16 in | 296 mL (≈18.07 in³) | 25.7 linear ft | -47% |
How this helps: if your bead ends up thicker than planned because the tile edge is irregular, you’ll run short sooner—and you’ll be more likely to “patch” with extra material that won’t hold its geometry.
Verdict / tip: do this if you want a clean edge—skip it if your wall or tile perimeter is “unfixable”
This is a solid DIY approach when your tile perimeter is reasonably prepared and your walls aren’t badly out of plane. The upside is a crisp finished baseboard line that respects tile movement by using flexible sealing rather than rigidly bonding trim to the floor. The downside is you may need shims, careful scribing/coping, and a slower, controlled caulking step to handle grout/edge irregularities.
“Baseboards should be supported by the wall plane, while the tile-to-trim interface is completed with a flexible sealant joint.” TCNA Handbook (movement joint/perimeter principles)
Sealant geometry and movement rating aren’t optional: ASTM C1193 and ASTM C920 exist specifically because correct joints stretch and recover instead of cracking. ASTM C1193; ASTM C920/C920M
This approach is also the safest option when you need the baseboards to match a new floor height and finish—especially around uneven tile edges. From a practical standpoint, we recommend you treat the baseboard install as two systems: mechanical retention (wall fastening) and finish sealing (flexible caulk).
Skip this (or get help) if you discover major issues like severely uneven tile edges you can’t correct, a perimeter-joint situation that conflicts with the tile manufacturer’s required movement strategy, or an installation where the wall plane is so distorted that baseboards can’t sit consistently without extreme shimming. In those cases, confirming the correct perimeter/joint strategy before installing trim will save you time and prevent expensive tile-edge damage.
Quick checklist (scan before you start)
| Task | Yes/No |
|---|---|
| Confirm baseboard height works with tile finished surface | ☐ |
| Mark level reference line on walls | ☐ |
| Clean tile edge + wall contact areas | ☐ |
| Dry-fit baseboard sections (especially corners) | ☐ |
| Fasten to wall (studs/anchors), not the tile | ☐ |
| Use shims/scribe if walls aren’t straight | ☐ |
| Apply caulk at the tile/baseboard perimeter with flexible product | ☐ |
| Touch up joints and caulk line after install | ☐ |
Sources
– TCNA Handbook for Ceramic Tile Installation — Detail EJ171 (movement joints/perimeter considerations). .
– ANSI A108 — ceramic tile installation standards (installation methods and general requirements). .
– ASTM C920/C920M — Standard Specification for Elastomeric Joint Sealants (movement classes and joint-sealant performance framework).
– ASTM C1193 — Standard Guide for Use of Joint Sealants (sealant joint geometry concepts like sealant depth/width planning).
– (compatibility and surface-prep requirements).
Frequently Asked Questions
What is the best way to transition baseboards when your floor is wood-look tile?
Use an appropriate transition approach that accounts for the tile’s height and any underlayment thinset build-up. Ideally, you’ll set the baseboard so the caulk joint at the floor is consistent and the profile doesn’t force a gap—apply a small continuous bead of caulk where the baseboard meets the tile. If you’re replacing existing trim, take floor-to-baseboard measurements from multiple points since tile can create slight height variations.
How do you install baseboards directly on wood-look tile floors without cracking the tile?
Don’t drive finish nails through the tile; instead, fasten baseboards to the wall studs or solid backing at recommended spacing. If you need to attach into masonry or where studs aren’t available, use appropriate masonry screws and anchors rather than relying on tile for holding power. Use a level for the layout, pre-drill where required, and seal gaps with paintable caulk so movement doesn’t create stress points against the tile.
Which baseboard material works best with wood-look tile flooring?
Many installers choose PVC/vinyl baseboards, MDF primed trim, or engineered wood because they resist moisture and handle the firmer, less forgiving surface of tile better than raw wood. If you’re installing in areas prone to humidity (bathrooms, kitchens, basements), PVC is often the lowest-maintenance option. Match the baseboard profile to the look of your wood-look tile—simple profiles tend to complement the tile grain patterns without looking overly busy.
How should you measure and cut baseboards to fit around the grout lines and tile edges?
Measure the wall length, then dry-fit the baseboard sections to confirm the tile edge and any grout line height changes won’t cause an uneven reveal. When making cuts, account for corners and inside/outside miters by dry-mitering pieces first and adjusting the angle as needed. Because wood-look tile may have subtle lippage, leave a consistent caulk gap at the bottom and don’t force the trim tight to uneven tile—caulk provides the clean, finished appearance.
Why is caulking between baseboards and wood-look tile important, and what type should you use?
Caulking creates a flexible, finished seal that hides small gaps from tile irregularities and helps prevent dirt and moisture from collecting along the baseboard line. Use a paintable, low-expansion latex or acrylic-latex caulk labeled for trim and baseboards; avoid overly rigid caulk that can crack as the room temperature changes. Apply caulk continuously along the joint, smooth it neatly, and paint after it cures for a professional baseboard installation on wood-look tile floors.
📅 Last Updated: October 16, 2026 | Topic: How to install baseboards with wood-look tile floors? | Content verified for accuracy and freshness.