
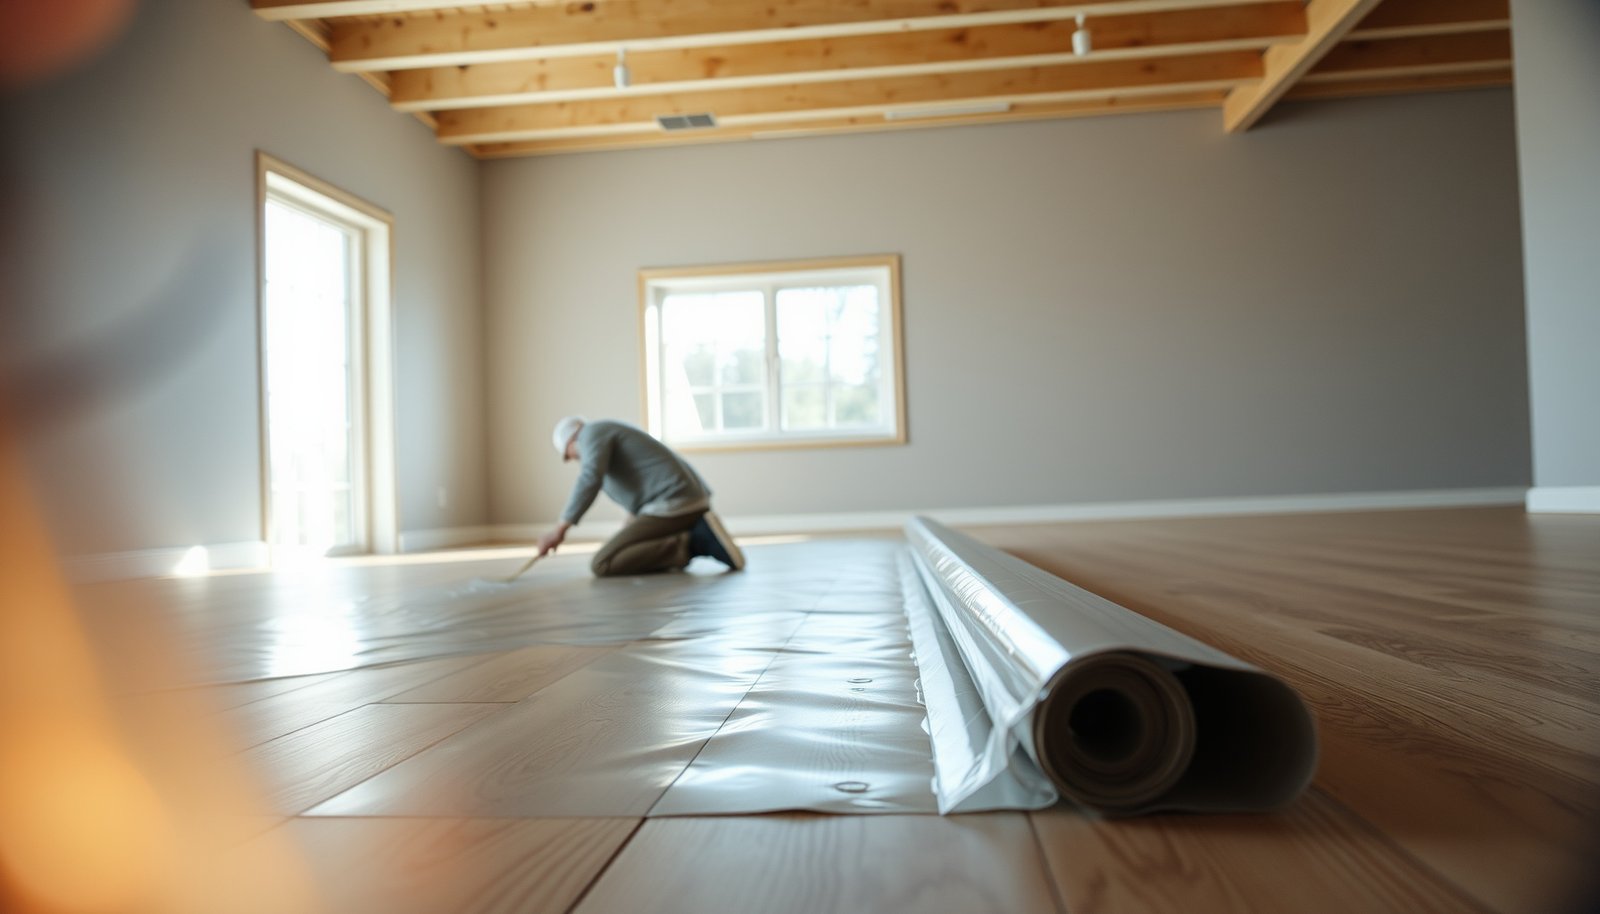

If you’re installing a vapor barrier under wood-look tile floors, the correct choice is to use a properly overlapped, sealed underlayment vapor barrier system—so moisture can’t migrate into the subfloor or tile assembly. This guide shows exactly where the barrier goes, how to tape and seal seams, and how to handle key transitions for a floor that stays stable. You’ll finish with a clear, step-by-step method that works for most residential installs and prevents common moisture-related failures.




A vapor barrier under wood-look tile floors helps control moisture movement from below so the subfloor and tile assembly stay stable. In practice, you’ll prep the subfloor, install the correct underlayment/vapor layer in the right orientation, seal seams properly, and then set tile using the system your tile/subfloor requires.
This guide is for DIYers or remodelers installing wood-look tile over concrete, slab, or other subfloor types where moisture control is needed. It also helps if you’re unsure which layer goes where (sheet plastic vs. membrane vs. part of a tile underlayment system).
Choose the Right Vapor Barrier Material (and Confirm Your System)

The right vapor barrier is the one your specific tile and underlayment system calls for—because “more moisture protection” isn’t always better. Start by matching the substrate and moisture conditions to the manufacturer’s required vapor retarder type and perm (vapor transmission) rating.
A Class I vapor retarder is defined as having a permeance of ≤ 0.1 perm (per vapor-retarder classification standards referenced in building guidance). ASTM E1745 / IBC/IRC vapor-retarder concepts
Vapor-retarder classes are commonly grouped as Class I (≤ 0.1 perm), Class II (0.1–1 perm), and Class III (1–10 perms). ASTM E1745
A 6-mil polyethylene sheet is 0.006 inch (about 0.152 mm) thick, which is a common baseline thickness for slab vapor retarder films. Conversion: 1 mil = 0.001 in
Here’s how to choose without guessing (and why it matters for wood-look tile):
– Identify your substrate. Is this over a concrete slab, an unconditioned crawlspace, or an interior wood subfloor? The required layer stack changes by substrate and system.
– Follow the tile + underlayment manufacturer’s moisture instructions. Wood-look tile systems often specify whether you need a separate vapor retarder sheet, a membrane, or no additional plastic because the underlayment already includes one.
– Watch for “double vapor control.” If your underlayment already contains a vapor retarder, adding another plastic layer can trap moisture instead of allowing it to escape in the direction the system expects.
– Use the correct perm rating for your conditions. If you’re unsure what perm rating your climate/substrate needs, don’t hand-wave—use a spec-driven target for your system.
Practical guidance: what “correct” usually means in real assemblies
A common approach for tile over concrete slabs is a sheet vapor retarder (often polyethylene) when the tile system calls for one. However, many modern tile underlayments use engineered layers that manage moisture differently than plain plastic. That’s why confirming the assembly (tile + thinset + underlayment + vapor control) is step one.
Typical Vapor-Retarder Class Benchmarks (ASTM E1745)
| # | Vapor-Retarder Class (perm) | Perm Range | Moisture-Blocking Strength | Installation Fit (tile-on-slab) |
|---|---|---|---|---|
| 1 | Class I | ≤ 0.1 perm | ★★★★ | Often specified when slabs need a stronger retarder |
| 2 | Class II | 0.1–1 perm | ★★★☆ | Sometimes acceptable depending on system limits |
| 3 | Class III | 1–10 perms | ★★☆☆ | Usually too “open” for many slab moisture-control cases |
| 4 | Polyethylene film (common baseline) | Often treated as Class I in specs | ★★★★ | Works when your system requires a Class I retarder |
| 5 | “No added plastic” systems | Assembly-defined (varies) | System-specific | Follow specs; extra layers can trap moisture |
| 6 | Membrane vapor retarders | Often engineered to meet perm limits | ★★★★ | Reliable when matched to the manufacturer’s assembly |
| 7 | Permeable membranes | Higher perm classes (varies) | ★★☆☆ | Use only if the tile system allows inward/outward drying |
Prep the Subfloor: Flat, Dry, Clean, and Measured
A vapor barrier can’t correct a wet or uneven slab—it can only control the direction of moisture movement. Before you lay plastic or membrane, you need the surface flat, secure, and dry enough for the tile system’s approved moisture limits.
Tile bond performance depends on the substrate meeting the moisture and preparation requirements set by the mortar and tile-laying standards. ANSI A108 / mortar installation requirements (manufacturer guidance referenced)
In moisture-sensitive slab installs, you verify concrete conditions with the method specified by the tile/adhesive system (commonly ASTM F2170 relative humidity). ASTM F2170
If you find active leaks, standing water, or ongoing dampness, a vapor retarder alone is not a remediation strategy. General moisture-control principles;
Build the right foundation:
– Remove debris and fix protrusions so the vapor layer lies flat without punctures or bridging.
– Level dips and secure loose areas. Flatness is critical for tile, because wood-look formats can be less forgiving if the slab flexes or the underlayment bridges hollow spots.
– Address moisture sources first. A vapor barrier manages migration; it doesn’t stop a plumbing leak or remediate chronically wet concrete.
– Verify dryness using the system’s required method.
– Keep an eye on crawlspaces and humidity. If the installation is over a crawlspace or over wood subfloor components, the “moisture side” may be different than you expect, and the barrier may need to be paired with ventilation or other measures.
From a practical standpoint, the most common failure pattern we see in slab-based tile is a mismatch between “installed plastic” and “system moisture expectations.” The barrier then becomes a film you’ve trapped moisture behind—turning a manageable situation into a slow one.
Install the Vapor Barrier Correctly (Sheet Layout, Overlaps, and Seams)
Installing the vapor barrier correctly means maintaining continuity—no gaps, no punctures, and no unsealed seams. With wood-look tile floors, the vapor layer is only as good as its overlaps, taped joints, and sealed penetrations.
Vapor retarders are only “continuous” if seams are overlapped and sealed using materials and details specified by the vapor-retarder manufacturer. ASTM E1745 concepts; manufacturer installation instructions
Any holes or openings through the vapor retarder (pipes, wires, posts) need sealed, system-specific details or approved sealants to prevent moisture bypass. Manufacturer penetration detail requirements
As of 2026, most tile assemblies still rely on the same core moisture-control logic: control moisture before thinset and grout are installed, not after.
Follow the install sequence that prevents bypass paths:
– Lay out the sheets with the correct orientation. Some membranes have a “smooth side” vs. “textured side,” and the manufacturer specifies which side faces up. Follow that direction.
– Overlap seams and tape them properly. Use the recommended tape for the barrier film (not generic HVAC tape).
– Run the barrier up the edges as required. The perimeter detail keeps moisture from wicking around the sheet.
– Seal penetrations. Pipes and other penetrations are common weak points—seal with manufacturer-approved methods so moisture can’t track through the smallest opening.
– Avoid punctures during underlayment placement. If you’re adding foam board or another underlayment on top, use the full assembly instructions so fasteners/adhesives don’t compromise the vapor layer.
Manage the Edges and Transitions Before You Tile
Edges and transitions are where vapor barriers most often fail because the barrier gets interrupted by walls, framing, and other floor layers. Plan your perimeter and isolation strategy before thinset ever touches the slab.
Tile and underlayment systems specify movement accommodation (isolation/expansion joints), and the vapor layer must not block required joint locations. TCNA Handbook guidance (movement accommodation principles)
A vapor retarder should be continuous at transitions, but it must also respect the tile assembly’s joint layout so cracking and debonding risk is not increased. Manufacturer assembly requirements
Use these steps to protect the assembly:
– Tape perimeter seams/edges where the barrier meets walls or adjacent materials.
– Plan expansion and movement joints early. Wood-look tile can be rigid; the system needs isolation where the floor must move. Keep the vapor layer compatible with those requirements.
– Treat transitions into other rooms carefully. Don’t allow a gap where moisture can bypass the barrier in one doorway segment.
– If you’re installing foam boards or additional underlayment on top, follow the complete assembly instructions. The underlayment may require specific fastener types, spacing, and adhesive methods that won’t puncture or peel back the vapor layer.
– Maintain continuity at corners. Wrinkled plastic at inside corners can create weak seam conditions—smooth and re-lap as instructed.
What Can Go Wrong (Common Mistakes and Edge Cases)
Most moisture-related tile failures come from layer mismatches, poor sealing, or ignoring active moisture sources—not from the concept of vapor control itself. If you treat vapor control as a one-size-fits-all DIY upgrade, you can create trapped moisture conditions that damage grout, debond tile, or warp vulnerable components.
Adding extra vapor barrier layers can trap moisture when the underlayment/tile system is designed to allow drying in a different direction. Manufacturer underlayment system instructions
Unapproved tape or missed overlaps create moisture bypass paths that undermine the entire vapor-retarder function. Vapor retarder continuity and manufacturer seam-tape requirements
If moisture is beyond allowable limits, installing a vapor retarder does not substitute for remediation of the moisture source. Moisture-control principles;
Here are the biggest pitfalls:
– Wrong barrier type or “extra plastic” on top of a vapor-controlled underlayment. This is a classic trap: your barrier looks correct, but the assembly’s moisture management changes.
– Skipping seam tape or using the wrong tape. Even small seam failures can become a steady moisture path.
– Installing over damp or actively wet concrete/crawlspace conditions. Moisture must be controlled at the source first, then managed through the assembly.
– Ignoring substrate-to-system requirements. If your slab needs a specific testing method and allowable readings, you can’t assume “it feels dry” is enough.
Pros/Cons: common vapor-retarder options under tile (quick decision guide)
- Polyethylene sheet (typical vapor retarder)
- Pros: Often provides strong Class I vapor control when installed continuously; widely understood detailing.
- Cons: Can be damaged during underlayment placement; must be correctly oriented and taped with compatible materials.
- Engineered vapor-retarder membranes
- Pros: Designed to integrate with tile underlayment/setting details; seam and penetration detailing may be more straightforward.
- Cons: Requires strict adherence to the manufacturer’s assembly instructions; using it with the wrong tile mortar can still cause failures.
- Built-in vapor control within a tile underlayment system
- Pros: Often reduces risk of layer mismatch; supports the intended moisture path for the assembly.
- Cons: You can’t assume extra plastic is beneficial—duplicating vapor control can trap moisture.
If your slab conditions are uncertain, be conservative:
Verdict: When This Approach Is Worth It (and When to Skip)
For most slab-related wood-look tile installs where the specifications call for a vapor retarder, adding a correctly installed, continuously sealed vapor barrier is a smart baseline step. The downside is real: if your underlayment already manages vapor (or if your slab moisture is outside allowable limits), adding a barrier may not fix the root issue and can create trapping problems.
A vapor barrier is most effective when it matches the tile/underlayment system requirements for perm rating, seam sealing, and continuity. Manufacturer installation instructions
If moisture is outside the system’s allowable limits, remediation and/or a system-specific moisture mitigation approach is required rather than relying on vapor retarding alone.
Skip DIY vapor-barrier guessing and confirm the correct assembly if:
– your tile/underlayment instructions don’t clearly state you should add a separate vapor layer,
– you see active moisture issues, staining, or recurring dampness, or
– you’re working with unusual substrate transitions (for example, switching from slab to wood with no clear assembly plan).
In other words: vapor control is important, but the system is the real waterproofing strategy for tile floors.
Quick Checklist: Vapor Barrier Under Wood-Look Tile Floors
– [ ] Confirm substrate type and follow the tile + underlayment system instructions for moisture/vapor requirements
– [ ] Subfloor is flat/clean/secured; fix dips and remove debris
– [ ] Barrier installed continuously with correct orientation and approved overlap
– [ ] Seams and penetrations sealed with manufacturer-approved tape/sealant
– [ ] Edges/perimeter details treated as required (no unsealed gaps)
– [ ] Expansion/isolation joint requirements preserved
– [ ] Proceed with the correct underlayment and thinset methods specified by the tile system
Sources
A well-installed vapor barrier supports a durable wood-look tile floor, but only when it’s part of the correct, manufacturer-approved assembly. If you’re unsure about perm rating, seam/penetration details, or moisture testing requirements as of 2026, verify with the tile/underlayment technical documentation before you lock everything in under thinset and tile.
Frequently Asked Questions
What vapor barrier should I use under wood-look tile floors over concrete?
Use a vapor barrier that meets your climate and local building requirements, typically a polyethylene sheet (often 6-mil or thicker) for concrete subfloors. If your tile system already specifies a vapor retarder, follow that manufacturer guidance to avoid voiding warranties. For below-grade or high-moisture areas, consider using a thicker poly or a product designed specifically for flooring assemblies rather than a generic liner. Always overlap seams and tape them with a vapor-rated seam tape to prevent moisture migration.
How do I install a vapor barrier under wood-look tile floors without damaging the subfloor?
Start by checking that the concrete is clean, dry, and flat, then repair cracks or high spots before installation so the tile won’t fail later. Lay the vapor barrier over the subfloor with seams overlapped (commonly 4–8 inches) and seal the overlaps with tape rated for vapor control. Extend the barrier up the wall slightly (often a couple inches) and keep it free of wrinkles, then protect it where thinset or underlayment will be installed according to your tile system. Finally, install your underlayment or uncoupling membrane as required, because vapor barriers are not usually the same layer as waterproofing.
Why do I need a vapor barrier under tile when using a wood-look tile or plank-style floor?
Wood-look tile flooring can be installed over slab, crawlspace, or other substrates where moisture can migrate upward and damage adhesives, cause debonding, or promote mold in enclosed areas. A properly installed vapor barrier helps control moisture transmission so the thinset and tile installation perform as intended over time. It also helps reduce the risk of efflorescence and surface issues when moisture-driven problems occur. Even though tile is water-resistant, the layers beneath it—especially thinset and underlayment—still require moisture management.
Which method is best for sealing vapor barrier seams under a wood-look tile installation?
The best approach is to use a vapor barrier system that includes both the sheet and a compatible, vapor-rated seam tape, then follow the overlap and sealing directions exactly. Press tape firmly along seams and transitions, and seal any penetrations (like plumbing pipes) with an appropriate flashing or sealant made for polyethylene vapor barriers. If you’re using multiple layers or transitioning between surfaces, ensure all joints are treated so there are no gaps where moisture can bypass the barrier. Proper seam sealing is critical because most vapor-control failures happen at joints rather than in the middle of the sheet.
How thick should the vapor barrier be for wood-look tile floors, especially in basements or below-grade areas?
For many slab-on-grade installations, a thicker polyethylene sheet (often 6-mil) is commonly used to provide durable vapor resistance under tile floors. In basements or below-grade conditions where moisture is more likely, local codes or manufacturer specs may call for thicker material or an additional moisture mitigation system. Before choosing thickness, test moisture where required (such as ASTM methods for concrete) and confirm the tile/uncoupling membrane manufacturer’s requirements. Matching the vapor barrier thickness to your moisture conditions helps protect the wood-look tile floor assembly long-term.
📅 Last Updated: October 16, 2026 | Topic: How to install a vapor barrier under wood-look tile floors? | Content verified for accuracy and freshness.
[…] gaps or misalignment? This step-by-step guide shows the fastest, most reliable way to measure, prep the subfloor, and install the right transition piece for a clean, professional finish. Follow it and you’ll […]