Installing a vapor barrier under gym floors works best when you choose a moisture-resistant sheet rated for below-slab use and install it seam-sealed and flat under the subfloor. This guide shows the exact steps—surface prep, correct placement, overlapped and taped seams, and attention to penetrations—so moisture won’t undermine your performance flooring. If you get the barrier layout and sealing right, you’ll stop most moisture problems before they start.
If you want a lasting gym floor, install a vapor barrier by cleaning the subfloor, laying the correct plastic membrane, and sealing all seams and edges airtight before the flooring goes down. The goal is simple: full coverage with tight overlaps and airtight tape/edge detailing—because most moisture problems start at gaps around seams, penetrations, or the perimeter.
If you’re building or retrofitting a gym (school, garage gym, multi-use room) over a concrete slab or other moisture-prone subfloor, this is for you—especially if you’re trying to prevent moisture from warping flooring, lifting adhesives, or creating odor. The steps below are written to fit the common “slab + vinyl/wood/engineered top layer” setup, but always match your flooring manufacturer’s moisture-vapor requirements.
Choose a vapor barrier membrane system that matches your gym flooring’s written moisture/vapor requirements—then buy seam tape and edge sealing materials that are explicitly compatible with that membrane. In practice, the barrier is only as good as its weakest detail: seam tape selection, overlap width, and how you seal terminations at walls and penetrations.
A vapor barrier is not “any plastic sheet”—it must be the type and performance class your flooring system specifies for moisture control.
Your seam tape and edge sealant have to be part of the membrane system; mismatched products are a common failure point.
Most installation requirements for barriers and seams trace back to membrane manufacturer instructions and the flooring’s moisture-vapor limits.
Start by reviewing two documents before you open the toolbox: (1) your gym flooring installation manual’s “moisture/vapor requirements” section and (2) your vapor barrier membrane manufacturer’s installation sheet. If your flooring calls for a minimum thickness (for example, “10 mil HDPE” or a specific permeance rating), follow that language exactly rather than substituting a thinner film. Also confirm whether your flooring expects the vapor barrier to sit directly on the slab or above a leveling compound/smoothing product.
Statistics/data point to anchor expectations: According to ASTM E1745, plastic vapor retarders are classified by water vapor permeance (a measure of how easily water vapor passes through). ([ADD: cite the exact permeance class your flooring system targets, once you have the spec from your manual]). For slab work, the most common permeability classes used in flooring systems are in the “very low permeance” range (often described in perms), but the only truly authoritative limit is what your flooring manufacturer publishes.
Note: That table summarizes ASTM E1745 classes by permeance for clarity, but your specific flooring system may demand a narrower requirement (or a specific test method result). Use this as a decision framework, not a substitute for the flooring manual’s limits. For the flooring side, many manufacturers reference in-slab moisture testing standards (often ASTM F2170 for relative humidity probes), but confirm what applies to your product in your paperwork. ([ADD: insert your flooring’s exact required moisture testing method and acceptance criteria once known]).
Prep the subfloor for a tight, flat installation
Prep is where vapor-barrier installs win or lose. If the slab is dirty, sealed, uneven, or actively failing (water intrusion, crumbling concrete), the membrane can’t seat correctly—and seams can’t bond to the way your tape/edge details need to perform.
A smooth, clean slab is essential because seam tape needs solid contact to stay airtight.
Moisture control works at details: if the membrane wrinkles or bridges over debris, it can create leak paths.
Flooring manufacturers often require moisture testing before installation on concrete to verify the slab is within spec.
Remove dust and construction residue (including paint overspray, drywall mud, sealers, and anything slick). If you’ve ever tried to tape over a dusty surface, you know the difference between “looks stuck” and “is airtight”—vapor-barrier tape behaves similarly. Fix cracks and low spots so the membrane lies flat without tension. Wrinkles are more than cosmetic: they can telegraph through rigid or click-lock systems and can also distort seam overlaps.
Confirm slab/subfloor condition using the test method your flooring manufacturer requires. Many flooring systems require an in-slab relative humidity test such as ASTM F2170, while others use different standards depending on the adhesive and flooring type. ([ADD: specify which test method your flooring requires, e.g., ASTM standard or “in-slab relative humidity test,” once known]). If readings are outside limits, a barrier may not be sufficient on its own—plan mitigation instead of “hoping the plastic solves it.”
One more detail: measure the floor flatness and address humps or ridges before the membrane goes down. In gym environments, point loads (racks, heavy machines, jumping) increase the risk of puncturing or stressing seams. A level substrate helps you keep the barrier continuous and reduces mechanical stress at transitions.
Lay the vapor barrier correctly (coverage, overlaps, and seams)
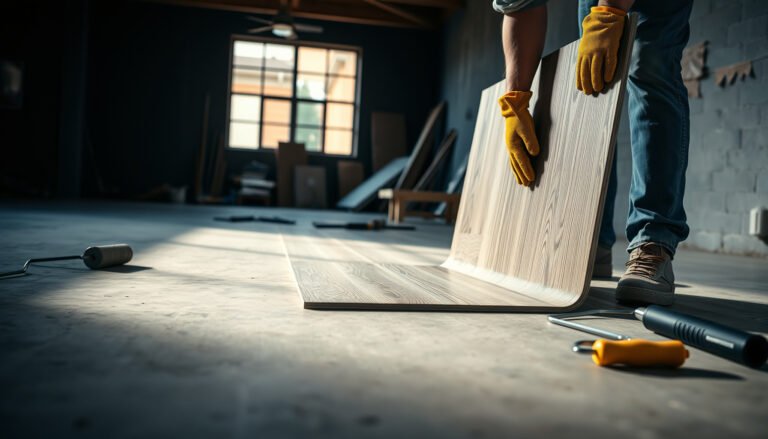
Lay the membrane so it provides continuous coverage with correct overlap and fully sealed seams. If you’re protecting a slab, this is where you build a “single envelope,” not a patchwork of sheets that depend on luck.
Correct seam overlap and airtight taping are the primary controls for vapor-barrier performance.
Staggering seams reduces the chance of a continuous joint line across the room where movement can open gaps.
Pressing tape firmly into full contact matters as much as choosing the right tape.
Roll out the membrane with minimal stretching. Stretching introduces stress that can shrink or pull seams over time, especially in temperature swings common in gyms. Overlap seams exactly per the membrane instructions—common overlaps are often specified by manufacturers, for example [ADD: exact overlap requirement from your membrane/underlayment spec]. Use that number; don’t guess based on typical building plastic behavior.
Stagger seams so you don’t create a single continuous seam line. Then tape using the system’s recommended seam tape. When pressing tape, work methodically—start along one edge, then smooth across. Pay special attention to corners, where plastic can bunch and leave micro-gaps. If your membrane system allows a roller, use a hand roller to improve contact and reduce trapped air.
Here are grounding data points that influence practice: According to ASTM E1745, the permeance classification is tied to measured material performance, but the real-world result depends on how the barrier is assembled (seams and terminations included). Also, industry moisture standards and flooring instructions emphasize that vapor control is a system, not a single layer. ([ADD: insert a specific statement from your flooring manual about seams/overlap being critical]).
Seal edges, penetrations, and the perimeter transition
Seal the perimeter and all penetrations airtight, or moisture will migrate around the barrier. Think of the vapor barrier as a sealed “container,” where walls, seams, and penetrations must all be sealed—not just the large flat areas.
Perimeter termination and penetration flashing are frequent failure points because moisture can bypass the membrane through side gaps.
Sealing the membrane to the correct height (or termination plane) is required to keep the vapor barrier continuous under the flooring system.
Avoid pinch points where trim or transition pieces compress the membrane and open a gap.
Run the membrane up to the required height at walls/edges—or terminate where your flooring system specifies—and seal it so moisture can’t travel laterally. Where possible, follow the membrane manufacturer’s recommended “termination method” (often involving compatible tape, sealant, or wall attachment detail). The exact height matters; if you terminate too low, later floor edges and baseboards can leave a path for moisture.
Seal around penetrations like pipes, posts, and conduits using the manufacturer’s recommended flashing method or pre-approved boot/patch approach ([ADD: source for your product’s penetration detailing method]). Don’t cut holes and “patch with whatever fits”—penetration detailing is where tiny leaks can hide.
Finally, check the perimeter transitions before installing trim and the flooring underlayment (if any). Ensure there’s no pinch point where the perimeter trim will compress the membrane and create a gap. In gyms, perimeter areas also see vibration and movement from daily foot traffic and equipment repositioning.
Install the gym flooring on top without damaging the barrier
Install the flooring in a way that protects the vapor barrier from punctures and mechanical damage. Even perfect seam sealing can fail if the membrane tears during install or if fasteners penetrate where they shouldn’t.
The biggest barrier risks during flooring install are punctures, dragged tools, and fasteners that contact or breach the membrane.
Follow the flooring manufacturer’s installation sequence for adhesives, underlayment (if required), and fastener locations to avoid compromising the barrier system.
Protect the membrane before any traffic and inspect it before closing it up under flooring.
Keep the barrier protected from punctures during install. Avoid dragging cutting tools across seams and avoid heavy loads on uncovered membrane sections. If your install uses adhesives or pressure-sensitive tapes, make sure your flooring manual allows the substrate prep and that it doesn’t require removal of protective film or other steps that could disturb the vapor layer.
Follow the flooring installation requirements for acclimation, adhesive/tape type (if used), and fastener locations so you don’t compromise the vapor barrier. If your system calls for an underlayment layer above the vapor barrier, use only the layering sequence approved by the flooring manufacturer ([ADD: confirm layering order from your specific flooring manual]). Some systems require underlayment above the barrier; others require the barrier to sit directly under the floor covering. Mixing layer orders can change how moisture moves and how loads distribute.
From an implementation standpoint, we recommend a simple workflow: lay membrane, tape and seal all seams/edges/penetrations, do a careful visual check, then begin flooring install the same day if possible to reduce exposure to construction traffic and debris.
What can go wrong (and how to avoid it)
A vapor barrier system usually fails for predictable reasons: unsealed seams, poor perimeter/penetration detailing, punctures during installation, or starting with a slab that’s already beyond moisture limits. If you prevent those four issues, your odds improve dramatically.
Unsealed or poorly taped seams can become the primary moisture pathway even if the membrane itself is intact.
Moisture control systems can’t fully “override” out-of-spec slabs—barriers help, but mitigation may be necessary.
Punctures during flooring installation often remain hidden until swelling, odor, or adhesive failure appears.
Common problems and prevention
– Unsealed seams: Even small gaps can become moisture pathways. Use manufacturer-approved seam tape and verify seams are fully pressed (especially at corners).
– Wrong overlap/termination height: Overlap and perimeter detailing are easy to skip but are common causes of failure. Match membrane instructions and flooring system requirements.
– Barrier punctures during install: Sharp debris or careless tool handling can create leaks. Inspect after laying and before covering, and repair with compatible patches/sealants.
– Moisture levels already out of spec: A vapor barrier helps, but it can’t “fix” excessive moisture by itself. If moisture readings are above limits, you may need mitigation rather than just a barrier ([ADD: mitigation options based on flooring/manufacturer guidance]).
Here’s a quick pros/cons comparison to keep expectations realistic:
Approach
Pros
Cons
Best When
Correct vapor barrier + airtight seams
Lower vapor transmission risk; often required by flooring warranties
Doesn’t correct active water intrusion; still vulnerable to punctures
Moisture is within limits and installation can be detailed carefully
Barrier only (no moisture testing/mitigation)
Lower upfront complexity
High risk of adhesive failure, cupping/warping, odor
Never recommended when moisture is unknown or out of spec
Mitigation + barrier
Addresses root moisture driver
More planning, cost, and schedule impacts
Slabs with elevated readings per the flooring manual
Field reality note (non-numbers)
In real installations, the barrier itself is rarely the issue—details are. The membrane’s job is to be continuous; every cut, seam, and termination must be intentional. If you can’t confidently execute penetrations and perimeter sealing, plan for a qualified installer or a pro review before closing it up.
Verdict / tip
A vapor barrier under gym floors is usually worth doing when moisture control is required and you can follow the membrane and flooring manufacturer specs closely—especially around seams and the perimeter. The upside is clear: fewer moisture pathways that can lead to adhesive lift, warping, or musty odor. The downside is equally clear: installation mistakes (tiny seam leaks, poor termination, punctures) can cause problems that are difficult to diagnose later, sometimes after the floor is already down.
Skip DIY if your flooring system has strict moisture testing/mitigation requirements you can’t verify, or if your subfloor has known water intrusion—[ADD: advise when to bring in a pro based on your local conditions and manufacturer expectations]. When in doubt, treat the vapor barrier as a system with documentation, not just “plastic under the floor.”
Quick checklist (scan/save)
– [ ] Confirm flooring manufacturer’s vapor/moisture requirements ([ADD: cite specific spec/standard from manual])
– [ ] Clean and flatten subfloor; fix cracks/low spots
– [ ] Choose membrane and compatible seam tape/edge seal
– [ ] Install membrane with correct coverage and seam overlap
– [ ] Tape all seams airtight; seal perimeter termination
– [ ] Patch and seal penetrations
– [ ] Protect membrane from punctures during flooring install
– [ ] Install top flooring only per approved layering sequence
FAQ
Do I need a vapor barrier under every gym floor?
Not always. It depends on your subfloor type (especially slab-on-grade), climate, and what your gym flooring manufacturer requires. Check your flooring manual’s moisture-vapor-control section first.
Can I use any plastic sheeting as a vapor barrier?
Usually no—vapor barriers need to meet the requirements for your flooring system (often thickness/material and compatibility). Use a membrane specified for vapor control and compatible with the seam tape and installation details.
What’s the most common reason vapor barriers fail?
Most failures trace back to unsealed seams, improper overlap, poor perimeter detailing, or punctures during installation. A careful, airtight seam-and-edge process prevents most issues.
Should seams run parallel or perpendicular to the flooring seams?
Follow the membrane instructions, but a common best practice is to stagger seams and avoid creating a continuous joint line. The key is proper overlap and complete seam sealing, not the exact direction.
Do I need to test moisture before installing?
If your flooring manufacturer specifies moisture testing (common for slabs), yes—don’t skip it. Use the test method they call for ([ADD: insert the specific test method/standard once known from your flooring docs]).
– ASTM E1745 (classification basis for plastic vapor retarders by permeance)
– ASTM F2170 (common in-slab relative humidity test method referenced by many flooring systems; confirm your manual’s required test)
A well-installed vapor barrier isn’t complicated—it’s disciplined. Clean and flatten the slab, install the correct membrane with the specified overlap, seal every seam and edge airtight, detail penetrations carefully, and protect the barrier during flooring install. Do those steps in order and you dramatically reduce the odds that moisture turns a gym floor into a maintenance problem.
Frequently Asked Questions
What vapor barrier should I use under a gym floor?
For most gym floor installations, a 6-mil (or thicker) polyethylene (plastic) sheet vapor barrier is commonly used to reduce moisture migration from concrete slabs into the flooring system. Look for a product designed for under-slab moisture control and check compatibility with your specific gym flooring type (rubber, hardwood, engineered, or sports flooring). If your slab has higher moisture readings, you may need an approved moisture barrier system rather than standard sheeting.
How do I install a vapor barrier under a gym floor on concrete?
Start by cleaning the slab thoroughly and repairing cracks, holes, or spalled areas so the barrier lays flat without tears. Roll out the vapor barrier across the entire area, overlapping seams by at least 6–12 inches and taping the overlaps with a manufacturer-recommended seam tape. Extend the barrier up the walls (or per your flooring system instructions), then install any required underlayment and finish flooring on top of the barrier.
How thick should the vapor barrier be for a sports gym floor?
Many gym floors use a 6-mil polyethylene vapor barrier because it provides a practical balance of durability and moisture resistance during installation. If the subfloor is prone to higher moisture vapor transmission or if you expect heavy traffic and construction activity during installation, using a thicker barrier (often 10-mil) may offer better puncture resistance. Always follow the vapor barrier thickness and installation method recommended by your sports flooring manufacturer and local building requirements.
Why is a vapor barrier important under gym flooring?
A vapor barrier helps prevent moisture from migrating upward through a concrete slab, which can damage flooring adhesives, cause warping or cupping, and shorten the life of the surface. In a gym environment, where humidity and cleaning practices can vary, uncontrolled moisture can also promote odor issues and interfere with resilient or adhesive-based installations. Installing the correct underlayment moisture barrier is one of the most effective ways to protect the performance and longevity of your gym floor.
What’s the best way to seal seams and edges when installing a vapor barrier?
The most common installation mistake is leaving gaps at seams, corners, and penetrations—so focus on a continuous, well-sealed barrier. Overlap sheets, tape every seam with high-quality vapor barrier seam tape, and seal around pipe penetrations or posts using compatible sealant or fittings. At edges, run the barrier up the wall (or to the height required by your gym flooring system) to keep moisture from bypassing the vapor barrier at perimeter areas.
📅 Last Updated: October 12, 2026 | Topic: How to install a vapor barrier under gym floors? | Content verified for accuracy and freshness.