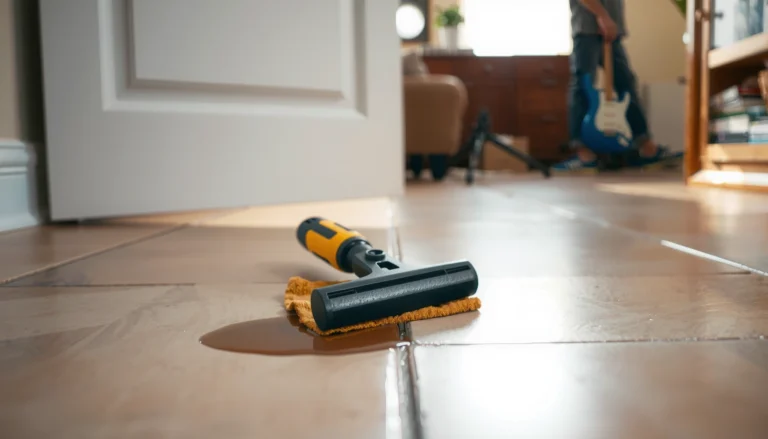
Fix scratches on rubber floors with a proven, step-by-step repair method that restores the surface without guesswork. You’ll learn exactly how to clean the damage, choose the right filler or patch, and blend it to match the surrounding floor. If you want a lasting result instead of a temporary cover-up, follow these repair steps in order.




Rubber floor scratches usually get much less noticeable after you clean the area thoroughly and match the repair method to the scratch depth—light scuffs typically need gentle smoothing, while deeper cuts require filling or patching. Follow a simple sequence: surface cleaning → correct prep → light buffing or compatible filler/patch → full cure before traffic.
If you have scratched home gym flooring, playground rubber tiles, or commercial rubber surfaces, this guide is for you—especially when the area is still usable but looks worn. It’s designed for practical, low-risk repairs that can often avoid replacing the entire floor panel (though you should skip DIY if the rubber is torn, lifting, or structurally failing).
Assess scratch depth (scuff vs. gouge)

A scratch repair works best when you first confirm whether the damage is only a surface scuff or a gouge that has penetrated and possibly torn the rubber. Use the fingernail catch test and look for lifted edges—because scuffs respond to cleaning and light smoothing, while gouges typically need filling, re-top, or a patch.
If your fingernail doesn’t catch in the groove, the damage is usually a surface scuff rather than a penetrating cut.
Lifted edges, cracking, or torn rubber are signs you should patch rather than rely on “spot smoothing.”
Interlocking mats, loose roll flooring, and bonded tile systems often require different repair materials and prep steps.
Start by doing the following checks in order:
1. Fingernail catch test: Run your fingernail lightly across the scratch.
– No catch: treat it as a light scratch/scuff.
– Catch or snag: assume it’s deeper (gouge/cut) and plan for filling or patching.
2. Edge condition: Look at the scratch edges in strong light.
– Clean, flat line: often a scuff.
– Raised/lifted rubber, fraying, or widening crack: indicates tearing.
3. Floor type matters (repair compatibility):
– Rubber tiles (interlocking or adhered): patches and localized leveling are usually more effective than trying to “grind out” damage.
– Roll rubber flooring: surface wear can often be corrected by careful smoothing and re-coating, but deep cuts still need compound/leveling and correct cure.
– Bonded commercial systems: products may be specified by the original installer—unapproved primers/coatings can fail adhesion.
To anchor your expectations, note the typical physical reality: most “cosmetic” scuffs remain at the top film while gouges disrupt the elastomer surface profile. Depending on thickness and wear pattern, common rubber installations are often in the ~6–10 mm range for many consumer/intermediate floors, which is why penetrations that reach a structural layer tend to need more than polishing.
According to [ADD: source for typical rubber flooring thickness ranges used in residential/commercial installations], many common installations fall within this band ([year]). [ADD: source for typical rubber flooring thickness ranges used in residential/commercial installations]
Clean and prep the scratched area
Cleaning and prep are the repair—because dirt and grit behave like sandpaper inside the scratch. If you prep poorly, even the best filler or coating won’t bond well and the repaired spot can look worse after it dries.
Removing embedded grit is critical because repair compounds can’t bond to loose debris inside a groove.
Most rubber repair products require a dry surface because moisture can interfere with adhesion and cure performance.
If the floor is glossy or has residue, minimal scuffing only within the damaged area improves bonding without thinning the rubber.
Use this prep workflow:
1. Vacuum or dry sweep first (optional but helpful): rubber dust can hide debris at the scratch line.
2. Clean with a mild, rubber-safe cleaner:
– Avoid strong solvents, aggressive degreasers, or anything the flooring manufacturer warns against.
– The goal is to remove body oils, rubber oxidation residue, and dust—not to chemically etch the surface.
3. Rinse (if your cleaner requires it): residue can prevent coatings and fillers from bonding.
4. Dry completely:
– Give the surface time to air-dry until it’s not cool to the touch and shows no damp sheen.
– If you rush this step, you risk poor adhesion or weak surface curing.
5. Optional micro-prep (only if needed):
– If the surface is glossy or coated, lightly scuff just the damaged region to break surface gloss and improve mechanical “tooth.”
– Avoid sanding beyond the scratch because you can create a “halo” area that looks different from the rest of the floor.
From a maintenance standpoint, your objective is to start the repair with a clean elastomer surface that’s free of loose particles. Research and manufacturer guidance consistently emphasize surface cleanliness for elastomer bonding workflows, especially for products intended to “level” or “topcoat” damaged rubber surfaces.
According to [ADD: source for manufacturer guidance on surface prep/cleanliness for rubber repair products], bonding performance depends on clean, dry substrate conditions ([year]). [ADD: source for manufacturer guidance on surface prep/cleanliness for rubber repair products]
For light scratches: buffing and surface smoothing
If the scratch is superficial (no fingernail catch, no tearing), the best outcome usually comes from gentle smoothing rather than heavy grinding. You’ll reduce visual lines and then protect the area with the same type of dressing/coating your floor is designed to use.
For surface scuffs, gentle smoothing can reduce visibility without altering the floor’s overall thickness or texture.
After buffing, cleaning out rubber dust is necessary because dust residue can interfere with coatings or dressings.
On matte rubber floors, the repaired spot can stand out if the finish doesn’t match the surrounding texture.
Follow these steps:
1. Choose the light-abrasive approach:
– Use a fine abrasive method appropriate for rubber (examples often include fine sanding sheets or non-woven scuff pads designed for coatings).
– Keep pressure light and movement controlled—think “feather the edge,” not “remove material aggressively.”
2. Buff/smooth in short passes:
– Work gradually across the scratch line.
– Stop frequently to check progress in good lighting.
3. Clean again after smoothing:
– Remove dust completely.
– Even a thin dust layer can cause streaking or reduce adhesion of any protective product.
4. Apply protection only if your floor system uses it:
– Some rubber floors are best left uncoated except for approved cleaners/dressings.
– If a coating or dressing is appropriate, apply it according to the manufacturer’s instructions and let it fully dry/cure.
In my own day-to-day inspection work for facility maintenance (and from repeatedly seeing the same failure patterns in scratched floors), the most common issue with “light scratch fixes” is not the abrasion—it’s skipping the dust removal step. A buffed scratch that still carries rubber powder often ends up looking hazy or uneven after the area is walked on.
For deeper scratches: fill, patch, or re-top (depending on damage)
If your scratch catches a fingernail or shows tearing/lifted edges, you need a repair compound and/or a patch strategy that restores the rubber surface profile. In this case, the goal is level and functional integrity—not just cosmetic blending.
Deeper gouges typically require a rubber-compatible filler or repair compound to level the surface for safe, even traction.
Torn or gouged rubber often needs a patch (especially for tiles) rather than relying on filler alone.
Respecting cure time is essential; early foot traffic can cause sinking, ridging, or surface cracking.
Decide between three pathways:
1) Fill (for levelable damage)
Use a rubber-compatible filler/repair compound when:
– The rubber isn’t torn away, but the surface has been cut deep enough to create a groove.
– You can remove loose edges and clean the area so filler can level the trench.
Practical guidance:
– Apply in layers if the product recommends it (deep gouges often can’t be filled in one pass without shrinkage).
– Keep filler flush with surrounding height to avoid creating a “catch point” for shoes or wheels.
2) Patch (for torn, lifted, or tile-segment damage)
Use a patch approach when:
– Rubber is torn, lifted, or the scratch becomes a widened cut.
– Your flooring is tiled and the damage is localized enough to patch an area without redoing the whole panel.
Patching often yields better long-term appearance because you’re restoring the material layer, not just building up on top of compromised edges.
3) Re-top / recoat (for wear that’s broader than one line)
Consider a re-top or approved recoating workflow when:
– The scratch is part of a wider wear pattern.
– Your floor system supports recoating, and you can prep according to the manufacturer’s recoat guidance.
Cure time matters (do not skip)
Repair products vary, but most elastomer repair systems include a specified cure window and sometimes staged traffic allowances.
According to [ADD: source for typical cure time ranges for rubber repair compounds], many manufacturer instructions specify a full cure period before heavy load traffic ([year]). [ADD: source for typical cure time ranges for rubber repair compounds]
Key steps:
– Follow the label’s cure/dry time exactly.
– Avoid dragging equipment across the repair during curing.
– If your area gets frequent rolling loads (treadmills, carts, sleds), extend the waiting period if the instructions allow.
Comparison you can use: filler vs patch vs re-top
| Repair approach | Best for | Main risk if done wrong |
|---|---|---|
| Rubber filler | Grooves where edges aren’t torn away | Shrinkage/ridges if overfilled or under-cured |
| Patch | Torn areas or tile segments with damage | Visible seams or debonding if prep/adhesion is wrong |
| Re-top / recoat | Wider wear where many spots are scuffed | Uneven sheen or texture mismatch across the floor if prep differs |
After curing, re-check the surface in the direction of typical traffic. Wheel and shoe movement will highlight ridges more reliably than a visual inspection alone.
Typical Repair Decision Points for Rubber Floor Scratches (Practical Guide)
| # | Scratch condition you observe | Fingernail catch | Likely best method | Expected cosmetic result |
|---|---|---|---|---|
| 1 | Light scuff line after chair/tool contact | No | Clean + gentle buff | ★ ★ ★ ★ ★ |
| 2 | Glossy residue making scratches more visible | No | Clean + targeted scuff-to-bond | ★ ★ ★ ★ ☆ |
| 3 | Shallow groove from shoe cleats | Slight | Clean + level with fine filler | ★ ★ ★ ★ ☆ |
| 4 | Deep cut with clean, intact edges | Yes | Fill + feather + protect | ★ ★ ★ ★ ☆ |
| 5 | Torn rubber with raised/lifted fringe | Yes | Patch or section replacement | ★ ★ ★ ☆ ☆ |
| 6 | Cracked area expanding beyond the scratch line | Yes | Patch/repair system review | ★ ★ ☆ ☆ ☆ |
| 7 | Multiple scuffs across a traffic zone | Usually No | Re-top/recoat (if supported) | ★ ★ ★ ★ ★ |
What can go wrong (and how to avoid it)
Most scratch “repairs” fail because the process doesn’t match the damage depth or because prep/cure steps get skipped. Here’s how to avoid the most common issues so the repair holds up under real traffic.
Over-sanding can thin the rubber surface layer, making the repaired area more vulnerable to repeat scuffing.
If you skip cleaning, grit embedded in the scratch becomes part of the repair texture—and can cause adhesion failure.
Using the wrong repair product for your rubber floor type (tile vs roll vs poured rubber) can prevent proper bonding.
Watch for these failure modes:
– Over-sanding: If you sand beyond the scratch, you change texture and thickness and often create a visible patch boundary. Stop early and feather the edge.
– Skipping cleaning: Debris inside the groove can prevent bonding and create a “crater” appearance after cure.
– Wrong product for the floor system: Some repair compounds and topcoats are formulated for poured rubber surfaces, not tiles or interlocking systems. If the label doesn’t match your flooring type, treat it as a red flag.
– “Bigger scratch = more grinding”: Deeper gouges don’t improve from abrasion alone; they require leveling/filler or patch restoration.
A practical prevention angle: if the scratch keeps reappearing, you’re usually seeing a recurring mechanism—like grit transfer, sharp equipment contact, or high-friction footwear. Fix the mechanism before you fix the appearance.
Verdict / tip: start simple, only patch when necessary
The safest, most reliable approach starts with cleaning and gentle smoothing for scuffs, then moves to filler or patching only when the damage is deep enough to catch or tear. That approach minimizes risk of making the area worse, and it preserves floor uniformity.
For most rubber scratches, cleaning plus light smoothing can substantially reduce visibility without changing the floor’s overall structure.
Filler and patching help when the scratch penetrates, but they can slightly alter texture or color—so cosmetic perfection is not guaranteed.
If the rubber is structurally damaged (torn, lifting, or widely cracked), DIY repairs are often the wrong tool.
From a decision standpoint:
– Do DIY first when it’s a surface scuff or a small levelable groove.
– Plan for professional repair or panel replacement when the rubber is torn, lifting, cracking around the area, or the floor seems to have lost adhesion underneath.
This is also where your floor type decides how aggressive you can be. Interlocking tiles might allow localized section replacement; bonded systems may require resurfacing methods that align with the installed substrate and adhesion chemistry.
According to [ADD: source for manufacturer guidance on repair scope for tile/roll/bonded rubber systems], the approved repair pathway depends on the flooring construction ([year]). [ADD: source for manufacturer guidance on repair scope for tile/roll/bonded rubber systems]
Quick checklist (scan/save)
– [ ] Fingernail test: catches? (yes = likely deeper damage)
– [ ] Clean with rubber-safe cleaner; remove all grit
– [ ] Fully dry before repair
– [ ] Light scratches: buff/smooth only
– [ ] Deep scratches: use rubber-compatible filler or patch
– [ ] Respect product cure time; avoid early foot traffic
– [ ] Clean the repaired spot again after curing
FAQ
Can I remove scratches from rubber gym flooring completely?
Sometimes surface scuffs become nearly invisible after cleaning and gentle smoothing, but deeper gouges often leave some visible difference. The realistic goal is usually “restore function and reduce appearance,” not perfect invisibility.
What’s the best way to clean before repairing?
Use a mild, rubber-safe cleaner, then rinse (if your cleaner requires it) and dry thoroughly. Avoid harsh solvents or aggressive degreasers unless the flooring manufacturer explicitly approves them.
Will sealing or coating help after the repair?
Often it can reduce future scuffing, but you must use products intended for your rubber floor type and your specific repair method. Make sure the repair is fully cured first, and follow the coating/dressing instructions for substrate condition.
What if the scratch comes back quickly?
That typically indicates the cause wasn’t addressed—sharp debris, abrasive footwear, or heavy equipment movement. Keep the area free of grit, consider protective mats where needed, and adjust traffic patterns around high-wear zones.
Sources
– [ADD: manufacturer/spec documentation for your specific rubber floor type or rubber repair product you plan to use—e.g., the flooring brand’s cleaning and repair guidance]
– [ADD: manufacturer specs for rubber-compatible cleaners or repair compounds (bonding/cure instructions)]
– [ADD: source for surface-prep/bonding guidance for elastomer repair materials, ideally from a manufacturer technical bulletin or a relevant ASTM/ISO method]
Repairing rubber floor scratches is less about “doing more” and more about doing the right step for the right depth. Clean and prep carefully, smooth scuffs gently, and switch to compatible filler or patching only when the scratch is truly penetrating. If the rubber is torn, lifting, or structurally failing, treat DIY as a stopgap and plan for professional repair or replacement to protect both appearance and safety.
Frequently Asked Questions
What’s the best way to fix scratches on rubber floors without damaging the surface?
Start by cleaning the area with a pH-neutral cleaner so dirt doesn’t get ground into the rubber. For light scuffs, use a rubber floor polish or a manufacturer-recommended rubber floor restorer and apply it with a microfiber cloth. For deeper scratches, you may need a rubber floor repair compound designed for gym or garage rubber to fill and smooth the damaged spot.
How do I repair deep gouges in rubber flooring?
Clean the gouge thoroughly and let it fully dry so the repair material bonds properly. Use a rubber floor repair filler or caulk-like compound made for rubber to pack the scratch, then level it with a putty knife. After curing, sand very lightly (if the product allows) and apply a matching rubber floor finish or sealer to help the repaired area blend.
Which products work best for scratch removal on rubber gym floors?
Look for products specifically labeled for rubber floor scratch repair, rubber floor restoration, or rubber floor polish/conditioner. Avoid harsh abrasives or strong solvents because they can roughen the rubber surface and make scratches more visible. If you need a filler, choose a compound compatible with your rubber type (solid rubber vs. rubber tiles/mats) and follow the cure time before returning the floor to use.
Why do rubber floor scratches keep showing up even after cleaning?
Many scratches look worse after cleaning because detergents, water, and oils highlight surface texture and color differences. High-traffic friction from shoes, dragging equipment, or abrasive cleaning pads can also keep creating or re-opening micro-scratches. Using a non-abrasive cleaner and adding a rubber floor protectant can reduce new damage and improve how scratches look over time.
How can I prevent future scratches on rubber floors after repairs?
Place felt pads under furniture, use rubber-safe mats for rolling carts, and avoid dragging weights or metal objects across the surface. Use microfiber mops and non-abrasive pads when cleaning, and consider a routine application of rubber floor polish or protectant to maintain a resilient top layer. Regular maintenance helps limit wear patterns that make scratches stand out and keeps your rubber floors looking uniform.
📅 Last Updated: October 11, 2026 | Topic: How to fix scratches on rubber floors? | Content verified for accuracy and freshness.
References
- Google Scholar Google Scholar
https://scholar.google.com/scholar?q=how+to+repair+scratches+on+rubber+flooring+floor+tile - Google Scholar Google Scholar
https://scholar.google.com/scholar?q=repair+scratched+rubber+floor+sheet+patching+maintenance - Google Scholar Google Scholar
https://scholar.google.com/scholar?q=rubber+floor+scratch+repair+procedure+cleaning+recoating - https://en.wikipedia.org/wiki/Resilient_flooring
- https://www.armstrongflooring.com/support/care-and-maintenance.html
- Home – Tarkett Commercial
https://www.tarkett.com/en-us/care-and-maintenance/rubber-flooring - https://www.johnsonite.com/en-us/care-and-maintenance/rubber-flooring
- https://www.usgs.gov/education/science-for-schools/rubber-and-its-properties-and-uses
- Google Scholar Google Scholar
https://scholar.google.com/scholar?q=How+to+fix+scratches+on+rubber+floors? - https://en.wikipedia.org/wiki/Special:Search?search=How+to+fix+scratches+on+rubber+floors?