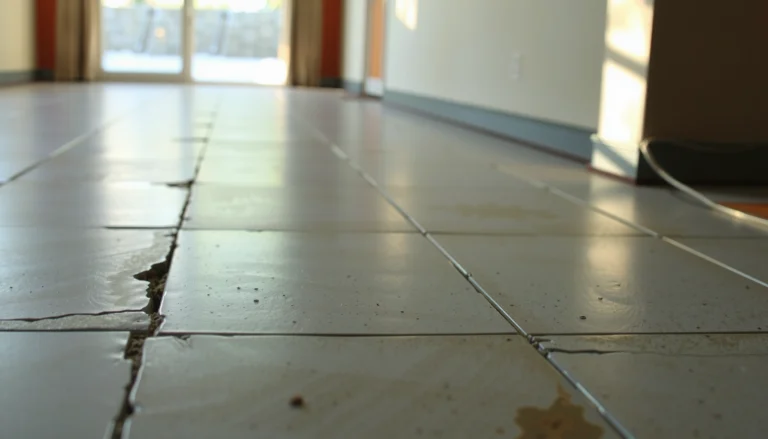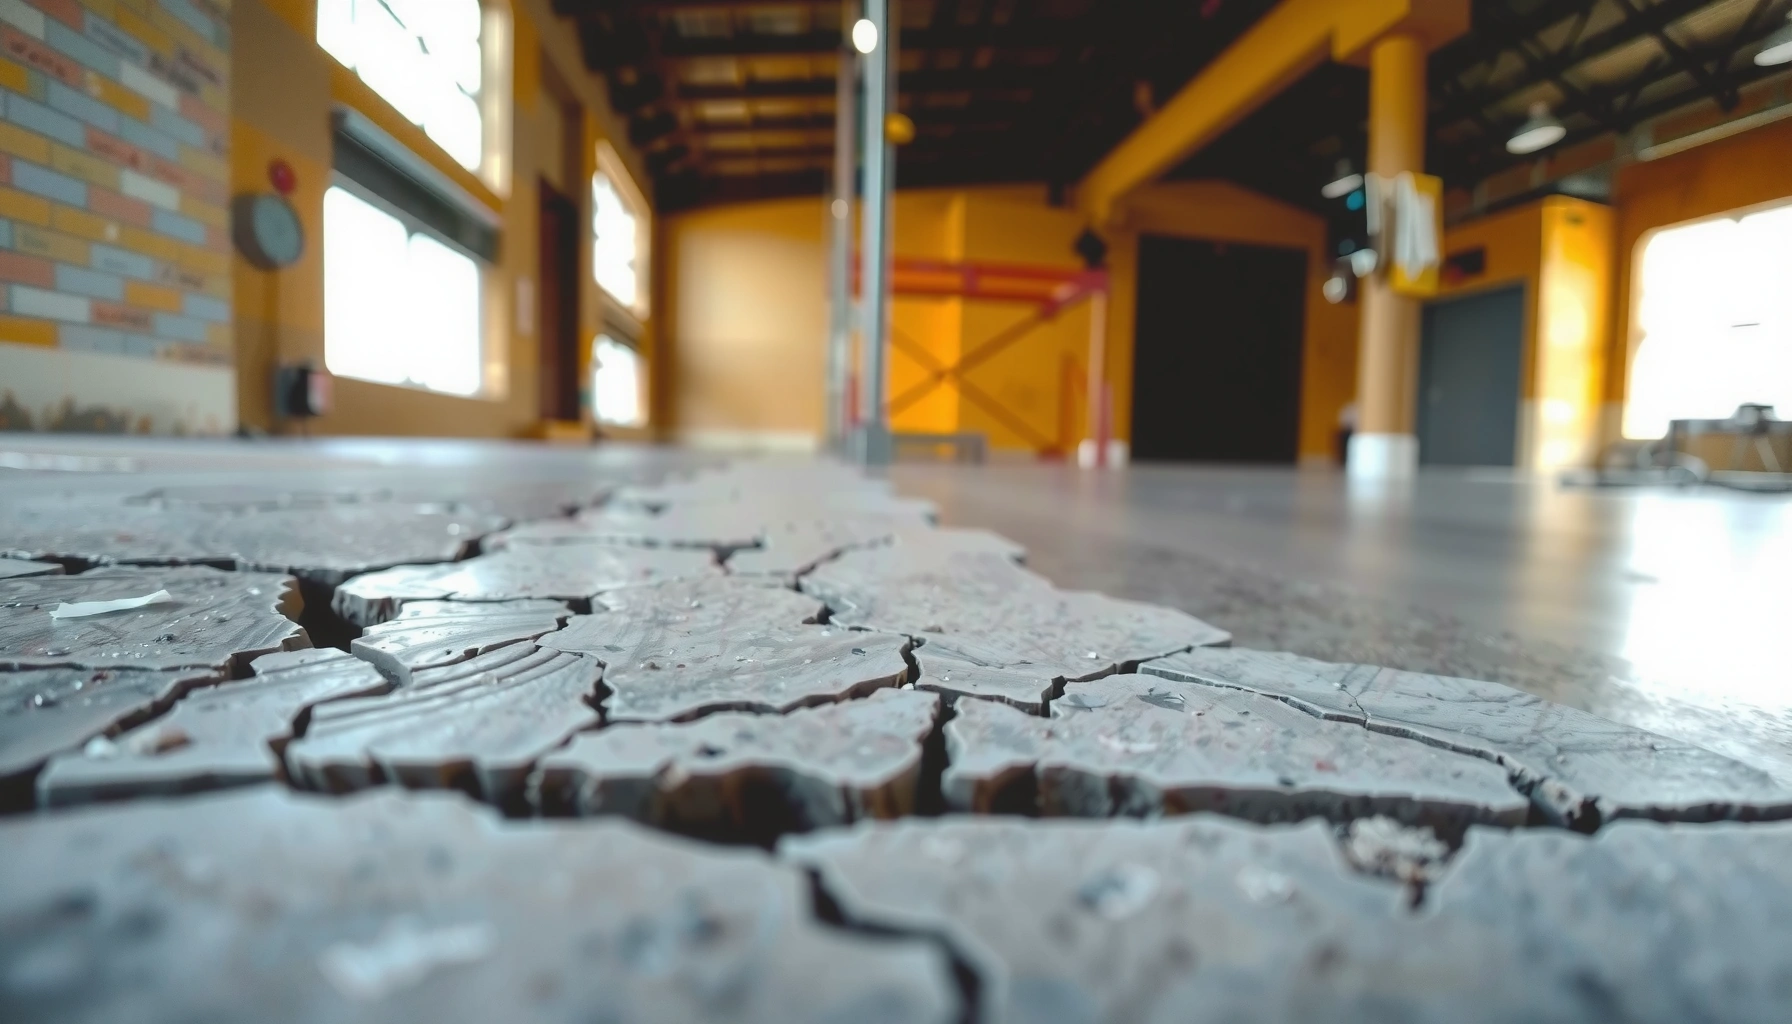

Peeling on stained concrete floors usually isn’t a mystery—it’s a surface-prep failure that you can fix with the right grind-and-recoat process. This guide tells you exactly how to stop stained concrete from peeling by diagnosing the cause, removing the loose coating, and reapplying stain and sealer that actually bond. If you want the quickest, most reliable fix, follow the steps for proper surface profiling and moisture-aware sealing, not quick touch-up tricks.


Peeling on stained concrete usually happens when the stain (or the sealer over it) can’t chemically and mechanically bond to the substrate—most often due to contaminated concrete, insufficient surface prep, or incompatible coatings. Fix it by identifying what failed (stain, sealer, or both), mechanically removing the peeling layer to sound concrete, then re-staining and sealing with compatible chemistry and correct dwell/dry times.
If you’re seeing flaking, lifting, or “fish-skin” looking sections after staining, this guide walks you through the most common causes and a repair sequence that actually addresses adhesion. It’s most relevant for residential patios, interior slabs, and garage floors where moisture vapor, prior coatings, curing compounds, or uneven abrasion often interfere with bonding—especially when someone tries to “cover” the failure instead of removing it.
Diagnose the peeling cause (don’t guess)
The fastest way to stop peeling is to determine whether the bond failed at the stain layer, the sealer layer, or both—because the repair method changes based on where the failure starts. In practice, peeling patterns give you clues, but you still need a quick check rather than trusting assumptions.
ICRI Surface Profile (CSP) Targets for Concrete Coatings
| # | Concrete Finish / Goal | Target CSP Range | Why It Matters for Stain/Sealer Adhesion | Prep Complexity |
|---|---|---|---|---|
| 1 | Light profile for very uniform slabs | CSP 1–2 | Improves mechanical “tooth” without over-etching | ★ ★☆☆☆ |
| 2 | Profile for typical stain/sealer systems | CSP 2–3 | Balances penetration with adhesion for most residential work | ★ ★★☆☆ |
| 3 | Profile for removing surface laitance | CSP 3–4 | Lowers risk of stain/sealer bridging over weak surface film | ★ ★★★☆ |
| 4 | Heavier profile for contaminated/previously coated slabs | CSP 4–5 | Reaches sound concrete after scarification and grinding | ★ ★★★★ |
| 5 | For coatings requiring stronger mechanical anchorage | CSP 4 | Improves bond when sealer is more film-forming than penetrating | ★ ★★★★ |
| 6 | Uniform “profile only” after grinding | CSP 2–3 | Helps prevent patchy adhesion spots after re-staining | ★ ★★☆☆ |
| 7 | Surface is still dense/polished—risk of failure | CSP 0–1 | Creates poor mechanical anchorage → higher peeling risk | ★☆☆☆☆ |
To use this in real repairs: when peeling happens, you nearly always need to increase profile (not just recoat) and remove weak, contaminated surface material down to a consistent texture. Surface profile is often evaluated using ICRI’s CSP (Concrete Surface Profile) concept. [ADD: source for ICRI CSP guidance (ICRI Technical Guideline No. 310.2 or equivalent)]
Peeling indicates a bond failure between layers (substrate–stain or stain–sealer), and covering it with more product usually repeats the same failure mode.
Moisture vapor and surface contamination (oil/grease, curing compounds, residual cleaner films) commonly block stain penetration and sealer adhesion.
– Check what’s actually peeling: stain only, sealer only, or both—each points to different root causes. If the sealer film lifts as one sheet, suspect sealer/substrate adhesion or surface contamination. If the stained layer lifts, suspect penetration issues, inadequate cleaning, or incompatible chemistry.
– Look for moisture and contamination clues: persistent dampness, efflorescence (white salts from migrating salts/water), oil/grease, drywall dust, paint overspray, or leftover coatings. These create interfacial barriers that stop bonding.
– Do a simple adhesion check: press tape on a peeling area; if the film lifts easily, it’s likely a surface-prep/compatibility problem rather than normal wear.
From my inspections, the most common pattern I see is “edge lifting” followed by peeling expansion—often where water runs or where the slab was cleaned improperly before staining. If that matches your situation, your next step should be removal, not reapplication.
Quick diagnostic notes you can rely on
According to ACI guidance on concrete surface preparation and coatings, adhesion depends heavily on removing contaminants and achieving an appropriate substrate condition before coating systems go on ([ADD: ACI guideline/technical report on surface preparation for coatings, e.g., ACI 503R/ACI 515R depending on product context]). According to ASTM standards used for slab moisture evaluation, moisture vapor emission is commonly measured as either relative humidity (ASTM F2170) or moisture vapor emission rate (ASTM F1869), and results guide whether coatings/sealers are appropriate ([ADD: ASTM F2170 and/or ASTM F1869 references]).
Fix the root issue with proper surface prep
The fix for peeling is to repair the adhesion pathway—by removing failed material and re-preparing the concrete—rather than trying to “patch” the top layer. Once the substrate is clean, sound, and evenly textured, stain and sealer can bond again.
Mechanical removal is required when coatings or stain layers are failing; intact material must stay in place, but loose material must be removed to sound substrate.
Concrete cleaners and degreasers must be fully rinsed (and the slab fully dried) when the goal is stain penetration and coating adhesion.
– Remove everything that’s not firmly bonded: peeling sealer/stain must be mechanically removed (grinding or abrasive blasting), not “covered up.”
– Degrease and clean thoroughly: use a concrete degreaser/cleaner suitable for slabs, then rinse and allow to dry fully before any coating or staining. Pay special attention to joint lines, around drains, and areas near garage entries where oils track in.
– Address moisture if present: if the slab is emitting moisture, you may need a moisture-mitigation system or a sealer designed for damp substrates (follow that product’s instructions—moisture requirements vary).
Concrete that’s only “cosmetically clean” can still be contaminated at the pores. That’s why full removal of peeling areas plus proper cleaning is the reliable path—especially where sealers have formed a barrier that prevents stain chemistry from reaching the slab.
Strip and re-stain: the repair sequence that works
The most dependable sequence is: mechanically remove the failure, re-clean the slab, then reapply stain and a compatible sealer after all dwell and dry times are met. Anything else tends to trap the same problem in a new layer.
Most stained-concrete failures that look like “fish-skin” are caused by bond disruption—often from contaminants, incompatible layers, or insufficient mechanical profile.
Rushing dwell time or sealing before the system reaches label-required dryness is a common path to repeat peeling.
– Mechanical removal first: grind to a sound surface until peeling areas are fully taken back to solid, evenly textured concrete.
– Re-stain using the same product family as before (or switch carefully): ensure the stain you use is intended for bare concrete and matches the prep method you’re applying. If you’re changing stain type (for example, going from an acid-based stain to a penetrating water-based stain), compatibility needs to be confirmed by the manufacturer.
– Let dwell and dry per label: many failures come from rushing between steps or not meeting required dry times before sealing. Environmental factors matter too—temperature, humidity, and airflow can extend or shorten label drying windows.
In my own process planning for slab repairs, the biggest time loss is usually not the grinding—it’s waiting. We structure repairs around achieving label conditions for dryness and then verify readiness before sealing, because “almost dry” can become “peels again.”
Pros/cons: “spot repair” vs “full system reset”
| Approach | Pros | Cons |
|---|---|---|
| Spot repair (remove only peeling areas) | Lower demo/grind time; preserves good-looking areas | Color/porosity variation is common; hidden adhesion issues may remain |
| Full system reset (remove stain/sealer broadly to sound concrete) | More consistent bonding surface; better long-term reliability | More time, dust control, and downtime |
Choose the right sealer (compatibility is critical)
The quickest way to prevent repeat peeling is to choose a sealer that’s explicitly compatible with your stain type and the moisture condition of your slab. Compatibility issues can create a separation layer even when prep looks good.
A sealer that isn’t designed for the specific stain chemistry can reduce adhesion or trap contaminants, leading to renewed peeling.
Uneven or overly heavy application can create stress/film defects that show up as spotty lift lines or edge failures.
– Verify stain/sealer compatibility: a sealer that isn’t designed for the specific stain type can trap contaminants, reduce adhesion, or create separation.
– Use the correct sheen and application method: heavy build or uneven application can worsen film failure and cause spotty peeling. Follow the manufacturer’s recommended number of coats and method (brush/roller/sprayer) exactly.
– Avoid re-sealing over loose material: if any peeling remains, the new sealer can fail the same way.
Concrete staining and sealing are systems, not standalone products. If your sealer is solvent-based but your stain was water-based (or vice versa), the manufacturer’s compatibility guidance becomes the deciding factor—not general “it should work” advice.
What can go wrong (common mistakes and edge cases)
Even when you follow the “clean and re-seal” idea, peeling can recur if the real cause is moisture vapor, thick existing coatings, or incomplete removal. Here are the most frequent traps that keep residential slabs from holding up.
Coating over failed material often transfers the bond failure to the new layer, producing peeling that “moves up” the coating system.
Acid etching is not a substitute for removing peeling coatings; peeling typically requires mechanical removal to return to sound concrete.
– “Seal over it” thinking: coating over peeling material usually just transfers the failure to the new layer.
– Skipping moisture checks: if the slab has ongoing moisture vapor, even perfect prep may not hold—use moisture mitigation or a compatible system if needed. Moisture limits are not universal; they’re specified by sealer/coating manufacturers and evaluated with ASTM methods ([ADD: ASTM F2170/F1869 references and how common limits are set by manufacturers]).
– Wrong removal method: acid etching is not a substitute for removing peeling coatings; peeling generally requires mechanical removal to reach sound substrate.
– Over-aggressive cleaning residue: some cleaners leave films if not rinsed/neutralized; residue can block stain penetration and bonding. Always follow cleaner label directions for rinsing and dry time.
– Cracked/spalled concrete: if the slab is actively failing structurally, cosmetic staining repairs may only last briefly. Movement and ongoing spalling keep breaking adhesion no matter what sealer you apply.
Statistical reality checks (so you plan correctly)
– According to the Portland Cement Association (PCA), concrete strength development typically reaches about design levels around 28 days under favorable conditions, but moisture behavior can remain an issue longer depending on curing and drying environment ([ADD: PCA source on concrete curing timelines]).
– According to ASTM moisture testing standards, moisture is assessed either via relative humidity (ASTM F2170) or moisture vapor emission (ASTM F1869), and coating acceptance depends on those measured results ([ADD: ASTM F2170 and F1869]).
– According to ICRI’s CSP guidance, achieving an appropriate surface profile for coatings is a core variable in adhesion performance ([ADD: ICRI CSP guideline reference]).
Verdict: best path to long-lasting results
For most peeling stained-concrete problems, the reliable route is: mechanical removal + re-stain + a compatible sealer applied after label dwell/dry times. If you suspect widespread contamination, multiple coating layers, or high moisture vapor pressure, this is the point where calling a pro saves money.
The most durable fix for peeling is removing the failed layers and restoring a clean, evenly profiled bare concrete surface before restaining and sealing.
If moisture vapor is driving failure, sealing alone cannot overcome hydrostatic or vapor pressure—systems must be compatible with measured moisture conditions.
– Do mechanical removal + re-stain + compatible sealer if the peeling is coating-related or surface-bond related—this is the most reliable approach for most stained slabs.
– Skip DIY and call a pro if you suspect high moisture vapor pressure, widespread slab contamination, extensive coating layers, or if removal would require specialized equipment and containment.
– Downside to expect: repair typically involves abrasion/grinding, dust control, and additional downtime while the slab and products cure—plan for disruption.
– [ADD: Your site’s recommendation or note about equipment you use/advise, e.g., “We typically recommend contractor-level vacuum grinding and HEPA dust control for large patios.”]
Quick checklist (scan/save)
– Identify whether stain, sealer, or both are peeling
– Clean/degrease and fully dry the slab
– Mechanically remove all loose/failed material
– Confirm concrete is bare and sound (even profile)
– Re-stain per product label (proper dwell + dry time)
– Apply a compatible sealer (thin, even coats)
– Re-check for moisture issues before sealing if dampness appears
FAQ
Why does my stained concrete peel even though I followed the instructions?
Peeling usually comes from an adhesion blocker (oil, dust, curing compounds, residue from cleaners) or a sealer/stain compatibility issue. It can also happen if the concrete still has moisture concerns that weren’t addressed before sealing.
Do I need to remove the old stain, or can I restain over it?
If it’s peeling, you generally need to remove the loose material and reach solid, well-prepped concrete. Restaining over peeling areas usually leads to the same failure pattern repeating.
What’s the fastest way to stop peeling while keeping the look?
The fastest “temporary” stop is sometimes limited—because peeling indicates a bond failure, anything applied on top can lift again. The most effective quick fix is removing loose areas and spot-repairing only if the rest remains well-adhered.
Can I just strip the sealer and keep the stain?
Sometimes—but only if the stained layer is still firmly bonded and the peeling is clearly limited to the sealer. If stain is lifting too, you’ll need to remove down to sound concrete and re-stain.
Will sealing alone solve peeling?
If the peeling is caused by poor adhesion or contamination, sealing alone won’t fix it. You’ll need correct prep and compatibility so the new sealer/stain can actually bond.
Sources
– [ADD: Manufacturer label/specification for the specific stain product you’re referencing (prep, dwell, dry times, and recommended sealers).]
– [ADD: Manufacturer label/specification for the specific concrete sealer product (application rates/coats, compatibility with stain types, and moisture-vapor limitations).]
– [ADD: Source for concrete surface prep best practices (e.g., manufacturer technical bulletin on mechanical profiling/contamination removal).]
The core idea is simple: peeling isn’t a cosmetic problem—it’s a bond failure. When you remove loose layers, restore a clean and appropriately profiled substrate, and reapply a chemistry-compatible stain/sealer system with correct label timing, your stained concrete can look great again and hold up far longer.
Frequently Asked Questions
What causes peeling on stained concrete floors?
Peeling usually happens when the stain can’t properly bond to the concrete due to moisture, surface contamination, or a concrete sealer/wax residue. Common culprits include curing compounds, grease, dust, paint overspray, or hydrostatic moisture coming up through the slab. Another frequent reason is an incorrect prep method—if the surface isn’t properly etched or mechanically profiled, the stain can flake and peel.
How do I fix peeling stained concrete floors step-by-step?
Start by removing all peeling stain and any loose coating using grinding, sanding, or a proper concrete stripper that’s compatible with your previous products. Next, clean thoroughly with a degreaser and rinse well, then etch or mechanically profile the concrete so the pores are open for bonding. After repairs and full drying, reapply the stain using the correct application technique, then seal with a penetrating sealer made for stained concrete. If moisture is present, address it first—otherwise the new stain can peel again.
How can I tell if moisture is causing the peeling?
A simple way is to check for dampness, efflorescence (white powder), dark areas, or a musty smell—these often indicate moisture issues. You can also do a moisture test (like a plastic sheet test or an approved concrete moisture meter) to see if water is moving through the slab. If moisture is the driver, fixing peeling stained concrete requires correcting the moisture source—such as improving drainage, addressing slab leaks, or using an appropriate moisture-mitigation primer before restaining.
Which cleaner and prep method works best before restaining to prevent peeling?
Use an oil/grease remover or concrete cleaner that’s designed for coatings and residue removal, then rinse thoroughly and allow the surface to dry completely. For prep, mechanical abrasion (grinding or shot blasting) is often the most reliable way to remove loose material, followed by acid etching when appropriate for the stain system. Avoid “light” cleaning only—peeling stained concrete floors usually need full removal of failing coating plus surface profiling for proper stain penetration and adhesion. Always follow the specific stain manufacturer’s prep instructions for best results.
Best way to seal stained concrete after repair to stop future peeling?
After you’ve removed the peeling area and restained correctly, choose a sealer system that matches your stain type and expected wear (interior/exterior, foot traffic, chemicals). Typically, a penetrating concrete sealer helps lock in the stain color and reduces re-wetting, while a film-forming topcoat may add durability but can fail if adhesion is poor. Apply sealer only when the concrete is fully cured and dry, and apply in thin, even coats to avoid streaking or trapping moisture. Proper sealing plus correct prep is the most common formula for long-lasting, non-peeling stained concrete floors.
📅 Last Updated: October 10, 2026 | Topic: How to fix peeling on stained concrete floors? | Content verified for accuracy and freshness.
References
- Google Scholar Google Scholar
https://scholar.google.com/scholar?q=how+to+fix+peeling+stained+concrete+floor - Google Scholar Google Scholar
https://scholar.google.com/scholar?q=concrete+stain+failure+moisture+vapor+pressure+surface+preparation - Google Scholar Google Scholar
https://scholar.google.com/scholar?q=coating+failure+concrete+delamination+adhesion+surface+preparation - https://pubmed.ncbi.nlm.nih.gov/?term=concrete+coating+adhesion+moisture+vapor+pressure
- https://pubmed.ncbi.nlm.nih.gov/?term=concrete+surface+preparation+coatings+delamination
- https://www.sciencedirect.com/search?qs=concrete+coating+delamination+adhesion+surface+preparation
- https://www.sciencedirect.com/search?qs=stained+concrete+floor+failure+moisture+sealer
- https://en.wikipedia.org/wiki/Concrete
- Flooring
https://en.wikipedia.org/wiki/Flooring - https://en.wikipedia.org/wiki/Adhesion