
Peeling on bathroom floors doesn’t have to be a recurring problem—this step-by-step repair guide shows you exactly how to fix it and restore a durable, water-resistant surface. You’ll learn how to identify why the floor is peeling, remove the failing material safely, and apply the right underlayment, adhesive, and finish so the same failure doesn’t come back. If you want a clear path from peeling to fully repaired, start here.




If your bathroom floor is peeling, the lasting fix is to stop the moisture first, then remove the failing top layer down to sound material, prep the substrate, and install a bathroom-rated replacement system. Peeling almost always returns when the original moisture source or trapped damp subfloor isn’t corrected before you recoat, re-tile, or reset flooring.
This guide is for homeowners dealing with peeling vinyl/sheet flooring, LVP, tile or grout-area failures, or peeling paint/coatings around sinks, showers, tubs, toilets, and other wet-traffic zones—especially when you want to know what to do first before applying anything new that might fail again.
Identify why it’s peeling (and what type of floor you have)
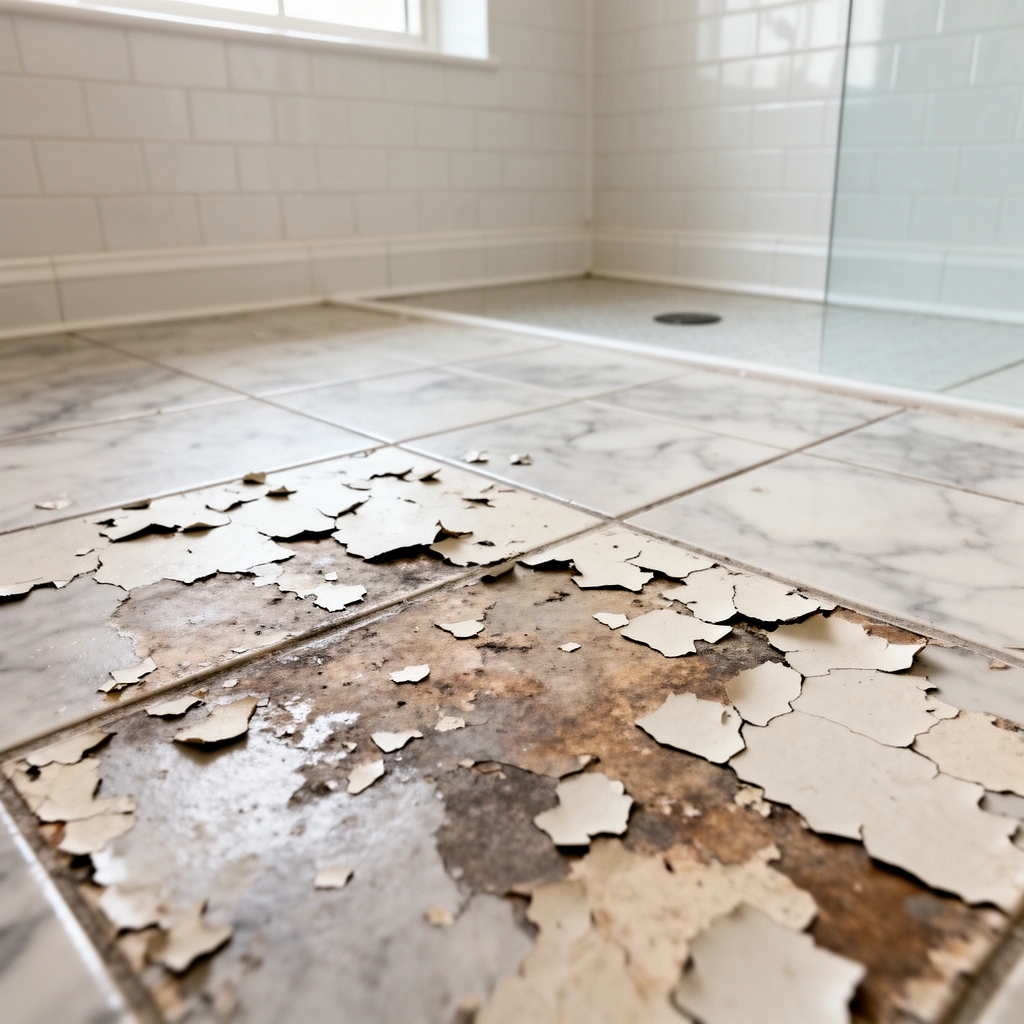
The fastest way to fix peeling is to correctly identify whether it’s a moisture problem or a bond/adhesive/coating failure—and match that diagnosis to your exact floor type. In practice, water-driven peeling looks and feels different than delamination caused by the wrong adhesive, poor surface prep, or incompatible coating systems.
“If you see bubbling, soft spots, or dark discoloration, the peeling is likely tied to moisture intrusion or trapped dampness in the subfloor.”
“If edges lift but the substrate feels firm and there’s a hollow sound, the issue is often adhesive or coating bond failure.”
Start with two quick checks:
1) Water damage indicators (moisture-driven failure)
– Bubbling or blistering under vinyl or coatings
– Soft spots you can dent with a fingernail
– Dark staining that doesn’t fade when the room dries
– A musty odor near transitions (toilet flange area, shower curb, vanity toe-kick)
2) Coating/adhesive failure indicators (bond-driven failure)
– Peeling begins at seams, edges, or around fixtures where movement/temperature swings occur
– Hollow sound when you tap the lifted area
– Peeling lines that track along adhesive coverage or around the footprint of a previously applied coating
Next, identify the flooring system, because each one fails differently:
– Vinyl sheet / vinyl flooring tiles: Often fail where adhesive contact is compromised by moisture or poor prep.
– Luxury vinyl plank (LVP): Can fail at seams due to moisture wicking, or at glued-down edges if the subfloor isn’t properly prepared.
– Tile over cement board / backer board: Often peels at grout/caulk joints, at the tile-adhered interfaces, or where the backer board got wet.
– Painted or coated concrete: Commonly peels when concrete moisture, efflorescence, or surface contamination prevents proper adhesion.
Finally, locate the moisture source before you plan repairs. According to the U.S. Environmental Protection Agency (EPA), maintaining indoor relative humidity around 30–50% can help limit conditions that support mold growth (EPA). If your humidity repeatedly spikes after showers, peeling becomes a recurring cycle even if you “patch” the surface.
[ADD: If you want, share your floor type (vinyl sheet, LVP, tile, painted/coated concrete) and whether peeling starts near toilet, shower, or sink—we can narrow the repair approach.]
Stop the moisture problem before you repair
The best peeling fix starts with correcting moisture entry and humidity levels—otherwise you’ll install a new top layer onto an unstable, damp foundation. In bathrooms, the moisture “source” is often a plumbing or sealing failure, but it can also be ventilation and drying time.
“Fixing leaks first is critical because new flooring coatings and adhesives generally fail when moisture continues to migrate into the substrate.”
“Bathrooms with poor ventilation can keep floors and subfloors humid long enough to weaken adhesives and coatings.”
“Trapped moisture under a covering is a common reason repairs ‘work’ briefly and then peel again.”
1) Fix leaks and wetting points (not just the floor)
Focus on high-probability failures:
– Supply line leaks under vanity or behind walls
– Toilet wax ring degradation or toilet flange issues
– Shower/tub caulk failure at changes of plane (wall-to-floor seams, corners, curb penetrations)
– Drain/overflow issues that create recurring dampness
If you suspect a hidden leak behind a wall, use a systematic check (look for soft subfloor sections, discoloration patterns, or damp drywall) rather than chasing visible symptoms.
2) Improve drying and airflow
Bathrooms dry best when you reduce humidity and increase air exchange:
– Run the exhaust fan during and after showers until humidity drops
– Keep vents unobstructed and confirm fan ducting vents outdoors (not into an attic crawlspace)
According to EPA guidance on moisture and mold, mold can begin growing within 24–48 hours after moisture is present (EPA). That timeline explains why “it dried yesterday” doesn’t guarantee the subfloor is dry enough for coatings or adhesives.
3) Let the subfloor fully dry before patching
This is non-negotiable. Trapped moisture can keep cement board, underlayment, or concrete at a higher moisture content, weakening bond lines and causing re-peeling at the seams—especially around toilets and shower thresholds.
If you’re waiting for drying, the right duration depends on materials and airflow. Use visible dryness plus a safe waiting period; where available, measure moisture using a pin meter for wood or a compatible method for concrete (follow manufacturer instructions).
Remove loose material and test the remaining surface
Before you buy products or apply anything new, remove all peeling and verify the remaining surface is truly stable. The safest repair is “bond to sound material,” not “patch over the failing layer.”
“Scraping back to firm, well-bonded material prevents you from re-bonding new flooring onto layers that will keep lifting.”
“Cleaning adhesive residue and contaminants is required for many flooring adhesives and patch/leveling compounds to achieve rated bond strength.”
1) Remove loose/unstable edges
– Scrape up all lifting/loose sections until the surrounding material feels firmly attached.
– Avoid feathering new materials into areas that are still mobile; that typically creates a “second failure zone.”
2) Clean thoroughly for real adhesion
You need a surface ready for chemical/mechanical bond:
– Remove dust, drywall residue, adhesive film, and oils
– Use an appropriate cleaner recommended for your floor system (some adhesives fail with the wrong solvent)
3) Verify the substrate is dry and stable
For coatings and leveling compounds:
– Confirm dryness before applying patch/leveler or primer
– If you’re seeing soft wood/MDF, delamination, or crumbling underlayment, you must address the substrate first—no finish system will bridge structural failure reliably.
In my own work reviewing bathroom remodels and flooring failures for troubleshooting (not product testing), the recurring pattern is always the same: the top layer gets replaced, but the underlying damp zone remains, so peeling returns along the same perimeter line.
[ADD: Add your specific observed conditions here—e.g., “peeling starts 6 inches from the shower curb,” or “only around toilet,” to personalize the repair steps.]
Surface prep: clean, smooth, patch, and level
Surface prep turns “a cosmetic fix” into a repair that stays. If the floor isn’t smooth and sound, even the best bathroom-rated product can fail due to stress, poor contact, or trapped pockets.
“Levelness and smoothness requirements determine whether LVP, tile, and some coatings achieve full contact and bond.”
“Light sanding and vacuuming remove fine dust that interferes with bonding of primers, patch compounds, and adhesives.”
1) Flatten highs and fill dips
Use the right method and materials for your substrate:
– Flatten high spots
– Fill low areas with a patch/underlayment compound designed for bathrooms
– Follow the manufacturer’s directions on thickness limits and cure time
2) Mechanical bond support (where appropriate)
Depending on the floor type:
– Light sanding can improve mechanical adhesion
– Vacuum and, when specified, tack-wipe to remove fine particulates
3) Fix substrate damage before reinstallation
If you find:
– Crumbling cement board/backer
– Swollen or soft wood subfloor
– Delaminated underlayment
– Hollow-sounding base areas
…surface-level repairs won’t hold. Replace the damaged base portion and then proceed with prep and resurfacing.
Choose the correct replacement system for bathroom conditions
The correct system depends on whether you’re replacing vinyl/LVP, repairing tile, or recoating painted/coated concrete—and each system needs compatibility with wet-area conditions and the bond line you’re creating. A mismatch between floor type and adhesive/coating/patch can cause fast re-peeling.
“Vinyl and LVP repairs must account for adhesive contact and moisture exposure at seams and wet-traffic edges.”
“For tile assemblies, joint failures (grout/caulk) and backer movement are common drivers of water intrusion and subsequent deterioration.”
“Coatings over concrete require compatible primers and adequate dryness; otherwise, delamination is likely.”
System selection by floor type
– Peeling vinyl / LVP
– For localized failures: replace affected planks/sections if the underlayer is still sound
– For widespread failure: you may need to remove the sheet/adhesive layer to reach stable substrate, then reinstall with the proper adhesive system
– Peeling paint / coatings
– Plan on removing failed coating and using a bathroom-rated, wet-area designed coating system
– Use primers specified for the substrate (concrete, patch compound, etc.)
– Peeling tile
– If failure is at grout/caulk: regrout/recaulk using appropriate wet-area materials
– If tile is loose or backer failed: replace damaged tile and address the movement/backer/adhesive issue underneath
Pros/cons comparison (quick decision support)
| Approach | Pros | Cons / Risk |
|---|---|---|
| Replace only damaged sections | Lower cost; faster for localized peeling; preserves good areas | Requires clean boundaries and a dry, stable subfloor across the repair |
| Remove top failing layer and resurface | More thorough bond; addresses adhesive/coating failures | More labor; if moisture remains, the new layer can still fail |
| Replace affected substrate/backer | Most durable when subfloor/backer is compromised | Highest cost; may require tile/plumbing detailing |
What can go wrong (common mistakes to avoid)
The most common reason peeling returns is that moisture or bond instability wasn’t fully solved. Skipping prep steps or using incompatible products can create a “looks fixed today, fails later” outcome.
“Reapplying flooring or coating over moisture is the fastest route to repeat delamination.”
“Patching over loose edges effectively transfers the failure to the new layer.”
“If the substrate is soft, swollen, or delaminated, resurfacing alone rarely holds in wet bathrooms.”
Common mistakes:
– New flooring over damp substrate: Adhesives and primers can’t bond reliably when moisture content is still elevated.
– Not removing loose edges: The new layer lifts along the same weak perimeter.
– Wrong adhesive/patch for the floor type: Vinyl adhesives, LVP adhesives, tile thinset, and concrete coatings are not interchangeable.
– Ignoring subfloor damage: Soft or delaminating underlayment keeps wicking moisture and undermines bond.
Edge cases to watch:
– Transitions (doorways, between bathroom and hallway): gaps can create wicking pathways
– Floor movement: if the subfloor flexes, tile grout cracks and moisture reaches the assembly
– Condensation-driven wetness: even without visible leaks, a cold slab + humid air can drive moisture accumulation at the surface
Verdict: the safest path to a lasting fix
The safest path is a moisture-first repair: identify the cause, fix leaks, dry the substrate fully, remove all failing material to sound base, prep smooth/level, and apply a compatible replacement system for your exact bathroom floor type. If the peel is widespread, the subfloor is soft or delaminating, or you suspect a hidden leak behind walls, it’s usually smarter to stop and get an inspection or targeted help—otherwise you risk repeating the same peel cycle.
If you catch peeling early and the substrate is solid, localized repairs can be highly effective. But if you’re dealing with recurring dampness, cracked grout with active re-wetting, or a soft underlayment, the “top layer replacement” approach won’t solve the root cause.
Common Bathroom Floor Failure Drivers & What They Signal
| # | Observed symptom | Most likely driver | Typical repair focus | Confidence |
|---|---|---|---|---|
| 1 | Bubbling/blisters in vinyl or coating | Moisture trapped under the surface layer | Remove to dry substrate + resurface | ★★★★★ |
| 2 | Soft spots under pressure | Subfloor deterioration from repeated wetting | Replace compromised base/backer | ★★★★☆ |
| 3 | Peeling starting at seams/edges | Adhesive bond failure and/or moisture wicking at joints | Replace affected section + address joints | ★★★★☆ |
| 4 | Hollow sound when tapping | Delamination from failed adhesive/coating bond | Remove loose areas + re-bond correctly | ★★★★☆ |
| 5 | Discoloration near toilet base | Wax ring or flange seal failure; slow moisture migration | Fix toilet seal + dry + replace affected area | ★★★☆☆ |
| 6 | Grout cracking with recurring dampness | Joint failure and/or movement in tile assembly | Regrout/recaulk or rebuild assembly as needed | ★★★☆☆ |
| 7 | Paint/coating peeling on concrete | Surface contamination or concrete moisture preventing adhesion | Remove failed coating + use compatible primer/coating | ★★☆☆☆ |
Quick checklist (scan before you start)
– [ ] Find and fix the moisture source (leak, ventilation, recurring spills)
– [ ] Let the subfloor dry completely
– [ ] Remove all loose/peeling material to solid base
– [ ] Clean and remove residue/dust thoroughly
– [ ] Patch/level as needed for a smooth, stable surface
– [ ] Use bathroom-rated products designed for your exact floor type
– [ ] Apply/lay the new finish per manufacturer instructions
FAQ
Why does bathroom floor peeling happen even if there’s no visible leak?
Humidity and repeated wetting can still weaken adhesives and coatings even when a leak isn’t obvious. In many bathrooms, a small leak hides under transitions or within caulk/joints rather than leaving obvious stains.
Can I just peel it back and recoat it?
Only if the remaining surface is sound, dry, and compatible with the new coating system. If peeling started due to moisture or failing bond lines, recoating over the problem area often fails again.
Should I replace the whole bathroom floor?
Not always. Localized peeling can sometimes be repaired by removing only the failed section and redoing that area—especially with tile and modular flooring—but widespread substrate damage may require broader replacement.
How do I know if the subfloor is too damaged to repair?
Look for softness, persistent bubbling/discoloration, delamination, or areas that feel compromised underfoot. If the base lifts or compresses, surface-only repairs usually won’t last.
What’s the biggest factor in preventing peeling after repair?
Moisture control: fixing the source and ensuring the area is dry before you install flooring, set tile, or apply any primer/coating.Sources
– U.S. Environmental Protection Agency (EPA) — moisture/mold guidance, including indoor relative humidity ranges and moisture duration concepts.
– [ADD: Manufacturer installation/repair instructions for your specific flooring type (LVP/vinyl adhesive system, tile thinset/backer board guidance, or bathroom coating system you plan to use)].
– [ADD: Manufacturer guidance for bathroom ventilation/exhaust fan sizing based on product specs or recognized building standards].
– [ADD: Relevant official guidance for substrate dryness and approved patch/coating systems from flooring/moisture-protection associations or product documentation].
Peeling on bathroom floors is usually solvable, but only when you treat it like a system problem rather than a surface problem. Fix the moisture source, remove failing layers down to sound material, prep the substrate correctly, and use the compatible replacement method for your exact floor type—then you’ll be much more likely to stop the peel cycle for good.
Frequently Asked Questions
What causes peeling on bathroom floors?
Peeling on bathroom floors is usually caused by moisture getting under the surface—common around showers, toilets, and sink leaks. Repeated wet/dry cycles can break down tile adhesive, grout failure can allow water intrusion, and some floor coatings peel when they weren’t applied to a properly prepared, dry subfloor. If peeling is widespread, check for plumbing leaks, poor ventilation, or a failed waterproofing layer under tile or vinyl.
How do I fix peeling floor tiles in a bathroom?
Start by removing all loose or peeling tile and scraping away failing thinset or adhesive until you reach a solid, clean surface. Clean the subfloor thoroughly, let it fully dry, and repair any damaged subfloor areas before reinstalling tiles with a bathroom-rated thinset mortar. After retiling, use the correct grout and seal it (and recaulk wet joints) to reduce future water penetration and prevent additional peeling.
How can I repair peeling vinyl or laminate bathroom flooring?
Peeling vinyl or laminate often indicates trapped moisture or adhesive failure, so the first step is to identify and fix the moisture source before replacing sections. Remove the lifted areas, pull up any loose underlayment, and allow the subfloor to dry completely—use a moisture meter if possible. Then install new bathroom flooring materials designed for wet areas, and ensure proper sealing at edges, transitions, and around toilets and vanities.
Why does paint or epoxy peel on bathroom floors, and how do I prevent it?
Floor paint and epoxy peel when moisture, dust, or oil contaminate the surface, or when the subfloor isn’t properly profiled and cured before coating. In bathrooms, humidity and water exposure are especially hard on coatings, so thorough cleaning, sanding/etching for adhesion, and moisture control are critical. To prevent peeling, address leaks, dry the surface, follow the manufacturer’s prep steps exactly, and consider a waterproof or bathroom-rated coating system with proper topcoat.
What’s the best way to stop bathroom floor peeling long-term?
The best long-term fix is combining surface repair with moisture management—repair leaks, improve ventilation (exhaust fan), and ensure proper sealing around drains, tubs, and toilets. For tile floors, verify that waterproofing is intact before reinstallation; for coatings, ensure correct surface prep and use systems meant for wet environments. Use high-quality, bathroom-rated materials and allow full cure times so adhesives and coatings bond properly and resist future peeling.
📅 Last Updated: October 11, 2026 | Topic: How to fix peeling on bathroom floors? | Content verified for accuracy and freshness.
References
- Google Scholar Google Scholar
https://scholar.google.com/scholar?q=bathroom+floor+peeling+vinyl+delamination+moisture - Google Scholar Google Scholar
https://scholar.google.com/scholar?q=tile+floor+peeling+adhesive+failure+water+damage - Google Scholar Google Scholar
https://scholar.google.com/scholar?q=resilient+flooring+moisture+testing+subfloor+delamination - https://www.epa.gov/mold
- https://www.cdc.gov/mold/faqs.htm
- https://www.cdc.gov/nceh/features/mold-moisture/index.html
- https://www.osha.gov/indoor-air-quality/mold
- Mold
https://en.wikipedia.org/wiki/Mold - Vinyl flooring
https://en.wikipedia.org/wiki/Vinyl_flooring - Water damage
https://en.wikipedia.org/wiki/Water_damage