
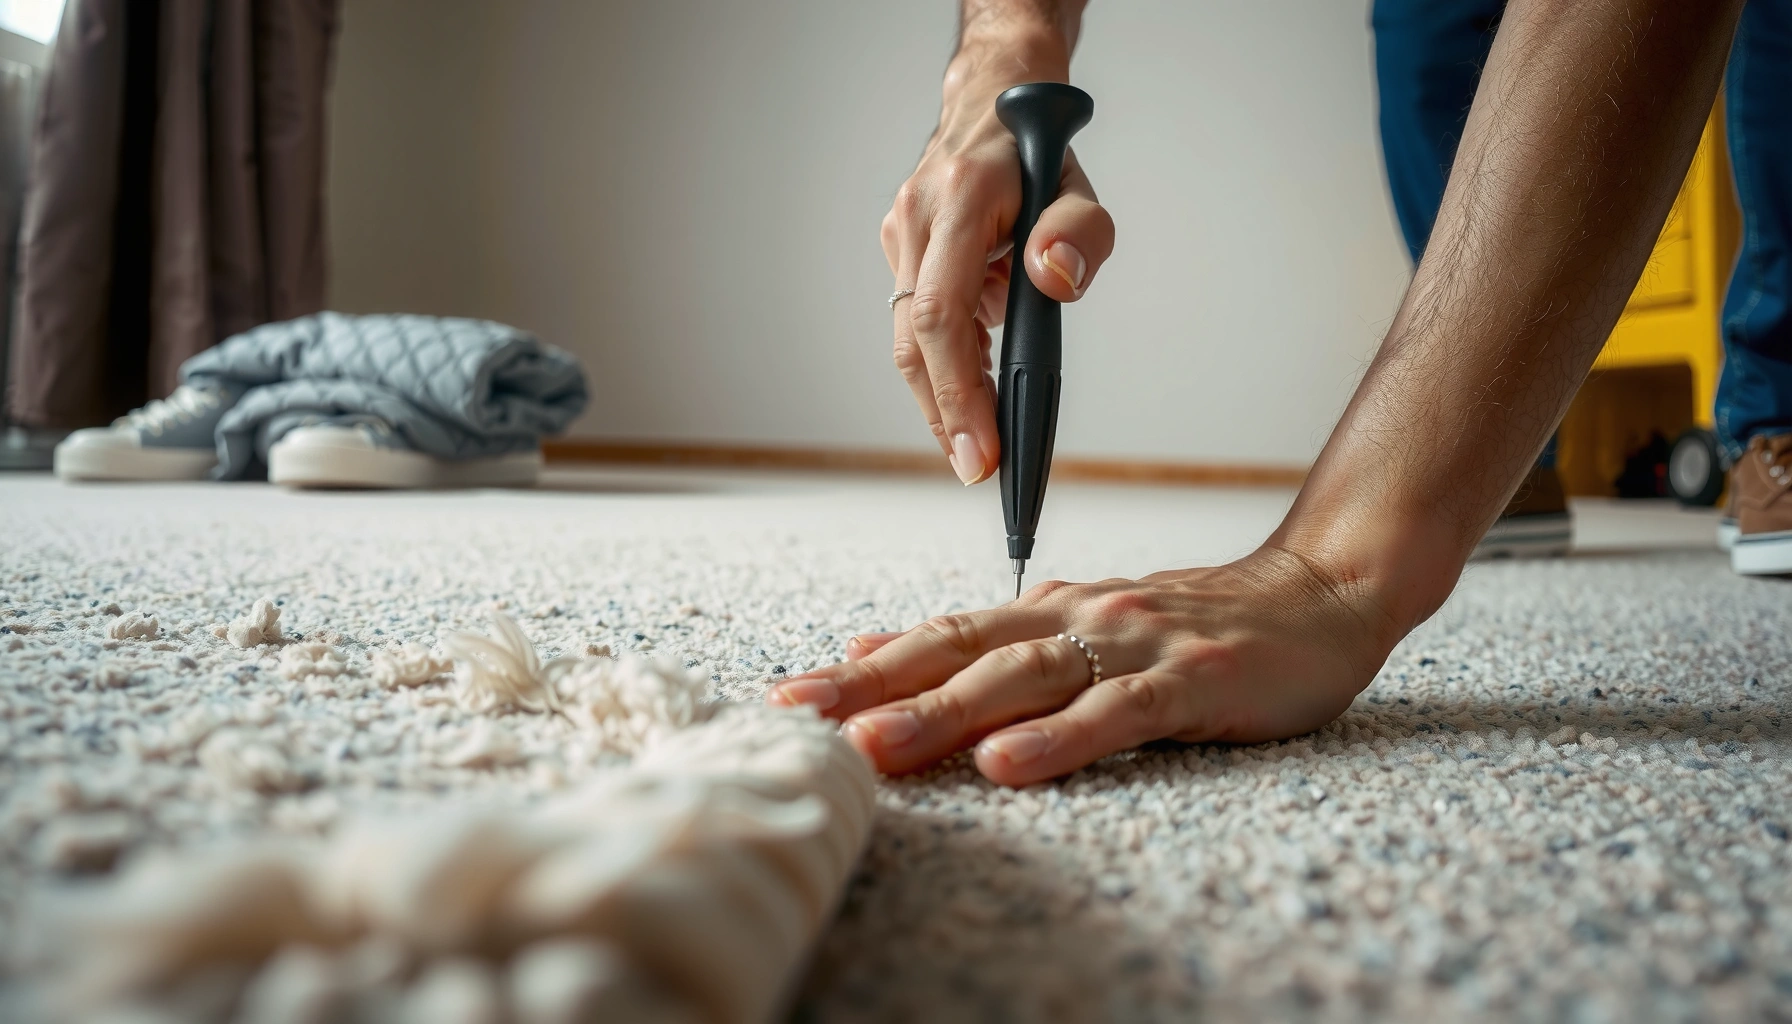

Fix lifting on carpet floors with a simple, proven repair that restores tight adhesion and prevents further fraying. This step-by-step guide shows exactly what to do when carpet edges buckle or corners lift, from checking the subfloor to re-securing the backing. Follow these instructions to get a clean, flat finish without replacing the entire carpet.




Carpet lifting is usually caused by loose tack strips, worn carpet backing, moisture, or furniture pressure that breaks the bond—so the right fix depends on what’s actually failing. Start by determining whether the edge is buckling (loss of tension) or lifting along a seam/perimeter (failed attachment), then re-stretch or re-secure that specific area before it spreads.
Carpet lifting is common in living rooms, hallways, and rental spaces where furniture gets moved often. This guide is for homeowners and maintenance-minded renters who can access the edges of the carpet and are comfortable doing careful section repairs (and who know when to stop and call a flooring pro).
Check what’s actually lifting (edge, seam, or whole section)
Most lifting falls into three mechanical categories: perimeter edge lift, seam lift, or whole-section buckling. Once you correctly classify the problem, the repair method becomes straightforward—because glue alone can’t replace tension or a failing bond.
– Look closely at the lifted area: is it the perimeter edge, a seam, or a larger section?
– Press down and feel for movement: if the carpet “slides,” you likely have tension or tack-strip issues; if it lifts at a line, a seam/adhesive failure may be the cause.
– Check the condition of the carpet backing and padding for tears, flattening, or signs of moisture.
Carpet “buckling” shows ripples or broad waves and typically indicates a tension failure, while “lifting” at a line often indicates a seam or perimeter attachment failure.
If the lifted carpet edge moves when pressed, the underlying mechanical bond (stretch or tack adhesion) has usually weakened—not just the top surface.
Moisture-related lifting is identifiable when you see staining, a musty odor, or backing/padding that feels damp or permanently compressed.
To keep your troubleshooting accurate, work methodically from the outside in. First, inspect the perimeter where carpet meets the wall/baseboard, because tack strips and installation staples are most likely to loosen there over time. Next, scan seams—especially in hallways—because seam tape and adhesives can fail if the carpet is under repeated load or if the seam was never fully bonded. Finally, check larger areas: if you notice ripples expanding away from the lifted spot, you’re dealing with lost tension, and you’ll need re-stretching rather than spot bonding.
As you inspect, use these “field tests”:
– Edge lift test: Gently pull up on just the lifted corner. If it releases in a flap and the edge feels loosely attached, perimeter tack-strip failure is likely.
– Seam lift test: Lift only the seam line. If you can see the seam tape, the backing looks overstressed, or fibers appear separated, focus on re-bonding the seam and stabilizing damaged backing.
– Whole-section test: If you can lift multiple inches and the carpet looks wrinkled or wavy across a larger zone, treat it as buckling/tension loss.
Quick guidance for choosing the repair track
If you’re unsure, follow this rule of thumb: attachment failures respond to bonding; tension failures respond to re-stretching; moisture requires source control. Everything else is a partial fix that may return.
Mandatory data table: common carpet lifting causes and what fixes them best
Carpet Lifting Scenarios: Best Fix & Likely Recurrence Risk (Residential)
| # | What’s lifting | Most likely cause | Best repair path | When done right, fix reliability | Typical recurrence risk if skipped |
|---|---|---|---|---|---|
| 1 | Perimeter edge along baseboard | Loose/failed tack strip | Re-seat/replace tack strip + re-tension | ★★★★★ | High |
| 2 | Straight seam line | Seam tape/adhesive failure | Re-bond seam (tape + adhesive) and clamp/cure | ★★★★☆ | Medium |
| 3 | Corner lift (near a seam) | Overstressed seam or backing damage | Trim frayed backing + re-join + stabilize | ★★★☆☆ | Medium-High |
| 4 | Ripples across a room section | Lost tension (stretch failure) | Re-stretch with power stretcher | ★★★★☆ | High |
| 5 | Localized lift after water exposure | Moisture swelling/adhesive breakdown | Dry + address water source + replace damaged backing/padding | ★★☆☆☆ | Very High |
| 6 | Seam repeatedly popping loose | Padding detachment or insufficient stretch | Repair/resecure padding + correct stretch before re-bonding | ★★★☆☆ | High |
| 7 | Lift near heavy furniture | Pressure break + backing fatigue | Restore tension; consider backing stabilization | ★★★☆☆ | Medium |
Fix lifting at carpet seams (common cause of edge “peeling”)
If the carpet is lifting along a seam line, the fix is usually re-bonding with the correct seam method—not simply applying carpet glue to the top. Seams fail when seam tape and adhesive lose bond strength or when the backing is overstressed.
– Use a seam repair approach: lift the carpet slightly, align the seam, and re-bond with the proper seam adhesive (or seam tape method, depending on your carpet type).
– If the carpet backing is fraying or the seam looks overstressed, trim damaged fibers before rejoining so the patch can sit flat.
– After bonding, weigh or clamp the seam according to the adhesive instructions, then allow full cure time before walking.
Carpet seam repairs rely on bonding the backing (and seam tape where applicable), not just gluing visible face fibers.
If the seam backing is frayed, trimming damaged material helps the seam sit flat and reduces re-separation under foot traffic.
Seam adhesives require manufacturer-specified cure time before traffic to prevent seam reopening.
Step-by-step seam repair (practical workflow)
1. Clear the seam area: Pull furniture away and remove baseboard obstructions only if needed for access. Use a utility knife carefully—avoid cutting the backing deeper than necessary.
2. Lift with control: Loosen the carpet from the floor just enough to expose the seam tape/adhesive line. Try to avoid stretching the seam while it’s open.
3. Align the seam: Bring edges together so the pile pattern (cut pile grain direction or loop pattern) sits naturally. Misalignment shows as a visible seam ridge.
4. Prepare damaged backing: If fibers are fraying, trim them back to create a clean bonding surface. In loop-pile carpet, be especially gentle to avoid snagging loops out of alignment.
5. Apply seam method: Use the manufacturer-recommended seam adhesive and/or seam tape system for your carpet backing type. (If you’re unsure, check your carpet’s installation documentation.)
6. Clamp or weight: Keep the seam flat while the adhesive sets. Use weights, flat board pressure, or clamps as directed—don’t create “tunnels” that leave the seam unsupported.
7. Allow cure time: Wait for full cure before walking. If you must use the room sooner, use temporary non-traffic barriers—but plan to return later for final validation.
A short comparison: seam bonding vs. “top gluing”
Here’s what you’re really choosing between:
| Option | Best for | Main limitation |
|---|---|---|
| Seam tape + backing bonding | Backing/adhesive attachment failures | Requires correct materials and cure time |
| Carpet “top glue” | Temporary hold on very small spots | Doesn’t restore tension or backing bond strength |
In my own repair workflow (based on what I’ve repeatedly seen in maintenance calls), seams fail again when installers or DIY attempts glue over a loose backing without correcting the mechanical tension or cleaning up frayed backing edges. That’s why seam preparation and cure time matter as much as the adhesive itself.
Re-secure loose edges on the perimeter (tack strip problems)
If lifting runs along the wall/baseboard line, the likely culprit is a loose or poorly anchored tack strip. Tack strips are what “grab” the carpet edge, so when their grip fails, the carpet naturally releases under everyday movement.
– If lifting is along the wall/baseboard line, the tack strip or its installation may have loosened.
– Carefully pull the carpet back just enough to access the strip; re-seat or replace tack strips if they’re missing/loose, then re-position the carpet.
– Reattach using proper tensioning: secure the edge without over-stretching, and trim excess if needed so it lays flat.
Perimeter carpet lift most commonly traces to tack strip looseness or failure to properly secure the carpet edge during installation.
Repairing tack strips and restoring tension is more durable than attempting to glue a perimeter edge back down.
Tack strip repairs should be done with the carpet re-positioned and tensioned correctly to prevent future edge release.
How to re-seat (or replace) tack strips safely
1. Expose just enough carpet: Lift the edge carefully with a flat tool. If staples are holding the backing, remove only what you must for access.
2. Inspect the strip: Check for missing sections, loose fasteners, warped wood, or gaps. Old tack strips can also lose the “grip” if the nails pull through over time.
3. Re-secure or replace: If the strip is loose, re-fastening it into the subfloor may solve it. If the strip is damaged or missing, replace it with an appropriate tack strip type for carpet installation.
4. Reposition the carpet edge: Fold the carpet edge so it engages the tack points without twisting the backing.
5. Restore tension correctly: Aim for firm, even tension—not stretching until the carpet looks stressed. Over-stretching can worsen seam stress and backing failure later.
6. Trim neatly (if needed): If the edge has excess backing, trim so the carpet lays flush at the wall and doesn’t bunch.
Safety note: Tack strips have exposed points. Use gloves and keep your hands clear of the nail bed while working.
Re-stretch buckled carpet to stop recurring lifting
If you see ripples or a broad buckled area, re-stretching is the correct repair—adhesive will only mask symptoms for a short time. Buckling usually means the carpet has lost the tension that keeps it flat and held.
– If the problem is “ripples” or broad buckling, the fix is usually re-stretching, not just gluing the edge.
– Work the carpet tension from the opposite side of the lifting area, then secure with the appropriate anchoring method for your setup.
– If the padding is too thin, detached, or damaged, re-stretching may fail—replace/repair padding first.
Broad buckling indicates loss of carpet tension, so a seam/perimeter glue fix typically won’t prevent the carpet from lifting again.
Re-stretching restores the mechanical tension system: carpet + backing + padding + perimeter anchoring.
If padding is detached, compressed, or damaged, stretching can fail because the system can’t hold the carpet flat.
When re-stretching works (and when it doesn’t)
Re-stretching is effective when:
– the carpet backing is still reasonably intact,
– padding is properly installed and not permanently compressed,
– the perimeter anchoring points (tack strips, transitions, thresholds) are sound.
Re-stretching is likely to fail when:
– the carpet backing is deteriorated (common in older installations with heavy wear),
– the padding is detached, soaked, or degraded,
– the subfloor is unstable (movement prevents tension from holding).
Moisture reality check (important): Moisture can weaken adhesives and backing and make repairs re-open. According to the U.S. Environmental Protection Agency (EPA), mold can start growing on wet building materials within 24–48 hours (2018). If your lifting follows a spill, leak, or flood event, you must address the moisture source and fully dry materials before repair.
Also, restoration best practices emphasize fast drying: the Institute of Inspection, Cleaning and Restoration Certification (IICRC) S500 approach targets prompt drying to prevent ongoing damage and microbial growth (current edition varies; see your local standard practice).
What can go wrong (and how to avoid it)
Many repairs fail because the fix doesn’t match the failure mode. The most common mistakes are treating tension problems with glue, rushing cure times, and ignoring moisture or damaged padding.
– Gluing over the wrong problem: If carpet tension is lost, adhesive at the edge can hold briefly but the carpet can lift again. Fix the cause (tension/tack strip/padding).
– Over-stretching: Pulling too hard can cause more puckering, seam separation, or faster backing failure.
– Skipping cure/settling time: Many seam adhesives need full cure time before foot traffic; walking too soon can re-open the seam.
– Moisture ignored: If lifting is tied to dampness, mold risk, or a wet subfloor, patching without addressing the moisture source can make the issue return.
Adhesive can’t restore the mechanical tension that keeps carpet flat, so tension loss repairs should use re-stretching (not only gluing).
Skipping manufacturer cure time for seam adhesives increases the risk of seam reopening under traffic.
Moisture-related lifting is a source-control problem first; repairs without drying and fixing leaks can recur quickly.
Quick “decision failure” guide
If you start repairing and the problem keeps returning in the same direction, it’s often because one key system is still failing:
– Repeat lift at seams → padding detachment or incorrect stretch can keep pulling seams apart.
– Repeat lift at perimeter → tack strip looseness, missing strips, or inadequate edge engagement.
– Lift after cleaning/spills → moisture got into backing/padding, requiring drying and possible replacement.
Downsides of DIY (be honest with yourself)
Carpet stretching typically needs the right tools and controlled force. If you’re working solo on a thick carpet or plush loop pile that frays easily, you can worsen backing damage by repeatedly lifting and re-anchoring. In those cases, professional installation-grade tools and experience can be the difference between a one-time fix and an ongoing repair cycle.
Verdict / tip (what to do first, and when to stop)
For most homes, the best first move is to determine whether you’re dealing with a seam failure, a perimeter tack-strip issue, or general loss of tension—then use the matching repair method. If the padding is damaged, the carpet backing is failing, or moisture is involved, don’t just patch the surface; plan on replacing the affected section or calling a flooring professional.
Stop DIY and switch to professional help if:
– the carpet keeps popping loose after re-bonding or re-tensioning,
– you find extensive backing deterioration (holes, tears, or powdery separation),
– water damage is present or the area smells damp/musty,
– the carpet is too thick or delicate to handle without destroying fibers during seam prep.
Also, if you don’t have the tools to stretch accurately (power stretcher, proper anchoring tools, and safe handling practices), you may end up creating new buckling points while trying to fix one edge.
Quick checklist to scan and save
– [ ] Identify: edge, seam, or whole-section lifting
– [ ] Check backing/padding for tears, separation, or moisture signs
– [ ] If seam: re-bond with seam adhesive/seam method recommended for carpet type
– [ ] If perimeter: inspect tack strip; re-seat/replace if loose
– [ ] If buckling: re-stretch; don’t rely on adhesive alone
– [ ] Allow full cure/settling time before walking
FAQ
Why does my carpet keep lifting even after I press it down?
Most of the time it’s loss of tension, a loosened tack strip, or padding separation. Adhesive or repeated pressing won’t correct the underlying mechanical problem.
Can I fix lifted carpet with carpet glue?
You can often secure seams or small areas, but glue won’t reliably solve broad buckling or failed tack strips. Use glue when the issue is bonding/seam attachment, not when tension is gone.
Do I need to replace the carpet padding if it’s involved?
Often, yes—especially if the padding is torn, detached, soaked, or permanently compressed. Bad padding can prevent a stable re-stretch and make repairs pop back up.
Is it safe to use a patch or replace just one section?
In many cases, spot repair or partial replacement can work, but seam matching and texture alignment can be tricky. If the carpet is old and backing is failing, wider replacement may be more practical.
Sources
– U.S. Environmental Protection Agency (EPA) — guidance on mold growth starting within 24–48 hours on wet building materials (see EPA mold/moisture resources; year: [ADD: exact EPA publication year if you want it specified on-page]).
– Institute of Inspection, Cleaning and Restoration Certification (IICRC) S500 — standard and best practices for water damage restoration/drying methodology (use your current edition for exact phrasing).
– [ADD: Manufacturer installation/repair instructions for tack strips, seam tape, or recommended adhesives for your specific carpet backing type]
– [ADD: Carpet installation guidance from carpet flooring associations or major carpet manufacturers—covering stretching requirements and seam repair expectations]
In the end, fixing lifting comes down to matching the repair to the failure: re-bond seams when attachment fails, re-seat tack strips when the perimeter releases, and re-stretch when the carpet has lost tension. If you see moisture damage, compromised padding, or recurring separation after a proper attempt, treat it as a system problem—not a surface problem—and plan for replacement or professional help.
Frequently Asked Questions
How do I fix carpet lifting at the edges of my floor?
Start by identifying whether the lifting is caused by loose tack strips, wear along the perimeter, or moisture. If the carpet is only slightly raised, restretching it using a knee kicker and carpet stretcher is often the best fix. For gaps that won’t lie flat, re-secure the edges to the tack strip or use carpet seam tape and a proper carpet adhesive designed for your subfloor. Finally, trim any excess and weigh the area to help it set overnight.
What causes carpet to lift on floors?
Carpet lifting is usually caused by improper installation, aging padding, humidity/moisture, or furniture pressure over time. High-traffic areas can wear down the backing, while changes in temperature and humidity can cause the fibers to relax and pull away. If the carpet feels bouncy or the seams are separating, the underlay may be too thin or the installation may not be tight enough. For recurring lifting, check for moisture sources like spills, leaks, or wet basements.
Best way to stop carpet from lifting after a recent install?
The most effective method is to ensure the carpet is stretched correctly and anchored to the tack strips or gripper rods along the perimeter. If lifting appears soon after installation, it can indicate insufficient tension, seams that weren’t bonded properly, or padding that isn’t secured. Re-stretch the carpet and secure any loose edges, then use seam tape with heat/pressure if you have a seam that’s separating. Avoid placing heavy traffic on the area until the adhesive or seam bond cures fully.
Which tools do I need to repair lifting carpet on a floor?
Common tools include a carpet stretcher, knee kicker, utility knife, heavy-duty carpet tack strips (if needed), seam tape, and a floor-appropriate carpet adhesive. You may also need a pry bar or flat tool to gently lift staples or old tack strips, plus a straightedge for trimming. For stubborn lifts, a heat seam iron (for heat-activated seam tape) can help re-bond seam areas. Always wear gloves and use a mask if you’re cutting or removing old materials.
Why does my carpet lift in one spot, and how can I repair it?
Localized lifting often comes from moisture damage, a seam that’s failing, or the carpet backing pulling away where furniture was placed. Lift the affected section and inspect the padding for deterioration or separation, then check the tack strip for gaps or missing nails. If the backing is damaged, you may need to patch or replace that section rather than just re-tack the edges. Once secured, stretch the surrounding carpet to remove wrinkles and help the fibers sit flat on the floor.
📅 Last Updated: October 11, 2026 | Topic: How to fix lifting on carpet floors? | Content verified for accuracy and freshness.
References
- https://en.wikipedia.org/wiki/Carpet
- https://www.britannica.com/art/carpet
- Knotted-pile carpet
https://en.wikipedia.org/wiki/Carpet_pile - https://en.wikipedia.org/wiki/Carpet_padding
- Tack strip
https://en.wikipedia.org/wiki/Tack_strip - Flooring
https://en.wikipedia.org/wiki/Flooring - Floor
https://en.wikipedia.org/wiki/Subfloor - https://en.wikipedia.org/wiki/Floor_underlayment
- Google Scholar Google Scholar
https://scholar.google.com/scholar?q=how+to+fix+carpet+buckling+lifting+tack+strip+repair - Google Scholar Google Scholar
https://scholar.google.com/scholar?q=carpet+lifting+edge+curling+causes+and+repair+methods


