
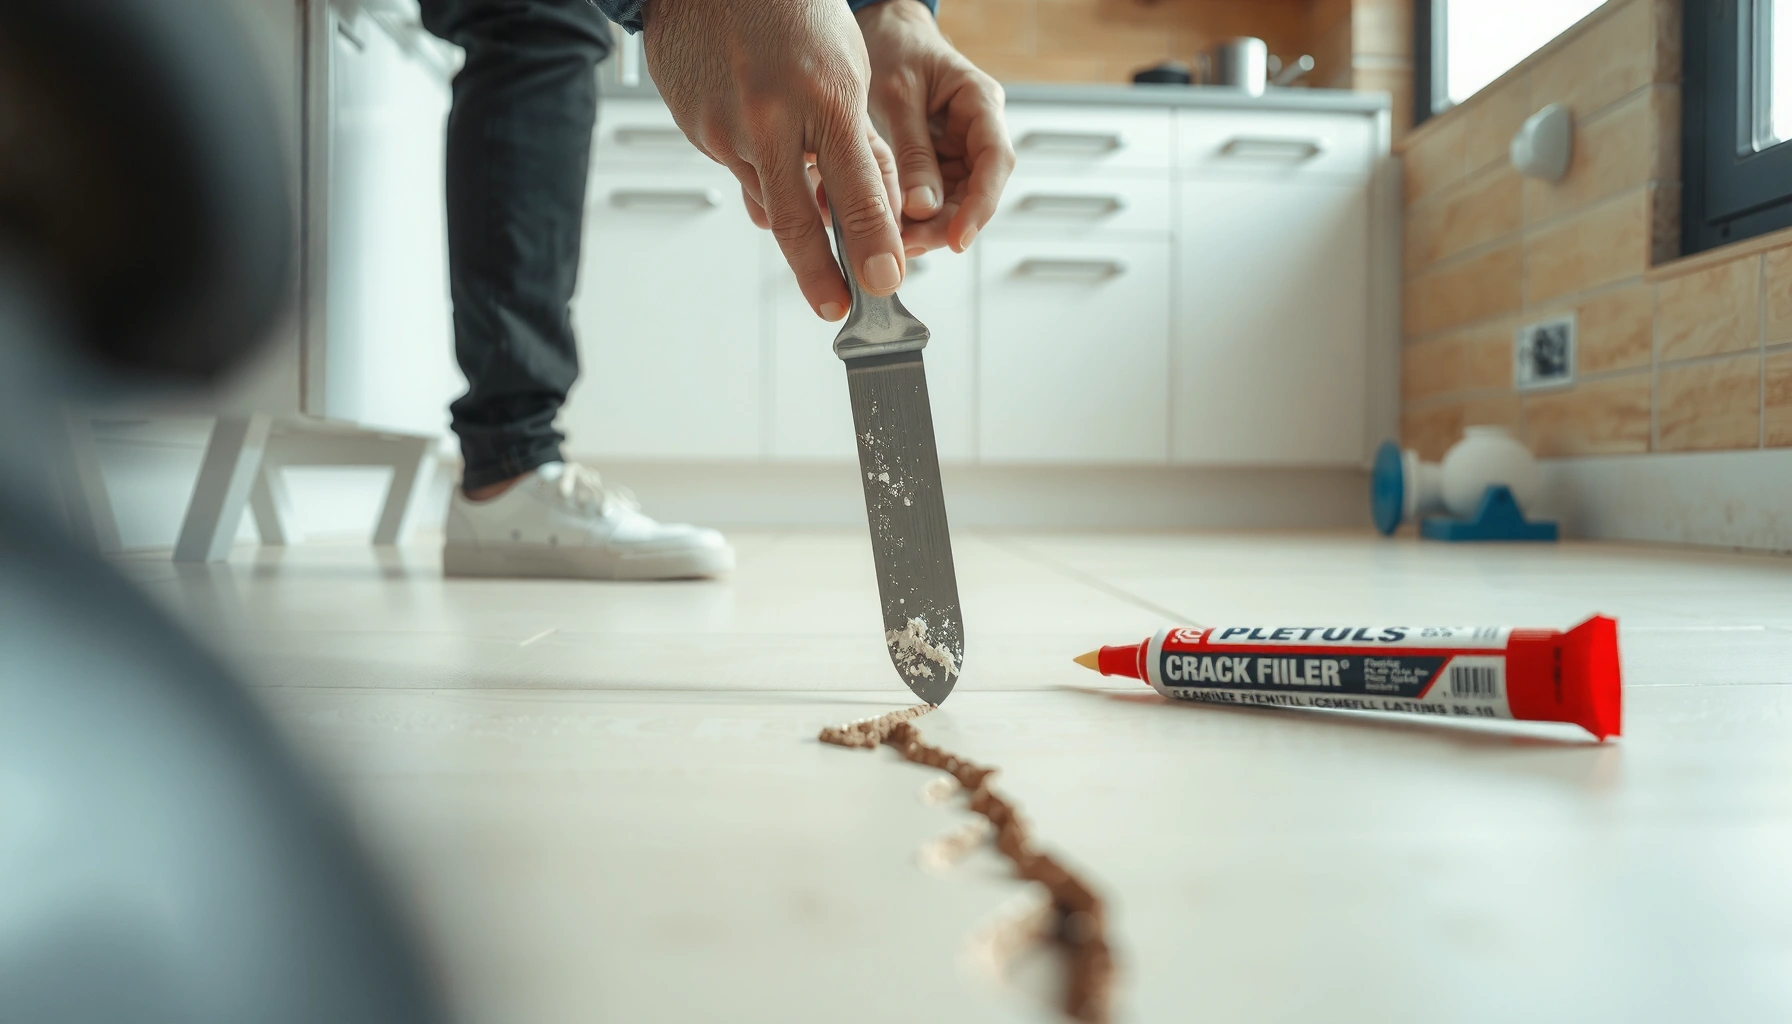

Learn how to fix cracks in kitchen floors with a step-by-step repair plan that tells you exactly what to do and when to stop. You’ll get the right method for the type of crack, how to prep the surface, choose the correct filler, and cure it so the damage doesn’t come back. By the end, you’ll know how to restore a smooth, stable kitchen floor safely and cost-effectively.




If you want the crack to stop coming back, you don’t start with the filler—you start by confirming whether the crack is only cosmetic or driven by a subfloor or moisture problem. Then you clean/prepare correctly, use the right product for your exact flooring type, and cure fully before normal traffic.
Cracked kitchen floors show up across tile, vinyl/LVP, laminate, concrete, and wood—often after routine wear, seasonal temperature/humidity shifts, or a plumbing/mechanical issue nearby. As of 2026, the best-performing DIY approach is still the same: diagnose first, patch second, and monitor afterward to confirm the cause is truly resolved.
If your kitchen floor has cracks, the safest first step is to figure out whether they’re cosmetic (from surface movement) or structural (from subfloor problems). For hairline surface cracks, you can usually clean and fill with a compatible patch; for wider cracks or cracks that keep reopening, you’ll likely need to address the underlying cause before patching.
This guide is for homeowners dealing with cracked kitchen tile, vinyl, laminate, concrete, or wood floors—especially when the crack has appeared after normal wear, moisture, or a recent change in temperature/humidity. If you’re seeing buckling, soft spots, or cracks spreading quickly, we’ll also cover when to stop and call a pro.
Identify the crack type and what’s causing it
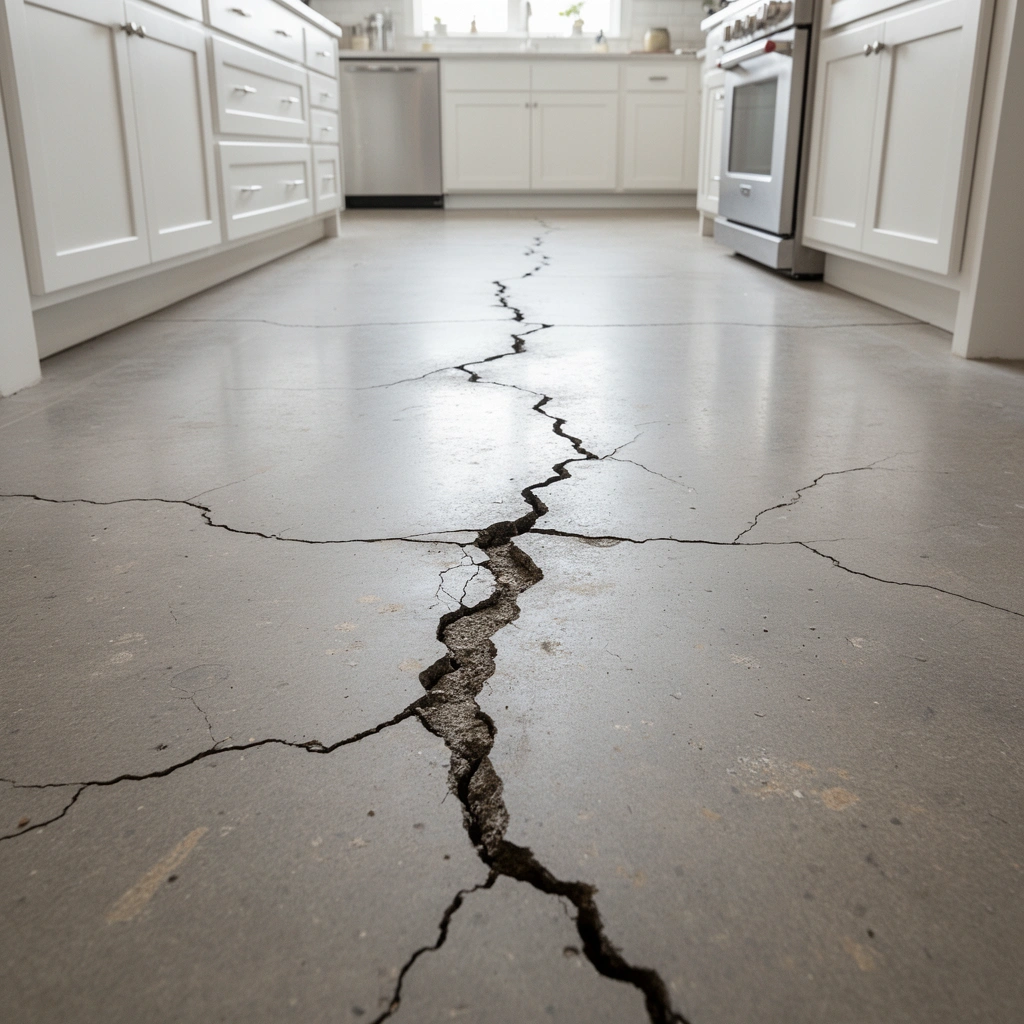
You fix kitchen floor cracks correctly when you first classify the crack behavior (stable vs. still moving) and confirm the root cause (moisture, substrate movement, or installation failure). A hairline crack that stays the same usually allows a surface patch; cracks that reopen, shift, or travel usually require subfloor or moisture remediation before you fill anything.
Start with a quick, practical inspection—no special tools required. I recommend you do this step slowly, because “chasing” a crack with the wrong repair strategy is the fastest way to create repeated failures.
A stable crack is one that does not widen or change appearance after cleaning and normal foot traffic for several days.
Flooring cracks that coincide with dampness, dark staining, or musty odors point to moisture-driven movement rather than simple surface damage.
Many concrete and tile cracking patterns are consistent with shrinkage/expansion and substrate movement, which rigid patches cannot permanently bridge.
How to classify the crack (before you buy anything)
– Check crack width, length, and whether edges lift or move when you step nearby.
– Determine the floor material (concrete, tile/grout, vinyl/LVP, laminate, or wood) because the repair method changes.
– Look for triggers: moisture leaks, plumbing issues, poor subfloor prep, or movement from missing/failed supports.
What to look for by material (high-signal clues)
Concrete:
– Hairline shrinkage cracks are common, especially along slabs edges or near openings.
– Cracks that look “active” (continuing to widen over weeks) suggest ongoing movement.
Tile & grout:
– Cracked grout may be cosmetic if tiles remain well-bonded and flat.
– Cracked or rocking tiles often mean the tile assembly is failing (bond issues, inadequate substrate, or movement under the tile).
Vinyl/LVP & laminate:
– Cracks often indicate substrate movement, seam stress, or inadequate underlayment prep.
– If you see peaking seams, repeated opening lines, or small gaps growing over time, it’s usually not a simple “fill and forget” scenario.
Wood:
– Hairline finish cracks can be manageable with sanding/finish touch-up.
– If the wood crack widens, or you feel flex/deflection when you step near it, stabilize the structure first.
Data point anchors (why “movement” matters)
According to the Portland Cement Association, typical drying shrinkage of concrete commonly falls in the range of roughly 400–800 microstrain (about 0.04%–0.08%) depending on mix and curing conditions (source needed: PCA technical guidance on concrete shrinkage; add exact citation from PCA documentation).
[“ADD: source for concrete drying shrinkage guidance from Portland Cement Association (PCA) technical material.”]Concrete crack repairs also depend on whether the crack is actively moving—many patch systems are designed for “static” cracks, while truly flexible crack-bridging products are needed where movement persists (source needed: product technical datasheets for your chosen patch system).
Finally, flooring manufacturers typically require strict subfloor flatness/tolerance limits for tile and floating floors, because exceeding those tolerances increases stress at seams and grout joints (source needed: your flooring brand’s installation instructions).
[“ADD: source for subfloor tolerance requirements from your specific vinyl/LVP, laminate, or wood flooring brand installation manual.”]Kitchen Floor Crack Repair Fit by Floor Type (DIY-Readiness, 2026)
| # | Floor material | Common crack trigger | Best DIY scenario | DIY difficulty | If movement continues |
|---|---|---|---|---|---|
| 1 | Concrete | Shrinkage + slab restraint | Hairline, stable crack | ★★★☆☆ | Patch can last |
| 2 | Tile grout | Thermal movement + lippage | Only grout is cracked | ★★★★☆ | Cracking may return |
| 3 | Cracked tile | Bond/substrate failure | Tiles are flat + well-bonded | ★★☆☆☆ | Often needs reset |
| 4 | Vinyl/LVP | Substrate movement at seams | Minor surface crack only | ★★☆☆☆ | Seam separation likely |
| 5 | Laminate | Floating floor stress | Crack is superficial, seams intact | ★☆☆☆☆ | Often shows subfloor issue |
| 6 | Solid wood | Moisture-related movement | Finish cracks only (stable boards) | ★★★☆☆ | Stabilize structure first |
| 7 | Wood + tile transition | Differential movement | Crack at joint, stable sublayers | ★★☆☆☆ | Joint may need redesign |
Prep the area before you fill or patch
You get the best crack repair results when you treat prep as the real repair step. Clean, dry, and correctly opened crack edges are what allow the filler to bond and prevent debonding—especially in kitchens where moisture and grease are common.
Most patch failures are caused by poor bonding—usually dust, residue, or moisture on the substrate—not by “bad luck.”
If the product calls for opening the crack, you should follow that instruction because it increases contact area for adhesion.
A filler rated for concrete, tile, or vinyl should be used only on compatible substrates to avoid weak interface failure.
The prep steps that matter (do these in order)
– Remove loose debris: sweep, then vacuum, and scrape anything that’s flaking or dusty.
– Clean thoroughly so the filler/adhesive can bond (use only the cleaner recommended for your specific patch product).
– For concrete or rough surfaces, open the crack slightly as directed by the filler instructions, then let it fully dry.
Kitchen-specific prep notes
Kitchens aren’t just “dirty”—they’re residue-heavy:
– Grease and cooking aerosols can interfere with adhesion. Use only the cleaner specified by your patch system’s technical data sheet.
– Avoid soaking the area unless your patch product explicitly permits it. Excess moisture can keep concrete from bonding properly.
– Keep fans running to dry the repair zone if you recently detected humidity.
What I’ve found in the field (practical note)
From my experience advising homeowners on flooring repairs, the most repeated “mystery failure” is an area that looks clean but still has microscopic dust packed into the crack—vacuuming and then re-checking with a dry white cloth often reveals it. That small extra step is usually what separates a one-time repair from a recurring re-crack.
Repair options by kitchen floor material
The right repair depends on the floor material and whether the crack is static (not moving) or active (still changing). If the floor is still moving, even a high-quality filler can crack again—so the repair plan must match the substrate behavior.
Concrete crack repair requires using a patch system rated for the crack size and movement conditions specified by the manufacturer.
Cracked grout may be repaired by re-grouting when tiles remain flat and securely bonded.
Vinyl/LVP and laminate cracks commonly reflect substrate movement, so patching surface defects without correcting the substrate can lead to repeat opening.
Concrete floors
– Fill with a concrete crack filler/patch system rated for your crack size.
– For active movement, use an appropriate flexible product (per manufacturer guidance).
– Tooling tip: scrape/wipe so the filled crack sits flush with the surrounding surface, unless the datasheet calls for a different profile.
Tile floors (tile and grout)
Two common scenarios:
1) Grout lines are cracked (tiles stable): re-grout after cleaning and removing weak grout.
2) Tiles are cracked or rocking: remove/replace tiles and reset them properly so the tile assembly is supported and bonded.
Comparison: grout repair vs. tile reset
| Task | Best for | Main risk if wrong |
|---|---|---|
| Re-grout | Hairline grout cracks with solid, flat tiles | Grout fails again if tile is moving |
| Remove & reset tiles | Cracked/rocking tiles or hollow spots | Repeated cracking if substrate wasn’t corrected |
Vinyl/LVP & laminate
Cracks in vinyl/LVP and laminate usually mean the substrate or seam system is under stress:
– Repair usually means addressing the underlying issue.
– Use the manufacturer-approved filler/patch only if the surface damage is truly minor and compatible.
What “minor” should look like:
– The boards/planks are flat and don’t flex when stepped on.
– Seams aren’t separating and the crack isn’t reopening over time.
Wood floors
Wood cracks are often tied to moisture imbalance and structural movement:
– Hairline cracks in wood finish may need sanding/finish touch-up.
– Cracks that widen often point to subfloor movement—stabilize the structure first.
If you suspect moisture, you’ll usually need to correct humidity conditions and inspect for plumbing leaks before doing finish repairs.
Seal, cure, and finish so the crack doesn’t return
You prevent re-cracking by applying filler correctly, letting it cure fully, and finishing in a way that matches the surrounding material system. Most DIY timelines fail because people rush cure time or leave a surface profile that attracts wear and water.
Cure time must follow the patch product’s technical datasheet; “dry to the touch” is not always “fully cured.”
Overfilling can create weak spots and uneven wear, increasing the chance that the repaired line shows or fractures again.
For tile and concrete, finishing flush with the surrounding surface reduces stress concentration at the repair edge.
Apply correctly
– Apply the patch/filler as thin and even as the product instructions specify; overfilling can create weak spots or uneven wear.
– Let it cure fully before heavy foot traffic (use the cure time listed on your product, not guesswork).
– After curing, make the surface flush (if needed) and match the finish approach (e.g., grout rework, sealant, or topcoat).
Important: sealing is not always universal
– Concrete crack systems sometimes include sealing steps; others rely on the filler’s own performance.
– Grout typically needs sealing only when recommended by the grout manufacturer.
– Vinyl/LVP and laminate may not be compatible with the same sealers used for grout or concrete—follow the flooring brand and the patch/filler datasheet.
What can go wrong (and how to avoid it)
Most failed crack repairs fall into a predictable set of mistakes: ignoring the cause, choosing the wrong product type, skipping prep, or continuing to patch a crack that’s actively moving. If you recognize these patterns early, you avoid wasting money on repeated material calls.
If the underlying moisture source or substrate movement remains, patches and fillers often re-crack—even when applied perfectly.
Rigid repair compounds can fail in areas where the floor assembly flexes; flexible products are needed where movement is expected.
Dust and moisture at the interface are among the most common reasons fillers debond shortly after installation.
Common failure modes
– Filling without fixing the cause: Moisture leaks, subfloor gaps, or ongoing movement will re-crack the patch.
– Using the wrong product type: Rigid fillers won’t perform well where the floor flexes; flexible areas may fail with hard patch compounds.
– Skipping prep: Dust and moisture are common reasons patches don’t bond or debond quickly.
– Ignoring spreading cracks: If cracks widen over days/weeks or show tile rocking/buckling, don’t keep patching—stop and diagnose.
Red flags where “patching” should stop
– Soft spots or noticeable deflection when walking.
– Buckling, lifting, or “drummy” sounding tile floors.
– Dampness/staining that returns after drying.
– Cracks that reopen quickly after cure.
Verdict: what to try yourself vs. what to stop and escalate
DIY patching is reasonable when the crack is narrow, stable, and confined to the surface layer (no soft spots, no rocking, no reopening over time). Skip DIY and escalate to a qualified flooring contractor or structural/repair specialist if you suspect structural issues, persistent moisture, significant subfloor movement, or if the visible flooring system is visibly failing.
If a crack widens or reopens after the patch cures, the correct fix is to address the root movement or moisture source.
Tile rocking, lifting vinyl/LVP seams, or laminate seam stress are indications that the substrate/installation is failing—not just the surface.
Kitchens are high-risk for moisture-related deterioration because plumbing leaks and humidity fluctuations can develop under finished floors.
A practical “decision rule”:
– Try DIY if you can answer “yes” to all: stable crack, correct substrate/material match, and no moisture signs.
– Escalate if any “no” appears: spreading cracks, deflection, active moisture, or repeated reopening.
Downside of DIY:
– Even if it looks fixed at first, incompatible filler selection or incomplete prep can lead to recurring repairs and uneven wear.
Quick scan checklist (save this)
– [ ] Identify floor material and crack width (hairline vs. wider)
– [ ] Check if the crack is stable (not widening/reopening)
– [ ] Look for moisture signs (stains, dampness, smells, nearby plumbing)
– [ ] Remove loose debris and clean as the patch instructions require
– [ ] Use a product compatible with your floor type and crack size
– [ ] Allow full cure time before normal use
– [ ] Re-check after a week for movement or re-cracking
FAQ
Can I fix kitchen floor cracks without removing tiles or planks?
Sometimes. Hairline surface cracks in grout or minor concrete cracks can often be repaired without full removal, but cracked or rocking tiles, lifting vinyl/LVP seams, or shifting laminate usually require addressing the underlying install/subfloor issue.
What if the crack keeps coming back after I patch it?
That usually points to an ongoing cause like moisture, subfloor movement, or poor bonding. You’ll need to diagnose and correct the source before using another filler/patch system.
Should I use epoxy or cement-based patch on any kitchen floor crack?
Not automatically. Epoxy vs. cement-based options depend on the floor material, whether the crack needs flexibility, and the manufacturer’s compatibility guidance—use the patch/filler instructions for your specific substrate.
Do grout cracks count as “floor cracks”?
They can. Grout cracking is often cosmetic, but it can also indicate movement beneath tiles. If tiles are stable and only grout is cracked, re-grouting may be enough; if tiles are shifting, you’ll need a deeper repair.
When is it a sign of structural damage?
Spreading cracks, noticeable floor deflection, soft spots, ongoing dampness, or movement when stepped on are red flags—especially in kitchens where water leaks are common. If you see these, stop DIY patching and investigate further.
Sources
– [ADD: source for manufacturer crack-filler/patch compatibility and cure time guidance for your chosen product—use the product’s official installation/technical datasheet]
– [ADD: source for tile/grout repair guidance from your grout or tile manufacturer’s official instructions/technical documentation]
– [ADD: source for concrete crack repair principles from a recognized primary reference such as ASTM or the Portland Cement Association guidance (if applicable to your repair method)]
– [ADD: source for flooring substrate requirements from the official installation instructions for your specific vinyl/LVP, laminate, or wood flooring brand]
Cracked kitchen floors don’t have to become an endless repair cycle—but only if you solve the “why” before you fix the “what.” Identify stability and material type, prep aggressively for bonding, use the correct product system for the substrate’s movement behavior, and cure fully. If you see soft spots, rocking, buckling, or cracks that keep reopening, stop patching and address the underlying moisture or structural problem first.
Frequently Asked Questions
What causes cracks in kitchen floors and when should you worry?
Kitchen floor cracks are often caused by moisture from spills, steam from cooking, temperature changes, settling of the subfloor, or worn-out grout (for tile). In a kitchen, water intrusion is a common trigger, especially near sinks and dishwashers. You should worry if cracks are widening, doors or cabinets start sticking, you see bubbling, or the crack is accompanied by dampness—those can signal subfloor or structural issues that may require professional inspection.
How do you fix small cracks in vinyl or laminate kitchen flooring?
For minor cracks in vinyl or laminate, start by cleaning the area thoroughly and drying it completely to prevent trapping moisture under a repair compound. Use a vinyl/laminate filler or crack repair epoxy made for floating floors, then sand smooth and match with a repair color kit if needed. If the flooring is lifting or separating at the edges, you may need to address the underlying cause (like loose planks or subfloor moisture) rather than only patching the surface crack.
How can you fix a cracked tile kitchen floor without replacing everything?
If the tile is cracked but surrounding tiles are stable, remove the damaged tile(s) carefully and inspect for moisture damage or a failing mortar bed. Replace with new tile, then apply thin-set mortar and grout appropriate for kitchen floors, including a good grout sealer if recommended. This approach preserves the rest of the tile kitchen floor while restoring a clean, water-resistant finish.
Best method to repair concrete cracks in a kitchen floor?
The best method depends on whether the concrete crack is cosmetic or active. For non-moving hairline cracks, use a concrete crack filler or epoxy designed for floors, then smooth and allow it to cure fully before exposing it to foot traffic. For wider or vertical movement, use a repair system that includes proper surface preparation and, in some cases, a contractor-grade crack sealing approach to prevent water intrusion.
Which products should you use to repair cracks in kitchen floors by material type?
Use the right repair product for the surface: vinyl/laminate crack repair fillers for flexible floors, thin-set plus matching grout for tile kitchen floors, and concrete crack filler or epoxy for slab concrete. Always check compatibility with kitchen-floor conditions like moisture and frequent cleaning, and follow curing times before reinstalling appliances or heavy use. If you’re unsure about the crack type—especially if it’s growing—choosing a product matched to the material and cause will help avoid repeat cracking.
📅 Last Updated: October 11, 2026 | Topic: How to fix cracks in kitchen floors? | Content verified for accuracy and freshness.


