
Fix dents in commercial floors with a step-by-step repair approach that beats patch-only fixes when the impact has compromised the surface. You’ll learn the fastest way to assess depth, clean and prep the area, choose the right filler or resurfacer, and finish so the floor looks level and withstands daily traffic. Follow these practical steps and get durable results without guessing.


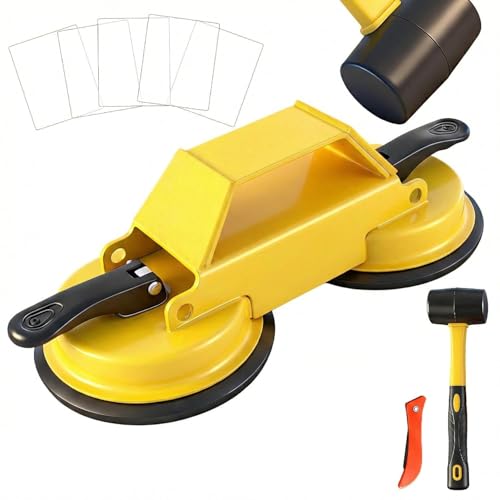

If your commercial floor is dented, the right fix depends on the surface system (concrete, resilient/VCT, epoxy, or tile). Start by confirming whether the damage is only cosmetic (finish/covering) or whether the base/substrate is compromised, then use the gentlest repair method that restores flatness without breaking the existing finish system. This guide helps property and facility teams pick the correct workflow—and avoid the common “temporary patch” mistakes that turn a single dent into ongoing floor failure.
This is for property managers, facility teams, contractors, and maintenance staff who need a reliable way to address dents in high-traffic areas like lobbies, corridors, loading zones, and retail spaces. If you’re unsure whether the dent is superficial (finish only) or structural (base damage), you’ll learn how to tell the difference and what to do next—based on the flooring type and the indicators you can observe onsite.
Step 1: Identify the flooring type and dent severity
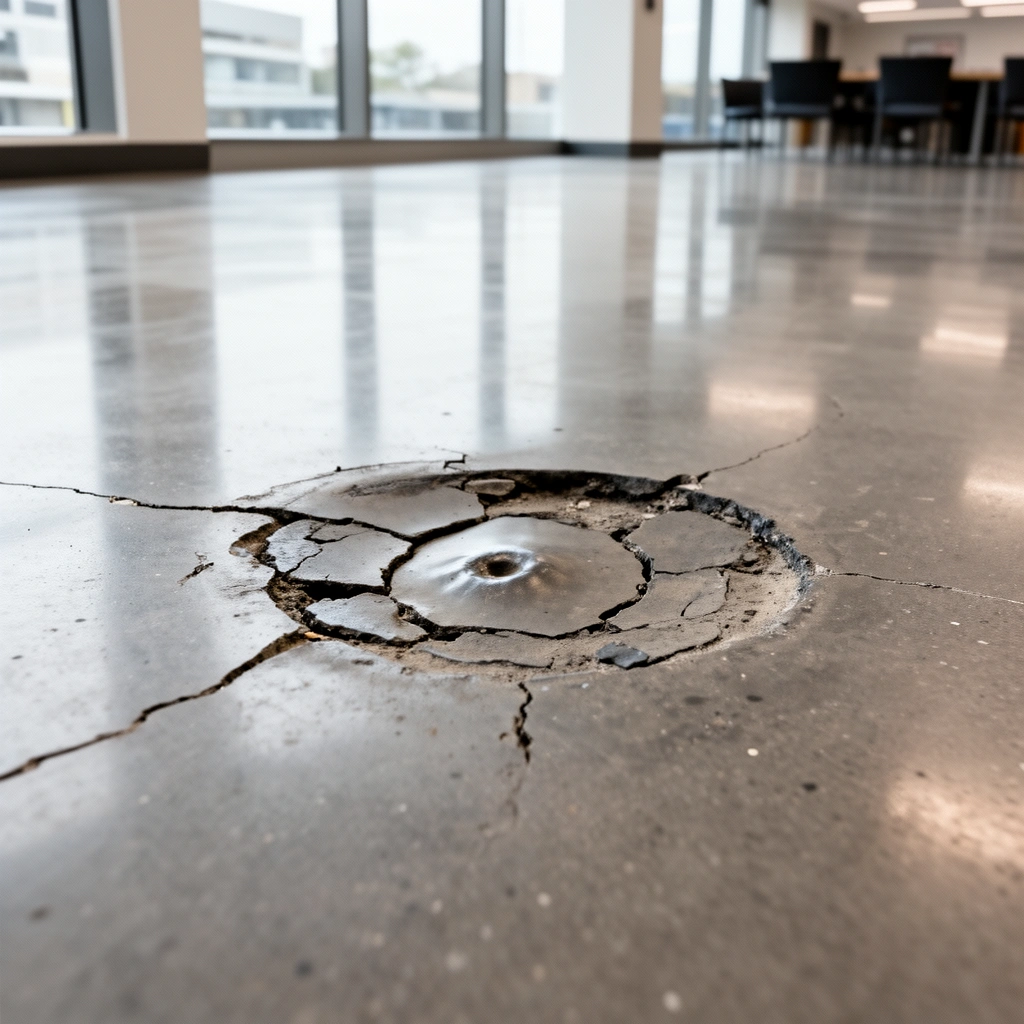
The quickest way to avoid a failed repair is to identify what the floor is made of before you touch it. Once you know the system (concrete, polished concrete, VCT/vinyl, epoxy-coated, or tile/stone), you can choose products and prep steps that match that exact bonding/finish behavior.
The most important question at the start is: “Is this dent only in the wearing layer, or did the dent deform or separate the substrate?” In my experience as a maintenance writer coordinating repair scopes, the repairs that last tend to begin with the same disciplined triage—material identification, then a depth/substrate check—because nearly every repair method depends on whether the base is still stable and bonded.
A dent in a finish-only layer can often be leveled; a dent that affects the substrate typically needs patching, re-setting, or replacement to prevent repeat damage. [ADD: cite source for finish vs substrate repair rationale]
Repair materials require compatible surface preparation (cleaning, profile, and dryness) to bond reliably in high-traffic commercial environments. [ADD: cite source from a repair product manufacturer technical bulletin]
What to look for (material identification)
– Concrete (including polished concrete): Usually repairs center on patch/leveling compounds and subsequent blending (and possibly re-polishing).
– Resilient flooring (VCT/vinyl/linoleum): Dents may reflect compression of brittle wear layers; forcing patch into a compressed resilient area can cause telegraphing or re-denting.
– Epoxy-coated surfaces: Dents can be a surface-coating failure, a top-coat/chip-out, or a sign of bond failure below the epoxy.
– Tile/stone: The dent may be a cracked/displaced tile, an edge lifting, or (less commonly) movement in mortar/underlayment.
Severity indicators (depth and stability)
Use a straightedge and visual inspection:
– Superficial (finish-level) indicators: surrounding surface remains firmly bonded, no cracking radiates outward, and there’s no hollow sound.
– Substrate-affected indicators: hairline cracks around the dent, lifted edges, hollow-sounding areas underfoot, or any ongoing movement with pressure.
According to ICRI (International Concrete Repair Institute) guidance on concrete surface preparation and repair planning, successful patching relies on stable substrates and correct preparation prior to any leveling/patch product. [ADD: ICRI reference for concrete repair planning and preparation]
Step 2: Confirm the dent isn’t moisture- or bond-related
A dent repair only “feels” complete when the cause isn’t still active. Before you fill anything, verify there’s no moisture intrusion or bond separation—because many dents return (or expand) when the underlying adhesion or moisture balance is compromised.
In commercial buildings, moisture and bond issues often look deceptively similar to impact damage. For example, a localized soft spot may look like an impact dent, but it’s actually a bond failure that makes the surface compress and deform under traffic loads.
Moisture-related failures can present as soft spots or reoccurring depressions even after leveling attempts. [ADD: cite source for moisture-related floor coating failures]
For coating and resilient systems, compromised adhesion around the dent increases the risk of edge curling, peeling, and continued deformation. [ADD: cite source from an epoxy flooring manufacturer technical guide]
Bond and moisture checks you can do onsite
– Look for peeling/edge lift around the dent (especially with epoxy and resilient flooring).
– Tap test for hollow spots (carefully and only where safe) to detect delamination from the base.
– Check for recurring softness: walk (or place a controlled load) and see if the area compresses more than adjacent areas.
– Inspect for discoloration or efflorescence (for concrete and polished concrete), which can indicate moisture migration.
Why this matters for different systems
– Epoxy-coated surfaces: A dent may be “just coating,” but if the bond layer is failing, patching over it can create a new weak point.
– VCT/vinyl/linoleum: If edges have separated, the dent can telegraph and propagate as traffic flexes the top layer.
– Concrete: If moisture has softened the concrete surface layer or undermined bonding for a previous repair, a new patch may not achieve long-term cohesion.
According to typical VCT product build-ups, resilient sheet/tile systems rely on secure adhesion; small separations can spread quickly under rolling loads. [ADD: cite source for resilient flooring adhesion/installation limits]
Step 3: Clean and prep the damaged area correctly
The best repair method in the world won’t hold if the surface is contaminated or improperly prepared. Clean and prep according to the flooring system and the specific repair product instructions—then let everything dry fully before patching/leveling.
In practice, the “prep step” is where many facilities shorten timelines and create failure. For example, grease from pallet jacks or cleaning residue left behind can prevent patch compounds and coatings from bonding correctly.
Adhesion performance depends on removing wax, grease, and residues using compatible cleaners and achieving full dryness before bonding. [ADD: cite from a manufacturer surface prep guideline]
For concrete patching/leveling, surface profile and cleanliness are controlled factors that influence whether the repair delaminates under traffic. [ADD: cite source for concrete surface profile requirements]
Cleaning standards by system (what to prioritize)
– Concrete (including polished concrete):
– Degrease if there’s any transport-related residue.
– Keep water use controlled—many concrete repair systems require a dry surface prior to bonding.
– VCT/vinyl/linoleum:
– Use a cleaner that doesn’t leave residue and doesn’t swell or compromise the surrounding finish.
– Remove wax/strippers carefully and rinse thoroughly if the product instructions require it.
– Epoxy-coated surfaces:
– Remove surface contamination and any loose or delaminated coating material.
– Profile the remaining coating only to what the repair system specifies.
– Tile/stone:
– Remove grout/caulk/edge debris around the damaged unit.
– Ensure bonding surfaces are clean and free of haze.
Profiling and roughening (do it only as specified)
Many repair systems need mechanical profiling (a controlled roughness) or surface activation. Over-grinding can widen the damaged zone; under-profiling can reduce bond strength.
One common commercial reality: polished concrete patches often need finishing beyond the patch itself because the repair compound cures with a different surface texture and sheen than surrounding concrete. [ADD: cite source from a polished concrete repair/blending guide]
Step 4: Choose the right repair method (by floor type)
The correct “how-to” depends on the flooring system, because each has different failure modes and finish behaviors. Use a repair workflow that restores flatness without undermining adhesion, flexibility, or the appearance/traction requirements of the original finish.
Concrete dent repairs typically focus on patch/leveling and curing to restore flatness, then optional re-polishing/blending for appearance. [ADD: cite from concrete repair product technical data]
Resilient and coated systems often require repairing or replacing the affected section because localized filling can telegraph or re-dent as traffic loads compress the top layer. [ADD: cite from resilient/epoxy maintenance guidance]
Concrete (including polished concrete)
Best-fit approach: patching compound + proper cure + blending.
– Prep: remove loose material, clean thoroughly, and create the correct surface profile per the compound spec.
– Fill: use a compatible patch/leveler in layers if the dent depth requires it.
– Cure: follow re-traffic and curing times.
– Finish: polished concrete may require re-polishing to match texture/color.
Resilient flooring (VCT/vinyl/linoleum) and epoxy-coated systems
Best-fit approach: restore integrity first, then level/replace.
– If the dent is isolated and the surrounding material is fully bonded, some systems allow localized repair—but only with compatible products and methods.
– If the dent is deep, brittle, or there’s separation at edges, replacing the affected section is often the cleaner long-term fix.
Tile/stone
Best-fit approach: assess displacement and substrate condition.
– Minor issues (e.g., grout/edge damage without movement): re-grout/repair edges may solve the problem.
– If the tile is cracked or displaced, or if the substrate is affected: you’ll likely need to remove and re-set the unit(s) and match grout/finish.
Comparison: repair strategy by floor type (quick parseable view)
| Floor type | Primary risk if repaired incorrectly | Preferred repair focus |
|---|---|---|
| Concrete / polished concrete | Delamination, visible patch line, sheen/texture mismatch | Compatible patch/level + cure + blend/re-polish if needed |
| VCT / resilient | Telegraphing, re-dent, edge separation | Integrity check first; repair only if system allows localized leveling |
| Epoxy-coated floors | Crack propagation and bond failure around the patch | Remove failing coating; re-bond with compatible epoxy workflow |
| Tile / stone | Loose units, grout cracking, trip hazards | Re-set displaced tiles if substrate is compromised; re-grout if stable |
What can go wrong (and how to avoid it)
Most failures are predictable: incorrect material matching, poor prep, or ignoring the traffic pattern that caused the dent. If you prevent those three issues, your odds improve dramatically—even when the repair is small.
The most common repair failure is mismatch between filler/patch chemistry and the floor system, leading to cracking, raised repair areas, or visible lines. [ADD: cite from concrete/resilient repair failure guidance]
Moisture and contamination can prevent adhesion and cause premature repair failure, especially in coatings and resilient flooring. [ADD: cite from epoxy or resilient manufacturer technical bulletins]
– Using a “one-size-fits-all” filler: For example, filling a resilient floor like concrete can create a raised repair or a visible transition line.
– Skipping prep and drying: Residue prevents bond; moisture drives loss of adhesion.
– Not matching the finish: Even if the dent is filled, polished/finished floors may show a transition if finishing steps aren’t followed.
– Fixing only the dent without addressing the cause: Recurring impacts from equipment (forklift corners, pallet drops), trolley wheels, or worn caster assemblies will keep producing new dents. Consider protective mats, wheel maintenance, and route controls.
According to industry best practices summarized by repair professionals, root-cause prevention is essential because repeated impact loading can overwhelm even well-installed repairs. [ADD: cite source for root-cause prevention in floor repair maintenance]
Verdict / tip: What usually works best (and when to call a pro)
For most dents, the safest path is: identify the floor type → confirm there’s no loose material or moisture issue → prep properly → use a repair system designed for that specific flooring finish → restore the surface (blend/polish/texture match as required). This approach minimizes the risk of adhesion failure and appearance mismatch.
Call a pro (or switch to a higher-certainty workflow) if: the floor is coated and failure risk is high; the dent involves cracks, lifting, or hollow areas; the area is structurally compromised; or you need a seamless polished finish that must match sheen and texture across adjacent concrete.
Also note: what “looks flat” may not be “safe flat.” If the dent creates a trip hazard, rolling load instability, or excessive vibration, prioritize safety and compliance over aesthetics.
Quick checklist: Dent repair readiness (scan/save)
– [ ] Confirm flooring type (concrete vs VCT/vinyl vs epoxy-coated vs tile/stone)
– [ ] Check depth and whether the substrate is affected (cracks, hollow spots, lifting)
– [ ] Look for moisture or bond failure signs (peeling, recurring soft areas)
– [ ] Clean and fully dry using product-appropriate methods
– [ ] Use a repair system designed for that specific floor type/finish
– [ ] Finish/restore the surface (polish, blend, or match texture) if needed
– [ ] Address root cause (wheels, forklift traffic, dropped loads, protective mats)
Typical Repair Approach by Commercial Floor System (Risk vs. Match)
| # | Floor system | Best-first repair focus | Repair confidence (general) | Common failure signal |
|---|---|---|---|---|
| 1 | Concrete (unpolished) | Patch + cure + re-level | ★★★★☆ | Raised edge after traffic |
| 2 | Polished concrete | Patch + blend/re-polish | ★★★☆☆ | Sheen/texture mismatch |
| 3 | VCT / resilient tile | Assess compression + replace if separated | ★★☆☆☆ | Re-dent near patch line |
| 4 | Resilient sheet (linoleum/vinyl) | Repair only if adhesion intact | ★☆☆☆☆ | Peeling at repaired perimeter |
| 5 | Epoxy-coated concrete | Remove failing coating + re-bond | ★★★☆☆ | Cracks expanding from edges |
| 6 | Ceramic tile (set in mortar) | Re-set if displaced; re-grout if stable | ★★★☆☆ | Loose tile sound when tapped |
| 7 | Natural stone (marble/granite) | Evaluate substrate; re-set cracked units | ★★☆☆☆ | Grout failure/edge chips |
Note: “Repair confidence (general)” reflects typical system behavior and common failure modes, not a guarantee for any single site condition.
FAQ
Can I fix a dent in commercial concrete with regular spackle?
Spackle isn’t designed as a structural floor repair system. For commercial concrete dents, use a floor-appropriate patch/repair compound and follow its prep/curing instructions—especially if the area must be walked on quickly.
How do I tell if the dent is only in the finish?
If the surface is dented but the surrounding area is firmly bonded (no lifting/peeling, no hollow sound, no cracks propagating), it may be finish-level. If you notice separation, soft spots, or movement, the substrate or bond layer may be compromised.
Should I re-polish after patching concrete dents?
Often, yes—especially for polished concrete—because patch compounds can cure with different texture/color. Follow the repair product system guidance for whether polishing/blending is required.
Is it better to patch or replace damaged VCT/vinyl?
If the dent is deep, the material is compressed or brittle, or the area shows separation, replacement of the affected section is frequently the cleaner long-term solution. If it’s minor and the floor remains intact, some systems allow localized repair—only with the correct products for that flooring type.
How long should I wait before reopening the area?
It depends on the repair system and cure requirements. Use the manufacturer’s instructions for re-traffic and any coating/polishing steps—don’t rely on guesswork.
Sources
– [ADD: manufacturer specs for the specific concrete patch/leveler or flooring repair product you plan to use, including surface prep, curing time, and re-traffic guidance]
– [ADD: manufacturer installation/repair instructions for the specific resilient flooring or coating system (VCT/vinyl, epoxy, etc.), including adhesion and patch/repair limitations]
– [ADD: manufacturer or trade guidance on concrete surface preparation methods appropriate for coatings/patching (e.g., surface profile expectations, cleaning agents compatibility)]
A dent in a commercial floor doesn’t have to become a recurring maintenance problem. When you match the repair method to the actual flooring system, confirm the dent isn’t caused by moisture or bond failure, and prep/finish to the requirements of the product and finish, you restore both flatness and performance—without creating a bigger issue for the next busy shift.
Frequently Asked Questions
How can I fix dents in commercial concrete floors without re-pouring?
For minor dents, start by cleaning the area thoroughly and removing any loose debris so the repair material bonds properly. You can fill shallow dents with a rapid-setting concrete patch or epoxy concrete filler, then grind and smooth to match the surrounding surface. If the dent is deeper or has exposed aggregate, use a cementitious resurfacer or two-step repair system and allow full cure before returning the floor to traffic. Always follow the product’s cure and coating guidelines, especially in commercial settings with heavy footfall.
What’s the best way to repair dents in polished concrete in a commercial facility?
Polished concrete dent repairs should preserve surface flatness and sheen, so plan for grinding and re-polishing after patching. After cleaning and profiling the dent, apply a compatible concrete filler, level it flush, and cure fully. Then grind progressively (often with diamond tooling) to blend the repair into the surrounding finish, and re-polish or re-seal to restore durability and slip resistance. This approach helps prevent visible repair spots and ensures the floor performs like the original polished surface.
Why do dents reappear after repairs in commercial floors?
Dents often come back when the underlying cause—like heavy impacts, inadequate slab thickness, poor base support, or moisture-related weaknesses—isn’t addressed. If the slab is still moving or the repair material is not compatible with the concrete, the patch can break down or delaminate. To prevent repeat damage, inspect for cracks, hollow spots, or drainage issues, and use a repair system designed for commercial traffic and the specific floor type (concrete, epoxy-coated, or sealed floors). In some cases, a structural contractor assessment is necessary to avoid recurring damage.
How do I repair dents in epoxy-coated or resin floors in a commercial space?
For epoxy-coated commercial floors, clean and degrease the damaged area, then grind to create a proper profile and remove any failing coating. Fill the dent with an epoxy repair compound or epoxy mortars designed for impact and heavy-use environments, then re-level and blend the finish. After curing, recoat with an epoxy system that matches the original thickness and chemical resistance requirements. This method restores the protective layer while reducing the risk of peeling and moisture intrusion.
Which commercial floor repair method is best for large or deep dents?
Large or deep dents typically require a more robust approach than simple patching, such as a cementitious repair mortar, polymer-modified repair system, or a full-depth removal-and-replacement section. Start by chiseling out loose or unsound concrete to reach stable material, then rebuild the area with a repair mortar engineered for thickness and structural bonding. After curing, grind, level, and match the surface finish, and apply the appropriate sealant or coating for your commercial environment. For heavy rolling traffic or industrial loads, choosing a system rated for compressive strength and abrasion resistance is critical.
📅 Last Updated: October 12, 2026 | Topic: How to fix dents in commercial floors? | Content verified for accuracy and freshness.
References
- Google Scholar Google Scholar
https://scholar.google.com/scholar?q=repairing+dents+in+commercial+concrete+floors - Google Scholar Google Scholar
https://scholar.google.com/scholar?q=repair+indentations+in+resilient+vinyl+commercial+flooring - Google Scholar Google Scholar
https://scholar.google.com/scholar?q=concrete+floor+surface+patching+and+spall+repair+methods - https://en.wikipedia.org/wiki/Concrete_repair
- https://en.wikipedia.org/wiki/Resilient_flooring
- https://www.cdc.gov/niosh/topics/slips/
- American Cement Association
https://www.cement.org/ - American Concrete Institute
https://www.concrete.org/ - https://pubmed.ncbi.nlm.nih.gov/?term=concrete+floor+repair
- Concrete – Pavement & Materials – Pavements – Federal Highway Administration
https://www.fhwa.dot.gov/pavement/concrete/