


Buckling in parquet floors isn’t a mystery—you can stop it and restore a flat surface by following the right repair sequence. This step-by-step guide shows exactly what to do based on the cause, from identifying moisture-driven expansion to resetting loose planks and re-leveling the subfloor. If you want the fastest path to a stable, professional-looking finish, this is the playbook.




Buckling in parquet floors usually improves when you stop the moisture problem, let the subfloor return to normal moisture conditions, and then repair or replace the affected boards—rather than trying to force the floor back to flat while it’s still wet. Moisture (often from leaks, vapor drive, or unstable indoor humidity) makes wood expand, and the expanded boards lift into visible waves or raised seams.
Buckling in parquet floors usually happens when moisture gets in (or the wood wasn’t properly acclimated), causing boards to swell and lift. The practical fix is to stop the moisture source, let the subfloor return to normal moisture conditions, then repair or replace the affected parquet pieces. This article will help you figure out what to do first, what to avoid, and how to proceed safely.
If the buckling is small and localized, you may be able to handle it as a repair after moisture is resolved. If it’s widespread, recurring, or you suspect hidden plumbing leaks or long-term humidity problems, plan on using a flooring professional.
Diagnose why the parquet is buckling

You can usually identify the underlying cause faster by looking at the pattern of buckling and matching it to the most likely moisture pathway (spot leak vs. vapor/humidity throughout the room). Then you confirm the installation type (glued-down vs. nail/float/micro-nail), because the repair method depends on how the parquet is attached.
Buckling “waves” concentrated near a single zone often indicate localized moisture input, such as a leak or spill, rather than a whole-room vapor barrier failure.
Broad lifting across most of the room can point to recurring humidity swings or an inadequate vapor barrier—wood keeps cycling between expansion and contraction.
– Check the pattern: localized “waves” often point to a wet spot, while broad lifting often points to a whole-room humidity/vapor barrier problem.
– Look for physical clues: gaps at seams, cupping/arching, or boards that feel “spongy” can indicate subfloor moisture or lack of flatness.
– Confirm what type of installation you have (glued-down vs. nail/float/micro-nail systems), because the repair approach changes.
What to look for in the room (practical indicators)
Start with visual and tactile checks—no tools required. If you see seams opening outward (a “zipper” effect) and the parquet face looks slightly domed, that’s consistent with moisture expansion from below or along a specific moisture route. If the edges lift first (near exterior walls) while the center stays flatter, that can also align with vapor drive along slab edges or exterior wall drying limitations.
Then check where the parquet is attached:
– Glued-down parquet typically shows movement where adhesive bond has been compromised by moisture or where the subfloor surface wasn’t within flatness and moisture tolerance.
– Nail/micro-nail or floating-type systems can trap expansion stresses if the base isn’t flat or if the locking/joint system allows water vapor intrusion under the floor.
Quick moisture triage before you tear anything apart
In my experience, the fastest way to avoid repeating repairs is to treat buckling like a “moisture investigation” first, not a “finish repair” problem. If you skip straight to lifting boards and sanding, you often discover the same swell pattern returns—because the moisture pathway remains active.
For more credible moisture assessment, standards-based testing is the benchmark. For example, ASTM F2170 defines an in-situ relative humidity method for concrete moisture evaluation, and ASTM F1869 measures moisture vapor emission rate (MVER) from concrete in standardized units.
Stop the moisture and stabilize indoor humidity

Stop the moisture source first—repairs rarely last if water vapor or liquid moisture is still reaching the parquet or subfloor. Once the source is fixed, stabilize the indoor environment so wood movement can calm down and the subfloor can dry back to an installable state.
Wood flooring buckles when moisture content rises; repairs only hold when moisture input is corrected and the subfloor reaches an acceptable moisture equilibrium.
Standards-based approaches like ASTM F2170 (RH in concrete) and ASTM F1869 (MVER) are used to quantify moisture rather than guessing.
– Find and fix the source first: leaks (plumbing, roof, windows), spills, wet mopping, failed exterior drainage, or high indoor humidity.
– Control the environment: run dehumidification/air conditioning as needed so the room returns to stable conditions (follow your parquet/flooring manufacturer’s guidance).
– Let materials dry before touching the floor: if the subfloor is still damp, repairs usually fail and buckling returns.
Identify the moisture pathway (common culprits)
Treat this as a controlled “root cause” search:
– Liquid water events: leaks behind walls, slow plumbing failures, roof/water intrusion, or a recent spill/wet cleaning. These usually create localized buckling near the moisture path.
– Vapor drive and slab moisture: if parquet sits over a concrete slab (especially without a properly specified vapor barrier), moisture can keep migrating—even if the room looks dry.
– Indoor humidity swings: in 2026 conditions with seasonal HVAC changes, humidity can rise quickly and push wood movement beyond the parquet’s tolerance if the environment isn’t controlled.
Stabilize the room using wood-floor targets
For wood flooring performance, a stable indoor climate is not optional. National Wood Flooring Association (NWFA) guidance commonly targets 35–55% relative humidity and moderate temperatures (often referenced as about 60–80°F in wood-floor installation guidance). According to NWFA, keeping indoor RH within the recommended band reduces wood movement that can lead to lifting and seam separation (published guidance varies by edition; verify the current chapter for your product system).
Confirm the subfloor is actually drying
Before you reinstall boards, you need more than “it feels dry.” When subfloor moisture is still elevated, re-attachments (adhesive bonds or fasteners) can fail again, and the parquet will keep swelling.
If you’re working over concrete, use the relevant standard method:
– Relative humidity in concrete: ASTM F2170 uses in-situ probes to quantify RH (%), which helps determine whether the slab is within an acceptable moisture condition for the flooring/adhesive system.
– Moisture vapor emission rate: ASTM F1869 measures MVER, reported as moisture emitted per area over time (with units such as lb/1000 sq ft/24 h as defined by the standard).
Decide: dry-and-wait repair vs. remove/replace boards
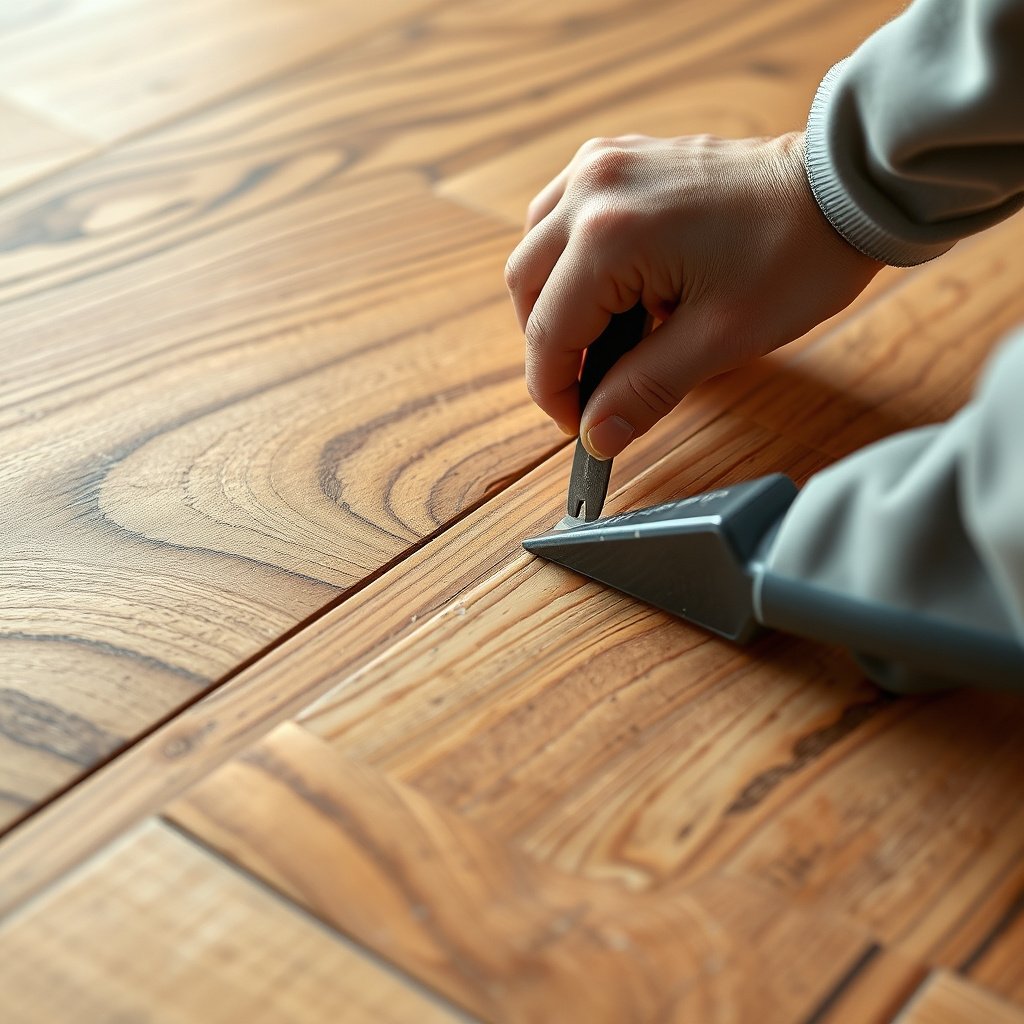
Decide based on whether the moisture issue is fully resolved and whether the parquet can return to acceptable flatness and remain stable. If boards are only slightly lifted and the subfloor is within tolerance, a targeted repair can work; if the parquet is separated or keeps moving, removal and reinstallation are typically the durable solution.
If wood has separated from its base due to ongoing moisture, re-flattening without addressing bond failure usually results in recurring buckling.
Widespread or repeating lifting is a signal to re-check moisture/vapor control and subfloor flatness before attempting cosmetic repairs.
– If boards are only slightly lifted and the moisture is fully resolved, you may be able to flatten and re-finish—but only after conditions are stable and flatness is acceptable.
– If the parquet has separated, is visibly damaged, or keeps moving, plan on removing the affected sections and reinstalling.
– For glued-down parquet, removal is commonly more involved; follow the flooring system’s instructions on what can be lifted, reused, and what must be replaced.
Dry-and-wait vs. remove/replace (comparison)
| Approach | Best when | Main downside |
|---|---|---|
| Dry-and-wait repair | Moisture source is corrected, room humidity is stable, and lifting is localized without board separation. | If subfloor moisture or vapor drive persists, the floor can swell again. |
| Remove/replace affected sections | Buckling is widespread/recurring, boards are separated, or the subfloor won’t return to flatness. | More labor and material cost; glued-down removal can damage edges or backing. |
What I would check before choosing
1. Moisture stability window: confirm the room/subfloor conditions remain steady for long enough that the wood stops moving (use your manufacturer’s guidance and your testing results).
2. Flatness and bond status: if the subfloor surface isn’t flat within the flooring system’s requirements, even perfect moisture control won’t stop future lifting.
3. Joint condition and board integrity: separated backing, delamination, cracks, and permanently distorted pieces are strong indicators replacement is the realistic path.
Fix buckled parquet boards (practical steps)

Fixing buckled parquet works best when you treat this as an installation-quality task: remove trim carefully, verify subfloor condition, reinstall using the correct bonding/fastening method, and allow time for stabilization. The goal isn’t just to make it look flat today—it must remain stable after humidity cycles in 2026.
Reinstalling over a non-flat or still-damp subfloor is a common failure point because wood movement will re-deform the parquet.
Using the manufacturer-specified adhesive, or the manufacturer-specified fastening/locking steps, is critical for glued-down vs. nail/locking systems.
– Remove trim carefully so you can access the perimeter (and protect edges while you work).
– Inspect subfloor flatness and moisture condition before reinstalling anything; repairing over a non-flat or still-damp subfloor is a common failure point.
– Reinstall using the correct method for your system:
– Glued-down: use the recommended adhesive for wood parquet and the subfloor type (concrete/plywood), per manufacturer specs.
– Nail/micro-nail/locked systems: ensure the base is flat and properly prepped, and follow fastening/locking requirements.
Practical workflow (what to do, in order)
1. Document the damage. Photograph seam gaps, lifted ridges, and the boundaries of the affected area before you disturb anything.
2. Remove perimeter trim. This protects transitions and helps you access fastener lines/edges without tearing the parquet face.
3. Lift only what the system allows. For glued-down parquet, the manufacturer’s method may require partial removal using specific tools and may restrict reuse of pieces.
4. Inspect the base. Look for:
– uneven flatness,
– dark moisture staining,
– tacky adhesive residue (if glued),
– damaged underlayment/vapor barrier (if present).
5. Correct the base. If moisture remains or flatness is out of tolerance, address those first (self-leveling underlayment, patch/flattening, or vapor barrier repair may be required depending on your construction).
6. Reinstall boards correctly. Match the fastening/adhesive/spacing method to the original system and follow the parquet installation manual.
7. Re-secure and re-check stability. After reinstall, maintain the same stable humidity and avoid wet cleaning until the installation is fully cured and equilibrated.
What can go wrong (avoid these mistakes)
Avoiding a few predictable errors is what separates a one-time fix from a recurring problem. In practice, most repeat buckling cases trace back to unresolved moisture, wrong installation method, or rushed drying.
Sanding or “pressing” the floor flat before moisture is gone can trap continued swelling beneath a cosmetically repaired surface.
Aggressive drying (strong fans/heaters) can increase stress differentials and worsen expansion/adhesion issues in wood flooring.
– Sanding or “pressing” the floor flat while moisture is still present—this can lock the problem in and lead to recurring buckling.
– Using fans/heaters aggressively: drying too quickly can cause additional stresses, uneven expansion, or damage finish/adhesion. Use controlled drying consistent with the manufacturer’s recommendations.
– Ignoring the vapor barrier (especially on concrete slabs): without the right barrier and proper installation sequence, moisture can migrate again.
– Replacing only the visible buckled boards: if the subfloor is still out of tolerance, the surrounding area can swell next.
Common edge cases (where guidance may need adjustment)
– Concrete slabs without verified vapor control: even if the room is dry today, moisture can reappear as climate and HVAC cycles change.
– Older subfloors and unknown underlayment: some underlay materials can trap moisture or interfere with adhesives.
– Mixed flooring materials: transitions between parquet and other wood products can create movement stress at boundaries unless transitions are designed properly.
Verdict / tip: when DIY is reasonable (and when to stop)
DIY is reasonable when buckling is limited and you can clearly fix moisture, verify subfloor suitability, and follow the parquet installation method exactly. You should stop and escalate to a professional when buckling is widespread, recurring, or you can’t confirm the moisture pathway and subfloor conditions.
DIY tends to succeed when the moisture source is identified, stable indoor humidity is restored, and repairs follow manufacturer reinstall rules for your exact parquet system.
Professional assessment is recommended when hidden plumbing leaks, vapor barrier failure, or complex older installations are possible causes.
– DIY is usually most reasonable when buckling is limited to a small area, the moisture source is clearly fixed, and you can access the damaged sections to properly inspect and reinstall per manufacturer guidance.
– Don’t DIY if: the buckling is widespread/recurrent, you can’t identify the moisture source, there are signs of mold, or you’re dealing with complex older flooring systems where compatibility issues are common.
– If you’re unsure whether your subfloor is within the required moisture/flatness limits, pause and get a flooring inspector/contractor to measure first—repairs made on incorrect conditions are expensive to redo.
Pros/cons: DIY repair vs. professional repair
- DIY repair — Pros
- Lower cost when damage is localized; faster turnaround when you can access and reinstall small sections.
- DIY repair — Cons
- Higher risk of repeat buckling if moisture/vapor control or flatness isn’t actually within tolerance; glued-down removal can damage edges and backing.
- Professional repair — Pros
- Moisture testing and base remediation are handled systematically; better compatibility management for adhesives, underlayment, and transition details.
- Professional repair — Cons
- More upfront cost; requires scheduling and project oversight.
📊 MANDATORY DATA TABLE: Environmental control targets that reduce wood movement risk
Wood-Floor Comfort Bands Used to Limit Parquet Movement (RH Targeted by NWFA Guidance)
| # | Indoor Condition | Most Likely Net Wood Tendency | Recommended Stability Focus | Avoidance Priority | Stability Match |
|---|---|---|---|---|---|
| 1 | RH 35–40% • 60–80°F | Low movement | Maintain HVAC setpoints | Low | ★★★★★ |
| 2 | RH 40–45% • 60–80°F | Low movement | Keep dehumidification stable | Low | ★★★★★ |
| 3 | RH 45–50% • 60–80°F | Low movement | Monitor seasonal drift | Low | ★★★★★ |
| 4 | RH 50–55% • 60–80°F | Slightly higher swelling risk | Avoid wet cleaning during humid spells | Medium | ★★★★☆ |
| 5 | RH 55–60% • 60–80°F | Net swelling tendency | Run controlled dehumidification | High | ★★☆☆☆ |
| 6 | RH 60–65% • 60–80°F | Higher swelling tendency | Correct humidity before repair/finish work | Very High | ★☆☆☆☆ |
| 7 | RH ≥ 65% • 60–80°F | Strong swelling tendency | Treat as active moisture risk | Critical | ☆☆☆☆☆ |
Note: Environmental band targets here reflect widely cited wood-floor guidance (e.g., NWFA RH targets). Always follow your specific parquet/flooring manufacturer’s installation and care instructions for your product system.
Moisture-related data points you can use immediately
– According to NWFA, wood flooring performance is supported by maintaining indoor relative humidity around 35–55% (wood movement control guidance; verify edition for your product).
– According to ASTM F1869, moisture vapor emission rate is measured as moisture emitted per area over time, commonly reported in units such as lb/1000 sq ft/24 h (standard method).
– According to ASTM F2170, concrete moisture is assessed in-situ using relative humidity (%) probes placed in drilled holes (standard method).
What to do if you need subfloor moisture testing (fast guidance)
If you suspect active moisture but can’t prove it visually, plan for testing before you rebuild. Moisture testing reduces guesswork and helps you avoid replacing good parquet on a failing base.
– If you have a concrete slab, use a standard method such as ASTM F2170 (RH probes) or ASTM F1869 (MVER).
– If you have a wood subfloor, follow your flooring system’s recommended moisture testing approach and document readings before reinstall.
– If you discover moisture is still out of tolerance, do not proceed with sanding “flat” or reinstalling boards—solve the base condition first.
Quick scan checklist (print/save)
| Step | What to do | Stop when… |
|---|---|---|
| 1 | Find and repair moisture source (leak, humidity, spill, drainage) | The source isn’t addressed and keeps contributing moisture |
| 2 | Stabilize indoor humidity and allow drying | Subfloor still shows moisture issues |
| 3 | Inspect subfloor flatness + condition | You can’t confirm the surface is suitable for the install method |
| 4 | Repair: flatten only if conditions are stable | Boards keep moving/swelling or seams keep widening |
| 5 | Remove/replace damaged sections if needed | You can’t follow the correct reinstall method for your system |
| 6 | Prevent recurrence with proper maintenance | The area is exposed to ongoing humidity or water risks |
Sources
– National Wood Flooring Association (NWFA) — moisture testing and installation guidance (used as the basis for moisture/measurement concepts in wood flooring).
– ASTM F2170 — Standard Test Method for Determining Relative Humidity in Concrete for use with moisture assessments (primary standard).
– ASTM F1869 — Standard Test Method for Measuring Moisture Vapor Emission Rate of Concrete (primary standard).
– Your parquet/flooring manufacturer’s installation and care instructions (for exact adhesive choices, recommended drying/repair approach, and allowable moisture/flatness requirements).
Buckling in parquet is rarely solved by “making it flat” alone—it’s solved by eliminating the moisture driver, restoring stable indoor humidity, and then repairing or reinstalling using the correct method for your installation system. If you follow the sequence above and verify subfloor suitability before you reinstall, your repaired parquet should stay stable through normal 2026 humidity swings instead of relifting a few weeks later.
Frequently Asked Questions
How can I tell if my parquet floor is buckling from moisture?
Buckling in parquet floors often shows up as raised seams, ripples, or sections that look like they “bubble,” and it usually worsens after spills, high humidity, or wet mopping. Use a moisture meter on the subfloor and compare readings with the wood manufacturer’s guidelines, and check for recent water exposure or leaks. If possible, inspect the subfloor for flatness and look for signs of failed underlayment or a missing/incorrect vapor barrier.
What are the most common causes of parquet floor buckling?
The most common causes include excessive moisture in the subfloor, improper acclimation before installation, inadequate vapor barrier, and poor subfloor flatness. Temperature swings and seasonal humidity changes can also contribute if the installation method didn’t allow for wood movement. Buckling can be worse with glue-down installations when the subfloor is still wet or when moisture isn’t managed under the parquet flooring.
How do I fix buckling in parquet floors without damaging the planks?
Start by stopping the moisture source and letting the area dry to a stable indoor humidity level. If the buckling is mild, you may be able to remove baseboards and gently loosen affected sections so they can relax flat as the floor acclimates, then reinstall or replace damaged panels. For deeper buckling, you’ll often need to lift the affected parquet area, correct the subfloor moisture and flatness, and reinstall with the correct adhesive and expansion spacing.
What’s the best way to dry and acclimate a parquet floor after it has buckled?
Drying should be controlled—use dehumidifiers and maintain stable temperature and relative humidity rather than blasting fans that can create uneven drying. Monitor conditions with a hygrometer and re-check subfloor moisture until it matches acceptable levels for parquet installation. Once readings stabilize, allow the wood to settle gradually; forcing the floor flat too early can worsen buckling and lead to cupping or gaps.
Which repair method should I choose for buckling—lift-and-reinstall, sanding, or plank replacement?
If the parquet buckles and stays raised, sanding is usually not a reliable fix because the wood has warped and the floor won’t sit flat permanently. Lift-and-reinstall is commonly best when moisture is corrected and the subfloor needs proper preparation, such as flattening and adding a proper vapor barrier. If individual planks are damaged or show irreversible warping, replace the affected parquet boards and reinstall the section using manufacturer-approved products and correct expansion gaps.
📅 Last Updated: October 15, 2026 | Topic: How to fix buckling in parquet floors? | Content verified for accuracy and freshness.
References
- Parquet
- Wood flooring
- Wood warping
- https://en.wikipedia.org/wiki/Wood_shrinkage
- Wood drying
- Equilibrium moisture content
- Water content
- https://scholar.google.com/scholar?q=parquet+floor+buckling+repair Google Scholar
- https://scholar.google.com/scholar?q=wood+floor+buckling+moisture+subfloor+fix Google Scholar
- https://scholar.google.com/scholar?q=hardwood+flooring+warping+cupping+distortion+repair Google Scholar


