
Estimating the cost of polyurethane floors comes down to a short list of inputs—installed square footage, thickness (and coating system), surface prep, and application complexity. This guide shows you exactly how to translate those variables into a realistic price range before you buy materials or book installers. You’ll also learn what typically drives the final number up or down, so your estimate matches the job you’re actually getting.




Polyurethane floor costs are best estimated by multiplying your total square footage by the installed cost per square meter/foot, then adding line-item extras like surface prep, primers, coatings, and finish/coat count. If you don’t know the exact coat system yet, start with a “per m²/ft² range” for labor + materials and refine it once you confirm substrate condition and the intended use (garage, commercial, chemical exposure, etc.). In this guide, you’ll learn a practical way to build an estimate so you can compare quotes apples-to-apples.
If you’re budgeting for a polyurethane floor for a home garage, retail space, warehouse, or workshop, this is for you—especially if you’re trying to understand why two quotes differ. It’s also useful when you’re working with contractors and want to sanity-check pricing based on what drives cost.
What “cost” really includes (so estimates aren’t misleading)
Most budget surprises come from one thing: the quote’s “per square-foot” rate is only comparable if it includes the same coating system and the same level of preparation. Before you compare numbers, make sure you’re comparing materials + labor + details (primer, number of coats, sealer/topcoat, and surface prep scope) rather than only the install surface area.
A polyurethane “installed cost” quote is only apples-to-apples when it specifies the primer + polyurethane coat count + topcoat/sealer, not just a price per square foot.
Surface prep is typically the largest cost driver because adhesion and coating longevity depend on cleaning, profiling, and remediation—not the number of coats alone.
Exclusions (cracks, repairs, moisture mitigation, and edge details) can be priced separately, so “cheap” bids can become expensive after scoping.
– Polyurethane “floor cost” usually bundles materials + labor, and often assumes a specific coating system (primer + multiple coats + sealer/topcoat).
– Surface preparation is frequently the biggest variable—cracked/peeling concrete, uneven slabs, moisture issues, or contaminated surfaces can add labor and specialized steps.
– Most installers also price exclusions differently (repairs, grinding/decontamination, crack bridging, cove/base details, disposal), so ask what’s included line-by-line.
A quick framing: what you should request in writing
When you ask for an estimate, request a scope sheet that lists:
1) Surface prep method (e.g., wash/decontaminate, grind/shot blast, vacuuming, profile level targets per spec)
2) Primer (type and coverage)
3) Polyurethane coats (number of coats and whether they’re broadcast/filled)
4) Topcoat/sealer (and whether it’s UV-stable, chemical-resistant, or anti-slip)
5) Exclusions (moisture mitigation, crack repair, patching, transitions, drainage channels)
This prevents the common “per-square-foot rate mismatch,” where two bidders both quote $X/ft² but assume different prep and different finish systems.
Step 1: Measure square footage and note geometry
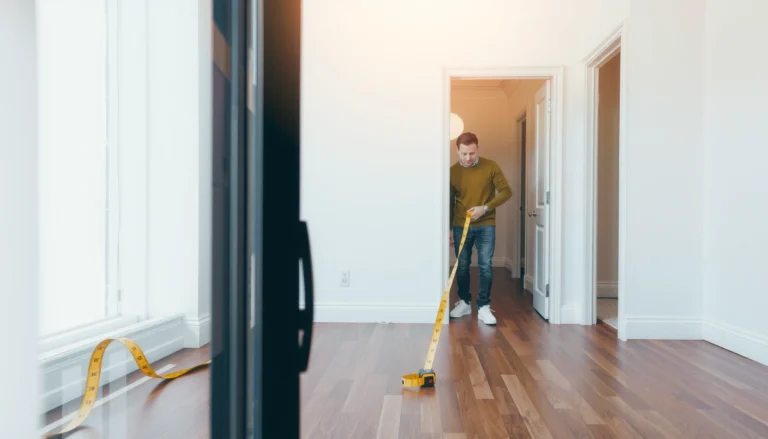
Start by measuring the actual coated area, then add the “geometry extras” that installers often bill separately. Even a perfect $/ft² rate becomes misleading when quotes calculate area differently (gross vs net, or floor only vs including transitions and edge details).
Measure length × width for the covered footprint, then add separate allowances for columns, pits, drains, and stair landings so the estimate matches contractor takeoffs.
Ask whether the contractor prices on net floor area (excluding some edges) or gross area (including boundaries and specified transitions).
If the space has ramps or thresholds, you need the same “edge/transition” assumptions in every quote.
– Calculate total covered area (length × width) and add any expansion/edge details like around columns, pits, drains, or stair landings.
– Confirm whether cost is quoted per m²/ft² of floor only, or also includes perimeter edging, wall tie-ins, and transitions (especially for ramps or door thresholds).
– If the space has odd shapes, split it into rectangles and total them so your estimate matches how contractors measure.
Unit conversions that prevent calculator errors
Contractors may quote in m² while homeowners measure in ft². A simple conversion mistake can create a “10%+” disagreement in budgets.
Conversion factors used to compare polyurethane floor quotes (exact constants)
| # | Estimator input | Equivalent | How to use in a quote | Impact |
|---|---|---|---|---|
| 1 | 1 m² | = 10.7639 ft² | Convert contractor m² to your ft² area | ★ ★ ★ ★ ★ |
| 2 | 1 ft² | = 0.092903 m² | Convert your ft² to contractor m² | ★ ★ ★ ★ ★ |
| 3 | 1 US gal | = 3.78541 L | Convert material quantity if coverage is given by liters | ★ ★ ★ ★ ★ |
| 4 | 1 L | = 0.264172 US gal | Convert liters to US gallons for estimating “per gallon” pricing | ★ ★ ★ ★ ☆ |
| 5 | 1 mil | = 0.001 inch (0.0254 mm) | Convert dry-film thickness targets across specs | ★ ★ ★ ★ ★ |
| 6 | 1 mm | = 39.3701 mil | Convert metric film thickness targets to mil if your contractor uses inches | ★ ★ ★ ★ ☆ |
| 7 | 1 mL | = 0.001 L | Convert small additive quantities if a system spec references mL | ★ ★ ★ ★ ☆ |
(These are exact unit constants used in estimating; they won’t solve prep scope differences, but they remove one major source of “quote math” disagreement.)
Step 2: Choose the polyurethane system and coat count
Different systems (standard vs chemical-resistant, thicker build vs thinner finish) can change both material usage and labor time—so you must treat “system selection” as part of the cost estimate, not an afterthought. Coat count is especially important because each additional coat requires consistent surface conditions, recoat windows, and curing time.
Coat count directly affects total material consumption and recoat labor because each layer has its own curing and recoat window requirements.
If two quotes don’t match primer type, polyurethane coat count, and topcoat/sealer, the per-square-foot number isn’t comparable.
For chemical exposure, system selection often matters more than increasing thickness alone.
– Different systems (e.g., “standard” vs chemical-resistant, thicker build vs thinner finish) change material usage and labor time, which changes your installed cost.
– Coat count matters: more coats (and/or a thicker build) typically increases material quantities and total working time.
– If you’re unsure which system you need, base your selection on the expected wear and exposures (foot traffic vs vehicles, water/chemicals, slip resistance needs).
Coat count: how it changes the estimate model
A practical estimating workflow is:
– Build a “baseline system” (primer + [X] polyurethane coats + topcoat/sealer)
– Multiply expected materials per m²/ft² by area
– Add labor time that scales with:
– surface prep effort
– application method (roller/squeegee/broadcast)
– drying/curing windows
If you’re comparing contractor bids, ask them to list the system by name (or at least by primer + polyurethane product line + topcoat type) so you can confirm coat count and compatibility.
Step 3: Estimate surface prep and substrate condition
Surface prep is where estimates win or fail. Concrete that looks “fine” can still be contaminated (oils, curing compounds, dust) or out of spec for moisture and profile—issues that can undermine coating adhesion even if the installation is done correctly.
Most polyurethane failures trace back to prep and substrate conditions (contamination, insufficient profile, or moisture), not to the polyurethane “mix” during installation.
Ask whether prep is priced separately—because if it’s not, the quote may assume ideal concrete that you may not have.
Moisture testing documentation matters because mitigation steps should be aligned to the system’s published requirements.
– Concrete condition often dictates the scope: cleaning/decontamination, grinding/shot blasting, patching, crack repair, and any moisture mitigation.
– Ask whether prep is priced as a separate line item or included in the per-square-foot rate—this is where estimates most often diverge.
– If moisture testing or repairs are recommended, get that documented as part of the estimate so you understand what’s being mitigated and why.
Substrate items that change prep scope (and cost)
Expect different pricing if the slab has:
– Cracks, spalls, or delamination requiring patching or crack bridging
– Smooth/weak surface requiring grinding/shot blasting to create profile
– Contaminants (paint overspray, oil, sealers) requiring decontamination
– Moisture vapor transmission or dampness requiring mitigation (as specified by the coating manufacturer)
If you can, request photos of previous similar jobs and the contractor’s prep verification steps (what they measure and how they decide the coating system is appropriate).
Step 4: Add labor factors and schedule constraints
Labor cost rises when the job gets more complex: more prep steps, more coats, tighter recoat timing, special edge conditions, and access constraints. Even with identical materials, contractors may price schedule risk differently—especially for multi-coat systems where downtime affects your site.
Recoat windows are schedule-critical: if a contractor can’t hit timing targets, they may require additional labor or rescheduling cost.
Containment, ventilation, protection of adjacent areas, and debris handling can add cost even when the floor area stays the same.
Small projects can carry minimum mobilization charges, so confirm how those fees scale with square footage.
– Labor time scales with complexity: surface prep effort, number of coats, drying/curing windows between coats, and whether recoat timing compresses the schedule.
– Access and containment can add cost—moving items, protecting adjacent areas, ventilation needs, and debris handling/disposal.
– If the contractor lists “minimum mobilization” charges, confirm how they apply (small areas can feel disproportionately expensive).
A note on “dry time” vs “recoat readiness”
Dry-to-touch time and recoat readiness are not always the same. The correct guide is the polyurethane system’s installation instructions (recoat window temperature/humidity dependent). If you don’t have those instructions yet, ask the contractor to reference the manufacturer’s spec.
What can go wrong (common mistakes and edge cases)
The easiest way to get burned is to compare “per square foot” numbers without matching the scope: coat count, primer type, topcoat/sealer, and prep details. Another frequent issue is assuming that surface prep will be “the same” across spaces when concrete conditions are clearly different.
If one bid includes topcoat/sealer and another stops at base polyurethane, the cheaper bid can end up less durable or less chemical resistant.
If one contractor assumes “paint-over” and another assumes profiling and contamination removal, adhesion and lifecycle cost will diverge.
Expansion joints, drains, and transitions are where labor spikes because they require detail work beyond flat-floor coating.
– Comparing quotes without confirming coat count, primer type, and whether finish/sealer is included can make one bid look cheaper but end up thicker/more durable—or vice versa.
– Underestimating prep due to “paint-over” assumptions: if the slab is dusty, contaminated, or moisture-affected, coating performance can suffer even if the application is done correctly.
– Ignoring details that change labor: drains, expansion joints, flooring transitions, coves/footings, and traction/anti-slip requirements.
– Using the wrong estimate basis: some bids quote on gross area; others quote on net floor area after exclusions.
Prep-scope mismatch: pros/cons you can use to evaluate quotes
- Option A: “Assume ideal concrete” pricing
- Pros: Lower initial number if your slab truly meets requirements.
Cons: May require change orders after inspection for grinding, crack repair, or moisture mitigation. - Option B: “Documented prep scope” pricing
- Pros: More predictable budget; easier to compare contractors.
Cons: Higher upfront number if you later discover prep wasn’t needed.
Verdict / tip (how to get a quote you can trust)
Use a two-pass approach: first estimate using square footage × a realistic installed rate range, then tighten it after you confirm the prep scope and the exact polyurethane system (primer + coats + topcoat/sealer). The downside is that this method can’t perfectly predict your final cost until substrate condition and the specified coating system are confirmed—so build in a contingency for prep surprises.
A quote is trustworthy when it matches the same coating spec (primer + polyurethane coats + topcoat/sealer) and the same prep steps, in writing.
If you can’t access the slab for inspection/testing or a contractor won’t clarify inclusions/exclusions, you can’t reconcile the estimate to real scope.
Your best negotiating position is a line-item scope checklist that forces “like-for-like” comparisons.
– Downsides: this method can’t perfectly predict your final cost until substrate condition and the specified coating system are confirmed—so build in a contingency for prep surprises.
– Skip this approach (or at least pause) if you don’t have clear access for inspection/testing or if the contractor refuses to clarify what’s included; you’ll be unable to reconcile the estimate to real scope.
Quick scan checklist (for your next quote)
– [ ] Total square footage measured (and geometry counted)
– [ ] Exact system specified (primer + polyurethane coats + topcoat/sealer)
– [ ] Coat count and thickness/buildup expectation confirmed ([ADD: exact spec if provided])
– [ ] Surface prep scope listed (cleaning, grinding/shot blasting, patching, crack repair)
– [ ] Moisture/contamination testing or mitigation included if needed ([ADD: test method/source if provided])
– [ ] Line items for edges, details, drains, and transitions clarified
– [ ] Cure/recoat timing constraints and how they affect labor scheduling explained
– [ ] Disposal/cleanup, protection of adjacent areas, and exclusions spelled out
FAQ
How do I estimate polyurethane floor cost per square foot or per square meter?
Start with square footage, then apply the contractor’s installed rate that includes materials + labor for the specified system. Adjust upward for additional prep, repairs, and any extra details like coves, drains, and anti-slip topcoats.
Why does polyurethane floor pricing vary so much between contractors?
Most differences come from (1) surface preparation scope, (2) the specified primer/topcoat/coats, (3) inclusion/exclusion of repairs and testing, and (4) labor complexity from the space layout.
Should I budget for moisture testing and repairs?
If the contractor recommends it based on substrate condition, treat it as part of the real scope—not optional—because moisture issues can affect coating performance. [ADD: source for recommended moisture testing method if you have one.]
Is it cheaper to “coat over” old concrete?
Sometimes contractors propose coatings over existing surfaces, but the total cost may increase later if the prep needs change or adhesion fails. Ask for the prep method and performance reasoning behind their approach.
Sources
– [ADD: manufacturer spec sheets for the specific polyurethane coating system you’re considering—primer compatibility, recommended coat count/thickness, and surface prep requirements]
– [ADD: official substrate preparation guidance from the coating manufacturer (e.g., concrete profile/cleanliness standards)]
– [ADD: applicable industry standard reference from a named organization (e.g., surface prep standards for coatings from ISO/ASTM or the relevant coatings association)—include the exact document name when available]
[ADD: If you share the room size (square footage), current slab condition, and the coating type (general-purpose vs chemical-resistant vs anti-slip), we can turn this layout into a more precise, quote-comparison estimate.]
A reliable polyurethane floor estimate is less about finding a single “right” price and more about building an accurate scope: measure correctly, match the coating system and coat count, and itemize surface prep and exclusions. When you compare quotes using the same assumptions, you can spot whether differences reflect real engineering and risk management—or just an incomplete scope that could cost you later.
Frequently Asked Questions
What factors affect the total cost of polyurethane floors?
The biggest cost drivers are the floor area, surface condition (existing concrete cracks, moisture, and contamination), and the polyurethane system you choose (e.g., 1K vs 2K coatings, self-leveling vs trowel-applied). Labor and preparation typically make up a large portion of the polyurethane floor cost because grinding, filling, and priming are essential for adhesion and long-term performance. Environmental needs like humidity control, temperature requirements, and topcoat/UV protection can also increase the estimate.
How can I estimate the cost per square foot for polyurethane flooring?
Start by calculating your total square footage and then get unit pricing for each layer: primer, base coat, broadcast or chip/aggregate (if used), and topcoat. Multiply the required material coverage rate (sq ft per gallon or per kit) by the number of coats to estimate materials, and add waste (commonly 5–15%) for realistic polyurethane floor pricing. Then estimate labor by including prep time, mixing/curing expectations, and any recoat scheduling, since polyurethane coatings are often priced by labor hours or installed sq ft.
How do surface preparation and substrate condition change the estimate for polyurethane floors?
If the concrete is uneven, cracked, or has weak laitance, the installer may need grinding, mechanical scarification, patching, and possibly moisture mitigation before polyurethane flooring can be applied. These prep steps increase labor and sometimes add extra primer or leveling products, which directly affects your total polyurethane floor installation cost. Asking for a moisture test and an on-site assessment helps prevent underestimating prep requirements and avoids costly rework later.
Which polyurethane flooring thickness and system should I use to balance cost and durability?
In general, thicker or multi-layer polyurethane systems (such as self-leveling polyurethane or polyurethane mortar systems) cost more upfront but may provide better impact resistance, chemical resistance, and wear performance. For light-duty areas, a thinner polyurethane coating with the right primer and topcoat can be cost-effective, while warehouses, garages, or chemical exposure zones often justify higher system build. Choose based on traffic type, expected abrasion, and chemical exposure so you don’t pay for unnecessary thickness—or risk premature failure by choosing too thin.
Why do quotes for polyurethane floors vary so much, and what should be included?
Quotes vary because coverage rates, coating specifications, and preparation requirements differ between installers and projects. A complete estimate should itemize primer, base coat(s), any aggregate or anti-slip additives, topcoat (including UV protection if outdoor), floor sealants, and surface prep methods like grinding and crack repair. Confirm whether the quoted price includes testing (e.g., moisture conditions), batching/mixing requirements for 2K systems, curing times, and warranty terms—these details strongly influence the final polyurethane flooring cost.
📅 Last Updated: October 11, 2026 | Topic: How to estimate the cost of polyurethane floors? | Content verified for accuracy and freshness.
References
- Google Scholar Google Scholar
https://scholar.google.com/scholar?q=polyurethane+flooring+cost+estimate - Google Scholar Google Scholar
https://scholar.google.com/scholar?q=polyurethane+floor+coatings+life+cycle+cost - Google Scholar Google Scholar
https://scholar.google.com/scholar?q=cost+model+polyurethane+coating+flooring+installation+surface+preparation - https://www.nist.gov/publications/handbook-135-life-cycle-costing
- WBDG
https://www.wbdg.org/guide/life-cycle-cost-analysis - https://www.epa.gov/sustainability/learn-about-life-cycle-assessment-lca
- https://www.fhwa.dot.gov/policyinformation/if1126/
- https://www.energy.gov/eere/buildings/downloads/life-cycle-cost-analysis-building-systems-guide
- https://www.usace.army.mil/Resources/Engineering-and-Construction/
- https://www.gao.gov/products/gao-18-284