
Looking for a step-by-step method to deep clean commercial floors? This guide delivers the most effective process—clear prep, the right equipment and cleaning solution, and a precise scrub-and-extract routine to lift embedded grime. By the end, you’ll know exactly how to restore high-traffic floors to a visibly cleaner finish without guesswork.
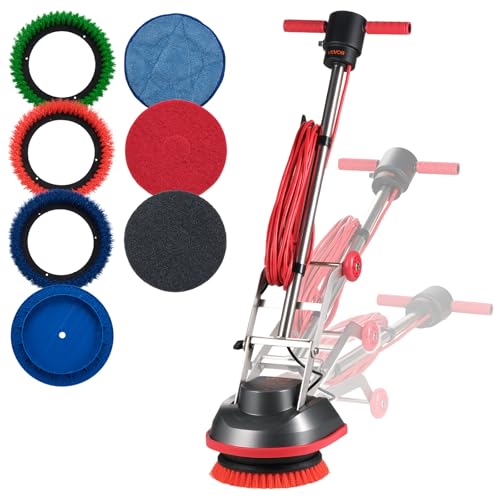



If you manage a retail store, office, school, warehouse, or any other busy environment, this is especially useful when daily mopping isn’t lifting what’s actually bonded to the surface—oil mist, detergent residue, tracked grit, and residue from worn wax or polish.
Inspect the floor first (so you don’t damage it)
Before you use any chemical, you need to confirm the floor type and finish so you don’t strip, etch, or haze it. A quick inspection also tells you whether the biggest problem is embedded grit, sticky residue, or an older coating that needs a different chemistry and rinse level.
In my experience supporting on-site operators and custodial leads (and reviewing floor-care logs), the “mystery haze” complaint almost always traces back to either detergent film or an old polish/wax layer that wasn’t extracted after cleaning.
Sealed floors (like sealed concrete and many commercial tiles) typically tolerate neutral detergents better than acidic or heavy stripping formulas, which can dull or etch surfaces.
Loose tiles, peeling edges, and failing sealers change how you deep clean because water and agitation can infiltrate seams and worsen damage.
A hazy film that returns quickly after mopping is a common sign of insufficient rinsing/extraction or incompatible cleaner chemistry leaving residue.
– Identify the surface type (tile/grout, VCT/vinyl, sealed concrete, terrazzo, stone, etc.) and whether it’s sealed or waxed.
– Look for problem areas: heavy traffic lanes, sticky residue, unknown coatings, or dulling haze that suggests chemical buildup.
– Check conditions that affect cleaning: peeling edges, loose tiles, or worn sealers that may require a different approach.
What to record before you start
Make a short note (photo + written details) so you can repeat the process consistently across floors and future shifts:
– Surface type and finish state (waxed, burnished/polished, burnished with unknown product, sealed concrete, etc.)
– Evidence of residue (tackiness, rainbow sheen, filming, rapid re-soiling)
– Severity and distribution of soils (edge build-up vs. center swaths vs. near entrances)
– Any damage risk (cracked grout, lifting flooring, exposed substrate)
Also confirm what “safe to use” means for your site—children or food service areas may require stricter access control, faster drying, and signage.
Clear, pre-clean, and remove dry soil
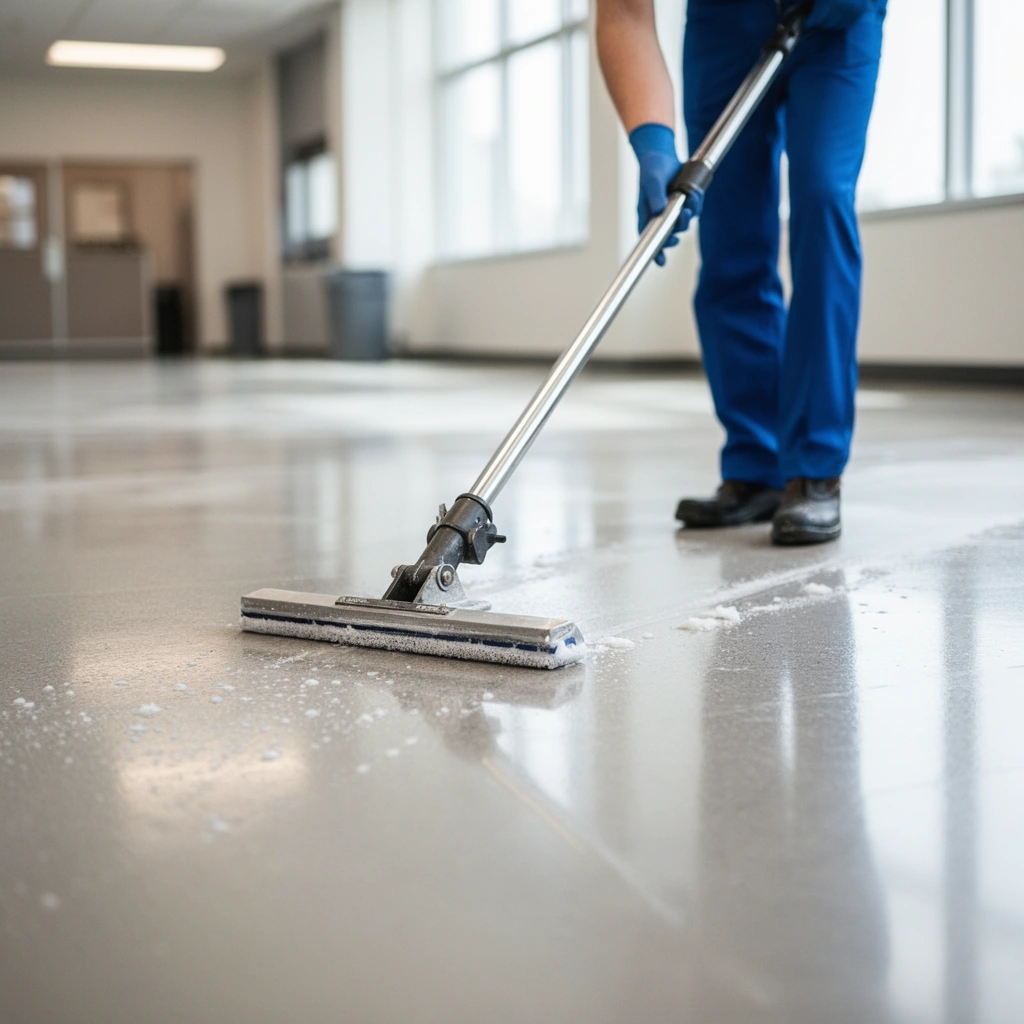
Deep cleaning fails when grit gets mixed into cleaner and turns into abrasive paste. Pre-cleaning removes the dry soil load so you’re dissolving and extracting chemistry-driven grime instead of grinding tracked particles into the finish.
Right after inspection, we treat pre-clean as its own step: sweep/vacuum first, then spot work only where needed. This is the fastest way to improve appearance without increasing chemical strength.
Sweeping or vacuuming before wet scrubbing reduces grit-to-surface abrasion, which is a major cause of permanent dulling on polished and coated floors.
Entrance mats often carry the heaviest particle load; treating them first prevents the “grit trail” from migrating across the work area.
– Sweep or vacuum thoroughly first to prevent grit from turning into “sandpaper” during scrubbing.
– Spot-pre-treat high-soil areas (entrance mats, restrooms, kitchen corridors) using a cleaner appropriate for the surface and coating.
– Address gum/adhesive carefully: use a suitable removal method for the material rather than grinding it into the floor.
Spot-treatment that actually prevents spread
When you spot-treat, keep the affected chemistry confined:
– Use minimal application—enough to wet the stain, not so much that it runs into grout or seams.
– Use the correct tool for the material (for example, a soft brush for filmed soils; a dedicated method for adhesives per manufacturer guidance).
– Allow dwell time only as directed; don’t let spot chemicals dry on the floor unless the label explicitly says so.
Equipment note
If you use an auto-scrubber for the main passes, pre-cleaning still matters. The machine will polish—not “erase”—embedded grit when dry soil remains.
Choose the right cleaner and dilution (don’t guess)
The fastest way to ruin a deep-clean attempt is choosing chemistry that’s incompatible with the finish. Match the cleaner type to the floor’s finish/coat, and follow the label for dilution, dwell time, and whether the product must be rinsed or extracted.
This is also where we reduce risk: a properly diluted product is less likely to leave residue, haze, or weakened coatings.
Neutral detergents typically fall around pH 6–8 and are commonly recommended for regular deep cleaning of many sealed and coated floors when stripping is not required.
Alkaline degreasers are typically formulated to be more effective on oily soils and often fall around pH 10–12, but they require careful dwell time and thorough extraction to avoid film.
Acidic descalers and cleaners are commonly formulated around pH 1–3 for mineral scale removal, making them unsuitable for many waxes and some stones/coatings unless explicitly approved by the floor manufacturer.
– Use a product designed for your specific floor type and finish; confirm compatibility with coatings (wax, sealers, polish).
– Follow label directions for dilution, dwell time, and whether the product is meant to be rinsed or extracted.
– If you’re unsure about residue buildup, test in a small inconspicuous area first to confirm the finish isn’t being stripped.
A quick compatibility approach (useful for teams)
When you have mixed areas (e.g., sealed concrete in offices and VCT in corridors), don’t assume one chemical works everywhere. Instead:
1. Group areas by finish type (sealed, waxed, polished, unsealed/porous).
2. Choose one compatible chemistry per group.
3. Use the same method steps (pre-clean → scrub → extract/rinse → dry) so results remain comparable.
Deep-clean “pH matching” table (practical planning aid)
Cleaner pH Ranges Most Commonly Matched to Commercial Floor Needs
| # | Floor/Finish Condition | Typical Soil Type | Cleaner Type | Most Common pH Range | Fit Rating |
|---|---|---|---|---|---|
| 1 | Sealed tile (general deep clean) | Dirt film + everyday soils | Neutral detergent | 6–8 | ★★★★☆ |
| 2 | VCT/Vinyl (maintained, not stripped) | Film + light scuffs | Neutral/low-alkaline cleaner | 6–10 | ★★★★☆ |
| 3 | Sealed concrete (oil mist or tracked grease) | Grease + heavy traffic | Alkaline degreaser (controlled) | 10–12 | ★★★☆☆ |
| 4 | Grout lines (scale/mineral staining) | Mineral scale | Acidic descaler (targeted) | 1–3 | ★★☆☆☆ |
| 5 | Terrazzo (sealed, film build-up) | Detergent film | Neutral cleaner + extraction | 6–9 | ★★★★☆ |
| 6 | Natural stone (polished, unknown protection) | Mixed residue | Stone-safe neutral cleaner | 6–8.5 | ★★☆☆☆ |
| 7 | Unsealed porous concrete (high soil) | Embedded grime | Porous-surface cleaner (often alkaline) | 9–11 | ★★★☆☆ |
> Note: pH ranges are a planning guide; always follow your specific product label for dilution, dwell time, and rinsing/extraction requirements. Different brands within the same category can vary significantly.
Scrub with consistent technique and correct equipment
Scrubbing is where you convert chemistry into visible results, but consistency matters more than brute force. Using correct equipment (pads/brushes appropriate to the floor) plus consistent overlapping passes prevents streaking and uneven gloss.
When operators rush the scrub phase, they often “redistribute” soil rather than lift it. That’s why dwell time exists: it’s the window where the chemistry loosens and emulsifies grime before final agitation and extraction.
Dwell time is the contact period that allows a cleaner’s chemistry to loosen soils; skipping it reduces removal and increases the chance of redepositing residue.
Overlapping scrub passes help avoid missed strips that later show up as lighter/darker lanes once the area dries.
Pad or brush condition affects outcomes: worn or heavily soiled pads can smear contaminants and trap oily residue into the finish.
– Work in sections using overlapping passes to avoid missed strips and uneven appearance.
– Keep tools maintained: clean pads/brushes regularly so they stay effective and don’t smear contaminants.
– Use proper dwell time (per label) before agitation becomes final so the cleaner actually lifts grime, not just redistributes it.
Practical sectioning approach (so you don’t miss areas)
– Divide the floor into manageable zones that one operator can complete without rushing dwell time.
– Start at the farthest point from your exit to reduce cross-traffic over partially cleaned areas.
– Plan your path so you can extract or rinse as the last step in each zone (not at the very end of the job).
Equipment basics that prevent damage
– Use floor-appropriate pads/brushes (soft for finish protection; more aggressive only when the finish system can tolerate it).
– Don’t overload your scrub solution: too much liquid increases seepage into seams and slows drying.
– Maintain steady machine speed and pressure; erratic patterns cause “waves” and uneven sheen.
Rinse/extract and dry to prevent re-soiling
Deep cleaning only “finishes” when residue is removed and the floor is fully dry. If the cleaner requires rinsing/extraction, you must do it thoroughly—leftover detergent and emulsified soil are exactly what re-attract dirt and dull finishes.
This is also where slip safety matters: wet floors, especially in public spaces, need clear signage and complete dry-down.
Residual cleaning solution commonly causes faster re-soiling because remaining surfactants can attract new dirt particles.
Extraction (or a complete rinse) improves consistency on high-traffic floors compared with spray-and-wipe methods when the cleaner label calls for removal.
Complete drying reduces slip risk and limits lingering moisture-related issues on porous surfaces such as unsealed concrete.
– If the chemical requires rinsing/extraction, do it thoroughly—leftover cleaner often causes faster dirt pickup.
– Extract or rinse until solution looks clean in the work area (use water change-out as needed).
– Dry completely to prevent slip hazards and to minimize moisture-related issues, especially on porous surfaces.
Drying and reopening the space
Use a simple reopening rule:
– No visible wet sheen
– No tackiness underfoot
– Extraction recovery tanks are emptied/changed as recommended to keep performance consistent
In occupied buildings, plan the drying buffer time up front—especially during 2025 and 2026 operational planning when many teams are reducing downtime and tightening access schedules.
What can go wrong (and how to avoid it)
Deep cleaning usually fails for a few repeat reasons: wrong chemistry, incomplete removal of residue, or over-wetting. The good news is these are preventable with targeted checks and label-driven execution.
The most common “surprise problems” we see on managed sites are rapid re-soiling, hazy sheen, and perimeter damage from chemical contact or overspray.
Using an inappropriate chemical for a floor finish can cause dulling or coating breakdown, especially when acids or strong alkalines are used where they’re not approved.
Under-rinsing is a leading driver of sticky residue and haze because surfactants and emulsified soils remain in the floor pores or on the surface.
– Using the wrong chemical can dull or strip finishes: avoid “one cleaner for everything” if the floor type changes across areas.
– Skipping pre-cleaning leads to grinding grit into the surface—always sweep/vacuum before scrubbing.
– Under-rinsing causes sticky residue and hazy film; follow the product’s rinse/extraction instructions.
– Over-wetting can seep into grout cracks or seams and create lingering odor or discoloration on porous flooring.
– Not protecting fixtures (baseboards, vents, electrical outlets) can lead to damage or corrosion from chemical contact.
Quick pros/cons comparison (so your team can choose wisely)
| Approach | Pros | Cons / Risks |
|---|---|---|
| Auto-scrubber + extraction | High productivity, consistent passes, typically better residue removal when tuned to the floor. | Requires correct pad selection and solution change-out; improper settings can leave streaks. |
| Brush scrub + wet vacuum extraction | Good control in corners and textured grout; effective when access limits machine use. | More labor; inconsistent team execution can create uneven gloss. |
| Spray-and-wipe only | Fast for very light, non-embedded soils. | Often leaves residue if the cleaner isn’t no-rinse; higher risk of haze and rapid re-soiling. |
Verdict / tip: worth doing—if you match the process to the floor
Deep cleaning commercial floors is usually effective when you treat it like a controlled process: inspect first, clean in the right order, use compatible chemicals, then extract/rinse and dry. The downside is time and coordination—especially in occupied spaces where you may need floor closures, signage, and careful drying to keep areas safe.
If the flooring is unsealed/porous, heavily damaged, or you’re dealing with an unknown prior coating, consider calling a floor-care professional for a first pass ([ADD: source for when to hire a pro, e.g., manufacturer guidance on coating removal/testing]).
When a cleaner label specifies extraction or rinsing, skipping that step increases the chance of detergent film and faster re-soiling.
A floor inspection that identifies finish type (sealed, waxed, polished, or unsealed) is a key safety step to prevent chemical incompatibility damage.
Quick checklist you can save
– [ ] Identify floor type + finish/coating (sealed, waxed, polished)
– [ ] Sweep/vacuum dry soil before any wet cleaning
– [ ] Pre-treat spots with surface-appropriate cleaner
– [ ] Use correct dilution + required dwell time (per label)
– [ ] Scrub in sections with overlapping passes
– [ ] Rinse/extract if required by the product instructions
– [ ] Dry completely; change water/pads as needed
– [ ] Spot-check appearance in each area before reopening
FAQ
How often should we deep clean commercial floors?
It depends on traffic, soil load, and maintenance quality. Use current appearance and residue behavior (scuffing, haze, sticky feel, faster re-soiling) as indicators—then set a schedule that prevents buildup before it becomes embedded.
Can I deep clean with just a mop and bucket?
You can for light-duty cases, but deep cleaning typically needs agitation and controlled extraction/rinsing to remove film and ground-in soil effectively. If you only mop, expect more residue risk and uneven results.
What’s the safest way to handle unknown residue on a floor?
Do a small test patch with the intended cleaner and check for finish dulling, color change, or sticky residue afterward. If the floor reacts, stop and switch to a compatible product or method ([ADD: source for patch-testing guidance from a relevant manufacturer]).
Do I need to rinse after using a cleaner?
Some products are no-rinse; others require extraction or rinsing to avoid residue. Follow the label instructions for your specific cleaner and floor type—don’t assume.
Sources
– [ADD: manufacturer documentation for floor cleaner dilution, dwell time, and rinse/extraction requirements for your specific product]
– [ADD: manufacturer or trade association guidance on commercial floor maintenance/testing (e.g., patch testing and residue control)]
– [ADD: floor finish/coating manufacturer instructions related to stripping, compatibility, and safe cleaning methods]
A clean schedule isn’t just about doing more—it’s about doing the right steps in the right order. Inspect the finish, remove dry grit first, use compatible cleaner chemistry with correct dilution and dwell time, scrub consistently, and finish by extracting/rinsing (when required) and drying completely. When those pieces line up, deep cleaning stops being a periodic “reset” and becomes a predictable maintenance routine your team can repeat across buildings.
Frequently Asked Questions
What’s the best way to deep clean commercial floors without damaging the surface?
The best approach starts with identifying your floor type (vinyl, tile, sealed concrete, terrazzo, marble, or rubber) and reviewing the manufacturer’s cleaning guidance. Use the correct cleaner and dilution rate, and avoid harsh chemicals or abrasive pads that can strip sealants or etch surfaces. Always test in a small, hidden area first, then follow with thorough rinse steps if your floor cleaner requires it to prevent residue buildup.
How do I deep clean commercial floors in a high-traffic area after hours?
Begin by removing loose debris and dry soil with a dust mop, broom, or vacuum rated for hard floors. Pre-treat traffic lanes and stains, then use a floor scrubber with the proper brushes or pads for deep scrubbing. After scrubbing, extract dirty water with a wet vacuum or perform a controlled rinse-and-extract cycle to remove detergent residue, and allow floors to fully dry before reopening the area.
Which equipment and pads are best for deep cleaning commercial tile and grout?
For tile and grout, a rotary floor machine or auto-scrubber with a stiff-bristle or grout-specific brush can help lift embedded dirt. Use acid-neutral or pH-appropriate cleaners (depending on grout type) and consider a dedicated grout brush for heavily soiled lines. Finish with careful rinsing and extraction to prevent dulling or residue that can make grout re-soil faster.
Why does deep cleaning commercial floors make floors look dull even if I used the right cleaner?
Dullness often happens when detergent residue remains on the floor or when the wrong pad abrasiveness strips the protective finish. Overusing high-alkaline cleaners on sealed surfaces or not rinsing thoroughly can leave a film that reduces shine and increases slip risk. To prevent this, use the correct chemical for the floor finish, follow the dwell time, and perform a complete rinse/extraction step when required.
How can I remove stubborn stains from commercial floors like grease, scuff marks, and rust?
Start with targeted spot treatment using stain-specific solutions—degreasers for grease, neutral or low-abrasion pads for scuffs, and rust removers that are compatible with your floor material. Work from the outside of the stain toward the center to prevent spreading, and allow proper dwell time before scrubbing. After stain removal, rinse or extract thoroughly so the remaining chemicals don’t react with the floor finish or attract dirt during normal traffic.
📅 Last Updated: October 12, 2026 | Topic: How to deep clean commercial floors? | Content verified for accuracy and freshness.
References
- https://www.cdc.gov/coronavirus/2019-ncov/community/cleaning-disinfecting.html
- https://www.cdc.gov/infectioncontrol/guidelines/environmental/index.html
- https://www.cdc.gov/infectioncontrol/guidelines/disinfection/index.html
- https://www.who.int/publications/i/item/cleaning-and-disinfection-of-environmental-surfaces-in-the-context-of-covid-19
- https://www.epa.gov/coronavirus/cleaning-and-disinfecting-your-facility
- https://pubmed.ncbi.nlm.nih.gov/?term=environmental+surface+cleaning+floor+disinfection+healthcare
- https://www.sciencedirect.com/topics/engineering/floor-cleaning
- Google Scholar Google Scholar
https://scholar.google.com/scholar?q=commercial+floor+deep+cleaning+stripping+and+waxing - Google Scholar Google Scholar
https://scholar.google.com/scholar?q=environmental+cleaning+disinfection+floor+mopping+efficacy+study - Google Scholar Google Scholar
https://scholar.google.com/scholar?q=healthcare+floor+cleaning+protocols+microbial+reduction