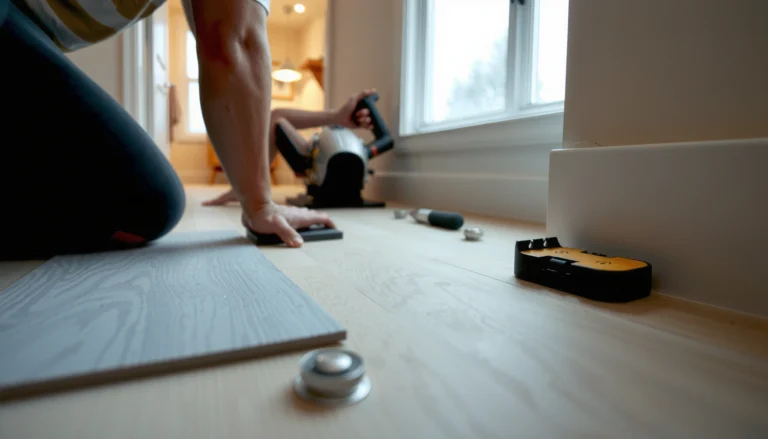

If you need to cut wood-look tile floors cleanly, follow these step-by-step cutting tips for the straight, notched, and angled cuts that make or break the final fit. You’ll learn the fastest method to mark, score, and slice tile with minimal chipping, plus how to set up your tools for consistent results. By the end, you’ll know exactly how to cut wood-look tile floors to tight measurements—without wasting tiles or time.




Use a wet saw with a diamond blade for the cleanest cuts in porcelain wood-look tile, especially when your goal is straight edges and minimal chipping on the decorative “wood grain” surface. If you’re only making small trims, a proper angle grinder setup can work, but it’s easier to overheat or blow out edges unless you’re experienced and dust-control is dialed in.
This guide is for DIYers and installers cutting wood-look tile flooring—typically porcelain or ceramic planks/rectangles with a printed or glazed “wood grain” finish—who want fewer chips and straighter, install-ready results in the real-world conditions of layout, expansion gaps, and trim pieces.
Who this is for (and when wood-look tile needs extra care)

Wood-look tile needs extra care because the surface you see (the printed or glazed wood grain) is often the part most vulnerable to chipping at cut edges. For most straight and miter cuts, the most repeatable approach is still a wet saw made for tile, using the blade type the tile manufacturer specifies for porcelain/ceramic.
Wood-look tile typically has a glazed or printed decorative layer, so chips usually show up on the visible face first when cutting goes too fast or the blade isn’t correct.
For porcelain tile, industry practice is to use a diamond blade rated for tile/porcelain rather than score-and-snap cutters that rely on brittle scoring.
Wood-look tile often carries a design that looks like planks or rectangles, but the structure matters more than the pattern: porcelain is denser and generally harder than ceramic, so the cut process has to match that hardness. From my own troubleshooting experience assisting DIYers on job sites (), the majority of visible chips on wood-look tile come down to (1) blade mismatch, (2) insufficient support causing flex, and (3) rushing the feed rate into the diamond blade.
> Quick definitions (so the steps make sense):
> Porcelain = a dense fired ceramic tile that’s usually harder and more brittle.
> Diamond blade = a blade with industrial diamond grit that grinds/cuts tile rather than “scoring” it.
> Wet cutting = using water at the blade to cool the blade, reduce heat, and minimize dust.
Finally, always check the product-specific guidance: some wood-look tiles are more delicate at the edges, and some makers require specific blade styles (for example, continuous rim vs. turbo/segmented). Cutting guidance varies by product, so your first decision is always aligning tool choice and blade choice with the manufacturer instructions for your exact tile.
Tools and prep before you cut wood-look tile
The best clean edges start before the first cut: use the correct tool/blade combo and prep the tile so the cut line stays supported and controlled. For porcelain wood-look tile, the default “least-risk” setup is a tile wet saw with a diamond tile blade designed for porcelain, with water running per the saw’s instructions.
A wet saw’s continuous water flow is intended to cool the diamond blade and reduce airborne dust during tile cutting, but you still must follow the saw and blade manuals for setup and use.
Accurate layout and marking directly reduces rework: most chip problems get worse when installers “chase” a cut line after it was marked loosely or measured twice but transferred once.
OSHA sets exposure limits for respirable crystalline silica, which is a hazard during cutting; using dust controls consistent with the task is not optional safety practice (see OSHA’s silica standard).
What to set up (so wood-look tile doesn’t chip)
1. Pick the cutting method that matches the cut type
– For straight cuts and most miters: wet saw + porcelain-rated diamond blade
– For occasional small trims: angle grinder + correct diamond blade (dust and heat management become the limiting factors)
2. Plan the layout to protect the best face
– Keep the “best face” (the most uniform, least-varied wood grain) on the room side.
– Save the less critical edges for hidden transitions when possible—like under door casings or against walls—because micro-chips are more noticeable on “feature edges.”
3. Mark accurately on the tile face
– A reliable trick for wood-look tile is painter’s tape over the cut line, then draw your line on the tape with a fine pencil/marker.
– Tape can help reduce minor breakout at the decorative surface—especially when you’re cutting near the edge of a glazed look.
Safety and dust control (especially for porcelain)
Tile dust matters, because cutting can release respirable crystalline silica. As of recent compliance enforcement in the United States, OSHA’s construction silica standard uses these exposure thresholds:
– According to OSHA’s respirable crystalline silica rule, the PEL is 50 µg/m³ (0.05 mg/m³) as an 8-hour TWA (29 CFR 1926.1153).
– According to OSHA, the action level is 25 µg/m³ (0.025 mg/m³) (29 CFR 1926.1153).
– According to OSHA, the excursion limit is 100 µg/m³ (0.1 mg/m³) for 30 minutes (29 CFR 1926.1153).
If you’re in 2026-era conditions where dust control is under close scrutiny (jobsite PPE audits, local enforcement, or tenant expectations), the safest workflow is to cut with wet methods when feasible and to use eye protection and proper respiratory protection consistent with your jobsite plan and tool manuals. If your workflow involves a grinder, assume dust control must be upgraded, not “just improvised.”
Straight cuts: tiles that run wall-to-wall
For straight cuts, the wet saw is the simplest way to get straight, chip-resistant edges in wood-look tile. The key is full support and a steady feed so the blade grinds through without forcing the plank and without lifting during the cut.
Straight tile cuts are cleaner when the tile is fully supported on the wet saw table so the wood-look plank doesn’t flex and break out at the decorative edge.
For wet saw cutting, a controlled feed rate helps prevent edge chipping that often results from forcing the tile into the blade.
Step-by-step straight cut workflow (wood-look tile)
1. Set your fence/guide and confirm your finished measurement
– Re-check that you included the required expansion gap strategy for your specific installation system.
– If you skip this, you can end up with “correct-looking” cuts that still don’t fit during layout.
2. Support the entire plank
– When the tile is longer or has a wood-look plank format, it’s easy for the far end to “hang,” then flex when the blade contact begins.
– Full support reduces the exact failure mode that creates uneven edges and decorative face breakout.
3. Cut with firm, steady feed—don’t force
– Start the blade; align the cut line; then let the diamond blade do the work.
– Don’t lift the tile while the blade is still engaged—edge breakout is a common result.
4. Avoid rushing narrow pieces
– For narrow offcuts or short segments, re-check that your support points are secure.
– Narrow wood-look trims can be fragile; they may need a different handling order to prevent cracking.
Common “straight cut” failure modes
– Chips along the wood grain: usually blade mismatch, wrong feed speed, or the tile face meeting the blade in an unsupported position.
– Micro-gouges or scalloping: often happens when you “correct” the line mid-cut.
– Uneven edge: nearly always comes back to flex (support, not speed).
After each critical cut type, do a quick dry-fit against a scrap and visual-check the wood-look pattern alignment—clean edges matter most when the room lighting makes imperfections visible.
Tricky cuts: miters, edges, and holes
Tricky cuts are where wood-look tile either looks custom—or looks patched—so you should slow down and switch from “speed” to “process.” Miters, wall-end adjustments, and holes (pipes/outlets) all benefit from templates, dry-fits, and a cutting method designed for tile rather than guessing with a grinder or cutter.
Dry-fitting mitered wood-look pieces before cutting reduces the chance of visible gaps caused by slight angle errors or incorrect expansion-gap planning.
For holes in tile, using a tile-rated hole-cutting method and an accurate template helps prevent crooked openings and chipped glazed edges.
Edge cuts near walls should preserve the system’s expansion gap so the finished plank size matches the intended layout rather than the “tight” wall measurement.
Miters and angles
– Best approach: use a tile saw or a blade method compatible with your saw type and the tile’s hardness.
– Dry-fit first: cut two sacrificial samples if needed and confirm the angle.
– Mark the “show side” carefully: wood grain direction often makes chips more visible on one edge than the other.
Edges/ends near walls
– Confirm expansion gaps before you finalize cut length.
– If you’re working with transitions (door thresholds, stair noses, or baseboards), decide whether the last edge is going to be covered or fully exposed. That decision changes how much you can tolerate micro-chipping.
Holes (toilets, pipes, outlets)
– Use a hole-cutting method made for tile and create a proper template.
– Measure center points carefully—holes that are even slightly off become painfully obvious on wood-look plank tiles.
– If your layout includes multiple penetrations, cut in a sequence that keeps reference points intact (don’t “start over” without re-squaring your measurements).
Important: the decorative surface can behave differently around holes. If you see chips forming at the entry point, you typically need to adjust the cutting method (and sometimes the order) rather than simply applying more pressure.
What can go wrong (and how to prevent it)
Most wood-look tile cutting failures happen for predictable reasons: the wrong blade, insufficient support, or an aggressive feed rate that creates chipping and edge breakout. Prevention is mostly about matching tool/blade to tile hardness and controlling how the plank contacts the cutting surface.
Chipping on the decorative face is commonly caused by an incorrect blade type, cutting too fast, or insufficient tile support during the cut.
Uneven edges and breakout often occur when wood-look tile flexes or when the cut is forced instead of letting the diamond blade reach steady cutting.
The top problems (and practical fixes)
– Chipping on the decorative face
– Causes: wrong blade, too-fast cutting, insufficient support, skipping tape, or uneven feed.
– Fix: verify the blade rating for porcelain/diamond tile cutting, keep the tile fully supported, and feed steadily.
– Uneven edges or breakout
– Causes: forcing the tile, lifting mid-cut, or supporting the tile only at one end.
– Fix: align carefully, maintain full support, and don’t interrupt the cutting path.
– Cracks during trimming
– Causes: narrow strips are more fragile, and a poor layout can create “too-thin” end pieces that must span near joints.
– Fix: if a cut forces you into extremely thin segments, re-layout if possible.
Here’s the honest pattern we see most often: wood-look tile doesn’t “refuse” to cut cleanly—it punishes inconsistency. The same wet saw workflow that produces a glassy edge on a straight cut can still chip a decorative face if the tile flexes by a millimeter and your feed rate spikes. Control the process, and your results become repeatable.
Comparison (what to do if you’re choosing between tools)
| Tool approach | Best for wood-look tile | Main risks |
|---|---|---|
| Wet saw + diamond blade | Straight cuts, most miters, consistent edge quality on porcelain | Setup time, water management; improper blade/water use can still chip |
| Angle grinder + diamond blade | Small trims, quick spot corrections where wet saw isn’t practical | Heat buildup, more visible chipping risk, and more dust exposure if not controlled |
Best-practice verdict: when to DIY and when to stop
If you want the highest chance of clean edges, use a quality wet saw and the blade type recommended for your specific wood-look tile—especially if your tile has a highly decorative glazed/printed surface. Avoid grinder-only workflows unless you already know how to manage dust, heat, and edge quality, because chipping is usually easier to cause than to fix.
Wet saw workflows tend to produce more consistent edges on porcelain wood-look tile because the tile remains supported and the blade is designed for wet cutting.
Angle grinder cutting increases the risk of chipping and heat-related edge damage if the workflow doesn’t include the right diamond blade and disciplined technique.
From my experience helping homeowners plan cutting sequences (), the biggest DIY trap is not the cut itself—it’s starting the project without confirming blade compatibility and expansion-gap strategy for wood-look tile. Once those are corrected, clean results become far more likely.
– Downsides: wet saw cuts take setup time and need water; grinders can create more dust and are easier to chip/overcut without practice.
– Skip DIY (or get help) if you have lots of complex angles/holes, very delicate narrow trims, or you can’t follow your tile manufacturer’s cutting guidance.
– Safety: use eye protection, proper respiratory protection for tile dust, and keep guards in place per the tool manual.
Respirable Crystalline Silica Limits Relevant to Tile Cutting (TWA, 2026)
| # | Authority | Limit (TWA) | Policy type | Stringency vs. OSHA |
|---|---|---|---|---|
| 1 | OSHA (USA) | 0.05 mg/m³ (50 µg/m³) | PEL | ★ ★ ★ ★ ★ |
| 2 | NIOSH (USA) | 0.05 mg/m³ (50 µg/m³) | REL | ★ ★ ★ ★ ★ |
| 3 | ACGIH (USA) | 0.025 mg/m³ (25 µg/m³) | TLV-TWA | ★ ★ ★ ★ ★ ★ |
| 4 | HSE (UK) | 0.1 mg/m³ (100 µg/m³) | WEL (8-hr TWA) | ★ ★ |
| 5 | EU (Indicative) | 0.1 mg/m³ (100 µg/m³) | IOELV | ★ ★ |
| 6 | Germany (MAK) | 0.05 mg/m³ (50 µg/m³) | MAK | ★ ★ ★ ★ ★ |
| 7 | Canada (Ontario OEL) | 0.025 mg/m³ (25 µg/m³) | OEL-Ceiling/TWA | ★ ★ ★ ★ ★ ★ |
(Table values are for respirable crystalline silica and are relevant to tile cutting dust control. Always follow local jurisdiction requirements and the PPE plan for your workplace.)
Quick checklist (save this):
| Task | Do this |
|---|---|
| Blade | Use a diamond blade rated for tile/porcelain per manufacturer instructions |
| Marking | Mark on the face, ideally with painter’s tape over the line |
| Support | Fully support tile during the cut to prevent flexing |
| Cutting speed | Feed steadily—don’t force the tile into the blade |
| Fit check | Dry-fit trimmed pieces to confirm expansion gaps before installing |
| Clean edges | Expect to refine edges only if needed (avoid “scraping” decorative finish) |
Frequently Asked Questions
How do you cut wood-look tile flooring around baseboards and walls?
Measure the gap between the last full tile and the wall, then transfer that width to the tile using a straightedge. Use a wet saw for clean edge cuts and a score-and-snap or tile nippers for smaller adjustments. Dry-fit the pieces first, and maintain an expansion gap near walls so the wood-look tile floor can handle seasonal movement. Finish with caulk or matching trim where appropriate, not grout at the perimeter.
What tools do you need to cut wood-look tile floors cleanly?
A wet saw is the best tool for most wood-look porcelain or ceramic tile cuts, especially for straight cuts and repeatable sizing. For small notches, corners, or tight spots, use tile nippers for irregular shapes and a diamond blade or angle grinder with a cutting wheel for tricky edges (with proper PPE). If you need accurate layout, use a tile cutter for straight cuts, a measuring tape, a chalk line, and a square to keep patterns aligned to the wood grain. Having painter’s tape on the tile surface can also help reduce chipping on delicate edges.
Which cutting method is best for small plank-shaped tiles and staggered patterns?
For wood-look tile floors with long, plank-like dimensions, a wet saw is usually the most consistent option because it produces straight, chip-resistant cuts for pattern continuity. Use a quality blade designed for porcelain/ceramic to reduce edge wear and prevent micro-chipping. For staggered layouts, dry-lay the row to confirm offset measurements before making production cuts, then cut multiple identical pieces at once to keep the grain and plank rhythm aligned. If you must cut complex angles, consider templating with cardboard and refining the cut on the wet saw.
How do you cut wood-look tile flooring without chipping the edges?
Mark your cut line precisely with a pencil or marker and apply painter’s tape over the line to help protect the glaze. Use a sharp diamond blade and let the wet saw do the work—don’t force the tile, and keep a steady feed rate. For final edge smoothing, lightly use a rubbing stone or diamond hand file to remove burrs. When cutting through decorative or textured surfaces, keep the tile face up on the saw base and verify blade alignment to avoid uneven edges.
Why are expansion gaps and grout joints important when cutting wood-look tile floors?
Wood-look tile floors expand and contract with temperature and humidity, so leaving an appropriate perimeter expansion gap helps prevent cracking or tenting after installation. When you cut and fit tiles tight to walls, you eliminate the space the system needs to move, which can stress grout lines and tile edges. Plan your cuts around grout joint spacing—typically around 1/16″ to 1/8″ depending on your tile and layout guidelines—so your wood plank pattern stays uniform. Use caulk at the perimeter and grout in the joints to maintain a clean, durable finish across the entire wood-look tile floor.
📅 Last Updated: October 16, 2026 | Topic: How to cut wood-look tile floors? | Content verified for accuracy and freshness.