


Choosing hardwood floors for a closet comes down to one decision: pick a wear-resistant, moisture-stable solid-or-engineered hardwood that can handle foot traffic without warping. If the closet is inside conditioned space, durable engineered hardwood is usually the clear winner for stability and easier installation. If moisture or temperature swings are possible, prioritize thicker engineered planks with tight grain and a protective finish to prevent cupping or gaps.
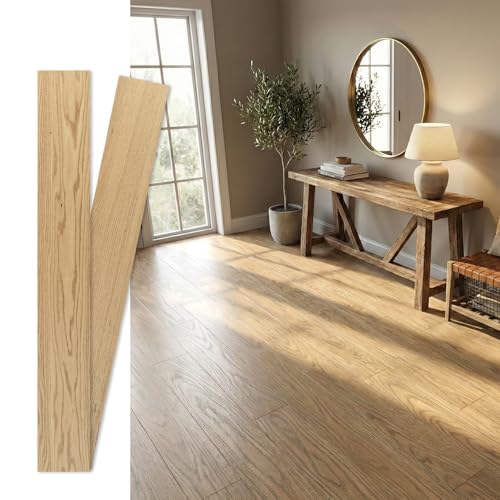



If you’re planning a small closet remodel (or replacing worn flooring inside an existing closet), you’re in the right place. The steps below focus on the details that matter specifically for closets: subfloor conditions, expansion risks, and practical finish durability.
Start with closet moisture and humidity risk

Moisture is the biggest make-or-break factor for closet hardwood floors, because closeted spaces can experience swings even when they “feel” dry. The best choice starts with mapping what’s behind the floor—then aligning the hardwood type and installation system to that risk.
Before you select closet hardwood, treat moisture like a materials-design problem, not a guessing game. Closets often look dry, but they can sit over concrete slabs, above damp crawlspaces, or along exterior walls where seasonal humidity changes are stronger. In my own walkthroughs with homeowners, the most common failure pattern wasn’t the wood species—it was installing the wrong system (or skipping the moisture steps) for the actual substrate conditions.
Closet floors can experience humidity swings if the closet is on an exterior wall, near HVAC returns, or adjacent to a basement/crawlspace.
Engineered hardwood is generally more dimensionality-stable than solid hardwood when environmental conditions fluctuate, but it still requires manufacturer-approved installation parameters.
Moisture testing and subfloor/environment verification are foundational steps in documented hardwood installation guidance from industry standards bodies like NWFA.
Check what’s under (and beside) the closet floor
Focus on the construction you can verify:
– Subfloor type: slab concrete vs. wood subfloor over joists/crawlspace.
– Access to moisture sources: plumbing nearby, washer/dryer stack walls, exterior wall exposure.
– History of dampness: musty smells, visible efflorescence (on concrete), prior water intrusion.
Also look at airflow paths. A closet next to a return duct can pull or redistribute air faster than you expect, which changes the moisture content equilibrium of wood flooring over time.
Use moisture targets tied to your substrate and product
Hardwood flooring failures in closets typically show up as gapping, peaking, cupping, or finish failure (from movement). The documented fix is to follow the moisture requirements for:
1) the subfloor, and
2) the specific product’s warranty/installation guide.
According to NWFA moisture-control guidance (documented in their hardwood installation resources), moisture testing is expected before installation over moisture-prone substrates, using recognized lab/field methods such as ASTM test procedures (). A commonly referenced benchmark approach is:
– concrete slab moisture vapor emission limits tested with ASTM F1869 (units like lbs/1000 sq ft/24 hr), and/or
– in-situ relative humidity tested with ASTM F2170 (% RH) ().
> If you want “closet hardwood” to last, don’t treat the closet as automatically moisture-free—verify it for your exact building conditions.
Pick the right hardwood type (solid vs. engineered)
In most closets where humidity can change, engineered hardwood is the more forgiving choice for maintaining stable dimensions. Solid hardwood can work when indoor conditions are tightly controlled and you follow the installation specs, but closets are more likely to introduce variable moisture and concentrated wear.
The hardwood type you pick for closet flooring should be driven by dimensional stability, installation method, and manufacturer approval for your location (including below/above grade). Then you pair it with a finish that survives abrasion—because closets often turn “low-traffic” flooring into shoe-and-box traffic.
Solid hardwood dimensional movement is typically greater than engineered products when indoor humidity varies, so closets with uncertain humidity need extra scrutiny.
Engineered hardwood remains an “approved-for-installation” system: if the product is not rated for your subfloor/location, warranty coverage can be void.
Documented installation guidance emphasizes matching flooring construction (solid vs. engineered) to the environment and substrate conditions.
Compare solid vs. engineered for closet environments
Use this decision lens for closet hardwood floors:
| Feature | Solid Hardwood (for closets) | Engineered Hardwood (for closets) |
|---|---|---|
| Best-fit environment | More suitable when indoor humidity is stable and controlled | Often preferred when humidity/temperature can fluctuate |
| Moisture tolerance mindset | Requires stricter confidence in moisture equilibrium | Typically more stable, but still requires correct moisture and installation steps |
| Installation method alignment | Often nail-down (method depends on product specs) | Frequently glue-down or click/float (depends on system) |
| Warranty risk | Higher if closet location/subfloor isn’t approved | Still requires approval; wrong substrate/location can void coverage |
| Long-term movement symptoms | Can show gaps/peaking sooner in swingy environments | Often reduces movement-related visual issues in variable conditions |
Confirm approval for your closet’s location
“Closet” doesn’t automatically mean “easy.” The manufacturer may specify:
– allowed above/below grade locations,
– acceptable subfloor types,
– acceptable installation method (nail/glue/click),
– required expansion spacing.
According to documented installation guidance from NWFA, hardwood performance depends on proper subfloor prep and maintaining conditions within the flooring system’s spec window (). That means your closet choice should be based on your product documentation—before you buy.
Choose finish durability for real closet use
The right finish is what keeps closet hardwood looking good after repeated scuffs, heel marks, and box/basket abrasion. Since closets often see concentrated contact points, prioritize a finish system designed for wear—not just one that looks good at purchase time.
Closet flooring durability is mostly about the topcoat and surface chemistry, not only the wood species. A tougher wear layer/topcoat can significantly reduce maintenance pain and preserve appearance longer in practical closet traffic.
Closets create localized abrasion from shoes, sliding storage bins, and frequent pulling of hangers and clothing baskets.
Finish durability should be selected from the product’s finish specs (topcoat type and intended use), not from species alone.
A more abrasion-resistant topcoat can reduce the frequency of touchups in storage/entry-style closets that get used often.
What to look for in finish specs
When reviewing the manufacturer’s technical documentation, look for:
– Topcoat type (e.g., a hardened multi-coat system vs. more basic finishes).
– Wear rating / intended use language (residential vs. light commercial).
– How the finish is cleaned (recommended cleaners and what to avoid).
If you’re deciding between look-based samples, a more useful question is: Will the finish survive repeated contact under your closet’s habits? For example:
– kids’ closets (more frequent bin movement),
– shared storage closets near doorways,
– closets used as seasonal shoe storage.
Match finish to your cleaning reality
Cleaning errors can damage finishes faster than abrasion. Avoid soaking the floor, and follow the manufacturer’s recommended method and products. Many finish failures in flooring are traced back to incompatible cleaners or too much water—not the finish “wearing out” naturally.
Match installation method to your subfloor and space
Your installation method must match your subfloor condition, because the wrong system can fail even if you choose the correct hardwood. In closets, tight clearances also increase the chance of fit problems—so plan transitions and expansion details before installation.
Hardwood installation isn’t interchangeable. Nail-down, glue-down, and lock-click floating systems each require different subfloor tolerances, underlayment (or lack of underlayment), and spacing rules. A closet’s small footprint can make mistakes more visible.
Nail-down, glue-down, and lock-click hardwood systems have different subfloor and environmental requirements, which affects warranty eligibility.
Closets often have tight edges and thresholds, so transition planning and height matching are critical to a clean final fit.
Expansion spacing requirements are part of documented installation instructions and are especially important in small rooms where tight layouts amplify movement.
Nail vs. glue vs. click: align to what your base can support
Start with your subfloor:
– Wood subfloor: often supports nail-down or specific engineered systems per manufacturer specs.
– Concrete slab: typically requires moisture controls and a compatible glue or approved floating system (depending on product rating).
Then verify underlayment requirements. Some click systems require a specific underlayment for sound and moisture management; other systems require none. If you skip or substitute, you can break performance assumptions.
Plan transitions and expansion in a tight closet
Closets commonly have:
– small wall runs,
– a door threshold,
– baseboard/shoe molding details,
– built-ins that limit access.
Practical steps:
– Measure carefully so the floor height aligns with adjacent rooms.
– Plan the plank direction to reduce visible end joints.
– Use the spacing/edge details required by the manufacturer (including expansion gaps near fixed objects).
Acclimation, layout, and maintenance plan
Acclimation and layout planning are what protect closet hardwood floors from early movement and finish problems. In practice, small rooms punish shortcuts: the wrong acclimation timeline or a poorly planned plank layout shows up faster in a closet than it does in a large open living area.
Hardwood acclimation is not one-size-fits-all; it’s product-specific. The manufacturer’s instructions control the acclimation period, environmental conditions (temperature/RH), and handling requirements.
Hardwood acclimation requirements should follow the specific product’s installation instructions, including temperature and humidity targets.
Dry-fitting plank direction and transitions helps avoid narrow “sliver” pieces at walls that are hard to trim neatly in closets.
Finish longevity depends on following the manufacturer’s cleaning guidance and avoiding excessive water during maintenance.
Set up acclimation correctly (for the exact product)
Don’t rely on general rules. Follow:
– how long to acclimate,
– whether to acclimate in a sealed package or opened,
– target environmental conditions during acclimation and installation.
If the closet sits inside a basement or near HVAC swings, keep conditions stable during installation. According to NWFA installation guidance, maintaining proper environment conditions and following moisture/subfloor requirements is central to dimensional performance ().
Layout choices that prevent future headaches
In closet hardwood floors, layout is a “small room multiplier”:
– Avoid ending runs in places that will be blocked by shelves or built-ins unless the product and plan accommodate it.
– If you need a transition at the closet entry, ensure the subfloor is consistent and the transition height is correct.
Maintenance plan that matches the finish
Use cleaning methods recommended by the flooring manufacturer. In general closet care:
– vacuum with a floor-safe attachment,
– wipe up spills promptly,
– never use steam or excessive water unless the finish system explicitly allows it.
What can go wrong when choosing closet hardwood
Most closet hardwood problems come from mismatched moisture conditions, incorrect installation method, or a finish that can’t handle abrasion. The result is movement (gaps/peaking/cupping) or finish wear (scuffs and rapid dulling) that becomes obvious in a small space.
Common pitfalls cluster around three decisions: wood type, finish selection, and installation system.
Ignoring closet moisture risk and the manufacturer’s installation limits can lead to dimensional defects such as gaps, peaking, or cupping over time.
Skipping acclimation and expansion-spacing requirements increases stress in the flooring system, leading to visible movement after conditions stabilize.
A showroom-friendly finish can still scuff quickly if the finish system isn’t intended for abrasion from shoes and moving bins.
The most frequent “closet-specific” failure modes
– Moisture mismatch: installing a flooring system that isn’t rated for your closet substrate/location.
– Inadequate acclimation: the flooring ships “stable,” but your indoor equilibrium is different.
– Tight layouts without proper expansion: small rooms magnify installation errors.
– Unexpected traffic: closets used for shoes, seasonal storage, or children’s items can see higher abrasion than a typical bedroom closet.
If any of these apply—especially moisture uncertainty—lean toward engineered hardwood and an installation plan that’s explicitly approved for your closet conditions.
Verdict / tip + quick checklist
If your closet area stays reasonably stable in humidity and you can follow the manufacturer’s installation requirements, hardwood can be a great upgrade—especially when you choose an abrasion-capable finish. For closets with moisture uncertainty or changing indoor conditions, engineered hardwood (paired with the correct installation method and finish) is usually the safer direction—but don’t assume “closet” means moisture-free.
Quick checklist (scan before you buy):
| What to verify | Why it matters | Where to find it |
|---|---|---|
| Closet moisture/humidity conditions | Prevents movement and long-term failure | Site notes + manufacturer limits () |
| Solid vs. engineered approval for your situation | Dimensional stability varies | Product technical documentation |
| Finish durability / intended use | Helps with scuffs from shoes/bins | Product finish specs |
| Installation method (nail/glue/lock) matches your subfloor | Avoids warranty issues and defects | Installation instructions |
| Acclimation requirements for the specific product | Reduces expansion/contraction problems | Manufacturer acclimation guide |
| Transition plan and door clearance | Prevents poor fit and future trimming headaches | Your measurements + layout plan |
Sources (primary / documented):
– National Wood Flooring Association (NWFA) — hardwood flooring installation guidance (acclimation, subfloor prep, and environment requirements):
– ASTM standards relevant to hardwood flooring performance/measurement (use only where your selected product documentation references them):
Frequently Asked Questions
What hardwood flooring type works best for a closet?
For most closets, solid hardwood or engineered hardwood can work well, but engineered hardwood is often the safer choice because it handles minor humidity swings better. If your closet is in a basement area or can get damp, choose engineered hardwood with a stable core and a protective finish rated for residential interiors. Consider plank width and thickness based on your subfloor condition, since closet floors can still show unevenness through the finish.
How do I choose the right hardwood thickness for a closet?
In general, thicker planks (around 3/4-inch for solid hardwood) provide more material to refinish later, but they require proper subfloor conditions. For engineered hardwood, thicknesses vary and some thinner options can still be durable if the top wear layer is thick enough for future sanding. Measure your closet height carefully and check for clearance around doors, baseboards, and any built-ins before committing to a thicker floor.
Why is acclimation important when installing hardwood floors in a closet?
Hardwood floors can expand and contract with indoor humidity, so acclimation helps prevent gapping or cupping after installation. Even closets have their own microclimate, especially if they’re deeper, poorly ventilated, or affected by HVAC vents. Follow the manufacturer’s acclimation instructions and store the planks in the closet area so temperature and moisture conditions match the living space.
Which finish is best for hardwood floors in closets with high foot traffic or shoes?
For closets that see frequent use, choose a durable finish such as aluminum oxide–cured urethane or a factory-finished option designed for everyday wear. A satin or matte sheen hides scuffs and scratches better than high-gloss finishes, which can show imperfections more clearly. Also consider a finish that resists moisture from shoe soles and cleaning products, since closets often have spills and frequent spot-cleaning.
What’s the best way to match hardwood floors in a closet with the rest of the home?
To keep your closet looking cohesive, match the hardwood species, plank width range, and finish tone to adjacent rooms where the flooring is visible. If the closet is only partially visible, choose a similar undertone (warm, neutral, or cool) so the color doesn’t look mismatched under different lighting. Bring home samples and view them in the closet’s natural and artificial light at different times of day before ordering hardwood flooring.
📅 Last Updated: October 17, 2026 | Topic: How to choose hardwood floors for a closet? | Content verified for accuracy and freshness.
References
- https://www.epa.gov/mold/mold-and-moisture
- https://www.cdc.gov/mold/default.htm
- https://www.fpl.fs.usda.gov/documnts/fplgtr/fplgtr190.pdf
- Wood flooring
- Engineered wood
- Solid wood
- https://scholar.google.com/scholar?q=hardwood+flooring+moisture+relative+humidity+acclimation Google Scholar
- https://scholar.google.com/scholar?q=engineered+hardwood+flooring+vs+solid+wood+dimensional+stability+humidity Google Scholar
- https://scholar.google.com/scholar?q=wood+flooring+installation+moisture+testing+subfloor+relative+humidity Google Scholar


