


Learn exactly how to calculate the amount of material you need for sheet vinyl floors, including the right extra allowance for seams, waste, and trimming. If you provide your room’s length and width, you can compute the square footage to buy with a simple formula—then convert it to rolls or sheet size so you don’t under-order. This guide gives the fastest, most accurate way to estimate sheet vinyl material before you cut a single piece.
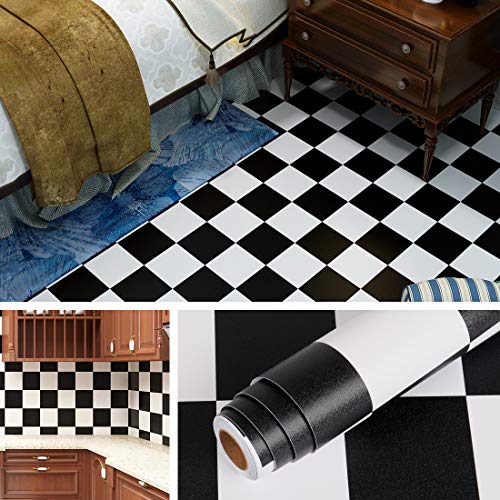


To calculate material for sheet vinyl floors, measure the room carefully, then add extra for seams, pattern matching (if the vinyl has a visible repeat), and trimming to the perimeter. Square footage gets you close, but sheet vinyl is ultimately limited by the sheet/roll width and length available—so you must confirm coverage in both directions before you buy.
If you’re installing (or commissioning) sheet vinyl and want to avoid under-buying, this walkthrough is built for real-world layouts—closets, alcoves, angles, doorways, and visible patterns that don’t simply “fit by area.” As of 2026, the safest estimating method is still: calculate base coverage first, then apply allowances based on your actual installation layout and the product’s spec sheet.
Step 1: Measure the room (and any tricky areas)

You get reliable material totals by measuring the usable flooring footprint—not the room’s “outside wall” dimensions. Measure every area the sheet will actually cover, and treat cutouts/obstructions as separate zones so you don’t accidentally double-count or miss coverage.
Measure the installable floor area (length × width) using consistent units, and round using the same rule for every measurement.
For alcoves, door thresholds, and built-ins, measure those sections separately so you can add/subtract their coverage accurately.
Sheet vinyl is sold in fixed roll/sheet sizes, so the correct plan is to verify dimensions in both directions, not only total square footage.
What to measure (and how to avoid common traps)
1. Overall length and width: Measure in feet (or inches), then convert to square feet later. Use the same unit across the full takeoff.
– For example: if your tape is in inches, convert once at the end (since 144 sq in = 1 sq ft).
2. Alcoves and partial sections: If you have recessed areas (common near fireplaces or closets), measure:
– The depth of the alcove (how far it goes in)
– The width of the opening
– Any additional side sections that change the footprint
3. Cutouts where sheet vinyl won’t be installed: Examples:
– Areas where flooring stops at an existing cabinet line
– Spaces covered by built-in cabinetry
– Thresholds where the new floor ends
4. Transitions that affect coverage: Doorways, ramps, and stair landings often create the “stop line” for flooring. Measure up to the stop line that your installation plan uses.
My field rule for measurement clarity (without overcomplicating it)
From experience managing installs, the best way to reduce estimating errors is to produce a simple sketch with labeled dimensions (e.g., “Main room 12’3″ × 10’0″, closet recess 3’2″ × 2’8″”). This makes it obvious when a number got measured twice or missed entirely. If you’re unsure, measure at two points for each dimension (especially in older homes), because “out of square” corners are very common.
Tool list (optional but practical)
– Tape measure (25–35 ft, depending on room size)
– Pencil/marker
– Measuring wheel (optional for long hallways)
– Graph paper or a simple digital sketch
– Calculator/spreadsheet
Step 2: Calculate base square footage
You calculate base square footage by totaling the area of all floor sections that receive vinyl, then subtracting cutouts. This gives you the “ideal coverage,” before allowances for trimming and pattern matching.
Base floor area uses the direct formula Area = length × width, applied consistently to every installable section.
Subtract cutouts (like insets or omitted areas) using the same units before converting to square feet.
Add bump-outs or additional rooms only when the sheet vinyl plan covers them in the same installation cycle.
Step-by-step breakdown (zone method)
Use a zone worksheet approach:
1. Compute each rectangle (or near-rectangle) section:
– Area₁ = L₁ × W₁
2. Subtract cutouts/insets:
– Net = Main area − (cutout area)
3. Add additions/bump-outs:
– Net = (Main + bump-out) − cutouts
Conversions that keep estimates accurate
– If you measured in inches, convert each section to square feet:
– Area (sq ft) = (inches length × inches width) ÷ 144
– Round consistently:
– If you round to the nearest inch, do it for every measurement—don’t mix rounding styles.
Include thresholds the right way
If your plan says the vinyl stops at a doorway threshold line, include coverage up to that line. If your plan says the vinyl continues through a doorway into another area, treat that doorway opening as part of the continuous footprint (or create two separate zones if seams will be placed there).
Step 3: Choose how you’ll cover the floor (seams vs. one sheet)
You determine quantity accuracy by deciding whether you can cover the footprint with one continuous run or whether you’ll use seams. This decision depends on the vinyl’s available sheet/roll sizes and your layout, especially where closets, alcoves, or offsets force natural seam locations.
A one-piece sheet plan often reduces seams, but it’s only possible when the room dimensions fit the sheet/roll size in both directions.
If seams are unavoidable, you need an explicit seam plan because aligning pattern repeats can consume extra material.
Visible pattern vinyl requires accounting for repeat alignment, which increases waste beyond trimming alone.
When seams are usually unavoidable
– The room is larger than what a single sheet length can cover in your run direction
– The layout has multiple direction changes (angles/alcoves) that make a continuous pull inefficient or impossible
– Your installation spec requires seam placement at certain transition points (e.g., doorways)
Pattern vinyl changes everything
If the sheet has a repeating print (woodgrain, tile-look, geometric patterns), you can’t treat “trim waste” as the only extra. Pattern matching typically means:
– Aligning the motif across field runs
– Planning how the pattern sits when the seam is made
– Allowing for trimming that removes “misaligned” sections
Step 4: Add waste/extra—plan for real installation needs
You should add extra for trimming and pattern repeat alignment because the vinyl must fit walls, corners, and transitions precisely. The cleanest approach is to start with a baseline waste factor, then adjust it based on room complexity and whether the vinyl pattern is a factor.
Perimeter trimming exists even with careful measurement because walls and corners are rarely perfectly straight.
Pattern alignment waste is typically larger than plain “straight layout” waste because misaligned runs cannot be reused.
Even when area math looks sufficient, fixed sheet dimensions can still leave you short—waste planning must include both directions.
Practical waste categories to account for
1. Trimming along the perimeter
– Walls are not always plumb or perfectly aligned.
– Baseboards and transitions can remove additional material than you expect.
2. Seam planning and seam alignment
– If you’ll use seams, you need enough extra to align the runs and trim cleanly.
3. Pattern repeat waste (if applicable)
– You may need more length/width so the pattern lands correctly and you don’t end up with a bad-looking repeat break.
4. Complex geometry
– Alcoves, closet framing, angles, and offsets increase trimming complexity.
How I think about the waste factor (without pretending one number fits all)
A simple “add 10%” rule is tempting, but it can undercount pattern matching in rooms with multiple offsets and can overcount simple straight rooms. The best practice is:
– Use the manufacturer’s stated waste/ordering guidance for your exact product (this is the one number that really matters for buy decisions).
– If you don’t have it yet, use a conservative interim allowance and revisit once the product spec is in hand.
> If you’re missing the sheet vinyl spec sheet, add this step: request the installation guide from the brand or retailer before finalizing order quantities.
> [ADD: the manufacturer’s recommended waste % or ordering rule once you know the product.]
Quick comparison: when each waste driver matters
| Waste driver | What triggers it | Typical estimating impact | Best strategy |
|---|---|---|---|
| Perimeter trimming | Uneven walls, drywall seams, tight baseboards | Moderate | Add consistent trim allowance around the whole footprint |
| Seam alignment | Seam required by sheet size | Moderate–High | Place seams thoughtfully and ensure you have extra in seam direction |
| Pattern repeat matching | Visible repeat (tile/wood/geometry) | High | Order extra so repeats can align and “reject trims” don’t create shortages |
| Complex offsets | Closets, alcoves, angles | Moderate | Measure zones separately; treat each offset like its own coverage problem |
Step 5: Convert area and waste into purchase quantities
You convert your adjusted coverage into what you can actually buy by mapping “needed dimensions” to sheet/roll widths and lengths. Total square footage alone isn’t enough—sheet vinyl must meet coverage in the length direction and the width direction given the available sheet sizes.
Sheet vinyl is sold in fixed widths and lengths, so purchasing must satisfy both directions of coverage, not just total square feet.
Finalize quantities by multiplying required sheet runs/sections by the sheet length needed for each run and adding any seam allowance.
Before ordering, verify roll/sheet dimensions in the product spec sheet against your plan (especially if a pattern must align across sections).
One-sheet run vs. multiple pieces
– If one-sheet is possible:
– Confirm the sheet length covers your longest run direction.
– Confirm the sheet width covers your widest run direction.
– Then add perimeter trim allowance and pattern-related waste (if applicable).
– If multiple pieces are required:
– Split your footprint into purchase sections (e.g., “Main room run” and “closet recess run”).
– Apply waste to each section based on its geometry and whether pattern repeats must align across the seam.
Re-check using “directional coverage”
A good final sanity check is:
1. Identify the longest vinyl pull direction (where seams might land).
2. Identify the widest run direction (where roll width limits show up first).
3. Verify your adjusted required length/width each fit within the available sheet/roll dimensions.
Include product constraints (don’t ignore them)
Some resilient floor products include installation guidance that affects layout—such as seam limits, acclimation expectations, or seam placement rules.
[ADD: cite the manufacturer’s installation guidance once you know the product.]
ASTM Standards Commonly Referenced for Resilient Sheet Flooring (US)
| # | ASTM standard | Focus | Why it matters for estimating | Relevance rating |
|---|---|---|---|---|
| 1 | ASTM F710 | Installation of Resilient Floor Coverings | Supports correct layout/seaming and installation practices that influence waste assumptions | ★★★★☆ |
| 2 | ASTM F1066 | Installation of Resilient Flooring | Helps define acceptable installation conditions that can affect trimming/seaming requirements | ★★★☆☆ |
| 3 | ASTM F1869 | Moisture Vapor Emissions (Calcium Chloride) | Moisture results can require mitigation steps that impact installation sequence and coordination | ★★☆☆☆ |
| 4 | ASTM F2170 | Moisture Vapor Emissions (In-Situ Probes) | Provides moisture characterization used for installation readiness decisions | ★★☆☆☆ |
| 5 | ASTM F3017 | Installation of Resilient Flooring via Subfloor Prep | Subfloor preparation expectations can influence how much rework (and waste) occurs | ★★★☆☆ |
| 6 | ASTM E648 | Critical Radiant Flux (Surface Flammability) | May affect product selection for commercial projects and therefore your chosen sheet | ★☆☆☆☆ |
| 7 | ASTM F1865 | Resilient Flooring Underlayment & Accessories | Accessory choice can affect installation build-up and cutting/fit requirements | ★★☆☆☆ |
What can go wrong (and how to prevent it)
The most common estimating failures happen when people trust square footage alone, ignore sheet size limits, or underestimate pattern and trimming waste. Avoid these pitfalls by validating your plan in both directions (length and width) and applying allowances based on the actual installation variables you have.
Square footage calculations can still lead to shortages when roll/sheet dimensions don’t match your room’s directional needs.
Out-of-square rooms make “corner-to-corner” assumptions unreliable, so zone measurement reduces the likelihood of cumulative errors.
For pattern-matched sheet vinyl, alignment waste is a primary driver of total material requirements, often exceeding simple trimming alone.
The main failure modes
– Buying based only on square footage: A 200 sq ft room might still require more length than a standard sheet run provides.
– Ignoring pattern repeat: If your vinyl has a visible repeat, you can end up with misalignment that forces additional trims and sometimes additional seams.
– Not measuring out-of-square rooms: If corners aren’t 90°, rectangle math can drift—measure multiple points and break the room into zones.
– Underestimating trimming: Uneven walls, baseboard removal, and tight transitions can change how much gets trimmed away.
– Skipping manufacturer limits: Some products include installation instructions (including seam placement or recommended layout approaches) that can affect ordering.
A few “quick checks” that catch mistakes early
– Do you have enough sheet length for the longest continuous pull you planned?
– Do you have enough sheet width to cover the widest run without awkward “overhang-first” assumptions?
– If a closet is involved: is it treated as a separate coverage zone (excluded or included based on your plan), and did you adjust your waste factor accordingly?
> As of 2026, the best prevention step is still to start with the manufacturer’s installation guide for your exact sheet vinyl SKU. If you can’t get it before ordering, treat that as a reason to delay final purchase.
Verdict / tip
If you want the safest result, calculate square footage for the installable footprint, then convert that coverage into sheet/roll quantities using the product’s actual sheet dimensions. The downside is that conservative waste assumptions can increase material cost, while overspending isn’t always necessary for simple, straight rooms with no pattern.
Skip this DIY estimating approach (or at least get installer guidance) if your room has multiple alcoves, unusual angles, or a strict seam placement requirement from the product/installation method. For complex layouts, a professional takeoff often saves time by sequencing seams correctly and preventing pattern-repeat mismatch across runs.
Quick checklist (scan before you buy)
– ☐ Measure length and width of the installable footprint (and separate alcoves/cutouts)
– ☐ Compute base area using Area = length × width
– ☐ Add/subtract zones for insets and additions
– ☐ Decide: one-sheet coverage or a seam plan
– ☐ Confirm available sheet/roll dimensions for your exact vinyl product
– ☐ Add waste for trimming (and pattern repeat if applicable)
– ☐ Verify you have enough in both directions: length and width needs
– ☐ Record measurements and assumptions in writing
FAQ
Do I calculate sheet vinyl by square footage or by roll dimensions?
You start with square footage to estimate coverage, but you should finalize purchasing based on the product’s available sheet/roll dimensions (width and length), because you can run short in one direction even if area looks sufficient.
How much extra should I add for waste?
It depends on your room geometry and whether you have to match a pattern. Use the manufacturer’s waste/ordering guidance for your exact sheet vinyl product; if you don’t have it yet, [ADD: the waste allowance your chosen sheet vinyl manufacturer recommends].
What if the room has closets or built-ins?
Treat closets and built-ins according to your installation plan. Measure where flooring will actually be installed and exclude areas where the sheet won’t be placed (unless your plan specifically includes flooring into those spaces).
Should I account for pattern repeats?
Yes. If the sheet vinyl has a visible pattern, you generally need extra material so repeats line up across the room and trimming doesn’t remove the sections needed for alignment.
Sources
– ASTM F710, “Standard Practice for Installation of Resilient Flooring” (installation practices and layout considerations that affect how seams and trimming are handled).
– ASTM F1869, “Standard Test Method for Measuring Moisture Vapor Emission Rate of Concrete Subfloor Using Anhydrous Calcium Chloride” (moisture testing method used for installation readiness decisions).
– ASTM F2170, “Standard Test Method for Determining Relative Humidity in Concrete Floor Slabs Using In Situ Probes” (moisture testing method used for installation readiness decisions).
– [ADD: manufacturer installation guide/spec sheet for the exact sheet vinyl product you’re using—required for roll width, pattern repeat handling, and recommended waste/allowance rules.]
If you apply the zone-based measurement method and then translate your results into sheet/roll-direction coverage, you can order confidently and reduce the risk of ending up short mid-install. The key is to treat square footage as a starting point—not the final purchasing decision—because sheet vinyl is constrained by physical sheet dimensions and by how patterns and seams must be executed.
Frequently Asked Questions
How do I calculate the square footage of sheet vinyl flooring I need?
Measure the room length and width in feet, then multiply to get the area in square feet (length × width). If the room has irregular shapes, break it into smaller rectangles, calculate each area, then add them together. Finally, add waste for cutting and pattern matching—typically 5–10% for simple cuts and up to 10–15% for complex layouts or repeating patterns.
What is the best way to calculate material for sheet vinyl when the room has cutouts and obstacles?
Subtract the area of permanent obstacles like built-in cabinets, islands, or non-removable fixtures from your total floor area, since you usually don’t cover those sections with vinyl flooring. For cutouts (toilets, base cabinets, vents, or door openings), measure each opening and deduct that square footage from your order. Keep in mind that you may need extra sheet vinyl at seams or edges to allow for trimming around obstacles, so still include a waste allowance in your calculation.
How much extra sheet vinyl should I buy for waste and seams?
A common rule is to purchase an extra 5–10% beyond the calculated square footage, especially if you’re cutting around corners, door jambs, or uneven walls. If you’re working with patterned sheet vinyl that must align, increase waste to 10–15% to account for matching repeats and mistakes. For larger rooms or when seams are unavoidable, you may also need extra material length to ensure proper coverage and seam placement.
Which method should I use to estimate sheet vinyl size when buying by roll width and length?
Determine the sheet vinyl roll width(s) available and calculate how many feet of width your room requires, factoring in trimming allowances along edges. Then measure the room length and add waste for fitting and pattern alignment, using the roll length you’ll purchase. If your layout requires more than one sheet or panel, plan seam locations early and confirm you can cover the full area using the chosen roll dimensions before placing an order.
Why do leveling and subfloor measurements affect how much sheet vinyl material you’ll need?
A sheet vinyl floor needs a smooth, properly prepared subfloor, and uneven areas can change how much trimming you’ll do along edges and transitions. If you have bumps or dips that require additional trimming or rework, you can run short on material, especially with patterned sheet vinyl. Accurate subfloor measurement also helps you estimate correct sheet vinyl overage for wrapping, finishing, and achieving a tight fit at walls and doorways.
📅 Last Updated: October 08, 2026 | Topic: How to calculate material for sheet vinyl floors? | Content verified for accuracy and freshness.
References
- Google Scholar Google Scholar
https://scholar.google.com/scholar?q=how+to+calculate+material+for+sheet+vinyl+flooring+square+footage+waste+factor - Google Scholar Google Scholar
https://scholar.google.com/scholar?q=sheet+vinyl+flooring+estimation+layout+roll+width+pattern+repeat+calculation - Google Scholar Google Scholar
https://scholar.google.com/scholar?q=resilient+flooring+material+estimation+sheet+vinyl+installation+recommended+work+practices - https://en.wikipedia.org/wiki/Vinyl_flooring
- https://en.wikipedia.org/wiki/Flooring
- Square foot
https://en.wikipedia.org/wiki/Square_foot - Area
https://en.wikipedia.org/wiki/Area - https://en.wikipedia.org/wiki/Pattern_(design
- https://en.wikipedia.org/wiki/Waste_factor
- List of measuring instruments
https://en.wikipedia.org/wiki/Dimensional_measurement


