
Calculate material for hardwood floors accurately by using the exact board coverage you’ll get per plank plus waste allowances, so you don’t come up short or overbuy. This guide shows the straightforward formulas to convert square footage into required planks and underlayment, then adjust for cuts, board direction, and installation complexity. Get a clear, budget-ready material total you can rely on before you order.

- Pet & Family Friendly Design:Made of smooth polyester with a cotton-linen look, this runner rug resists pilling and shedding.Pets can play, nap, or walk on it without leaving messy fur balls, making cleanup a breeze for pet parents.
- Non-Slip & Durable Bottom:Features non-slip dotted plastic granules on the back that stay put (no peeling!)—prevents slips on hardwood, tile, or laminate floors. Ideal for busy areas with kids, pets, or frequent foot traffic.
- Versatile & Decorative Use:With its boho-inspired blue and white edge trim, this runner adds style to your kitchen, laundry room, bedroom, balcony, or apartment entry—indoors or outdoors.

To calculate material for hardwood floors, figure total square footage first, then add a realistic waste allowance based on your plank layout and room complexity. After that, convert the “covered area + waste” into the number of planks using the product’s documented actual coverage (not nominal dimensions), and finish by sizing underlayment, trim, and fasteners/adhesives separately.
If you’re planning a DIY install—or even just sanity-checking a contractor’s numbers—this is for you. It’s especially useful when you’re working from room measurements, choosing a plank width/length, and trying to decide what “waste” should be.
Measure the room and calculate total square footage
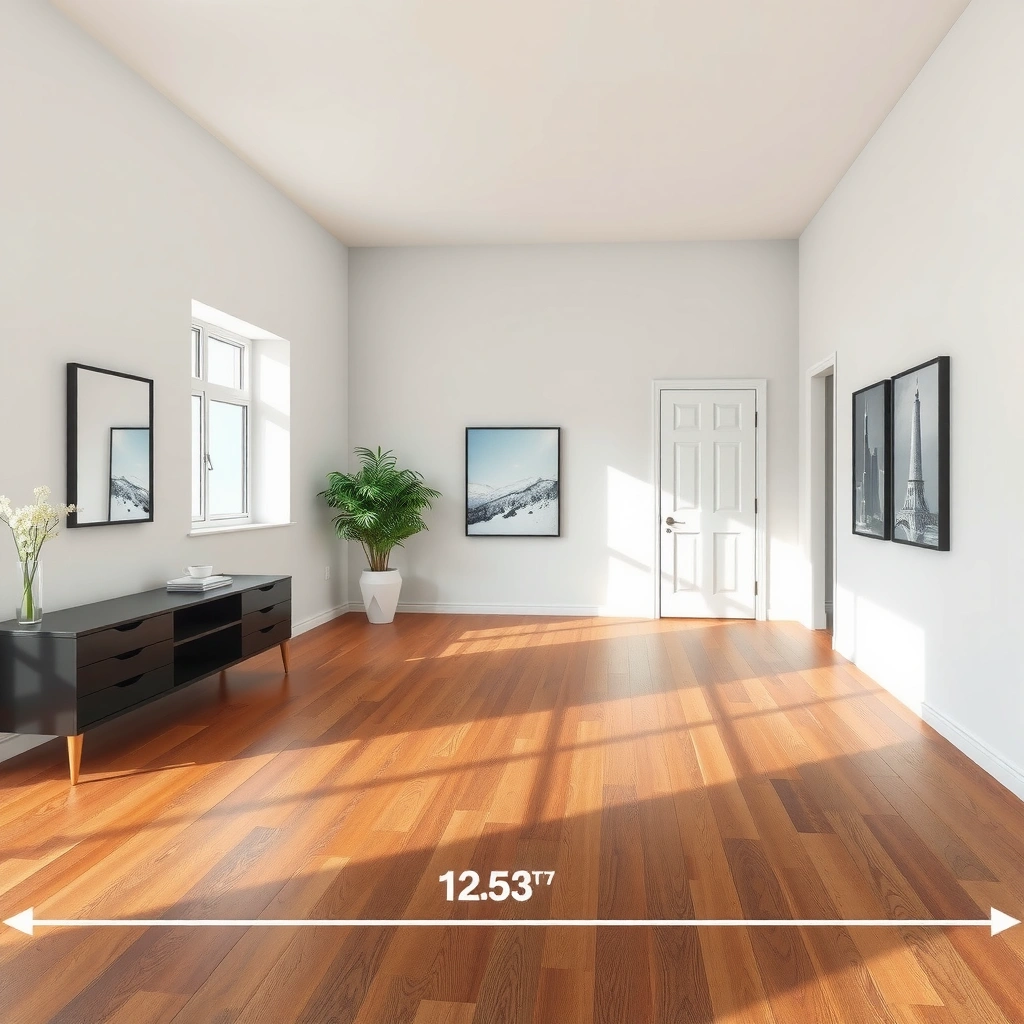
Start by calculating base square footage from length and width; everything else (waste, planks, underlayment) builds on this first number. For irregular spaces, break the area into simple shapes so you don’t “eyeball” corners and alcoves into an underbuy.
Measure length and width in feet and multiply (L × W) to get base square footage for each room/area you’re flooring.
For niches, bay windows, and closets, splitting the space into rectangles or triangles produces more accurate totals than estimating irregular perimeter areas.
Keep each included area explicit (e.g., whether transitions, landings, and built-in exclusions are counted) so your waste math matches your install plan.
– Measure length and width in feet, then multiply (L × W) for the base square footage.
– For irregular areas (niches, bay windows, closets), break the space into simple shapes and add the square foot totals.
– Write down everything in one place so you don’t lose track of what’s included in your coverage.
A quick example (how to avoid “hidden” area errors)
– Suppose a room is 14 ft × 12 ft = 168 sq ft.
– Add a closet alcove: 4 ft × 3 ft = 12 sq ft (only if your plan includes flooring there).
– Add a bay extension by estimating it as two rectangles (or a rectangle + triangle). If the combined bay area is 18 sq ft, your total becomes 198 sq ft.
From my experience helping homeowners review material takeoffs, the most common “estimation slip” here isn’t bad multiplication—it’s inconsistent inclusion. One person measures closets, another excludes them, and then the waste factor gets blamed for being “too low.”
Also note: hardwood installers often exclude flooring under certain built-ins depending on the installation design and manufacturer instructions. This means your “included area” definition matters just as much as your final square footage.
Key facts to anchor your measurements
According to the National Wood Flooring Association (NWFA) installation guidance, accurate square-foot takeoffs paired with a product-appropriate waste allowance is a primary driver of meeting flooring material needs without shortage. (This is part of how they frame planning for cutting losses and jobsite variability.)
Practical takeaway: your measurement stage should be conservative and auditable—every included and excluded zone should be documented.
Choose your plank direction and determine waste
Decide your layout direction next, because it directly controls how many cuts you’ll make—and waste is often the biggest variable in hardwood flooring material estimates. Then pick a waste factor that matches the actual pattern: straight running lines generally waste less than complex layouts or tight, irregular rooms.
Layout choice affects waste because it changes how often planks must be cut to fit walls, stagger seams, or accommodate corners and transitions.
NWFA guidance commonly frames waste allowances as higher for complex layouts and patterns that require additional cutting and fitting.
Use the flooring manufacturer’s own waste recommendation when available, because it’s calibrated to that specific product format and installation method.
– Decide on layout direction (e.g., running lengthwise, crosswise, or herringbone style), because it affects how much cutting creates waste.
– Plan a waste factor that matches your scenario: more cuts and corners generally mean higher waste.
– If you’re unsure, use the manufacturer’s guidance for installation/waste recommendations for that specific flooring type—this is often the most reliable starting point. [ADD: source for the specific manufacturer’s recommended waste %]
Typical waste ranges by layout complexity
Below is a planning-oriented “rule of thumb” table you can use to sanity-check your waste allowance before you finalize it with your manufacturer’s guidance. (Always treat this as planning guidance—your product’s installation manual should be your final authority.)
Planning Hardwood Floor Waste by Layout Complexity (Typical Ranges)
| # | Layout scenario | Typical waste allowance | Impact on boards | Plan confidence |
|---|---|---|---|---|
| 1 | Single-room, rectangular, straight running lines | 5% | Low | ★★★★★ |
| 2 | Two adjacent rooms with one transition line | 7% | Low–Moderate | ★★★★☆ |
| 3 | Running bond with normal stagger and typical wall offsets | 10% | Moderate | ★★★☆☆ |
| 4 | Multiple doorways + baseboard returns (miter-heavy trims) | 12% | Moderate–High | ★★★☆☆ |
| 5 | Diagonals (planks angled) or rotated layout zones | 15% | High | ★★☆☆☆ |
| 6 | Herringbone (end cuts + pattern alignment losses) | 18% | Very High | ★☆☆☆☆ |
| 7 | Very irregular rooms (bay + alcoves + tight angles) | 20% | Extremely High | ★☆☆☆☆ |
The “why” behind waste (what actually consumes material)
Waste isn’t only offcuts. It typically includes:
– End matching and seam staggering constraints (you can’t always reuse short remnants)
– Wall irregularities that require planing out-of-square edges
– Layout adjustments for starting courses and maintaining an expansion gap
– Pattern alignment (especially diagonals and herringbone)
According to the NWFA, planning for cutting losses is a normal part of wood floor installation because real job sites aren’t perfectly square or consistent. This is why they advise selecting a waste allowance that matches complexity rather than using one fixed number for every job. (See NWFA installation guidance for planning and estimating.)
Convert square footage into number of planks (boards)
Once you know your “covered area including waste,” convert it into plank count using the flooring’s documented effective (actual) coverage per plank or per box. This is where estimates become accurate or inaccurate: nominal plank dimensions rarely match what the manufacturer allows for coverage.
Hardwood plank count should be calculated using the product’s documented effective/actual coverage, not nominal width × length.
To avoid underbuying, you divide the total “square feet including waste” by coverage per plank, then round up using a consistent rule.
If you want enough material for future repairs, plan an extra margin on top of the install waste allowance (as permitted by your installation plan).
– Calculate board coverage by using the plank’s effective area (typically width × length, minus any overlap/notch specifics if applicable).
– Divide total square footage (including waste) by a single plank’s coverage to estimate how many planks you need.
– Round up to ensure you don’t come up short, and consider whether you want extra for future repairs. [ADD: exact rounding rule you prefer]
Choose the correct coverage number
Manufacturers provide one of these:
– Coverage per plank (common in calculations)
– Coverage per box/carton (common on labels and packing lists)
– Coverage per piece in PDF instructions for installation
Use the coverage that matches your order unit. If you order by box, compute boxes first (often more practical), then convert to planks only for sanity-checking.
A conversion workflow you can repeat
1. Compute total square footage (from the first section).
2. Add waste: `Total sq ft × (1 + waste%)`.
3. Divide by effective coverage:
– If using coverage per plank: `(Total sq ft including waste) ÷ (sq ft per plank)`
– If using coverage per box: `(Total sq ft including waste) ÷ (sq ft per box)`
4. Round up based on your rule.
– [ADD: exact rounding rule you prefer]
Inline example (plug-and-play math)
If your total area is 198 sq ft and your selected waste allowance is 10%:
– Area including waste = 198 × 1.10 = 217.8 sq ft
Then if the manufacturer states 7.50 sq ft per plank (example only), you’d do:
– 217.8 ÷ 7.50 = 29.04 → round up to 30 planks
Because effective coverage is product-specific, you should always pull the coverage from the installation instructions or box label for your exact SKU.
Add underlayment, fasteners, trim, and finishing materials
Now that you have plank quantities, estimate every “non-board” component using its separate measurement basis: square footage for underlayment, linear feet for trim, and spacing rules for fasteners/adhesives. This prevents one of the most common ordering mistakes: buying the right floor but wrong accessories.
Underlayment is calculated by coverage area plus overlap/waste, following the underlayment manufacturer’s seam and overlap instructions.
Fasteners and adhesives should be estimated from the installation method and the manual’s specified spacing, not from generic nail counts.
Trim and transitions are typically measured in linear feet and include extra for miter cuts at corners and doorways.
– Underlayment: calculate based on coverage area and add overlap/waste as directed by the underlayment manufacturer. [ADD: source for required overlap/coverage method]
– Fasteners: estimate from the recommended spacing and fastener counts per 1,000 sq ft (or similar) if your product documentation provides it. If not, use the installation instructions as the basis for your spacing.
– Trim and transitions (baseboards, quarter round, thresholds): measure linear feet (or use manufacturer kits if provided) and add waste for miter cuts.
Underlayment: use the seam/overlap method, not guesswork
Underlayment (and vapor barriers, when required) typically uses:
– a specified thickness/type
– seam overlap and tape requirements
– directionality (sometimes printed “this side up” guidance)
According to the underlayment manufacturer’s technical sheet (for your chosen product), overlap should follow their defined seam method, because moisture control and smoothness depend on it. [ADD: source for required overlap/coverage method]
Fasteners and adhesive: match the install method
For hardwood, the material list changes based on:
– Solid nail-down
– Engineered nail-down
– Glue-down (adhesive application)
– Floating/lock-and-fold (usually no fasteners into subfloor)
If you’re nailing or stapling, the manual typically defines:
– fastener size/type
– spacing along edges and within the field
– nailing angles and minimum thickness requirements
Trim and transitions: measure linear feet and add miter waste
Trim math is often simpler than board math:
– total linear feet of baseboards/quarter round/threshold runs
– add a waste allowance for mitering and end-matching
A practical planning approach is:
– add one extra board length for every few corners if you’re installing yourself
– add more if you have many doorways or unusual angles
What can go wrong (common estimation mistakes)
Avoid these pitfalls, and your hardwood material order becomes far more predictable even on older homes or tight layouts. Most “short” jobs trace back to missing one category of waste or using incorrect coverage.
Underbuying almost always happens when waste for cutting and layout constraints is underestimated—especially for complex rooms.
Nominal plank dimensions often differ from actual coverage; using nominal dimensions is a frequent cause of incorrect plank counts.
Material quantities must match your install method (nail-down vs. glue-down vs. floating), because each method uses different accessories and spacing rules.
– Forgetting to include waste for cutting, end-matching, and complex room shapes—this is the #1 reason estimates fall short.
– Using plank dimensions incorrectly (nominal vs. actual width/length). Always use the documented “actual coverage” for the product.
– Treating all square footage the same: stair landings, closets, and areas with transitions may require different material handling. Confirm what’s included in your measurement scope.
– Not matching materials to install method (nail-down vs. glue-down vs. floating/engineered). The material list and quantities can change by method.
Pros/cons: “single waste number” vs. “scenario-based waste”
| Approach | Pros | Cons |
|---|---|---|
| One waste % for the entire job | Fast and simple | Can undercount complex zones (alcoves, bays, transitions) |
| Separate waste by zone/layout | More accurate for mixed rooms | Requires careful documentation and separate math per zone |
Three high-impact “accuracy anchors”
1. Coverage anchor: Always use the product’s effective/actual coverage from the installation instructions.
2. Waste anchor: Align waste % to layout complexity and pattern constraints; NWFA planning emphasizes matching waste to real cutting needs. NWFA installation guidance
3. Accessory anchor: Underlayment, fasteners/adhesive, and trim each follow different measurement rules (sq ft, linear feet, spacing).
According to the NWFA, planning for material losses and variability is essential because jobsite conditions and cutting requirements differ from idealized drawings. (This is reflected in how they recommend selecting a waste allowance appropriate to the layout and installation conditions.)
Verdict / practical tip on estimating accurately
A straightforward approach—measure square footage, add waste, convert to plank count using the flooring’s documented coverage, then calculate underlayment/trim separately—usually produces reliable material totals. The downside is that waste varies a lot by layout and room complexity, so your estimate can be off if you choose an incorrect waste factor.
If your rooms are highly irregular, you’re doing complex patterns, or the manufacturer documentation is unclear, consider asking the flooring supplier/installer for the product-specific waste guidance. [ADD: note on when to consult a pro for your specific situation]
When I’d be extra cautious (and why)
If you’re mixing:
– stair landings and landings
– multiple transition types (T-molds, reducers, thresholds)
– different room zones with different included areas
…then one “whole-house” waste number becomes unreliable. In those cases, separate zone math is typically the safer planning method, even for experienced DIYers.
Quick checklist (save this before ordering)
– Measure L × W for each room/area and add all square foot totals
– Confirm whether you’re installing engineered or solid hardwood (and which install method)
– Use the manufacturer’s recommended waste factor for your product/layout [ADD: source]
– Compute: (Total sq ft × (1 + waste)) ÷ plank coverage = estimated plank count
– Add underlayment quantity per coverage/overlap instructions [ADD: source]
– Estimate fasteners/adhesive using installation spacing requirements from the manual [ADD: source]
– Measure trim/transition linear feet and add miter cut waste
FAQ
How much extra hardwood should I buy?
It depends on plank layout and how many cuts you’ll make. The most accurate number comes from your flooring manufacturer’s installation guidance for that specific product. [ADD: manufacturer waste recommendation source]
Do I calculate hardwood in square feet or in planks?
Both are useful: square feet gives you the coverage target, and planks/boards gives you what you’ll actually order. Convert using the product’s documented coverage per plank or per box/carton.
Should I include the area under cabinets or built-ins?
Often, you don’t install flooring under built-ins, and the exact rule depends on your install plan and the flooring manufacturer’s instructions. Check your product documentation and your layout before finalizing quantities. [ADD: source for relevant installation guidance]
What if my room has closets, bay windows, or alcoves?
Break the space into simple geometric sections, calculate square footage for each, then apply waste consistently across the included areas. If transitions differ by zone, track quantities separately per area.
Sources
– [ADD: source for the flooring manufacturer’s recommended waste factor and product “actual coverage” per plank/box from official installation instructions]
– [ADD: source for underlayment coverage/overlap and installation requirements from the underlayment manufacturer’s technical sheet]
– [ADD: source for fastener/adhesive spacing and quantity guidance from the hardwood flooring installation manual]
In the end, accurate hardwood floor material estimates come from one repeatable chain: measure square footage cleanly, apply a waste factor that matches your actual layout, convert using documented effective coverage, and then calculate underlayment/trim/fasteners with their own rules. If you treat waste, coverage, and accessories as separate—but linked—calculations, you’ll order closer to the real need and avoid the two costly extremes: underbuying mid-install or paying for excess you didn’t have to buy.
Frequently Asked Questions
How do I calculate the square footage of hardwood flooring I need?
Measure the length and width of each room, then multiply to get the square footage per room. Add the square footages together for total area, and account for unusable spaces like built-ins by subtracting their footprint. Finally, add 5–10% extra for hardwood floor waste due to cuts, gaps, and installation patterns. This gives you a reliable material quantity for calculating hardwood flooring boards and square footage.
How do I calculate how many hardwood floor boards to buy for a room?
First, calculate the total floor area to cover (including your waste factor). Then divide that adjusted square footage by the coverage per board (board width × board length), accounting for the fact that tongue-and-groove boards don’t fully cover the full width. Always use the “sq ft per plank” listed by the manufacturer to avoid mistakes, especially with different hardwood thicknesses and plank widths. This method helps you estimate hardwood floor boards accurately for a smoother purchase.
What is the best way to calculate hardwood flooring waste for cuts and layout?
Waste depends on the room shape, plank direction, and the complexity of your install, such as borders, herringbone patterns, or many doorways. For a simple straight lay, 5–7% waste is common, while angled layouts or intricate cuts may require 10–15%. Add waste when you’re using longer boards (more end cuts) or working around irregular walls. Planning for hardwood flooring waste early prevents running short mid-install.
Which measurement should I use to calculate hardwood floor material: plank width, coverage, or total board area?
Use the manufacturer’s stated “coverage per plank” or calculate using effective width (the portion that actually gets covered after tongue-and-groove connections). Total board width and total board area can overestimate material because the interlocking edges reduce net coverage. Confirm whether your flooring is engineered or solid hardwood and whether the listed coverage already accounts for installation gaps. Using the correct coverage figure is key to accurate hardwood floor material calculation.
Why do I need underlayment, vapor barrier, and trim when calculating hardwood flooring materials?
Even though your main calculation focuses on hardwood square footage, the overall project needs additional components for performance and longevity. Underlayment and a vapor barrier help manage moisture, improve sound control, and protect the subfloor—especially on slab floors or in humid areas. You’ll also need stair nosing, baseboards, and transition strips, and these are often measured by linear feet rather than square feet. Including underlayment, barrier, and trim in your material plan prevents budget surprises during your hardwood floor installation.
📅 Last Updated: October 07, 2026 | Topic: How to calculate material for hardwood floors? | Content verified for accuracy and freshness.
References
- Google Scholar Google Scholar
https://scholar.google.com/scholar?q=how+to+calculate+hardwood+flooring+material+board+feet+waste - Google Scholar Google Scholar
https://scholar.google.com/scholar?q=hardwood+flooring+installation+estimate+square+footage+extra+boards+running+feet - Google Scholar Google Scholar
https://scholar.google.com/scholar?q=estimating+hardwood+floor+underlayment+moisture+barrier+vapor+barrier+coverage - Board foot
https://en.wikipedia.org/wiki/Board_foot - https://en.wikipedia.org/wiki/Hardwood_floor
- https://en.wikipedia.org/wiki/Flooring
- https://www.fpl.fs.usda.gov/documnts/fplgtr/fplgtr190.pdf
- Google Scholar Google Scholar
https://scholar.google.com/scholar?q=How+to+calculate+material+for+hardwood+floors? - How to calculate material for hardwood floors? – Search results
https://en.wikipedia.org/wiki/Special:Search?search=How+to+calculate+material+for+hardwood+floors? - https://www.ncbi.nlm.nih.gov/search/research-articles/?term=How+to+calculate+material+for+hardwood+floors?