
You can calculate garage floor material fast and accurately by using the slab’s total square footage and thickness to determine exactly how much concrete (or self-leveler) you need—then converting that into bags or volume. This guide walks you through the one formula that drives your estimate, adds a realistic waste factor, and covers common extras like crack-control joints and vapor barrier coverage. If you know your garage dimensions and target thickness, you’ll leave with a clear material number instead of a rough guess.
To calculate material for garage floors, start with the garage’s square footage (length × width), then convert your target thickness into volume (area × thickness). After that, use the manufacturer’s coverage rate (coverage per bag, per gallon, or per roll) to translate volume into the exact units you’ll buy—then add a practical waste/overage buffer for cuts, prep losses, and uneven surfaces.
If you’re planning a new concrete slab, a resurfacing/overlay system, or a coating that needs primer and topcoat, your exact “material list” changes—but the core area-and-thickness approach stays consistent. This guide is written for homeowners, DIYers, and contractors who want a reliable takeoff without guessing, and it focuses on the steps where estimates typically go wrong.
Measure the garage floor area (and note special geometry)
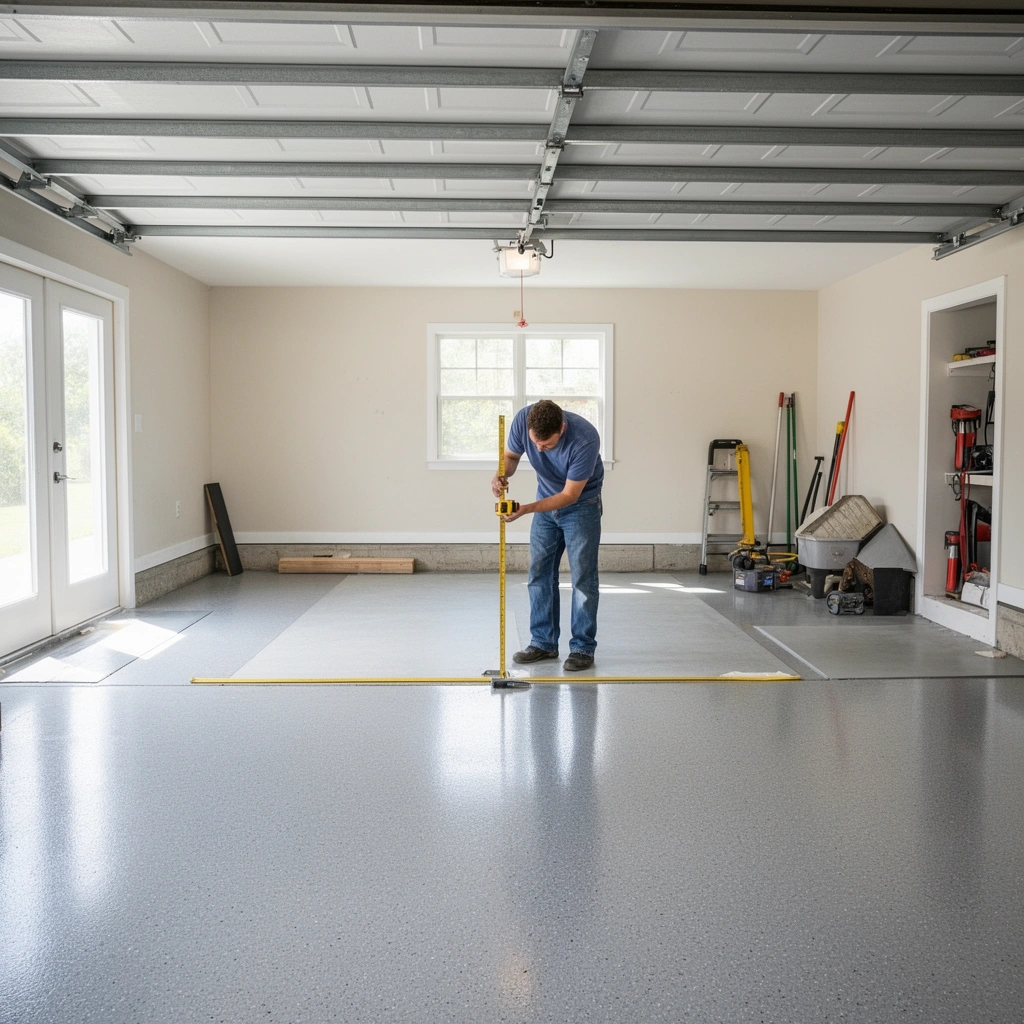
Start here because every downstream calculation depends on a correct square-footage number. If your space isn’t a perfect rectangle, splitting it into smaller shapes prevents material shortages—especially for overlays and coatings where coverage is tightly specified.
For a rectangular garage bay, the foundation of your estimate is Area = Length × Width in the same units (feet with feet, inches with inches).
Non-rectangular garages (steps, angled bays, bump-outs) should be broken into simple sections so the total area is the sum of each section.
If you’re coating only part of the slab (e.g., wheel-landing zones or a prep area), calculate that sub-area separately—don’t assume “full floor” coverage.
– Measure length and width in the same units (feet or inches) and compute area: Area = L × W.
– If the space isn’t a simple rectangle (steps, bends, angled bay), break it into sections and add the areas together.
– Write down whether you’re covering the full garage floor or only part of it (e.g., a prep zone around the doors).
Example Garage Sizes and Concrete Volume for a 4-in Slab (Planning Takeoff)
| # | Common garage size (L×W) | Area (sq ft) | Volume (cu ft) @ 4 in | Takeoff Risk* |
|---|---|---|---|---|
| 1 | 12×20 ft | 240 | 80.0 | ★☆☆☆☆ |
| 2 | 14×20 ft | 280 | 93.3 | ★☆☆☆☆ |
| 3 | 16×20 ft | 320 | 106.7 | ★★☆☆☆ |
| 4 | 18×20 ft | 360 | 120.0 | ★★★☆☆ |
| 5 | 20×20 ft | 400 | 133.3 | ★★★★☆ |
| 6 | 22×22 ft | 484 | 161.3 | ★★★☆☆ |
| 7 | 24×24 ft | 576 | 192.0 | ★★★★☆ |
“Takeoff Risk” is a planning proxy: higher stars generally mean the geometry is simpler and a uniform thickness estimate is more likely to hold. (Always confirm with your slab/plan.)
Pick thickness and convert area to material volume
Choose your target thickness next, because this is the step that turns an “area estimate” into a “quantity estimate.” For garage floors, thickness depends on whether you’re pouring new concrete, installing a leveling layer, or applying an overlay/self-leveler system.
Volume math uses consistent units: if Thickness is in inches, convert to feet before multiplying by square feet.
For slabs and overlays, Volume = Area × Thickness is the universal starting point—then you translate volume to product units using coverage rates.
Uneven slabs require a flatness plan (low spots, slope, and patch strategy), otherwise your uniform-thickness estimate will be wrong.
– Choose the target thickness for what you’re installing (for example, overlay thickness or the thickness of a leveling layer) and calculate Volume = Area × Thickness.
– Convert units carefully (common approach: convert feet to inches or inches to feet) so you don’t accidentally over-order.
– Add an allowance for thickness variation if your slab is uneven—use your plan’s recommended method for dealing with low spots and slopes (see notes placeholders where needed).
A quick, reliable unit conversion you can reuse
– 4 in = 0.3333 ft
– 1 cubic foot = 7.4805 gallons (useful if a primer/topcoat is specified differently, or if a material is sold by volume rather than coverage)
– 1 cubic yard = 27 cubic feet
Example thickness conversion (for planning)
If your overlay/leveling target thickness is 2 inches:
– Thickness in feet = 2 ÷ 12 = 0.1667 ft
– Volume = Area × Thickness = Area × 0.1667
Even if your product is sold “by bag,” this conversion is how you sanity-check the bag coverage math later.
Translate volume to the actual items you’ll buy
Now you translate the math result (volume) into the quantities on the product packaging. The crucial idea: concrete and cementitious materials are sold in bags, but coatings and primers are sold by gallon/kit, and coverage rates differ by surface condition.
Bagged concrete/mix estimates require the label’s stated coverage per bag at your exact thickness—not a generic “covers X sq ft.”
Self-levelers and patch mixes commonly specify coverage for a thickness range, so choose the value that matches your installation thickness.
For coatings, thickness is usually controlled by dry-film targets and application method; coverage is provided as square feet per gallon (or kit), not as volume-from-thickness.
– For bagged concrete/mix: convert required volume into the number of bags using the manufacturer’s coverage per bag at your target thickness (from the product label or technical data).
– For self-levelers/patch mixes: use the product’s stated coverage rate per bag and thickness range; many are specified for a particular installation thickness.
– For coatings/primers: use the listed coverage (e.g., square feet per gallon) for the specific system and surface condition; coatings are sold by volume, not by thickness the way concrete is.
How to avoid the “volume vs. coverage” trap
If you’re doing a cementitious overlay:
1. Compute volume (Area × Thickness)
2. Convert volume into bags using the product coverage math (bags × label coverage = area)
If you’re doing an epoxy/urethane system:
1. Compute surface square footage
2. Multiply sq ft ÷ coating coverage to get gallons/kit quantities
3. Repeat per layer (primer, base coat, topcoat)
This is where many takeoffs go off track: people correctly compute volume for concrete, then use that volume to order gallons of epoxy (which is not how coatings are specified).
Add waste, prep losses, and edge conditions
This is where “close estimates” become “correct orders.” Garage floors are full of constraints—cracks, expansion joints, door thresholds, wheel tracks, and the reality that prep (grinding, patching, mixing margins) consumes materials beyond the initial area × thickness.
Waste is not just scrap: cutting, mixing inefficiency, edge buildup, and repairs often consume enough material to change your order quantity.
Overlay and coating performance depend on substrate prep; if you undercount patching/grinding material, you’ll run short before the system is complete.
Surface porosity varies between new concrete, old slab, and previously sealed floors; this changes primer and coating consumption.
– Include an overage factor for waste and cutting—especially if you’re placing decorative finishes, mats, or multiple layers.
– Account for prep requirements like grinding, crack repair, patching, or underlayment overlap—these affect how much “system material” you actually use.
– Consider that coatings and overlays can vary by surface porosity (new concrete vs. old slab, sealed vs. unsealed), so follow the system documentation for required priming steps.
Practical overage guidance (how to choose a buffer)
Because each system’s documentation differs, the best approach is:
– Use the system’s recommended application coverage as your baseline
– Add a buffer based on your conditions: slab roughness, number of pours/sections, and whether multiple patch layers are expected
If you don’t have a system-specific guidance document, use a conservative allowance and treat it as a planning number to validate once prep begins.
What can go wrong (and how to avoid re-order headaches)
Even simple calculations can fail when unit conversions, coverage assumptions, or substrate realities don’t match the label. Here are the issues that most often cause expensive mid-project delays.
Mismatched units (inches vs. feet) usually create the biggest single-order error—always convert thickness to feet before multiplying by square footage.
Coverage rates are application-specific; a label coverage written for “smooth, properly primed” surfaces is not the same as a worn, porous slab.
Doors, expansion joints, and wheel paths often require additional prep and patching that aren’t reflected in a pure area × thickness estimate.
– Mismatched units: calculating with inches but ordering with feet-based coverage (or vice versa) is the most common math error.
– Using the wrong coverage rate: coverage differs by substrate and thickness; always use the manufacturer’s stated rate for the exact product and application thickness.
– Forgetting the seam/edge reality: doors, expansion joints, wheel paths, and cracks can reduce usable coverage or require additional patching.
– Underestimating prep material: many “garage floor” projects add patch/skim coats or crack repairs that aren’t included in the initial area×thickness estimate.
Pros/cons comparison: where your estimate should be “volume-driven” vs “coverage-driven”
| Approach | Best For | Main Risk |
|---|---|---|
| Area × Thickness → Volume → Bags | Cementitious mixes, overlays, leveling layers | Label thickness/coverage mismatch on uneven substrates |
| Area → Coverage Rate → Gallons/Kits | Epoxy/urethane coatings, primers, sealers | Porosity and prep level causing higher-than-expected consumption |
| System Takeoff (Layer-by-layer) | Multi-layer coating systems and resurfacing packages | Skipping required primers or patch layers |
Practical verdict (what to do next, and who should skip DIY math)
If you can measure the floor area and read the product label/technical sheet for coverage, calculating garage floor material is straightforward—and usually worth doing yourself to avoid big over/under-orders. The downside: if your slab is badly uneven, cracked, or moisture-problematic, your needed patching, primers, and thickness can change significantly, and you may need a site-specific plan rather than generic math. Skip the DIY-only calculation (or at least get professional input) if you’re dealing with structural issues, persistent moisture, or a complex multi-layer system where the manufacturer requires specific prep testing—[ADD: source for moisture testing/prep requirements if you have a chosen system].
A label coverage rate is a specification, not a suggestion—use it exactly for the stated thickness, substrate condition, and layer count.
If flatness is unknown, your thickness assumption becomes the biggest source of error; measure or follow the system’s leveling approach.
When moisture issues are suspected, the “math” can be irrelevant—successful coating systems depend on passing the required substrate testing before you buy materials.
Quick checklist / scan-able table
– Area: Garage length × width = 20 × 20 = 400 sq ft
– Thickness: Target thickness = 2 in = 0.1667 ft
– Volume: Area × thickness = 400 × 0.1667 = 66.7 cu ft
– Concrete/patch mix:
– Coverage per bag/unit at thickness: [ADD: ____ from label]
– Bags needed: [ADD: ____]
– Coatings (if applicable):
– Primer coverage: [ADD: ____ sq ft per unit]
– Topcoat coverage: [ADD: ____ sq ft per unit]
– Add overage for waste: [ADD: ____% per your plan]
– Prep add-ons (patch/crack repair/underlayment): [ADD: ____]
FAQ
How do I calculate material for an epoxy or coating garage floor?
Use the coating system’s stated coverage per gallon (or per kit) for each layer (primer + coat). Multiply the garage sq ft by the coverage requirements, then add the recommended overage for waste and extra coats if your system specifies them.
Do I calculate concrete and overlays the same way?
The core method is similar (area × thickness), but you must translate the resulting volume into the specific product’s coverage or bags. Overlays, self-levelers, and mixes often have thickness ranges with different coverage rates—use the label/technical data for your thickness.
What overage percentage should I add?
It depends on cutting, product waste, and how many layers you apply. If your product documentation recommends a specific overage, follow it; otherwise use a modest buffer and adjust after accounting for your layout complexity. [ADD: exact overage guidance from your selected manufacturer/system, if available.]
What if my garage floor is not perfectly level?
You may need patching/skim coats or a different thickness plan in low spots, which changes material quantity. Base your calculation on the system’s recommended approach for correcting flatness—not just an assumed uniform thickness.
Sources
– [ADD: manufacturer technical data sheet(s) for the specific mix/overlay/coating system you’re using—coverage rates and thickness guidelines.]
– [ADD: manufacturer instructions/technical application guide for surface prep and required primer steps.]
– [ADD: any official standards you plan to reference for concrete finishing or surface preparation requirements, if applicable.]
Calculate garage floor material by starting with square footage, converting to volume where thickness matters, and then using the manufacturer’s coverage/bag data to determine exactly what to buy. Don’t forget prep losses, waste, and any patching or priming requirements that change thickness and coverage. If you share your garage dimensions and the exact product/system (mix type, coating brand/system, and target thickness), we can plug them into the math layout and produce a tighter material takeoff.
Frequently Asked Questions
How do I calculate the amount of concrete needed for a garage floor?
Measure the garage floor length and width, then multiply to get square footage. Multiply square footage by the desired slab thickness (in feet) to get cubic feet, then divide by 27 to convert to cubic yards of concrete. For example, a 20 ft x 22 ft garage (440 sq ft) at 4 inches thick (0.333 ft) equals about 5.44 cubic yards; add 5–10% extra for waste, uneven subgrade, and material spillage.
How do I estimate the number of bags of concrete or self-leveler for my garage floor?
Convert your slab volume into cubic feet, then divide by the coverage per bag to estimate bag count. Check the product label for “coverage per bag” (it varies by bag size and thickness) and calculate based on your target thickness, not just an assumed depth. For self-leveling underlayment, also consider that thicker areas and surface prep (like priming) can change consumption, so it’s wise to order 10% more than your calculated amount.
Which thickness should I use for a concrete garage floor, and how does it affect material calculation?
Common residential garage slabs are typically 4 inches thick for cars, while heavier vehicles or work areas may need 5–6 inches for better strength and durability. Thicker concrete increases the required cubic yards, so thickness directly impacts your material estimate—every additional inch adds about 25% more volume for the same square footage (since volume scales linearly with thickness). Confirm local guidelines or your slab design, especially if you’re planning for a truck, lift, or heavy equipment.
What materials besides concrete do I need, and how do I calculate them for a garage floor?
Most garage floors also require a vapor barrier (like 6-mil polyethylene), edge insulation or foam, rebar or wire mesh (depending on your design), and gravel base for proper drainage and support. Calculate vapor barrier area by using the slab square footage plus an overlap (often 8–12 inches at seams) and add extra for upturns at edges. For base material, determine base thickness in inches and multiply by square footage to estimate cubic yards, then convert to tons if your supplier uses weight.
Why should I add waste or overage when calculating garage floor material, and how much should I add?
Waste accounts for spillage, uneven excavation, minor form adjustments, and cutting/finishing losses that aren’t captured in a simple length x width formula. A typical rule of thumb is adding 5–10% to concrete estimates, and 10–15% for self-leveling or bagged products where thickness variation and coverage inconsistencies are common. If your garage floor includes penetrations (drains, plumbing, posts) or irregular shapes, increase the overage to reduce the risk of running short.
📅 Last Updated: October 11, 2026 | Topic: How to calculate material for garage floors? | Content verified for accuracy and freshness.
References
- Google Scholar Google Scholar
https://scholar.google.com/scholar?q=calculate+concrete+slab+material+volume+thickness+reinforcement - Google Scholar Google Scholar
https://scholar.google.com/scholar?q=garage+floor+concrete+quantity+calculation+slab+thickness+rebar+mesh - Google Scholar Google Scholar
https://scholar.google.com/scholar?q=concrete+slab+estimating+materials+subbase+gravel+base+coverage - Concrete slab
https://en.wikipedia.org/wiki/Concrete_slab - Google Scholar Google Scholar
https://scholar.google.com/scholar?q=How+to+calculate+material+for+garage+floors? - How to calculate material for garage floors? – Search results
https://en.wikipedia.org/wiki/Special:Search?search=How+to+calculate+material+for+garage+floors? - https://www.ncbi.nlm.nih.gov/search/research-articles/?term=How+to+calculate+material+for+garage+floors?