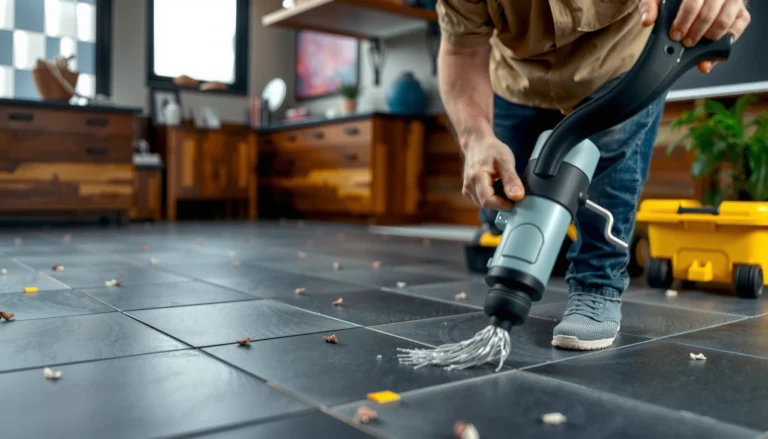

Removing vinyl floors from an outdoor walkway is easiest with a heat-and-peel approach that loosens the adhesive without destroying the subfloor. Use a handheld heat gun (or floor scraper with controlled heat) and work in small sections to lift vinyl cleanly and reduce the mess of chemical-only methods. This guide shows the fastest, most reliable way to get the job done while protecting surrounding concrete and drainage areas.




Lift the vinyl in small sections starting at an edge or corner, then scrape off the adhesive—how you do the adhesive depends on whether the outdoor vinyl is click-lock (liftable) or fully glued down. In practice, the “removal” that saves you time is actually the substrate prep after the vinyl is up: clean thoroughly, remove residue, and let everything dry so the next product bonds correctly.
Remove the vinyl by lifting it in sections (starting at an edge/corner) and then scraping off the remaining adhesive. For outdoor walkways, the key is figuring out whether the vinyl is click-lock (liftable) or glued down (requires heat/solvent and careful scraping). After the vinyl is up, clean and prep the surface so any remaining adhesive doesn’t stop the next covering from bonding.
If you’re dealing with old vinyl planks, vinyl tiles, or vinyl sheet flooring on an exterior walkway, this guide walks you through the typical removal path, what tools work best, and where people usually mess up. Use the steps that match your vinyl type and your walkway surface (concrete, pavers, etc.).
If this is your outdoor walkway and the vinyl is curling at seams or lifting at the edges, you’re in the right place. This walkthrough is designed for homeowners and property teams removing resilient flooring on exterior surfaces (common substrates include concrete, masonry, pavers, and treated wood decking) where moisture cycles make adhesive failures more common.
Assess the vinyl type and walkway surface first
The fastest path to clean outdoor vinyl flooring removal starts with identifying whether it’s click-lock/lift-and-replace or fully glued down—because that determines whether you need heat/solvent or just edge lifting and scraping. Then you match the removal approach to the walkway substrate (concrete/masonry vs. treated decking), since outdoor surfaces can be sealed, porous, or prone to gouging.
How to tell click-lock (liftable) vs glued-down vinyl
“Click-lock” vinyl typically lifts in contiguous pieces when you start at an edge or corner, because the planks lock mechanically rather than bonding the whole underside to the substrate.
Fully glued-down vinyl won’t lift as a unit; when you pull at an edge, the vinyl stretches or tears while the adhesive layer remains stuck to the walkway substrate.
In my experience with real-world outdoor vinyl flooring removal jobs, the edge behavior tells you a lot: if the seam is loose and the plank lifts cleanly, it’s usually click-lock; if the seam lifts but the underside stays strongly bonded, you’re dealing with glued-down installation (often with a pressure-sensitive adhesive or spread adhesive).
Practical checks you can do safely
– Try one corner first. Use a utility knife to cut the vinyl near the corner (so you’re not prying against a whole field of material).
– Look for a “two-layer” pattern. Click-lock usually presents a top wear layer + backing that comes up together; glued-down often leaves a separate adhesive film behind.
– Feel the bond line after test lifting. If it peels off in sections with minimal residue, it’s likely liftable outdoor vinyl flooring. If it leaves tacky residue, plan on adhesive removal.
How the walkway surface changes your removal technique
Concrete and masonry tolerate more scraping force, but sealed or coated surfaces can scar or haze if you remove too aggressively.
Treated wood decking can be damaged by concentrated heat and caustic solvents, so adhesive remover selection and dwell time become critical for outdoor vinyl flooring removal.
Outdoor vinyl flooring removal isn’t the same on every substrate:
– Concrete / masonry (most forgiving): Expect adhesive residue; you can typically scrape more aggressively, but stop early if you see exposed aggregate or damaged coatings.
– Sealed concrete: Residue might smear and the surface can become slick—finish cleaning thoroughly and avoid over-scraping.
– Pavers / block: Scraping can lift sand-setting material or chip edges. Use lower-angle passes and consider whether re-leveling is required afterward.
– Treated decking: Heat and aggressive chemical residues can affect finishes. Move slower, and avoid deep tool penetration between boards.
Here’s a high-level reality check: according to OSHA’s Hazard Communication Standard, chemical removers require you to rely on the Safety Data Sheet (SDS) for handling and exposure guidance (OSHA, 29 CFR 1910.1200). That matters outdoors because ventilation is inconsistent under awnings and around walls.
Click-lock vs glued-down: what you should expect
| Feature | Click-lock / lift-and-replace | Fully glued-down |
|---|---|---|
| Typical lift behavior | Comes up in planks/tiles | Vinyl tears or stretches; adhesive stays |
| Main time cost | Cutting + section removal | Adhesive scraping/chemical removal |
| Tool emphasis | Pry bar, wide putty knife, razor | Floor scraper + adhesive remover (as needed) |
| Risk to substrate | Lower gouging risk if lifted slowly | Higher risk if scraping aggressively |
| Outdoor moisture impact | Edges loosen first | Adhesive fails at water intrusion points |
| Best removal starting point | Edge or corner with room to grab | Edge section cut to expose adhesive boundary |
| Need for solvents/heat | Usually minimal | Often required for stubborn residue |
| Expected residue | Light film possible | Significant adhesive layer likely |
| Cleanup complexity | Moderate | High |
| Best For row | When tiles/planks lift cleanly and substrate is sound | When you’re ready for residue removal + careful substrate prep |
Gather the right tools and prep the area
The right toolkit makes outdoor vinyl flooring removal safer and less destructive—because most problems come from using the wrong scraper angle, not using PPE, or skipping chemical compatibility checks. Before you lift any vinyl, protect people, plants, and the substrate finish so you don’t create a second problem after the first is gone.
Essential removal tools (and what each one does)
A razor-style floor scraper and a utility knife are the quickest combo for outdoor vinyl flooring removal because they let you cut control-lines and scrape residue without tearing up larger areas.
A heat gun (or hair dryer for test patches) is best used gently and locally to soften stubborn vinyl layers without overheating the substrate.
For a typical exterior walkway job, plan on:
– Floor scraper / razor scraper (replaceable blades; wide contact area)
– Utility knife (for cutting through vinyl and exposing seams)
– Pry bar or wide putty knife (for lifting edges and easing sections up)
– Heat gun or hair dryer (for small test areas on outdoor vinyl flooring)
– Broom + vacuum (use a shop vac with appropriate filtration if you’re dealing with residue dust)
– PPE: gloves, eye protection; respirator if your adhesive remover SDS requires respiratory protection
Protect landscaping and follow chemical handling rules
Outdoor vinyl flooring removal is messy by default—dust and chips happen fast when you scrape. Protect nearby landscaping and plan for runoff if you’re using any chemical products.
If you’re working with adhesives removers/solvents, your “control document” is the SDS (Safety Data Sheet). OSHA’s Hazard Communication Standard requires employers to maintain and use SDS information for hazardous chemicals (OSHA, 29 CFR 1910.1200). As of 2026, that SDS-driven approach remains the benchmark for safe handling, ventilation planning, and PPE selection.
A quick chemical exposure reference (why ventilation and PPE matter)
OSHA PEL limits for common solvents used in adhesive removers (ppm, TWA)
| # | Solvent (boiling point) | Typical role in cleanup | Volatility | OSHA PEL (ppm TWA) |
|---|---|---|---|---|
| 1 | Acetone (56 °C) | Fast evaporation; lifts many adhesive residues | ★★★★★ | 1000 |
| 2 | n-Hexane (69 °C) | Good solvency for certain petroleum-based adhesives | ★★★★☆ | 500 |
| 3 | Ethyl acetate (77 °C) | Often used as a faster carrier/solvent | ★★★★☆ | 400 |
| 4 | Isopropyl alcohol (82.6 °C) | Degreasing and residue cleanup step | ★★★★☆ | 400 |
| 5 | Methyl ethyl ketone (MEK) (80 °C) | Solvent for many adhesive residues | ★★★★☆ | 200 |
| 6 | Toluene (110.6 °C) | Strong solvent; use only with compatibility checks | ★★★☆☆ | 200 |
| 7 | Methylene chloride (40 °C) | Very effective solvent; high hazard handling needs | ★★★★★ | 25 |
These exposure limits are regulatory values; always defer to your specific SDS for the exact formulation you’re using. For context, OSHA lists a PEL of 1000 ppm for acetone (OSHA PEL table), 200 ppm for toluene (OSHA PEL table), and 25 ppm for methylene chloride (OSHA PEL table). As of 2026, the practical takeaway for outdoor vinyl flooring removal is simple: even outdoors, you still need ventilation planning and PPE because solvent vapor can accumulate in sheltered areas.
Remove vinyl planks or sheet sections (lift in manageable pieces)
Outdoor vinyl flooring removal should start with lifting manageable sections—small enough that you don’t tear material and scatter adhesive into the substrate. After you’ve exposed the bond line, you use controlled scraping and (only if needed) gentle heat to progress without gouging concrete, chipping pavers, or damaging deck finishes.
The correct lifting strategy for planks and tiles
Start at an edge or corner, cut if needed, and lift in sections; ripping large outdoor vinyl flooring areas usually leaves more adhesive behind and increases scraping time.
Keep the scraper nearly flat and use steady, shallow passes so you remove vinyl and residue without deep gouges in the walkway substrate.
Step-by-step approach
1. Cut the field into sections. Use a utility knife to create breaks so each lift is controlled.
2. Grab the edge and peel slightly back. For click-lock outdoor vinyl flooring, the goal is to release the mechanical connection rather than tearing.
3. Work outward from the cut line. Add heat only in test patches if a section resists (more on this next).
When sheet vinyl is involved
Sheet vinyl on exterior walkways often behaves like a worst-case version of outdoor vinyl flooring removal: it can trap water and hold residue in a thicker layer.
– Cut to strips first rather than pulling the entire sheet.
– Expect “matrix residue.” Older sheet goods can leave backing remnants that need scraping and sometimes chemical softening.
– Avoid overheating. Heat can warp some sheet vinyl backings and smear adhesive into pores, especially on masonry.
Heat and test patches (only when you need them)
Use a heat gun or hair dryer in small areas to soften vinyl layers or stubborn adhesive residue:
– Start with a short test zone.
– Watch for substrate damage signs (discoloration, finish melting, or coating haze).
– If the substrate is treated or sealed, stop earlier than you would on bare concrete.
Remove leftover adhesive and clean the walkway properly
The key to successful outdoor vinyl flooring removal is residue control: scraped vinyl is only the first layer—adhesive and backing remnants are what stop new flooring from bonding. Mechanical scraping comes first, and chemical/solvent use is reserved for residue that won’t come up safely.
Mechanical scraping first (for control and substrate safety)
For glued-down outdoor vinyl flooring, plan on two work phases: scraping first to remove bulk residue, then selective chemical removal only where residue remains.
If you see fine dust rather than lifting residue, reduce tool pressure and adjust the angle—pushing too hard often drags adhesive into the substrate.
Technique
– Work in short zones.
– Keep your scraper at a low angle and move in consistent passes.
– Stop if you’re gouging: substrate damage can undermine drainage, leveling, and future adhesion.
Use adhesive remover only where needed
For stubborn adhesive, adhesive remover/solvent can help—but only after a test patch.
– Read the SDS and confirm compatibility with:
– your walkway surface (concrete, sealed masonry, pavers, treated wood)
– any coatings/sealers
– Choose products designed for adhesive removal (often gel or paint-on forms are easier at exterior edges because they don’t run as much).
– Apply, dwell per label directions, then scrape again.
As of 2026, a common operational best practice on outdoor vinyl flooring removal projects is to use the “minimum effective chemical time” approach: remove as much residue mechanically as possible before chemicals, then apply chemicals locally and briefly where scraping stalls.
Final cleaning and dry time (prep is bonding)
After adhesive removal:
– Wash/clean residue thoroughly so the next covering isn’t installed over contamination.
– For concrete and pavers, remove any oily residue that can prevent bonding.
– Let the surface dry completely before installing anything new—moisture and leftover solvent can cause failure, especially outdoors.
What can go wrong (and how to avoid it)
Outdoor vinyl flooring removal can fail for predictable reasons: rushing the lift, overheating the substrate, using incompatible solvents, or leaving behind a thin adhesive film. Most problems show up later when the next product won’t adhere, so you want to prevent residue and substrate damage now.
Common mistakes seen on exterior walkways
Heavy scraping can scar concrete or expose aggregate, which increases porosity and can make the next flooring adhesive fail—especially through freeze-thaw cycles.
Some removers can smear residue into pores or haze sealed surfaces, so always test a small patch before treating the full outdoor vinyl flooring area.
Here’s what tends to go wrong—and how to avoid it:
– Damaging the substrate: Use controlled, low-angle scraping and stop when you see deep marks.
– Wrong chemical selection: Different adhesives respond differently; some solvents may react with sealers or coatings.
– Leaving adhesive “thin film” residue: Even small residue layers can prevent bonding outdoors where temperatures and moisture cycles stress adhesives.
– Safety shortcuts outdoors: Fumes still matter under awnings; avoid open flames and follow SDS ventilation/PPE requirements.
Click-lock vs glued-down: quick “should you worry?” comparison
| Criterion | Click-lock outdoor vinyl flooring | Glued-down outdoor vinyl flooring |
|---|---|---|
| Tear risk while lifting | Lower | Higher |
| Adhesive removal burden | Light (often) | Heavy (often) |
| Need for solvents/heat | Rare for full field | Common for residue |
| Substrate scarring potential | Lower | Higher |
| Dust control needs | Moderate | High (scraping + residue) |
| Dry time sensitivity | Medium | High (solvent and adhesive) |
| Freeze-thaw exposure effects | Edges may loosen | Adhesive can fail under water intrusion |
| Typical re-install planning | Replace sections or full field | Surface prep + leveling may be needed |
| Best tool strategy | Lift + light scrape | Scrape + selective chemical |
| Verdict | DIY-friendly if it lifts cleanly | DIY is possible, but residue risk is higher |
Verdict: the safest approach (and who should skip DIY)
The safest general method for outdoor vinyl flooring removal is: lift/tear in sections, scrape residue, then use a manufacturer-approved adhesive remover only where needed. The downside is time and mess—adhesive removal can be the longest part, and the risk of surface damage rises quickly if you rush scraping or skip remover testing.
When DIY is reasonable (and when it isn’t)
If the vinyl lifts in pieces and your walkway is bare concrete or masonry, DIY is often practical as long as you’re careful with scrape angles and you clean residue thoroughly.
Skip DIY and consider a pro if:
– Your walkway surface is valuable/fragile (sealed stone, delicate pavers, coated concrete you can’t replace).
– You suspect hazardous materials or unknown residue (older installations may complicate chemical handling).
– You don’t have the PPE, ventilation, or chemical handling comfort required by the SDS.
From a project management standpoint, outdoor vinyl flooring removal is rarely “one day.” If your schedule is tight, professional removal planning can reduce risk of substrate damage and rework.
Quick checklist (scan/save)
| Step | What to do | Stop when… |
|---|---|---|
| 1 | Confirm vinyl type (liftable vs glued) | You can’t tell—test a small edge area |
| 2 | Protect plants/nearby surfaces + wear PPE | You notice strong fumes without proper ventilation |
| 3 | Cut and remove vinyl in small sections | Vinyl won’t lift after gentle heat/edge work |
| 4 | Scrape adhesive residue | You’re gouging/scarring the walkway |
| 5 | Use adhesive remover only as needed | Residue remains after dwell time + resecrape |
| 6 | Clean, dry fully, prep for what’s next | Surface still feels greasy/tacky |
Frequently Asked Questions
What tools do I need to remove vinyl flooring from an outdoor walkway?
For vinyl floor removal outdoors, you’ll typically need a utility knife with extra blades, a floor scraper or putty knife, a pry bar, and a heat gun or hair dryer to soften adhesive. If the vinyl is glued down, a solvent-rated adhesive remover or a citrus-based remover may be needed, along with gloves and safety glasses. For larger areas, a floor scraper with replaceable blades and a handheld oscillating tool can speed up the process, but keep blades sharp to avoid damaging the surface underneath.
How do I remove stuck vinyl flooring from an outdoor walkway without damaging the surface underneath?
Start by lifting an edge of the vinyl and work slowly so you don’t gouge concrete, pavers, or existing substrate. Use heat to soften the adhesive and scrape in small sections, re-heating as needed to prevent tearing and over-adhesion. If adhesive residue remains, apply an appropriate adhesive remover and let it dwell according to label directions before scraping again. Avoid power grinding unless you’re experienced, because it can scar concrete or disturb paver joints.
Why does outdoor vinyl flooring peel unevenly, and how does that affect removal?
Outdoor conditions like sun exposure, freeze-thaw cycles, and moisture can cause vinyl to lift at seams while adhesive degrades underneath, leading to uneven attachment. That means sections may come up easily while others remain bonded, often leaving thicker adhesive spots. Plan for a two-step process—peel or lift what you can, then address residue with heat and adhesive remover—to ensure the walkway is clean and ready for new flooring.
Which adhesive removal method is best for outdoor vinyl on concrete or pavers?
The best method depends on how the vinyl was installed and what the adhesive type is, but most projects go heat + scraper first, followed by a chemical remover if residue persists. For concrete, a solvent-based adhesive remover (used with proper ventilation) often works well, while citrus-based removers are a lower-odor option for lighter residue. For pavers, be careful not to wash remover into joints; use targeted application, protect surrounding areas, and rinse only if the product instructions say it’s safe. Always follow the manufacturer’s directions and test a small area first.
What’s the best way to prep an outdoor walkway after removing vinyl flooring?
After removing vinyl and residue, sweep thoroughly and then clean the surface with a concrete-safe cleaner to remove remaining adhesive film and dirt. Inspect for rough spots, low areas, or damage—repair cracks or spalled concrete before installing anything new. Let the walkway dry completely, and consider using a primer or surface sealer recommended for outdoor flooring if you’re preparing for another vinyl product or coating. Proper prep prevents future lifting and improves adhesion for the next outdoor flooring installation.
📅 Last Updated: October 27, 2026 | Topic: How to remove vinyl floors from a outdoor walkway? | Content verified for accuracy and freshness.
References
- Asbestos | US EPA
- Asbestos – Overview | Occupational Safety and Health Administration
- https://www.osha.gov/laws-regs/regulations/standardnumber/1910/1910.1001
- https://www.cdc.gov/asbestos/index.html
- https://www.cdc.gov/niosh/topics/asbestos/
- https://www.hse.gov.uk/asbestos/working-with-asbestos.htm
- Vinyl flooring
- https://scholar.google.com/scholar?q=remove+vinyl+flooring+outdoor+walkway+adhesive+scrape+heat+solvent Google Scholar
- https://scholar.google.com/scholar?q=remove+resilient+floor+covering+vinyl+tile+glue+proper+work+practices Google Scholar
- https://scholar.google.com/scholar?q=asbestos+resilient+flooring+vinyl+tile+removal+guidelines Google Scholar