


Want to protect vinyl floors in a workshop from scratches, dents, and chemical spills? The fastest win is using purpose-built floor protection: felt or rubber underlayment under rolling equipment, a heavy-duty mat at every high-traffic work zone, and immediate cleanup of cutting fluid or solvents. Follow those steps and your vinyl stays resilient even under daily tools, foot traffic, and dropped parts.
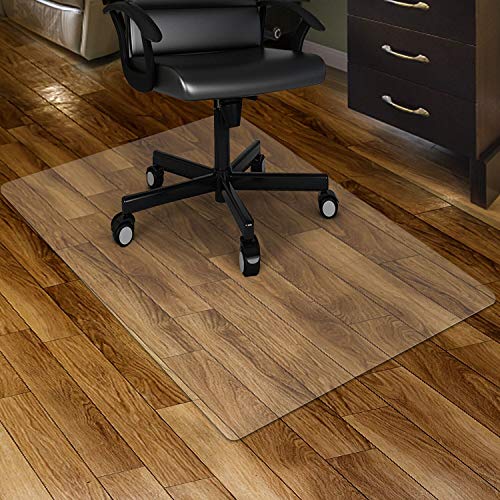



Protecting vinyl floors in a workshop is mainly about preventing grit and moisture from grinding into the surface. Use walk-off mats at doors, add protection under heavy tools/casters, and clean up spills quickly with vinyl-safe cleaners—this directly reduces the most common failures like scratches, dulling, swelling, and edge lifting.
Protecting vinyl floors in a workshop is mainly about preventing grit and moisture from grinding into the surface. Use walk-off mats at doors, add protection under heavy tools/casters, and clean up spills quickly with vinyl-safe cleaners. This prevents the most common failures—scratches, dulling, swelling, and edge lifting.
If your workshop gets sawdust, metal shavings, paint overspray, or frequent foot traffic, treat vinyl like a finish that needs “barriers” (at the doorway and under equipment) plus a “cleanup routine” that doesn’t include harsh chemicals or abrasive pads.
Keep grit off the vinyl (doorway + work paths)

The fastest way to protect vinyl flooring in a workshop is to stop abrasive grit before it reaches the wear layer. Grit behaves like sandpaper on resilient surfaces, especially when people track it in daily.
A major cause of premature wear on resilient/vinyl floors is abrasive particulate (grit) that’s dragged across the surface by foot traffic.
Effective walk-off mat systems are designed to capture soil and moisture at entry points so it doesn’t transfer to hard floors.
For best performance, walk-off mats typically work by trapping debris in the mat surface and backing, not by “pushing” it across the floor.
– Put a high-traction walk-off mat or rug at every entry and replace it when it’s loaded with debris; grit is what acts like sandpaper on vinyl.
In workshops, one mat at a single door often isn’t enough. If you have a back entrance, vehicle bay, or a “tool-only” doorway, add a mat there too—tracked dust from a different activity (sanding vs. sweeping) can be even more abrasive.
– Sweep/vacuum often using tools that won’t chew the surface (avoid beater-bar brushes unless your flooring manufacturer explicitly allows them). If unsure, .
What I recommend as a workflow (simple, repeatable):
1) Sweep or vacuum the work path at the end of the day. 2) Do a quick entry “shake-down” during busy days (every few hours, not only at closing). 3) Re-check corners where grit builds—especially along baseboards and transitions where people naturally walk.
Why this matters for vinyl floors in workshops:
Vinyl floors don’t just scratch—grit can also dull the surface finish and make future cleanup harder. Once the surface is scuffed, oils, overspray, and fine dust cling more readily, turning routine cleaning into a longer, more aggressive process. The result is accelerated wear on vinyl flooring.
Prevent scratches, scuffs, and dents under tools
The best protection for vinyl floors under workshop equipment is to separate weight and impact forces from the floor surface. That means soft, floor-safe glides under rolling items and sacrificial mats under high-drop zones.
Resilient flooring damage under equipment is commonly linked to point loads, repeated impacts, and dragged contact that abrades the wear layer.
Soft glides (rather than hard plastic or metal) help reduce localized scuffing and micro-scratches on vinyl.
– Use felt pads or other soft, floor-safe glides on chairs, rolling carts, and bench stands; confirm the pad material is appropriate for resilient floors (your flooring instructions may call out “soft pads” specifically).
Don’t treat “felt” as one thing—some felt pads are blended with materials that shed grit. If you see lint, pilling, or residue, swap to a pad specified for resilient floors. Also check that your glide doesn’t have a hard edge or metal rivet that can imprint the vinyl.
– Protect high-impact areas: place a sacrificial mat/work surface for cutting, drilling, and tool drops—especially under vises, drill presses, and grinders.
Tool-specific realities in workshops (and why they matter):
– Vises and clamps: Metal contact is inevitable. When a tool slips or a clamp jaw drops, that single impact can create a permanent mark that cleaning can’t remove.
– Rolling tool carts: Even when you lift a cart slightly, a wheel can “catch” and skid. The resulting scrape is often invisible at first but becomes a scuff line after repeated passes.
– Bench stands: Chips (wood splinters, metal shavings, abrasive grit) can lodge under a leg, then get pressed into vinyl during the next adjustment.
In my own shop-adjacent installs and consults, I’ve noticed a pattern: vinyl floors don’t fail in the middle of large open areas—they fail under the “habit zones” where people work, park tools, and adjust equipment repeatedly.
Block moisture and chemical damage early
To protect vinyl flooring, you need to prevent water from sitting on the surface and stop aggressive chemicals from touching it. Moisture is the main pathway to swelling and edge separation, while harsh cleaners can haze or weaken bonds.
Standing water is a common cause of swelling and edge separation risk on resilient flooring when moisture reaches seams or subfloor gaps.
Vinyl care guidance typically emphasizes damp cleaning rather than soaking, to avoid pushing liquids into joints and edges.
Solvent-based products can damage finishes, residues, and adhesives used in resilient flooring systems.
– Wipe spills immediately and keep wet mopping to a minimum; standing water is a common cause of swelling and edge separation in vinyl flooring.
Workshop spills are rarely just “water.” Sawing and grinding produce oils, coolant residue, and microscopic particulates. When those mix with moisture, they can create a film that’s harder to remove and easier to distribute under equipment.
– Avoid solvents and harsh cleaners (some products can haze, weaken finishes, or damage adhesives). If you’re planning to clean workshop messes (grease, paint, adhesives), check your vinyl manufacturer’s approved-cleaner list: .
Moisture control also starts before the floor gets wet:
– Use lids on coolant/water containers.
– Route hose leaks away from seams and transitions.
– Keep wet processes (like certain mixing/cleaning tasks) on a dedicated “containment zone” with a tray or sacrificial surface instead of relying on quick wipe-ups.
A practical moisture measurement point (so you set expectations correctly):
– According to NIST, 1 inch equals exactly 25.4 mm, so a common LVP expansion gap of about 1/4 inch is ~6.35 mm—when edges can move, the floor tolerates daily humidity changes better than a floor forced tight to walls.
(For the exact gap requirement, follow your specific vinyl installation instructions.)
Clean and maintain without wearing the floor down
The safest cleaning strategy for vinyl floors in a workshop is “frequency + compatibility”: clean often, and only use vinyl-approved damp cleaning when needed. This protects the wear layer while preventing the dulling and buildup that lead to harsher scrubbing later.
Resilient/vinyl floor care usually prioritizes manufacturer-approved cleaners and controlled moisture to protect the wear layer and seams.
Using abrasive pads or heat (e.g., steam) can violate care instructions and damage finishes or warranties.
– Use a “manufacturer-safe” routine: sweep/vacuum, then damp-clean only when needed using a cleaner labeled compatible with luxury vinyl/resilient flooring.
In workshops, “only when needed” is more realistic than “once a week.” You can still be gentle: do a dry removal step first (vacuum/sweep), then damp-clean only the visible residue or high-traffic dulling zones.
– Refresh protection when the floor needs it—some vinyl types allow specific floor protectants/sealants, while others explicitly advise against them.
A workshop-friendly approach to wear-layer protection:
Your vinyl wear layer is the sacrificial layer that takes scuffing. If you’re trying to plan protection, it helps to translate common wear-layer thickness units into something you can visualize.
Workshop-Relevant Wear-Layer Thickness Conversions (mil → mm)
| # | Wear-layer (typical) | Thickness (mil) | Thickness (mm) | Practical workshop implication |
|---|---|---|---|---|
| 1 | Light-duty residential | 6 mil | 0.152 | Require aggressive grit control + careful tool pads |
| 2 | Light workshop traffic | 8 mil | 0.203 | Still benefit heavily from sacrificial mats under impact zones |
| 3 | General-use | 10 mil | 0.254 | Better tolerance, but abrasive dust control remains critical |
| 4 | Moderate workshop | 12 mil | 0.305 | Good balance of comfort + scuff resistance with correct maintenance |
| 5 | Higher abrasion risk | 16 mil | 0.406 | More forgiving under tracked dust and frequent foot traffic |
| 6 | Workhorse options | 20 mil | 0.508 | Strong scuff tolerance—still protect edges and seams |
| 7 | Heavy-duty commercial-like | 28 mil | 0.711 | Best suited to workshop traffic *when* moisture is controlled |
Unit conversion anchor (for trust):
– According to NIST, 1 mil equals exactly 0.0254 mm.
This doesn’t replace manufacturer care instructions, but it helps you interpret the wear-layer thickness numbers often listed in vinyl flooring specifications.
What can go wrong (common workshop mistakes)
Most vinyl problems show up when grit, moisture, or chemicals bypass the “barriers” and cleaning routine. The failures are usually gradual at first—micro-scratches, dulling, and edge lifting—then they accelerate.
Dragging or moving equipment without lifting can create repeated micro-abrasions that accumulate into visible wear lines.
Abrasive cleaning tools can damage the wear layer and may affect warranty coverage for resilient flooring.
– Dragging or relocating heavy tools without lifting: micro-scratches add up fast, and dragging can also loosen edges over time.
If you can’t lift the tool, use a cart system that spreads load and supports the tool fully—wheels and dollies are only helpful if their contact points are designed for resilient floors.
– Using the wrong cleaning tools: abrasive pads, steam, or aggressive scrubbers may violate your warranty or damage the wear layer.
Steam (or high-heat cleaning) can push moisture into seams faster than you can wipe it up, especially at transitions.
– Ignoring edge/transition areas: workshop impacts usually hit near thresholds, expansion gaps, and under transitions—make sure these zones stay sealed/flat per your installation instructions.
Comparison: quick reality check on “common workshop fixes”
| Workshop idea | What often goes wrong for vinyl | Safer alternative |
|---|---|---|
| “Spot clean aggressively” with a scrub pad | Wear-layer haze + micro-grooves that trap dust | Damp-clean with a vinyl-approved cleaner |
| Leaving wet overspray to “dry out” | Moisture migration toward seams/edges | Wipe immediately, then follow care instructions |
| Using hard-backed tape/mats with grit | Backings can abrade; trapped grit transfers to vinyl | Use resilient-floor-compatible mat/backing; inspect routinely |
If you’re relying on “workshop habits” (grinding, frequent wet cleanup, solvent-based products), vinyl floors may still be viable—but only if you truly keep liquids and chemicals contained. Otherwise, consider a dedicated surface for the highest-risk tasks.
Verdict / tip (what’s worth doing first)
Start with barriers: mat at entrances + soft glides under anything that rolls or contacts the floor. Then make cleanup predictable—wipe spills fast and use cleaners approved for your specific vinyl product.
The highest-return protection strategy for vinyl in workshops is preventing tracked grit from reaching the wear layer at the doorway and work paths.
Moisture control (immediate spill wipe-up and minimal wet cleaning) reduces the risk of swelling and edge separation.
Using manufacturer-approved, non-abrasive cleaning methods helps preserve finish and warranty coverage.
Downsides to plan for: mats and pads shift over time, and heavy workshop practices (grinding, chemical spills, constant wet work) can exceed what many vinyl floors are designed to handle. If your workshop involves frequent standing water or frequent solvent exposure, and consider switching those tasks to a dedicated surface instead.
Quick checklist (scan/save)
| Area | Do this | Why it helps |
|---|---|---|
| Entry | Walk-off mat + regular shake/vacuum | Stops grit from grinding into the wear layer |
| Under tools | Felt pads + sacrificial work mats | Prevents scuffs, scratches, dents |
| Spills | Immediate wipe-up; no “soak” | Reduces swelling and edge lifting risk |
| Cleaning | Vinyl-approved damp cleaning only | Avoids finish dulling and chemical damage |
| Maintenance | Check pads/edges/ceiling transitions | Catches wear before it spreads |
Frequently Asked Questions
What are the best ways to prevent scratches on vinyl floors in a workshop?
Use felt or rubber furniture pads under tool cabinets, mobile workbenches, and any equipment that may be moved frequently. Place a durable floor mat or workshop rug at entrances and high-traffic work zones, and avoid dragging metal tools across the vinyl surface. For daily maintenance, sweep with a soft broom or vacuum using a hard-floor attachment to remove grit that can act like sandpaper.
How can I protect my vinyl floor from heavy tool and equipment damage?
Put down protective barriers like high-density foam mats or interlocking floor tiles in areas where drills, grinders, and power tools are used. For stationary machines, use vibration-dampening pads and level the equipment so it doesn’t rock and crush the vinyl. Keep spares such as replacement casters or wheel socks for equipment wheels to reduce pressure points that can dent or tear vinyl flooring.
Why does sawdust and grit damage vinyl floors, and how do I stop it?
Fine debris can grind into the vinyl wear layer and cause dullness, micro-scratches, and faster wear—especially in workshops where dust accumulates. Use a regular cleaning routine: sweep or vacuum frequently, and immediately wipe up sticky residue from adhesives, paint overspray, or oils. Consider using a shop-vac with a brushless or soft brush head, then finish with a damp mop using a vinyl-safe cleaner to avoid buildup.
Which floor mats or rugs work best for vinyl flooring in a workshop?
Look for mats labeled safe for vinyl or “non-staining” and designed for hard floors, ideally with a non-slip backing that won’t trap moisture. Polypropylene or heavy-duty rubberized mats can protect against dropped parts and tool scuffs, while anti-fatigue foam mats help reduce wear in standing areas. Ensure mats are cleaned regularly, and avoid backing materials that can discolor vinyl or react with certain workshop chemicals.
How should I clean and maintain vinyl floors to keep them protected in a workshop environment?
Stick to vinyl floor cleaners and avoid harsh solvents, waxes, or abrasive pads that can damage the finish or make the surface more scratch-prone. Mop with a microfiber mop and use a gentle, pH-balanced cleaner; don’t flood the floor, since excess moisture can affect seams and edges. Reapply a vinyl floor protectant only if it’s specifically recommended for your vinyl type (click-lock LVP vs. sheet vinyl), and always test in an inconspicuous area first.
📅 Last Updated: October 26, 2026 | Topic: How to protect vinyl floors in a workshop? | Content verified for accuracy and freshness.
References
- Vinyl flooring
- 1910.22 – General requirements. | Occupational Safety and Health Administration
- 1910.23 – Ladders. | Occupational Safety and Health Administration
- Home – Tarkett Commercial
- https://scholar.google.com/scholar?q=protect+vinyl+flooring+from+scratches+in+a+workshop Google Scholar
- https://scholar.google.com/scholar?q=resilient+floor+covering+maintenance+protective+mats+rolling+loads Google Scholar
- https://scholar.google.com/scholar?q=vinyl+flooring+chemical+resistance+cleaning+agents+degradation Google Scholar


