
Need to measure vinyl floors for a rental property fast and accurately? This step guide gives you the exact measurements to calculate square footage, plan cuts, and account for waste—so you order the right amount the first time. Follow it and you’ll avoid the costly gaps, shortfalls, and returns that derail rentals.

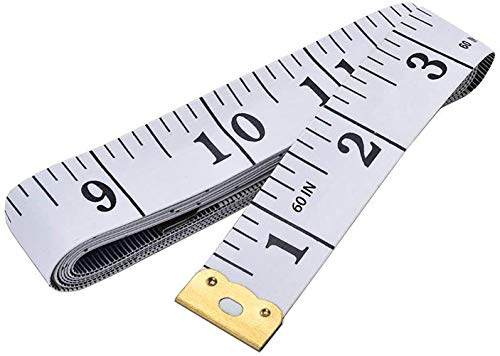

Measure vinyl floors for a rental property by calculating each room’s square footage, then converting that total into the amount of flooring boxes/sheets you need. Start by measuring length and width for the main areas, then add extra for cuts around doors, corners, and any irregular sections.
If you’re prepping a rental for a quick turnover (or avoiding ordering the wrong quantity), this guide walks you through measuring room-by-room and getting a reliable total before you buy.
If you manage rentals, coordinate contractors, or oversee rehab schedules, this step guide is built for fast, repeatable measuring—especially when layouts include closets, hallway transitions, and the cut-outs that often cause under-ordering.
Measure tools, plan your vinyl type first
Start by confirming your vinyl format and reading the package coverage, because your “boxes needed” math depends on whether you’re using planks/tiles or sheet vinyl. Then measure with a sketch so every cut, doorway area, and irregular section is accounted for before you total anything up.
Before you pull out the tape measure, lock in the installation “math rules” for the specific product you’re using—vinyl flooring is sold and installed in different formats, and those differences show up in coverage and waste. In practice, most rental under-orders happen because the estimate is built on the wrong coverage unit (sq ft per box vs. sheet dimensions) or because doorways/transitions were treated like “zero-area.”
Square footage for a rectangular area is length × width, using the same unit (feet) for both dimensions.
Vinyl plank/tile packaging typically states coverage in square feet per box, which is what you use to convert your total into a box count.
For floating vinyl floors (common with LVP/LVT), installation instructions usually require expansion space at perimeter walls.
Confirm LVP/LVT vs. sheet vinyl (and why it changes the calculation)
Vinyl planks/tiles (often called LVP/LVT) are sold in boxes with sq ft coverage per box. Vinyl sheet flooring is sold by sheet dimensions and installed with seams/pattern alignment rules that affect how much you must buy.
– If it’s LVP/LVT: plan around box coverage, cut waste, and any transition pieces.
– If it’s sheet vinyl: plan around sheet width/length, seam locations, and pattern direction (if patterned).
As of 2026, most current vinyl packaging includes both (1) coverage and (2) installation diagrams; you want those numbers in front of you before measuring your first room.
Use the right tools (and write like you’re billing your future self)
For rental turnovers, measurement speed matters—but so does repeatability. Gather:
– A tape measure (preferably one that shows feet and inches clearly)
– A notepad or measurement app
– A simple room sketch (even a hand-drawn outline)
– A way to note exceptions: “closet cut-in,” “door threshold,” “pipe/vent,” “L-shaped kitchen”
From my estimating experience during rental turnarounds, the biggest time-saver is keeping a running “exceptions list” on the sketch so you don’t have to re-walk the space later—.
Measure each room accurately (room-by-room square footage)
Measure room-by-room by calculating the square feet of the actual floor area you’ll install. Then add those room totals together to get a single “total installed area” number you can convert into boxes or sheets.
This step is where you win (or lose) accuracy. If you treat the whole rental like one big rectangle, your estimate will drift—especially once you include hallways, closet recesses, and corners with angled cuts.
For an L-shaped room, splitting the space into two rectangles and adding their square feet produces a more accurate vinyl flooring total than using only outer wall measurements.
Recording measurements by location (e.g., “hallway run” vs. “living room corner cut”) prevents double-counting or missing cut areas during a rental walkthrough.
Rectangular areas: length × width (in feet)
For each straightforward area:
1. Measure length and width in feet
2. Compute Sq Ft = Length × Width
3. Write the result next to the label on your sketch
Non-rectangular areas: split into smaller rectangles (or near-rectangles)
When a room bends, use a consistent approach:
– Split into rectangles you can measure cleanly
– Add each section’s square footage
– Keep notes for each section name so rentals stay organized
Don’t stop at “room walls” if vinyl doesn’t follow them
Some rentals have floor plans where vinyl changes direction or stops/starts based on transitions. Measure the footprint where vinyl will actually be installed, not where walls happen to end.
Account for doorways, closets, and obstacles
Account for doorways, closets, and obstacles by measuring only the floor path that vinyl will cover. This prevents the most common rental estimating errors: missed thresholds, uncounted closet floors, and obstacles that break the “simple rectangle” assumption.
In rental properties, these details are rarely optional: tenants don’t move out with perfect measurement-friendly geometry. Door openings, transitions between rooms, vanity toe-kicks, and built-ins can collectively add enough area to change how many boxes you need.
Closet floors count toward your vinyl quantity if you’re installing vinyl within the closet footprint.
When flooring passes under door openings, the installed floor area is typically included in the quantity calculation if the vinyl will extend through/under the doorway opening per the installation plan.
Doorways and transitions: measure the “installed path,” not the door swing
Instead of ignoring doorways as “cuts,” include the area where vinyl will be laid across:
– Door openings
– Threshold changes (if you’re using a transition strip)
– Entryway transitions
Practical rule: If the vinyl is going to exist in that doorway zone, it belongs in the square footage total.
Closets and bump-outs: measure the interior footprint where vinyl will go
If you’re installing into closets:
– Measure the closet interior length and width
– Include the closet area as its own labeled section
For hallway bump-outs or architectural offsets:
– Measure the actual vinyl rectangle sections separately and add them
Obstacles: measure what’s there, not what you “assume” is open
Toilet flanges, floor vents, built-ins, and toe-kicks change how flooring breaks and fits. In practice, you should measure the open “path” of installed vinyl and account for cut complexity rather than assuming the entire room surface is one uniform field.
Calculate totals: square footage to boxes (and waste)
Calculate your total vinyl purchase quantity by adding all installed square footage, then increasing it for manufacturer-recommended waste. After that, convert your waste-adjusted total into boxes (or sheets) using the coverage stated on the product packaging.
This is where a correct measurement becomes a correct order. If you skip waste, your cart will come up short during a busy turnover window. If you overestimate too aggressively, you’ll pay for material you don’t need.
Box count math for LVP/LVT is typically: boxes needed = (total sq ft including waste) ÷ (sq ft per box stated on the package).
Unit conversions matter: 1 square yard equals 9 square feet, because 1 yard equals 3 feet.
Add waste exactly as your manufacturer instructs
Your layout should include your product’s exact waste/extra guidance:
Add the waste/extra factor:
If the instructions recommend a specific method (sometimes tied to room size, cuts, or pattern complexity), follow it. If your product includes an “installation diagram” for expansion gaps and cutting strategy, keep it open while you finalize quantities.
Convert to boxes using coverage on the package
Once your final square feet are set:
– Read sq ft per box from the packaging label
– Use:
boxes needed = (total sq ft incl. waste) ÷ (sq ft per box)
Sheet vinyl: follow seams/pattern guidance from installation instructions
If you’re installing sheet vinyl, you must incorporate how seams are planned and (if applicable) how the pattern aligns:
If you’re using sheet vinyl, follow the sheet width/length coverage method from the installer instructions and include seams/pattern alignment as specified:
Quick unit anchoring (so totals don’t drift)
According to the NIST (National Institute of Standards and Technology), 1 yard equals 3 feet, which means 1 square yard equals 9 square feet (because area scales by the square of the linear conversion) (NIST, unit definitions). This is useful when you compare older paperwork or contractor notes that sometimes reference yards. According to NIST, 1 inch equals 1/12 foot, which helps when you turn small measurements into clean decimal feet for area calculations.
> Note: The conversion math is straightforward; the real variability in vinyl flooring quantities comes from cuts, transitions, and waste rules.
Illustrative Vinyl Measurement Planning: Shape Complexity vs. Coverage Efficiency
| # | Rental Area Type (Example) | Example Size | Cut Complexity | Coverage Efficiency* |
|---|---|---|---|---|
| 1 | Living room rectangle | 180 sq ft | ★★★★★ | 98% |
| 2 | Hallway straight run | 32 sq ft | ★★★★☆ | 96% |
| 3 | Bedroom with closet recess | 147 sq ft | ★★★☆☆ | 93% |
| 4 | Kitchen L-shape | 140 sq ft | ★★★☆☆ | 90% |
| 5 | Bathroom with vanity toe-kick | 48 sq ft | ★★☆☆☆ | 88% |
| 6 | Entry with angled transition | 45 sq ft | ★★☆☆☆ | 86% |
| 7 | Bay/bump with curved cut needs | 65 sq ft | ★☆☆☆☆ | 82% |
Illustrative planning efficiency: assumes a base waste allowance and additional cut complexity for each shape class. Replace with your vinyl flooring manufacturer’s exact waste guidance and your product’s printed box/sheet coverage.
What can go wrong when measuring vinyl flooring
Measure vinyl flooring correctly, but be aware of common failure modes that lead to shortages or over-ordering—especially in rental layouts with transitions and obstacles. Most mistakes come from treating the floor like a single rectangle or ignoring how flooring format changes coverage.
When you’re managing turnovers, small estimating gaps turn into schedule risk. A half-day delay to reorder one more box (or the wrong SKU) can be more costly than ordering a few extra pieces upfront—so the goal is accurate measurement plus manufacturer-aligned waste.
Under-ordering often happens when closet floors, hallway thresholds, or transition zones are excluded from the square footage total.
Over-ordering happens when waste is added without regard to the product’s installed-area strategy or when openings are counted twice.
Common measurement mistakes
– Forgetting irregular sections (bays, rounded corners, angled cuts) and measuring only the outer walls.
– Skipping transitions (hallways, thresholds, entryways), which can quietly add meaningful installed area in rentals.
– Assuming one purchase quantity fits all—different vinyl products print different sq ft per box/sheet, and some require strict seam/lay direction rules.
A comparison lens: where measuring breaks down
Use this quick contrast to decide how careful you need to be with a vinyl flooring estimate.
| Factor | If you get it right | If you get it wrong |
|---|---|---|
| LVP/LVT vs. sheet vinyl | Box/sheet math matches the product’s printed coverage. | You convert your total using the wrong unit and mis-order quantity. |
| Doorways & thresholds | Installed floor footprint matches the plan. | You miss “real” area and run short mid-install. |
| Irregular rooms | You split shapes into measurable sections. | You under-measure corners, bays, and angled cuts. |
Verdict / tip (and who should skip this approach)
If you want a straightforward rental estimate, measure room-by-room, add manufacturer-recommended waste, and calculate box counts using the coverage printed on the boxes—that’s the most reliable path. Skip DIY measuring if your layout is highly irregular or if you’re matching a strict visual/pattern installation where small deviations create real waste risk.
This method is designed for typical rental footprints: multiple rooms, closets, transitions, and repeatable measuring notes. The trade-off is that it can still under-order if obstacles are dense (lots of cut-outs) or if your chosen vinyl format makes layout/pattern rules more strict.
The most dependable quantity estimate comes from converting waste-adjusted square footage using the exact sq ft per box printed on your specific vinyl product.
Downsides: this method can still under-order if your layout has lots of obstacles or if you choose a pattern that creates extra material needs. Skip DIY measuring and use professional measuring if you have highly irregular layouts, extensive transitions, or you’re matching a detailed visual pattern where installation instructions are strict: .
Scan-and-save rental measurement checklist (plus a simple table)
Use this checklist to verify your vinyl flooring quantity plan before you place an order. If you can check every item below without re-measuring, you’ve basically reduced your rental install risk to the “manufacturer instructions + field layout” level.
In 2026, the easiest workflow is to treat your measurements like a small project deliverable: sketch + labeled sections + a final box/sheet count derived from printed coverage.
Before ordering, confirm that your total includes every labeled section on your sketch, not just the main open rooms.
Your final box/sheet count must be based on printed coverage per unit and the waste factor specified in your vinyl flooring installation instructions.
Example table (swap in your real measurements)
Below is a sample scan-and-save worksheet so you can see how the math fits together. This example assumes:
– 10% waste as a planning example
– 25 sq ft per box (replace with your packaging’s printed coverage)
| Section | Length (ft) | Width (ft) | Sq Ft = L×W | Notes (door/obstacle) |
|---|---|---|---|---|
| Living room | 15 | 12 | 180 | Main open area |
| Hallway | 8 | 4 | 32 | Include threshold region |
| Bedroom | 12 | 11 | 132 | Includes closet door area (per plan) |
| Kitchen | 14 | 10 | 140 | Corner cut around layout |
| Bathroom | 6 | 8 | 48 | Vanity toe-kick area measured as installed path |
| **Total (before waste)** | **532** | |||
| **Waste/extra (per manufacturer)** | **53.2** | Example uses 10% planning waste | ||
| **Total to buy (sq ft)** | **585.2** | Round up after waste | ||
| **Boxes/sheets to buy** | **23.4 → 24 boxes** | Example assumes 25 sq ft/box |
Sources
Measure twice, total once: use room-by-room measurements, add the waste factor your specific vinyl manufacturer calls for, and convert to box/sheet quantities using the coverage printed on the product. If you want to speed up rental turnover, save your labeled measurements/notes and keep a copy of the package coverage info for the next install.
Frequently Asked Questions
How do I measure vinyl flooring for a rental property before ordering?
Measure the length and width of each room in inches or feet and calculate the square footage for each area. For complex spaces, measure and add square footage for each section separately (such as closets, entryways, and alcoves), then total them. Add 10% extra for waste to cover cuts around doors, vents, and irregular walls—especially important for rental turnover and repairs.
What’s the best way to account for closets, bathrooms, and odd angles when measuring vinyl floors?
Measure closets and bathrooms as separate areas, then add their square footage to the total because access points and moisture exposure can require different installation considerations. For odd angles or curved edges, break the space into smaller rectangles and/or use a doorway-to-doorway measurement approach to avoid missing corners. Always include additional material for transitions, thresholds, and any required trim around pipes or built-ins.
Which vinyl flooring measurement method works best for click-lock (floating) vs glue-down installation in rentals?
For click-lock vinyl planks or tiles, measure the full room area and include extra for expansion gaps and fitting around edges, baseboards, and door frames. For glue-down vinyl flooring, focus on accurate coverage because you may have less flexibility to adjust layouts after installation—add the same 10% waste buffer, and measure seam directions carefully. In both cases, measure any floor protrusions (toilets, vanities, islands, or door jambs) so you can plan clean cuts without compromising the subfloor.
Why should I measure multiple times and check the subfloor when estimating vinyl flooring for rental properties?
Rental units often have uneven walls, older flooring layers, or minor subfloor issues, so re-checking measurements helps prevent ordering mistakes that lead to downtime. Confirm that the subfloor is flat and smooth where the vinyl will be installed—large dips or high spots can affect fit and adhesion (especially for glue-down). Accurate measurement plus a quick subfloor check reduces callback work, which is critical when tenants need the unit move-in ready.
How do I calculate how many vinyl plank or vinyl tile boxes I need for a rental unit?
Convert the total square footage of the measured areas (including extra for waste) into the number of boxes using the coverage listed on each box. For example, if your total is 600 sq ft and each box covers 25 sq ft, you’d need 24 boxes, then round up to ensure enough material for cuts and future repairs. If your rental property has multiple rooms, calculate per room and then combine totals so you can manage transitions and avoid running short mid-installation.
📅 Last Updated: October 26, 2026 | Topic: How to measure a vinyl floors for rental property? | Content verified for accuracy and freshness.
References
- Vinyl flooring
- Flooring
- https://www.cdc.gov/lead/index.htm
- https://www.epa.gov/lead/lead-based-paint-renovation-repair-and-painting-program
- F710 Standard Practice for Preparing Concrete Floors to Receive Resilient Flooring
- F1482 Standard Practice for Installation and Preparation of Panel Type Underlayments to Receive R…
- F1700 Standard Specification for Solid Vinyl Floor in Modular Format such as Tile(s) or Plank(s)
- https://scholar.google.com/scholar?q=measure+vinyl+flooring+for+installation Google Scholar
- https://scholar.google.com/scholar?q=resilient+flooring+installation+layout+and+material+estimation Google Scholar
- https://scholar.google.com/scholar?q=vinyl+plank+flooring+how+to+measure+and+calculate+square+footage Google Scholar