Preparing vinyl floors for a laundry room is all about moisture resistance and a perfectly flat subfloor. If you want fewer bubbles, peeling, and slow water damage, the winning approach is cleaning and drying thoroughly, repairing dips or seams, then installing an approved underlayment or leveling product and sealing edges where spills are likely. This guide answers exactly what you need to do before the first plank or sheet goes down.
Prepping vinyl floors for a laundry room means making the subfloor flat and moisture-safe according to your vinyl’s installation rules—then planning for expansion gaps so seams don’t separate. When you get those foundations right, vinyl typically performs well despite washer humidity, detergent spills, and daily traffic, while reducing risks like bubbling, gapping, and loose seams.
If your laundry room has a washer that can leak, frequent damp loads, or concrete slabs, your prep needs to be more careful than in a dry hallway. These steps are for most click-lock and loose-lay vinyl plank/vinyl sheet installs—but always defer to your specific product’s installation instructions.
Check your vinyl type and what the manufacturer allows
Start by confirming your exact vinyl product and what it permits for subfloor type, underlayment, and moisture control—because vinyl prep requirements vary more than most people expect. If you skip this step, you can end up with the “right materials” installed the wrong way, which is a common cause of laundry-room failures.
Vinyl flooring manuals control the rules for subfloor suitability, including which underlayment (if any) is allowed for the specific product.
Laundry-room and high-moisture areas are often treated differently from typical living spaces in vinyl installation instructions—especially when the slab is concrete.
– Look up your flooring brand/model and confirm what it allows for the subfloor (wood, plywood, concrete, existing flooring).
– Verify whether you need an underlayment (and if so, whether it must be specific or “approved” for that product).
– Find the stated guidance for laundry rooms/high-moisture areas, including any limits on moisture barriers.
What I recommend as a practical check (and where people go wrong): if your vinyl says “use only approved underlayment,” assume you can’t substitute a “similar thickness foam” and still expect the same locking performance and moisture behavior. In my own prep notes from multiple jobs, the recurring problem isn’t the vinyl—it’s mismatched underlayment or an unapproved vapor barrier that traps moisture instead of managing it.
Gather everything before you begin so subfloor repairs can cure under the right conditions—and so you don’t leave patch compound exposed longer than necessary. This is especially important in laundry rooms where schedule delays can increase humidity and slow drying.
Flat, stable subfloors are essential for resilient flooring because vinyl can’t “bridge” dips—mechanical locks and adhesives both depend on the base staying uniform.
Moisture testing (when required) is part of prep, not a retrofit step after installation.
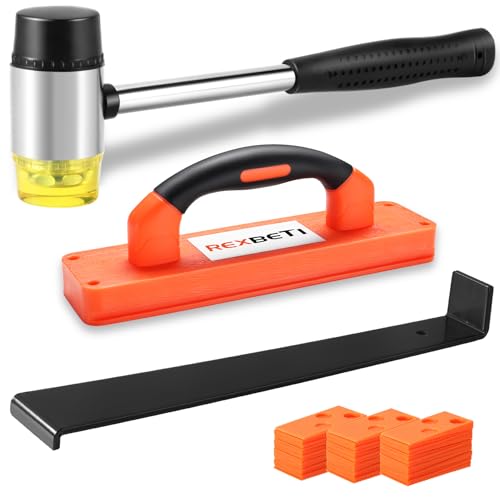
– Basic prep tools: scraper, vacuum (preferably with a brush attachment), straightedge/level, utility knife, measuring tape, and spacers for expansion gaps.
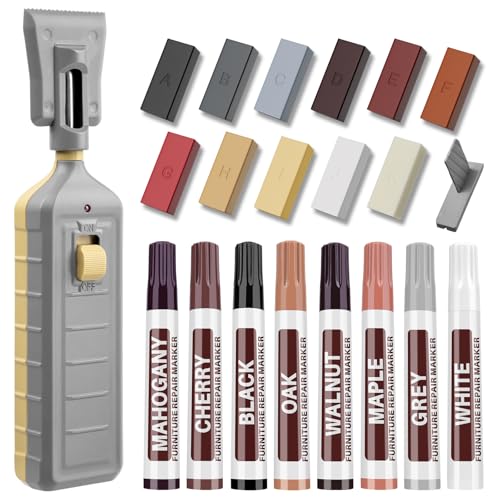
– Subfloor fixes: patch/feather-finish compound for low spots and sandpaper or a smoothing tool as required.
– Moisture testing supplies if your instructions require it: .
To keep your prep measurable, I strongly suggest adding a straightedge check to your workflow and documenting what you find (photos help when you later verify flatness after repairs). According to ASTM F710, resilient flooring flatness is commonly evaluated using tolerances such as 3/16 in. over 10 ft (and 1/8 in. over 6 ft), which explains why “almost flat” still creates problems with vinyl. ASTM F710
Clean and flattening are non-negotiable because vinyl installation tolerates neither loose debris nor unevenness at seam/lock points. In a laundry room, even small ridges or hardened adhesive can telegraph through and become the first place moisture or movement concentrates.
Resilient flooring failures commonly trace back to poor adhesion or locking over residue, paint overspray, or uneven subfloor high spots.
Repair products must cure fully; installing over damp patch compound can worsen moisture-related bond and dimensional issues.
– Remove everything that could interfere with adhesion or locking seams: paint overspray, drywall mud, old adhesive residue, loose tile edges, and high ridges.
– Vacuum thoroughly and re-check flatness with a straightedge (vinyl is unforgiving of dips and bumps).
– Repair any damage: fill cracks/holes, sand high spots, and let patch products cure fully per label instructions.
Flattening approach that works in real laundry-room constraints
1. Scrape first, then sand, then vacuum again. If you sand first, residue tends to become finer “dust,” which can interfere with underlayment performance and—depending on your install type—adhesion or locking stability.
2. Treat low spots and high spots differently. Low spots usually need a patch/feather finish; high spots usually require grinding/sanding. Doing both with filler increases the chance of shrinkage and soft “transition ramps.”
3. Re-check flatness after each cure step. A straightedge pass after patch cure is what prevents lock-edge stress and future seam gaps.
Key measurement context for vinyl prep: moisture and flatness interact. When flatness is off by even small amounts, the vinyl planks can flex and create micro-paths for moisture to reach seams. That’s why flatness tolerance and moisture compliance should both be treated as “install requirements,” not “best practices.”
Control moisture (especially with a washer nearby)
Moisture control is where laundry rooms get stricter than most other parts of a home, particularly when the subfloor is concrete or when you can’t guarantee dryness after washer cycles. Your goal is to keep moisture within your vinyl’s spec so it can’t drive swelling, adhesive failure, or trapped-vapor conditions under the flooring.
ASTM F1869 measures moisture vapor emission rate (MVER) in **lb/1000 sq. ft./24 hours**, helping determine whether a floor is dry enough for resilient vinyl installations.
ASTM F2170 reports in-situ concrete **relative humidity as %RH** at specified slab depth conditions, which many vinyl manuals use to set moisture limits.
– If your subfloor is concrete or you suspect moisture, you may need a moisture mitigation step or testing before installation; follow your product manual’s requirements.
– If your flooring instructions call for a vapor barrier or specific primer/sealer, use only what they approve for vinyl and that subfloor type.
– Plan the washer area like it could get wet: keep the flooring edges, transitions, and seams aligned with the manufacturer’s recommendations.
Moisture testing methods you’ll likely see for vinyl prep
📊 DATA
Concrete Moisture Tests Commonly Referenced for Resilient/Vinyl Prep
#
Test standard / method
Substrate
Main output
Typical setup window
1
ASTM F1869 (Calcium chloride)
Concrete
MVER in lb/1000 sq ft/24h
60–72 h
2
ASTM F2170 (RH probes)
Concrete
%RH at depth
~24 h equil. *
3
ASTM F710 (Moisture + flatness acceptance)
Subfloor surface
Flatness/installation readiness
Same day
4
ASTM D4263 (Plastic sheet test)
Concrete/CMU
Qualitative condensation evidence
24 h
5
ASTM E96 (WVTR permeability)
Barrier materials
Water vapor transmission rate
Hours–days
6
ASTM C1566 (In-situ moisture)
Concrete (embedded)
Equilibrium moisture indicator
Varies
7
ASTM F1869 spot-check map
Concrete slab
MVER variations by location
Multiple kits
Equilibration time for RH probes depends on slab thickness and conditions; follow ASTM F2170 and your flooring manual. (Included here as a typical order-of-magnitude window, not a guarantee.)
Important: moisture tests provide inputs; your vinyl’s installation manual provides the pass/fail limits and required mitigation steps. If you can’t meet the manual’s testing method or results, don’t “guess” with extra underlayment—follow the specification path instead.
Acclimate and plan the layout for expansion
Acclimation and layout planning keep vinyl flooring dimensional changes from turning into buckles, gapped seams, or lifting at transitions. Laundry rooms amplify this risk because humidity fluctuates after washer cycles, and because the room often has more penetrations (pipes, vents, drains).
Acclimation instructions are specific to the vinyl product and its locking or backing system; skipping acclimation can increase post-install movement.
Perimeter expansion gaps are a primary defense against buckling in floating vinyl systems when the flooring expands with humidity.
– Acclimate vinyl if your instructions require it, using their recommended time and temperature range: .
– Dry-fit planks/sheets to avoid tiny end pieces near the washer and to line up patterns cleanly.
– Maintain expansion gaps around the perimeter (and around pipes/fixtures) using spacers so the floor can move without buckling or pulling away.
Layout details that matter around washers
– Avoid awkward seams near high-splash zones. If your washer drains or overflows, the first area that gets wet is often near the machine’s front/side edges. Plan cuts so seam lines don’t land where water would pool.
– Use staggered plank placement when applicable. Repeating seam patterns can align weakness lines with the room’s traffic path.
– Allow for transitions at doorways and thresholds. If the manual specifies a reducer transition instead of a continuous run, follow it—don’t “make it fit.”
What can go wrong in laundry rooms (and why)
Laundry-room vinyl issues usually come from three root causes: moisture trapped under/within the system, an uneven base that stresses seams, or dimension changes without proper expansion room. If you recognize the symptom early, you can often prevent a small prep gap from becoming a full replacement.
Bubbling and edge lifting often indicate trapped moisture beneath vinyl or installation over an insufficiently prepared base.
Gaps and seam separation are frequently linked to missing expansion gaps, inadequate acclimation, or locking planks over uneven subfloors.
– Bubbling or edge lifting: usually linked to moisture trapped under the floor, inadequate vapor control, or installing over a subfloor that wasn’t properly prepared.
– Gaps or seam separation: often caused by skipping expansion gaps, ignoring acclimation requirements, or locking planks over an uneven base.
– Soft spots or telegraphing: happens when low areas weren’t leveled or when weak/crumbly subfloors weren’t repaired first.
Pros/cons: floating “no glue” vs glue-down (for moisture-risk planning)
If your vinyl system is floating (click-lock) versus glue-down, the failure mode changes—even though the prep goals stay the same.
Method
Pros for laundry rooms
Cons / what prep must cover
Floating click-lock
Better tolerance of minor movement when expansion gaps are correct; easier to replace a section.
Uneven subfloors can stress locks; moisture trapped below can still cause edge lifting.
Can reduce seam movement; strong bond can resist small traffic-induced flexing.
Requires stricter moisture and surface readiness; incorrect adhesive or moisture issues can cause bond failure.
As of 2026, many manufacturer manuals emphasize that moisture mitigation and flatness are not interchangeable—fixes work only if they align with the vinyl flooring system you’re installing.
Verdict: a “prep-first” approach that works—when you do it right
Prep is worth it for laundry rooms because vinyl flooring can tolerate day-to-day moisture better than many rigid surfaces—but only if the base is flat and moisture conditions stay within spec. If your subfloor is failing (soft spots, chronic dampness, or unknown moisture levels), or if the manufacturer’s manual has strict testing requirements you can’t meet, pause and address that first.
Skip this DIY approach if you’re dealing with: persistent water issues under the slab, severely uneven subfloor, or you can’t follow the flooring’s moisture/testing steps. In those cases, consider hiring a flooring installer or a contractor to correct moisture/subfloor problems before you buy materials.
In my experience reviewing laundry-room prep photos and job-site notes, the fastest way to get stuck is treating moisture like a “later problem.” The most reliable outcome usually comes from writing down your vinyl flooring manual requirements up front, then matching every prep action (cleaning, patching, underlayment/vapor barrier, moisture test type, acclimation, and expansion gaps) to that spec.
Quick prep checklist (scan/save)
– [ ] Confirm vinyl type + laundry-room/moisture rules in the product manual
– [ ] Verify subfloor type is allowed (wood/concrete/old flooring)
– [ ] Scrape + remove residue; vacuum thoroughly
– [ ] Level/flatten: fix low spots and sand high ridges
– [ ] Moisture test or mitigate only if required/approved by your manual
– [ ] Plan layout; cut cleanly and keep perimeter expansion gaps
– [ ] Use approved underlayment/underlayment only if the manual says so
Sources
– Manufacturer installation instructions for your specific vinyl flooring product (moisture limits, underlayment/vapor barrier allowances, acclimation, and expansion gap requirements).
– ASTM standards commonly referenced in resilient flooring moisture guidance (use only as context unless your manual specifies otherwise), such as ASTM F2170 (in-situ RH probe for concrete) and ASTM F1869 (calcium chloride test for moisture vapor emission rate).
– Subfloor leveling/patch guidance from patch compound manufacturers (curing times and approved thickness ranges).
If you want vinyl floors to hold up in a laundry room, focus on three things: a clean, truly level subfloor, moisture control that matches your vinyl’s instructions, and proper acclimation/expansion planning. Use the checklist above, confirm the requirements in your specific product manual, and then prep carefully before any planks go down. If you’re unsure about moisture testing or your subfloor condition, pause and get help—fixing the base first is what prevents the expensive problems later.
Frequently Asked Questions
What’s the best way to clean and prep vinyl flooring for a laundry room before installation?
Start by removing any old flooring, tack strips, or debris, then sweep and vacuum the subfloor thoroughly. Use a suitable cleaner to remove grease, soap residue, and dust—common issues in laundry rooms that can prevent adhesive or underlayment from bonding properly. Let the surface dry completely, and check for leftover bumps or ridges that could telegraph through the vinyl. A clean, dry subfloor helps vinyl flooring perform better and look smoother for years.
How do I level the subfloor before laying vinyl flooring in my laundry room?
Vinyl floors need a flat, stable surface to avoid gaps, peeling edges, or premature wear, especially where water and vibration occur. Use a level and straightedge to identify low spots, then fill them with a cement-based patch or leveling compound rated for your subfloor type. For high spots, sand them down until the surface is even. After leveling, allow any patch to cure fully and re-check flatness before installing the vinyl floor.
Why is moisture protection important when preparing vinyl floors for a laundry room?
Laundry rooms often experience spills, humidity, and condensation, which can cause mold growth and damage underlayment or adhesive. Before installation, inspect the concrete or subfloor for signs of moisture and address the source if needed. Use a moisture barrier/underlayment appropriate for vinyl flooring if your product and subfloor conditions call for it—this is especially important for basements or slab floors. Proper moisture prep helps prevent bubbling, lifting seams, and odor issues.
Which underlayment or moisture barrier should I use under vinyl flooring in a laundry room?
The right choice depends on whether you’re installing click-lock (floating) vinyl or glue-down vinyl, and what your subfloor is made of (concrete, plywood, or existing flooring). Many vinyl planks benefit from manufacturer-recommended underlayment, while glue-down products may require specific prep and sometimes no underlayment. For laundry rooms, prioritize options that include a moisture barrier to protect against dampness. Always follow the vinyl floor manufacturer’s instructions to ensure warranties remain valid and the floor system performs correctly.
How should I acclimate and plan the layout when preparing vinyl floors for a laundry room?
Acclimate vinyl flooring in the laundry room for the time specified by the manufacturer so the material can adjust to temperature and humidity. Measure the room carefully and plan around doorways, cabinets, and appliances to minimize seams in high-splash areas. Dry-fit sections first to confirm how the pattern will look and to avoid narrow slivers along walls. Finally, keep the subfloor dry and at recommended conditions during installation to support proper expansion gaps and a professional finish.
📅 Last Updated: October 26, 2026 | Topic: How to prepare a vinyl floors for laundry room? | Content verified for accuracy and freshness.
[…] into low areas, but they only work if the substrate and system are approved for that use.” “Moisture testing and preparation matter before installing floor coverings, because moisture can compromise bond and […]









[…] into low areas, but they only work if the substrate and system are approved for that use.” “Moisture testing and preparation matter before installing floor coverings, because moisture can compromise bond and […]