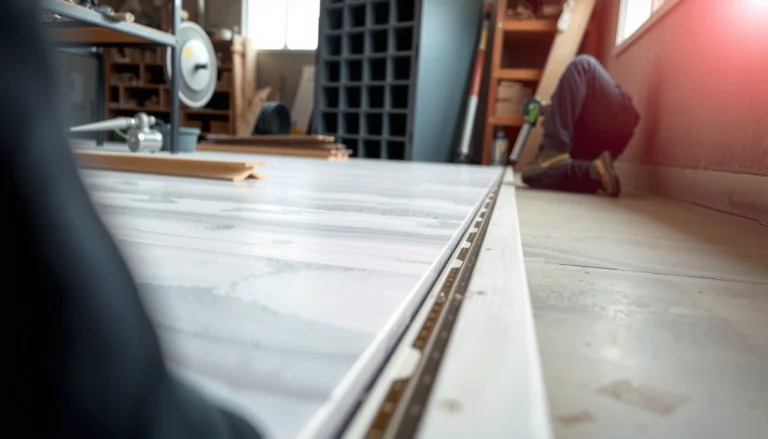
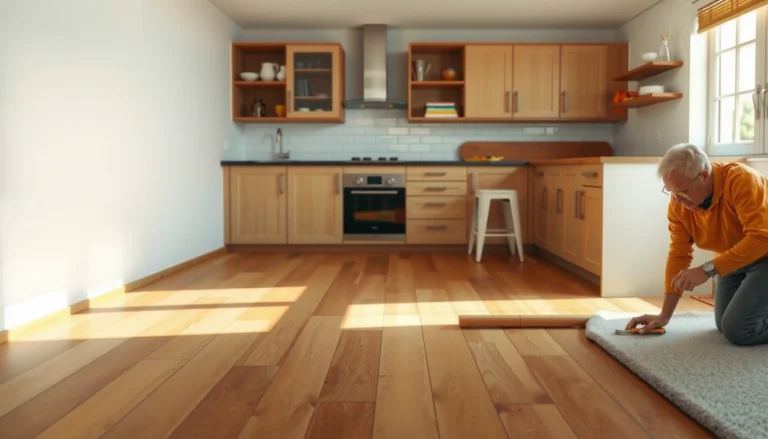
To measure laminate floors for a home gym correctly, start by mapping your exact room dimensions and calculating the total plank and waste allowance before you buy. This guide shows you the fastest, most reliable way to measure straight runs, account for doorways and recesses, and plan for cuts. Get the numbers right and you’ll avoid costly shortages and mismatched seams when you install.




Measure your laminate home gym floor by calculating the room’s total square footage, then adding waste for cuts (usually 5–10%) before buying. Break the space into simple rectangles, measure length and width, subtract any permanent obstructions, and double-check plank direction so the layout matches plank length and minimizes off-cuts.
This is for anyone installing laminate flooring in a home gym—especially if you’re working around corners, columns, or oddly shaped spaces and need a reliable way to avoid running short.
Measure the Home Gym Floor Space (Square Footage)

The fastest way to measure your laminate home gym floor is to calculate total square footage, then refine the number by splitting non-rectangular areas into measurable shapes. This produces a reliable baseline before you start adding waste, planning plank direction, or accounting for transitions.
Square footage for a rectangular room is calculated as length × width, using the same measurement unit for both dimensions.
If your home gym has an “L” shape, you can split it into two rectangles, calculate each area, then add them to get total laminate coverage.
For accurate laminate flooring estimates, note doors, steps, and cutouts at the measurement stage—these details affect later subtraction and transition planning.
Break the room into rectangles you can trust
Laminate floor estimating works best when your geometry is simple. For a mostly rectangular gym, measure:
– Length (L): the longest wall-to-wall distance
– Width (W): the perpendicular wall-to-wall distance
Then compute Area = L × W. For laminate home gyms, this simple approach is usually enough for the “main body” of the workout space.
For oddly shaped rooms (think corners, cut corners, or partial bays), split the space into rectangles first. If you truly have triangular sections, you can split those into rectangles by taking two measurements (or treat them as half of a rectangle once you confirm the right angles).
Use consistent units and write them down immediately
Pick one unit system and stick with it. If you’re measuring in feet, compute in square feet; if you measure in meters, compute in square meters.
In practice, you’ll reduce rework if you:
– Record measurements to the nearest 1/8 in (≈3 mm) (or the nearest 0.01 m if using metric)
– Sketch the layout with dimensions in one spot (even a phone note + rough diagram works)
– Mark where laminate will not go (built-ins, thick fixed bases, or permanent features)
Include gym-specific details that affect the final footprint
Home gym layouts frequently include elements that influence where laminate is installed:
– Door swings into the room
– Raised thresholds at entry points
– Stair landings (especially common when basements contain gyms)
– Columns that interrupt plank runs
You’re not calculating waste yet—just building an accurate “installable area map” that you’ll use in the next steps for obstruction subtraction and buying quantities.
As of 2026, this “measure first, plan second” workflow remains the most dependable method for laminate home gym floors because it separates geometry (your measurements) from materials (waste, cartons, and expansion).
Factor in Waste and Buying Extra Planks
The most reliable buying rule for laminate flooring is to add waste to your calculated square footage, then convert that adjusted area into cartons using the manufacturer’s specified coverage. For typical home gym layouts, a 5–10% waste allowance is a common planning range, but the exact number depends on cuts and layout complexity.
Waste increases when you cut around columns, door jambs, or irregular wall lines—so the same square footage can require more cartons in complex gyms.
Carpet, tile, and laminate all use different “coverage per box” definitions, so you must use the carton coverage printed in the laminate manufacturer’s documentation for your exact product.
To compute buying quantity, adjust your square footage for waste, then divide by carton coverage and round up to avoid short deliveries.
Add a waste allowance (then choose a defensible rate)
Start with:
– 5% waste: simpler rooms, fewer obstacles, mostly straight runs
– 7–8% waste: typical home gyms with a few turns, offsets, or transitions
– 10% waste: many corners, lots of trimming, frequent obstacles (columns, alcoves), or you’re changing plank direction
Because home gyms often include equipment zones, odd corners, and tight thresholds, 7% is a practical baseline—then move toward 10% if you’re working around multiple constraints.
Verify “coverage per box” from the carton specs
Even within the same laminate thickness or style, carton coverage varies. So before buying laminate home gym flooring, confirm:
– Coverage per box/carton (often listed as square feet per carton)
– Whether the product uses tongue-and-groove click locking
– If the manufacturer specifies additional waste for patterns or direction changes
Convert adjusted square footage into cartons (buy enough, round up)
Once you have:
1. Total measured installable area (after subtracting non-install zones—covered next)
2. Waste-added area = installable area × (1 + waste%)
3. Box coverage from the manufacturer specs
Then compute:
– Boxes needed = (adjusted square feet ÷ coverage per box), rounded up
This is where most laminate home gym projects succeed or stall—running short because you didn’t round up or misread carton coverage is a common failure mode.
Example: waste-added area for common gym footprints
The table below shows how waste affects buying math using a single planning assumption (7% waste) for clarity.
Laminate Home Gym Area Examples (7% Waste Planning)
| # | Gym Dimensions (ft) | Calculated Area | Area + 7% Waste | Longest Wall (Plank Run) |
|---|---|---|---|---|
| 1 | 8 × 10 | 80 sq ft | 85.60 sq ft | 10 ft |
| 2 | 10 × 12 | 120 sq ft | 128.40 sq ft | 12 ft |
| 3 | 10 × 14 | 140 sq ft | 149.80 sq ft | 14 ft |
| 4 | 12 × 15 | 180 sq ft | 192.60 sq ft | 15 ft |
| 5 | 12 × 18 | 216 sq ft | 231.12 sq ft | 18 ft |
| 6 | 14 × 16 | 224 sq ft | 239.68 sq ft | 16 ft |
| 7 | 16 × 20 | 320 sq ft | 342.40 sq ft | 20 ft |
Account for Obstructions and Layout Constraints
The simplest way to handle obstructions is to subtract permanent areas where laminate won’t be installed, then plan plank direction to keep cuts efficient. This prevents buying too little (because you underestimated cuts) or too much (because you didn’t subtract non-install zones).
Permanent fixtures like built-ins and thick fixed structures are typically subtracted from laminate home gym square footage because laminate is usually not installed over them.
Running planks parallel to the longest wall often reduces the chance of narrow “end-strip” boards at the room edges.
Offset corners and irregular wall lines affect joint spacing and end cuts, so they require measurement before you finalize plank direction.
Subtract what’s not getting laminate
In a home gym, obstructions are common:
– Built-in cabinetry or shelving
– Permanent columns or posts
– Fixed bases for equipment (if you’re not planning to remove them and extend flooring)
– Decorative or structural bump-outs
Measure the obstruction footprint using the same unit system as your overall measurements, then subtract it from the installable area. The goal is to keep laminate home gym buying aligned with the actual “floating floor footprint” you’ll cover.
Plan plank direction to minimize off-cuts
Laminate planks have a fixed length and a locking edge profile. When you run planks in the wrong direction, you often end up with:
– Very short end pieces near the opposite wall
– More complex trimming around corners/columns
– More seams that aren’t efficiently laid out
A reliable practice for laminate home gym floors is:
1. Identify the longest continuous run you can install
2. Orient planks parallel to that run (often the longest wall)
3. Only change direction if the room geometry forces it, and then measure again
Measure irregular corners as “layout constraints”
Corners that aren’t perfectly aligned create inconsistent edge widths, which can trigger extra end cuts. To avoid that, measure:
– The distance between walls at the starting edge
– The distance between walls at the ending edge
– Any step-outs or offsets where the wall line shifts
This is especially important in gyms with equipment zones separated by a doorway, half-wall, or column line.
Measure for Transitions, Thresholds, and Edges
Your laminate home gym estimate needs additional measurements for doorways, transitions, and the perimeter expansion gap. If you skip those, the final number can be correct for area yet still fail in installation because thresholds and edge clearances control how much flooring you actually leave in place.
Most laminate flooring installations require a manufacturer-specified expansion gap along walls and fixed vertical surfaces to accommodate seasonal movement.
Transition reducers at doorways determine how flooring ends are finished when laminate meets tile, carpet, or a different floor type.
When a home gym has distinct zones (lifting area vs. cardio area), measuring each zone separately improves material accuracy if you plan separate transitions.
Measure door openings and transition points
In many homes, the gym isn’t isolated. You may have:
– A doorway to a hall
– A stair entry
– A transition into tile near a utility area
– Openings where the plank pattern must align aesthetically
Measure the door opening width and note what the laminate will meet on the other side. This helps you plan thresholds/reducers so the laminate home gym floor ends cleanly and doesn’t pinch.
Leave the perimeter expansion gap (per manufacturer)
Laminate flooring expands and contracts with humidity and temperature changes. The laminate home gym perimeter needs an expansion gap along walls and fixed verticals.
Because the exact gap varies by product, the correct instruction is always:
– Use the gap size stated in your laminate manufacturer’s installation guide
Typical ranges are often several millimeters, but don’t assume—match the printed spec for your exact collection.
Measure multiple zones separately if you expect different transitions
If the gym includes two spaces separated by:
– A doorway with a reducer
– A change in floor plan where flooring runs do not continue uninterrupted
– A structural change (columns or partial walls)
Then treat each zone as its own “area calculation” so you don’t under-buy or over-buy cartons for the laminate home gym floor.
What Can Go Wrong (And How to Avoid It)
The most common problems when measuring laminate home gym floors are (1) miscounting cut complexity, (2) forgetting expansion gaps, and (3) ignoring real transition constraints. If you prevent these, your square footage and carton count usually hold steady even for awkward room geometry.
Using the wrong “coverage per box” value is one of the fastest ways to run short, because carton coverage varies by laminate brand and thickness.
Skipping expansion gaps can cause laminate to buckle during humidity changes, since laminate is designed to float with room at the perimeter.
Failing to subtract permanent obstructions leads to buying extra material, while subtracting too much can cause shortages in tight gym layouts.
Comparison: rectangle-first planning vs. zone-by-zone planning
When rooms are complex, planning method matters as much as the measurements.
| Planning Approach | Best For | Main Risk |
|---|---|---|
| Rectangle-first (split into simple shapes) | Mostly single-area gyms with a few cutouts | Underestimating how many trims you’ll make around obstacles |
| Zone-by-zone (measure separately where flooring changes) | Gyms with transitions, multiple directions, or split runs | Forgetting to carry expansion gap/threshold rules consistently across zones |
| Hybrid (rectangles + “constraint checks”) | Common real-world layouts with columns/offsets and at least one reducer | Mist-matching plank direction between areas if you don’t document the plan |
Common measurement mistakes to avoid
Here are the most frequent “why did we run short?” issues with laminate home gym floors:
– Forgetting the waste allowance: A room can have a correct square footage yet require more cartons because of end cuts and obstacle trimming.
– Misreading carton coverage: Square feet per box differs between brands/collections, so use the exact value from your laminate product documentation.
– Ignoring expansion gaps: Your measured area might be correct, but if you install too tight at walls, the floor can buckle as conditions change.
– Skipping obstruction subtraction: Not subtracting built-ins or mismeasuring around columns leads to buying either too little or too much—both are expensive.
A small planning correction saves money later.
Verdict: A Practical Way to Measure Accurately
The most practical approach for laminate home gym floors is: measure in simple shapes, add a defensible waste percentage, subtract permanent obstructions, and only then convert to carton counts using the manufacturer’s coverage per box. This keeps your laminate flooring quantity accurate even when your room includes corners, columns, or awkward transitions.
Here is why it works: you separate geometry (your measured install area) from materials reality (waste, carton coverage, and edge/threshold constraints). In my view, this workflow is also easier to audit later—if something feels off, you can revisit one stage without redoing everything.
The downside is that complex rooms (lots of angles, built-ins, or multiple transitions) can require extra planning or separate calculations by zone—if that’s your setup, consider doing a “second pass” measurement or using the manufacturer’s installation guidance step-by-step.
Quick Measurement Checklist (Save/Print)
– [ ] Measure length and width (or split room into sections/rectangles)
– [ ] Calculate total square footage (add section areas)
– [ ] Subtract permanent obstructions (only where laminate won’t go)
– [ ] Add waste allowance: 7% baseline (move to 10% if you have many corners/columns or complex trimming)
– [ ] Check box coverage in laminate manufacturer specs: use your exact carton/SKU coverage value (sq ft per box)
– [ ] Boxes needed = (adjusted square feet ÷ coverage per box), round up
– [ ] Verify expansion gap requirements and note thresholds/doorways from the laminate manufacturer guide
– [ ] Plan plank direction to avoid narrow edge pieces (usually align with the longest workable wall run)
Sources
– ASTM F2170 — Standard Test Method for Determining Relative Humidity in Concrete for Moisture Control (for basement moisture testing methodology)
– ASTM F1869 — Standard Test Method for Measuring Moisture Vapor Emission Rate of Concrete Subfloor Using Anhydrous Calcium Chloride (often reported as lb/1000 sq ft/24 hr)
– EN 13329 — Laminate floor coverings: element characteristics, evaluation of conformity, and marking (laminate performance and testing framework)
– NIST Special Publication 811 — “Guide for the Use of the International System of Units (SI)” (unit conversion reference such as inch ↔ mm)
– If your product has subfloor/moisture requirements (common for basements), use the same manufacturer’s moisture barrier/underlayment documentation:
A solid laminate home gym floor measurement plan comes down to order and documentation: measure accurately, subtract what won’t be covered, add waste that reflects real cutting complexity, and convert to carton counts using the exact specs for your product. Do those steps once with a clear sketch, and you’ll avoid the most expensive mistakes—running short due to cut complexity or discovering too late that transitions and expansion gaps dictate a different install footprint.
Frequently Asked Questions
What’s the best way to measure laminate flooring for a home gym?
Measure the total square footage of the room by multiplying room length by width, and then add a waste/extra factor of 10% to 15% for cuts around doors, corners, and obstacles. For home gyms, also measure any adjoining spaces that will receive the same laminate or transition strips, since equipment areas often extend into hallways. Write down each wall-to-wall measurement and note any off-square angles so you can plan accurate laminate flooring cuts.
How do I measure my room for laminate flooring if I have a workout area with irregular shapes?
Break the gym into simple rectangles and measure each section separately, then add the total square footage together. If you have an alcove for a treadmill, a recessed bench area, or curved features, measure those parts by section and treat them as additional “zones” for layout planning. Use the widest and longest points for each section, and record measurements to the nearest 1/8 inch for better accuracy when cutting laminate planks.
Which measurements should I take to account for expansion gaps when installing laminate floors?
Measure the room dimensions but plan for expansion gaps by subtracting the recommended gap space from each wall (commonly about 1/4 inch, or per your laminate’s instructions). For a home gym where temperature and humidity can fluctuate from workouts and HVAC cycles, following the manufacturer’s expansion requirement is critical to prevent buckling. Also measure doorways and fixed features (like cabinets, base plates, or floor vents) so you can maintain expansion space around them.
How do I calculate how many laminate planks or boxes I need for my home gym?
First calculate the total square footage needed (room area plus 10%–15% waste). Then divide by the square footage per box listed on the packaging to determine the number of boxes required, rounding up to the next whole box. If your home gym layout uses a specific plank direction (like running lengthwise under a squat rack), check that your estimated waste accounts for end cuts and pattern alignment.
Why is measuring threshold areas and transitions important for laminate floors in a home gym?
Gym setups often include thresholds to entryways, garages, or adjacent rooms, and transitions affect how the laminate will be laid and expanded. Measure the width of door openings and note any existing flooring height differences so you can choose the right transition strip and maintain a safe, level surface for moving equipment. Accurate measurements around thresholds also help you avoid leaving too little laminate for proper locking, trimming, and expansion gap placement.
📅 Last Updated: October 24, 2026 | Topic: How to measure a laminate floors for home gym? | Content verified for accuracy and freshness.
References
- Laminate flooring
- F1482 Standard Practice for Installation and Preparation of Panel Type Underlayments to Receive R…
- https://www.armstrongflooring.com/en-us/support/installation-guides/laminate.html
- Page Not Found – PERGO® Flooring
- MohawkFlooring
- Home – Tarkett Commercial
- https://scholar.google.com/scholar?q=how+to+measure+laminate+flooring+for+installation Google Scholar
- https://scholar.google.com/scholar?q=laminate+flooring+calculation+square+footage+waste+factor+installation Google Scholar
- https://scholar.google.com/scholar?q=home+gym+laminate+floor+installation+layout+measurement Google Scholar