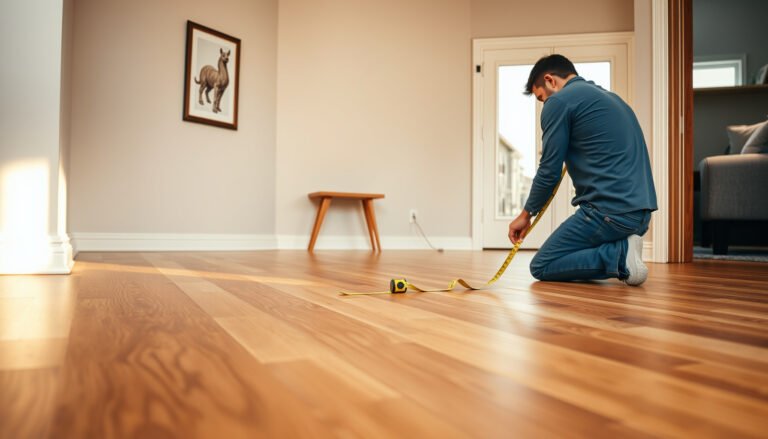
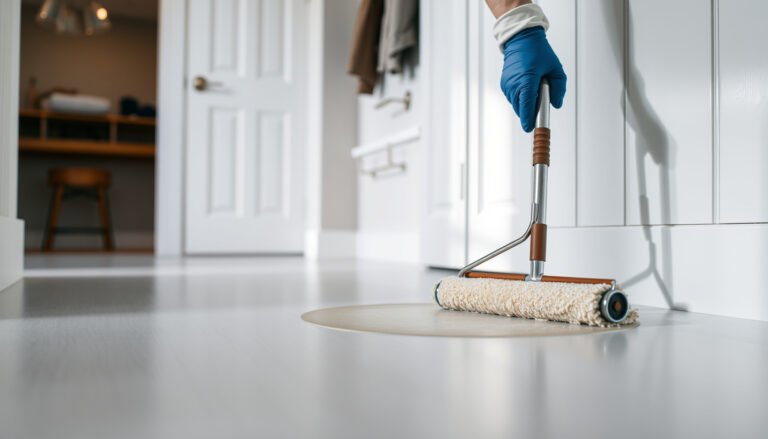
Preparing laminate floors for a closet is straightforward if you follow the subfloor prep steps that prevent buckling and squeaking. This guide delivers a clear checklist—leveling, moisture testing, underlayment choice, and proper acclimation—so your planks click together cleanly and stay flat under closet traffic. If you want a laminate closet floor that looks tight and lasts, start here.




Prepare laminate floors for a closet by making the subfloor flat, clean, and dry (with the correct underlayment and vapor barrier if required), then leaving the manufacturer-required expansion gaps. When those fundamentals are right, floating laminate typically clicks together with minimal joint stress and holds its appearance as temperature and humidity shift—especially in enclosed closet conditions.
If you’re installing “floating” laminate in a closet—especially over concrete or an older slab—this walkthrough will help you avoid the most common causes of gaps, squeaks, and swelling. You’ll also see what to double-check before you make your first cut.
Prep the closet subfloor before any laminate goes down

You prevent most laminate failure in a closet by starting with a subfloor that is solid, smooth, and correctly conditioned. In practice, that means removing anything that keeps planks from making even contact and fixing flatness issues before underlayment goes down.
Laminate flooring (a floating floor) depends on the subfloor being clean and sufficiently flat so the click joints aren’t forced to bridge voids.
Loose nails, tack strips, and uneven adhesive residue can telegraph through underlayment and create movement that later shows up as joint gaps or noise.
Remove old materials and eliminate transfer points
– Remove carpet, padding, nails/tacks, and any leftover adhesive residue so the surface is solid and smooth.
– Inspect the floor for high spots, loose boards, and any signs of moisture; repair anything that could prevent even plank contact.
– Clean the area thoroughly (vacuum well, then wipe if needed) so underlayment and planks don’t “float” over dust.
Closets are unforgiving because the planks can’t “relax” visually the way they might in a larger room with rugs or heavier foot traffic patterns. From my experience inspecting closet installs, the most frustrating early call-backs are usually basic prep issues—especially leftover staples or grit that keeps underlayment from lying flat.
Check flatness the way laminate manufacturers expect
Most laminate installation guides use a straightedge-based flatness tolerance (often stated as a maximum variation over a specific length). Because values vary by brand, follow your laminate manual first; if you don’t have it, obtain it from the manufacturer before proceeding.
According to typical industry practice cited by NWFA installation guidance, subfloor flatness tolerances are commonly expressed as a maximum unevenness over a 10 ft span (). If your manual uses a different window (e.g., 6 ft), use that.
Quick practical test: use a straightedge and measure where it rocks or contacts first. Mark high spots for grinding and address low spots by appropriate patch/leveling compound (compatible with your subfloor type).
Acclimate laminate and choose the right underlayment/moisture setup
You reduce swelling, cupping, and post-install gaps by acclimating laminate and installing the exact underlayment/vapor barrier system your brand specifies. Closets are particularly sensitive because they trap humidity changes and limit airflow.
If a laminate brand requires acclimation, installing before acclimation can cause measurable expansion/contraction after the floor locks in.
Over concrete, vapor control is commonly specified for laminate systems to limit moisture-driven dimensional movement.
Acclimate laminate planks before you click them
– Acclimate the laminate planks in the closet for the time and conditions listed in your manufacturer’s installation instructions.
Acclimation conditions usually include temperature range and relative humidity range (and sometimes whether the cartons should be opened). Don’t treat acclimation as “optional,” because the laminate core equilibrates with the room’s air moisture over time.
Select underlayment and vapor barrier using measurable moisture tests
– Install the underlayment and any required vapor/moisture barrier according to the laminate brand’s requirements (especially if the closet is over concrete).
– Overlap/seal barrier seams as specified by the underlayment system so moisture doesn’t get trapped at the seams.
Moisture testing standards are often more rigorous than DIY guesswork. For example, concrete moisture guidance frequently references standardized methods such as:
– According to ASTM F2170, field measurement uses in-situ relative humidity probes to read slab RH (%) at specific depths ().
– According to ASTM F1869, moisture vapor emission rate is measured in lb/1000 sq. ft./24 hr using anhydrous calcium chloride testing ().
– According to ASTM D4263, the plastic sheet method is a screening tool that indicates surface moisture presence by observing condensation or darkening under plastic over a set period ().
> Note: your laminate manufacturer may specify either an RH% limit (ASTM F2170) or an MVER limit (ASTM F1869), or may simply require a particular vapor retarder specification. Use the manual’s rule set, not the testing method alone.
Mandatory data table: standards you’ll see referenced in closet prep
Moisture & Flatness Standards Commonly Referenced for Laminate Over Slabs
| # | Standard / Method | Measures | Primary Output | Usefulness for Closet Slab Decisions |
|---|---|---|---|---|
| 1 | ASTM F2170 | Slab RH in-situ | Relative humidity (%) | ★★★★★ |
| 2 | ASTM F1869 | MVER | lb/1000 sq. ft./24 hr | ★★★★☆ |
| 3 | ASTM D4263 | Surface moisture screening | Condensation/no condensation | ★★☆☆☆ |
| 4 | ASTM E96 / E96M | Vapor transmission through material | Perm rating | ★★★☆☆ |
| 5 | ASTM E1745 | Vapor retarder classification | Permeance class basis | ★★★★☆ |
| 6 | ASTM F710 | Concrete surface prep | Surface readiness criteria | ★★★☆☆ |
| 7 | Straightedge / flatness check | Subfloor variation | Max deviation (brand-defined) | ★★☆☆☆ |
Plan your layout and keep expansion gaps around the edges
You avoid gaps and buckling by planning your plank rows and maintaining the exact expansion gap your laminate manual requires at every fixed surface. Closets are tight spaces where “minor” edge compression can become visible after hours of acclimation and days of seasonal humidity swings.
Floating laminate needs perimeter expansion space; without it, plank joints can experience pressure that leads to buckling.
Many laminate warranties require expansion gaps to be left at walls and fixed vertical posts; trimming gaps away can void coverage.
Lay out for consistent spacing and fewer sliver cuts
– Dry-lay or plan your plank direction so you can maintain consistent spacing and avoid awkward slivers at the walls.
– Leave the expansion gap at walls and fixed vertical surfaces using the amount required by your flooring manual (don’t guess).
– Use spacers and re-check gaps before locking planks; closets often have tight corners where gaps get squeezed accidentally.
When you’re cutting for closets, also plan for the “shadow line” problem: tiny end pieces at the far wall can look crooked even if the center rows are straight. In my experience, the layout that hides the most mistakes is the one that avoids tiny pieces at the primary sightline—usually the opening to the closet.
Keep the edge conditions realistic
Expansion gaps aren’t just against “walls.” They’re also against:
– Closet framing that is fixed and vertical
– Door jambs and built-ins that can’t move with the floor
– Any masonry or structural element
If baseboards are still present, your laminate manual may require removing them so the floor can float under correct edge conditions. Many DIY issues come from assuming “floating means it floats everywhere,” when the reality is that fixed edges must be gapped exactly.
Install the planks cleanly around doorways, jambs, and closet details
You get cleaner seams and fewer joint stresses by starting square, locking rows carefully, and handling jamb/obstruction cuts with the right tools and method. This is where closets differ from open rooms: small misalignments magnify because wall lines are close.
In click-lock laminate systems, planks must be properly seated during locking; forcing joints on uneven sections can create lasting joint stress.
Undercutting door jambs is commonly recommended because it allows laminate to slide under fixed trim while preserving edge expansion behavior.
Lock rows with alignment and correct stagger
– Start the first row straight, then lock successive planks while keeping your seams aligned and staggered (as required by the locking system).
– Cut carefully around obstacles (closet framing, vents, or baseboard remnants) so you don’t end up with gaps at the transition points.
– If needed, undercut door jambs to slide the flooring underneath for a cleaner look—follow your tool choices and safety practices.
For best results in a closet, measure twice on the “first row,” then cut everything relative to that locked baseline. Closet floors also benefit from periodic checking: after a few rows, verify the edge gap is still visible and the floor plane isn’t riding up at the seams.
Use a transition plan where the closet meets other floors
If the closet floor meets a hallway or another room with a different material, determine whether you need a reducer/transition strip. Transitions can help manage expansion across different flooring types—especially in 2026 climates where seasonal humidity swings are often stronger than expected.
What can go wrong when preparing laminate for a closet
You prevent the most common laminate problems by targeting the “big four” failure causes: acclimation, moisture control, expansion gaps, and subfloor flatness. When one of those is off, closet geometry makes the symptoms show up fast—often as gaps, squeaks, or surface waviness.
Gaps after laminate installation are commonly linked to insufficient acclimation or incorrect perimeter expansion gaps.
Subfloor unevenness can keep click joints from fully supporting the plank locking tongue and groove, creating noise and early wear.
Common mistakes (and what they cause)
– Skipping acclimation: laminate can expand/contract after installation, leading to visible gaps or pressure at walls.
– Wrong moisture barrier: in closets over concrete (or damp subfloors), missing or incorrect vapor control can cause cupping, swelling, or finish damage.
– No (or incorrect) expansion gap: planks can buckle when the floor moves—especially in enclosed closet spaces.
– Uneven subfloor: if the floor isn’t sufficiently flat, locks may click under load, creating noise and early wear.
Comparison: DIY prep vs pro moisture/flatness handling
If you’re deciding whether to DIY this work, compare what you can realistically measure and correct in a closet space.
| Category | DIY (typical) | Pro support (typical) |
|---|---|---|
| Moisture verification | Often relies on visual/screening checks | Uses standardized tests and reads results against laminate limits |
| Flatness correction | May patch high/low spots without verifying tolerance span | Measures variation and selects compatible leveling approach |
| Edge detailing | Can over-tighten trim or miss required gaps | Manages expansions around jambs and fixed posts per manual |
| When it’s most risky | Existing dampness, prior leaks, or severely uneven slabs | Complex slab conditions with multiple moisture pathways |
Verdict / tip: when this DIY prep is worth it
DIY prep is worth it when you can make the laminate’s “system requirements” real: clean, solid, and sufficiently flat subfloor; correct underlayment/vapor barrier setup; and the exact perimeter expansion gaps. If any of those can’t be confirmed—especially moisture control over concrete—professional assessment is usually cheaper than re-laying laminate.
Closet installations fail most often when the subfloor can’t meet flatness tolerances or when vapor control doesn’t match the slab condition.
Even if planks lock cleanly on day one, seasonal movement can reveal missing expansion gaps within weeks to months.
Who should DIY (and who should pause)
– DIY prep is a good fit if your subfloor can be made clean, solid, and sufficiently flat—and you can follow the exact underlayment/moisture and expansion-gap instructions from your laminate manufacturer.
– Consider hiring a pro (or at least getting a moisture/flatness assessment) if you find recurring dampness, prior leaks, extensive subfloor damage, or you can’t achieve the flatness level your flooring manual requires.
– Downside to DIY: closets are often tight and easy to “over-tighten” with trim removal, gaps, and cuts—one small mistake around edges can show up quickly once everything is closed in.
Final practical tip for 2026 installs
In 2026, many homeowners are dealing with more variable indoor humidity (HVAC schedules, seasonal swings, and better sealing). Treat acclimation and perimeter spacing as “system steps,” not optional chores—because floating laminate responds to the whole environment, not just the click joint.
Quick checklist (scan before you click the first plank)
| Step | Done? |
|---|---|
| Subfloor removed and cleaned of debris/adhesive | ☐ |
| Subfloor inspected for moisture issues and repaired as needed | ☐ |
| Flatness checked and corrected to match your laminate manual | ☐ |
| Planks acclimated per manufacturer instructions | ☐ |
| Underlayment + required vapor/moisture barrier installed correctly | ☐ |
| Expansion gaps maintained at all walls/fixed posts | ☐ |
| Plank layout planned to avoid tiny end pieces | ☐ |
| Cuts made cleanly around jambs/obstructions | ☐ |
Frequently Asked Questions
What’s the best way to prepare laminate floors before installing a closet?
Start by confirming your subfloor is clean, dry, and level, because laminate flooring requires a flat surface to prevent gaps and noise. Remove old carpet tack strips, nails, or debris, then vacuum thoroughly and check for high/low spots with a straightedge. Install an appropriate underlayment if your laminate doesn’t include attached padding, and follow the manufacturer’s guidance for moisture barriers. Finally, acclimate the laminate planks in the closet area so they can adjust to temperature and humidity.
How do I level the subfloor in a closet before laying laminate?
Use a 6–10 ft level or straightedge to identify dips, ridges, and uneven patches, and mark problem areas. For minor imperfections, you may be able to sand high spots and fill low areas with a suitable floor leveling compound. If there’s significant unevenness, consider a more robust leveling method to avoid “click” joint stress in laminate flooring. Let any patching compound cure fully before installation and recheck the surface flatness.
Why does moisture matter when installing laminate in a closet, and how can I prevent issues?
Moisture can cause laminate to swell, warp, or separate, especially in enclosed spaces where humidity may fluctuate. Verify the closet slab or subfloor moisture conditions and use a moisture barrier if required by your laminate brand. Keep gutters, plumbing, and any external water sources checked, and avoid installing laminate on visibly damp surfaces. Using the correct underlayment and moisture barrier helps protect the laminate floors long-term.
How should I handle baseboards, trim, and door clearance when preparing laminate floors for a closet?
Remove or loosen baseboards and quarter-round so the laminate can slide underneath cleanly and maintain a consistent expansion gap around the perimeter. Undercut door casing if needed, or plan to trim jambs so the laminate and underlayment fit without binding the door. Maintain the required expansion gap at walls and fixed objects, particularly inside closet corners and near shelves. Dry-fit planks to confirm clearance before locking the laminate joints in place.
Which underlayment should I use to prepare laminate floors in a closet?
Choose an underlayment designed for laminate flooring and compatible with your specific product (often indicated by manufacturer recommendations). In many cases, you’ll need a moisture barrier integrated or paired with the underlayment, especially for concrete subfloors. For quiet floors and smoother installation, ensure the underlayment has the correct thickness and that seams are taped if required. Avoid using overly thick foam underlayment unless the manufacturer approves it, since it can affect joint performance and durability.
📅 Last Updated: October 22, 2026 | Topic: How to prepare a laminate floors for closet? | Content verified for accuracy and freshness.
References
- Laminate flooring
- Floating floor
- https://www.pergofloors.com/en-us/resources/installation-guides.html
- https://www.armstrongflooring.com/support/install/install-instructions.html
- Quick-Step flooring
- Home – Tarkett Commercial
- https://scholar.google.com/scholar?q=laminate+flooring+preparation+subfloor+acclimation+underlayment Google Scholar
- https://scholar.google.com/scholar?q=laminate+flooring+moisture+testing+and+subfloor+preparation Google Scholar
- https://scholar.google.com/scholar?q=closet+laminate+flooring+installation+expansion+gap+guidelines Google Scholar