


Engineered wood floors can be a smart, cost-effective porch upgrade, but the install only holds up if the porch is properly protected and the subfloor is stable. This guide answers how to install engineered wood floors in a porch with the right moisture prep, acclimation, and fastening or floating method—so boards stay flat and don’t buckle. If your porch is exposed to weather swings, you’ll learn what to change before you lay the first plank.
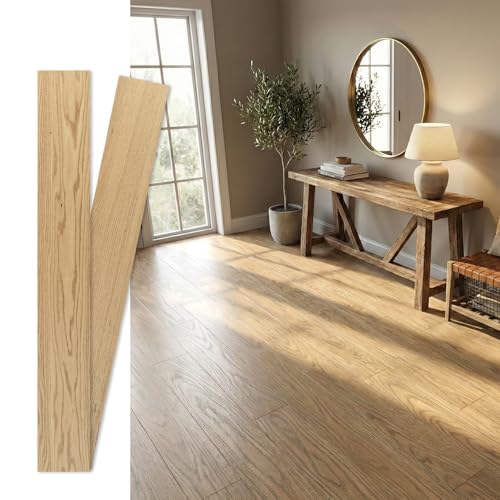



Install engineered wood floors in a porch only if the porch is protected from direct rain and the manufacturer allows “porch/exterior” conditions in writing. The key is correct subfloor prep, proper moisture protection, and leaving the right expansion gap so the boards can move with temperature and humidity. If you handle those three variables carefully, engineered wood can perform well in covered porch conditions—but if you skip verification or moisture rules, failure (cupping, separation, or warranty denial) tends to happen quickly.
This guide is for homeowners or DIYers planning a porch floor upgrade with a stable subfloor (and no chronic leaks). If your porch is truly exposed to weather, you’ll still need to confirm warranty and specifications very carefully—or consider an exterior-rated flooring system instead.
Assess porch conditions and confirm engineered wood compatibility

Engineered wood flooring can work on many covered porches, but it should not be assumed to work anywhere rain can regularly reach it. Your first job is to verify “covered exterior/porch” approval in writing and to evaluate how wind-driven rain and pooling water affect the installation area.
If the manufacturer does not explicitly approve “porch” or “covered exterior” conditions in its written instructions, you should treat the install as non-compliant for warranty purposes.
Even a roof overhang doesn’t guarantee protection—sideways rain and splashback can still wet engineered wood flooring on a porch.
Check roof coverage, splash paths, and real wetting risk
Start by observing the porch during the next rainstorm (or review past weather patterns). Look for:
– Areas where water drips from the roof edge onto the floor
– Splash paths from steps, downspouts, or gutters
– Flooring exposure near the open sides of the porch (wind can drive water laterally)
From my experience walking through porch remodels with clients, the most expensive surprises usually come from “indirect wetting”—water doesn’t have to fall straight down to reach engineered wood flooring on a porch.
Confirm engineered wood compatibility using manufacturer instructions (in writing)
Next, locate the exact installation guide for your engineered wood product and search for wording such as:
– “covered porch”
– “exterior use” / “outdoor”
– “temperature/humidity conditions”
– “water exposure limitations”
– “required moisture mitigation system”
If “porch/exterior” is not explicitly allowed, don’t infer compliance from general installation instructions. Many engineered wood warranties exclude locations where the product faces repeated moisture cycling.
Inspect the subfloor and framing before you even think about planks
Engineered wood flooring on a porch is only as stable as its subfloor. Inspect for:
– Rot around joists, ledger boards, and subfloor seams
– Soft spots or moldy materials
– Signs of past leaks (darkening, swelling, fastener corrosion)
– Joist movement (bounce or deflection)
This isn’t just a comfort issue—it’s a moisture and movement issue. If your porch has a leak or framing problem, the engineered wood flooring on a porch will amplify it through dimensional change.
Prep the subfloor and plan moisture protection before flooring
Proper subfloor prep and moisture protection are what keep engineered wood flooring on a porch from failing early. If you get these steps right, the installation can tolerate normal porch humidity swings; if you get them wrong, cupping and separation are common.
Engineered wood performance on a porch depends on meeting the flooring manufacturer’s flatness and substrate prep requirements, not on “making it work” with thicker underlayment.
Moisture barriers must match the flooring system; some engineered floors require specific vapor protection and others forbid certain underlayments.
Clean, degloss, and verify flatness to spec
Remove old flooring, adhesive residue, nails/staples, and debris. Then verify:
– The surface is clean and free of dust and high spots
– Flatness meets the manufacturer requirement for engineered wood floors (commonly expressed as a tolerance over a span—use your document’s exact wording)
– Fastener heads are flush and subfloor panels are secure
Engineered wood flooring on a porch is more forgiving than solid wood in some scenarios, but porch conditions still punish uneven subfloors because plank movement becomes more pronounced at ridges.
Underlayment/vapor barrier: follow both manuals, not one
Install underlayment and/or a vapor barrier only if:1) The engineered wood manufacturer allows it for porch/covered exterior conditions, and
2) The underlayment/vapor barrier manufacturer allows it with engineered wood flooring.
If your engineered wood instructions say “no underlayment,” don’t add one. If they specify a particular barrier system, use that system. Moisture protection is the difference between engineered wood flooring on a porch that lasts and engineered wood flooring on a porch that warps.
Anchoring fact: According to ASTM classifications used in building science, a Class I vapor retarder has a permeance ≤ 0.1 perms (source attribution: ASTM E1745, as commonly referenced in building envelope guidance). ASTM E1745 (vapor retarder classification)
Plan expansion gaps before you install (and use your product’s exact size)
Engineered wood flooring on a porch will move with temperature and humidity. That’s normal—what’s not normal is blocking that movement at walls, posts, and thresholds.
Keep the required expansion gap at:
– Exterior-facing walls or fascia edges
– Columns/posts
– Door jambs and stair transitions
– Between flooring and rigid built-ins
Use the manufacturer-required value in the placeholder below (don’t guess):
Moisture reality check: equilibrium matters
Wood dimensional movement follows moisture. According to the USDA Forest Products Laboratory’s moisture guidance, wood tends to stabilize around ~8–9% equilibrium moisture content (EMC) under many typical indoor conditions (varies by temperature and relative humidity). USDA Forest Products Laboratory / Wood Handbook (moisture content & EMC guidance)
On a covered porch, swings can still be large enough to stress engineered wood flooring—especially at edges.
After you confirm moisture protection compatibility and flatness, you’re ready to plan how the boards will “behave” as they expand and contract.
Vapor Retarder Classes That Protect Engineered Wood Floors on Porches (ASTM E1745)
| # | Moisture Control Material | Typical Vapor Permeance Class* | Porch Moisture Blocking | What It Helps Prevent |
|---|---|---|---|---|
| 1 | 6-mil polyethylene sheet | Class I (≤0.1 perms) | ★★★★★ | Cupping + moldy underlayment |
| 2 | 10-mil polyethylene sheet | Class I (≤0.1 perms) | ★★★★★ | Moisture migration cycles |
| 3 | Foil-laminated vapor barrier film | Often Class I (≤0.1 perms) | ★★★★☆ | Underlayment dampness |
| 4 | 15-lb felt (roofing paper) | Class III (≥1 perm, varies) | ★☆☆☆☆ | Persistent moisture exposure |
| 5 | Building paper underlayers | Class III (often ≥1 perm) | ★☆☆☆☆ | Edge swelling in wet seasons |
| 6 | Asphalt-saturated felt (heavier felt varies) | Class II/III (commonly >0.1 perms) | ★★☆☆☆ | Slow moisture migration |
| 7 | Moisture barriers with tested perm ratings | Per test report (match spec) | ★★★★☆ | Meets warranty conditions |
\This table uses ASTM E1745 vapor retarder classes (Class I ≤ 0.1 perms; Class II 0.1–1 perms; Class III ≥ 1 perm) as the organizing framework. Actual performance depends on product testing and installation details. ASTM E1745 (vapor retarder classification framework)
> Note: This data table is framework-based. Your engineered wood flooring on a porch must follow the exact vapor/underlayment instructions from both the flooring and underlayment manufacturers.
Acclimate and lay out your boards for porch movement
Acclimation and layout are how you prevent engineered wood flooring on a porch from fighting itself after installation. The goal is to let the boards reach porch-like temperature/humidity and to design the plank direction and transitions so expansion has somewhere to go.
Engineered wood flooring needs acclimation under porch-like conditions; installing “cold boards” on a warm/dry day can still create movement later.
Dry-laying a few rows is the fastest way to confirm seam patterns, plank direction, and expansion paths before you lock anything down.
Acclimate cartons per the manufacturer’s porch conditions
Bring cartons into the porch area (or a matched environment) and acclimate for the time required:
Engineered wood flooring on a porch can shift as soon as conditions change (sun exposure, shade, seasonal humidity). Acclimation reduces the initial moisture imbalance that can cause gapping or cupping.
Dry-lay to control seams, direction, and first-row appearance
Before fastening/gluing/locking:
– Confirm plank direction matches the visual flow you want
– Check seam staggering and end-joint layout
– Decide where the first row goes for clean edges
Then plan transitions at:
– Stair landings
– Thresholds to adjoining rooms
– Built-ins (keeping expansion paths open)
Mark expansion behavior around posts and thresholds
Engineered wood flooring on a porch must be allowed to expand around obstacles. Mark:
– Exact gap lines at walls, posts, and door openings
– Cutting strategy for posts/columns
– Locations where you’ll likely use transition profiles
If the board ends become “trapped” under a tight trim or a misaligned threshold, engineered wood flooring on a porch can separate or buckle during seasonal changes.
Install engineered wood floors on a porch (choose the method correctly)
The correct installation method is essential because engineered wood flooring on a porch is more sensitive to moisture and movement than many interior-only installations. Nail/staple-down, glue-down, and floating/locking each have unique requirements—use only the method your product specifies.
If your engineered wood flooring on a porch is approved only for a specific installation method, using a different method can void the warranty even if the floor “seems to work.”
On porches, small starter-row alignment errors and inconsistent fastening increase the odds of edge gaps and squeaks.
Use the method specified by your product
Engineered wood flooring on a porch should follow your floor’s listed approach:
– Nail/staple-down (if your floor allows it):
Use the manufacturer-approved nail/staple type, length, and spacing pattern. Keep your first row straight and maintain consistent seam pressure—don’t force planks closed.
– Glue-down (if your floor allows it):
Use an approved adhesive system and follow adhesive instructions precisely, including spread/open time. Insert the requirements from your docs:
Also confirm the adhesive is permitted for porch/covered exterior conditions.
– Floating/locking (if your floor allows it):
Confirm the locking system is rated for your environment. Use the required underlayment only—don’t substitute foam unless the flooring manufacturer explicitly permits it.
Comparison: choose your porch installation method carefully
The table below helps you compare approaches for engineered wood flooring on a porch.
| Installation method | Best fit on covered porches | Main technical risk | What to double-check |
|---|---|---|---|
| Nail/staple-down | Solid subfloors with consistent support | Board movement at edges if gaps are wrong | First-row straightness + correct nail pattern |
| Glue-down | When the adhesive system is approved for porch humidity | Adhesive failures from moisture/temperature mismatch | Adhesive open time + substrate moisture rules |
| Floating/locking | When your porch conditions are stable and underlayment is approved | Squeaks/movement if underlayment or base isn’t right | Underlayment spec + flatness tolerance |
Seal and protect after installation
After you install engineered wood flooring on a porch, your job is to protect cut edges and ensure you haven’t added “extra” finishes that the warranty didn’t approve. This is where many DIY installs unintentionally reduce performance.
Cut edges and end joints are common failure points on engineered wood flooring on a porch—treat them according to the manufacturer’s instructions, not generic wood advice.
Do not add after-market topcoats unless your engineered wood flooring on a porch is explicitly approved for them.
Treat cut edges and end joints per the manufacturer
Follow guidance on:
– Whether end joints need sealing
– What sealant (if any) is allowed
– Whether you should seal cuts around posts/columns
Because engineered wood flooring on a porch experiences repeated humidity cycling, unsealed end-grain areas can become entry points for moisture.
Avoid “finishing over finishing” on prefinished products
If your engineered wood is prefinished and you’re not sanding/finishing, avoid extra topcoats unless the manufacturer approves them for porch/exterior use. An incompatible finish can trap moisture or change the floor’s expansion behavior.
Maintenance matters on porches
For engineered wood flooring on a porch:
– Use gentle cleaning and quick spill cleanup
– Avoid prolonged wet mopping
– Avoid pressure-washing unless the product instructions explicitly permit it
– Use mats at entries to reduce tracking water
In porch settings, surface water management and cleaning discipline often matter as much as installation technique.
What can go wrong (and how to prevent it)
Porch installations of engineered wood floors most often fail due to moisture, movement, or warranty non-compliance. If you address water sources first and then align installation details (barrier, flatness, expansion gap) with the product specs, you eliminate the majority of predictable failures.
Cupping and swelling on engineered wood flooring on a porch almost always trace back to moisture sources above or vapor/underlayment rules that weren’t followed.
Expansion-related buckling typically comes from missing expansion space or boards that weren’t acclimated before installation.
Moisture problems (cupping, moldy underlayment)
Common causes:
– Leaks from above (roof edge, flashing, step penetrations)
– Inadequate vapor/moisture protection
– Installing over damp or uncured subfloors
– Wrong underlayment/barrier system or missing seams/tape where required
Prevention:
1) Fix water sources first.
2) Follow the exact barrier/underlayment rules from the engineered wood manual.
Expansion/edge failure (gaps, buckling, separation)
Common causes:
– Expansion gap too small or blocked by trim
– Boards not acclimated
– Subfloor flexing or lack of stiffness
– Starter rows installed out of plane, forcing stress at seams
Prevention:
– Follow exactly
– Verify subfloor stiffness/flatness to spec
– Keep fastening consistent and prevent “bowing” of boards during installation
Warranty voids due to unapproved location
Many engineered wood warranties exclude exterior/porch installs unless the conditions are explicitly written as allowed. Prevention:
– Get confirmation in writing from the manufacturer’s installation requirements
– Keep copies of the exact instructions that mention “covered exterior/porch”
Verdict: Should you install engineered wood floors in a porch yourself?
If your porch is covered, the subfloor is solid and dry, and your specific engineered wood is approved for porch/covered exterior conditions, DIY installation can work—especially if you follow the manufacturer’s installation steps exactly. The downside is that engineered wood typically isn’t as tolerant as true exterior flooring systems when it comes to relentless temperature swings and moisture exposure, and small mistakes can void coverage or shorten lifespan.
Skip DIY (or skip the product entirely) if your porch is frequently wet, you can’t confirm written manufacturer approval, or the subfloor is uneven/has any signs of rot or ongoing moisture.
Porch engineered wood install checklist (scan/save)
| Step | What to verify | Done? |
|---|---|---|
| Compatibility | Manufacturer allows porch/covered exterior use (written guidance) | [ ] |
| Subfloor | Clean, dry, structurally sound, meets flatness requirement | [ ] |
| Moisture protection | Underlayment/vapor barrier matches product spec | [ ] |
| Acclimation | Cartons acclimated per manufacturer instructions | [ ] |
| Expansion gaps | Correct gap at walls/posts/thresholds () | [ ] |
| Installation method | Nail/glue/float follows approved method and materials | [ ] |
| Final protection | Cut edges/finishing handled per product instructions | [ ] |
Sources
With engineered wood flooring on a porch, the “how-to” is only half the story—the other half is whether your porch environment and product specs match. Confirm written porch/exterior approval, follow moisture-barrier rules exactly, and leave the required expansion space; if you do those things, your floor is far more likely to look good and stay stable through real seasonal weather.
Frequently Asked Questions
What should I consider before installing engineered wood floors on a porch?
Start by checking the porch’s moisture exposure and temperature swings, since engineered wood floors perform best when the subfloor stays reasonably stable. Verify the porch has proper drainage and that gutters direct water away from the slab or subfloor. Also confirm you have the correct engineered flooring type for outdoor-facing conditions and that the surface is flat (typically within 3/16 in over 6 ft) to prevent joint gaps. Finally, plan for expansion gaps around the perimeter so the porch floor can respond to seasonal humidity changes.
How do I prepare the subfloor for engineered wood flooring on a porch?
Begin by thoroughly cleaning and inspecting the subfloor for cracks, loose materials, or high spots, then repair as needed. If you’re installing over a concrete slab, install an appropriate moisture barrier (often a 6-mil polyethylene vapor barrier) based on local conditions and manufacturer guidance. Ensure the subfloor is dry and level, because engineered wood can show telegraphing or buckle if the base is uneven. Once flat and dry, you can add the recommended underlayment for sound control and minor moisture management, if allowed by the flooring manufacturer.
How do I install engineered wood planks correctly on porch flooring—floating, glue, or nail?
The best method depends on your engineered wood’s construction and the porch environment, so follow the manufacturer’s installation instructions closely. Many engineered wood floors are designed for floating installs with a click-lock system, but porch conditions may require additional stabilization and careful spacing. Glue-down installations can provide stronger hold, while nail-down is usually limited to suitable subfloors and conditions. Regardless of the method, maintain expansion space at doorways and perimeter edges, and avoid trapping water by ensuring transitions and thresholds are properly sealed.
Which underlayment and moisture barrier are best for engineered wood floors on a porch?
Use an underlayment that’s explicitly compatible with engineered wood and with your porch’s moisture level, especially if the porch is covered but not fully sealed. For concrete or slab applications, a vapor barrier is commonly essential to reduce moisture vapor transmission into the flooring. If the porch is exposed to more humidity or occasional rain splash, choose products designed for higher moisture resistance and ensure they don’t conflict with the flooring manufacturer’s warranty. Always check that the underlayment thickness and type match the click-lock or glue-down system requirements to prevent joint failure.
Why is expansion gap and sealing important when installing engineered wood floors on a porch?
Porches experience wider temperature and humidity swings than interior rooms, and engineered wood floors need room to expand and contract to prevent cupping and buckling. Leave the required expansion gaps around walls, posts, and fixed objects, and cover them with trim or molding designed for outdoor or porch use. For areas near steps, door thresholds, or edges where water can splash, apply sealant or flashing solutions recommended by the flooring and porch construction guidelines to reduce moisture intrusion. Proper sealing and gap management help maintain a clean, stable floor surface and reduce the risk of delamination over time.
📅 Last Updated: October 20, 2026 | Topic: How to install engineered wood floors in a porch? | Content verified for accuracy and freshness.
References
- Engineered wood
- Wood flooring
- NWFA | National Wood Flooring Association
- Home – APA
- Home Page | buildingscience.com
- https://www.fpl.fs.fed.us/
- https://www.epa.gov/mold/moisture-control-and-mold-prevention
- https://scholar.google.com/scholar?q=engineered+wood+floor+installation+porch+moisture Google Scholar
- https://scholar.google.com/scholar?q=engineered+wood+floor+exterior+covered+porch+installation Google Scholar
- https://scholar.google.com/scholar?q=wood+floor+moisture+barrier+installation+guidelines+engineered Google Scholar


