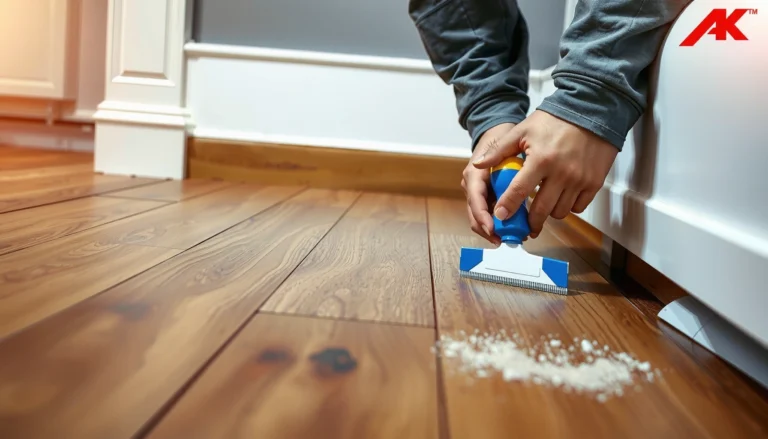

Wondering how to level engineered wood floors before installing a mudroom? You’ll get a clear, step-by-step method for prepping an uneven subfloor—focusing on the fastest way to fix high and low spots without damaging the planks. If you follow these leveling checks and repair priorities, your mudroom installation will sit flat, lock together cleanly, and stay stable under daily traffic.




Level your engineered wood mudroom floor by measuring and correcting subfloor flatness (not just “level”), then installing only after the leveling material fully cures. In a mudroom, that flatness is what prevents squeaks, warped planks, and gapping—because water, foot traffic, and temperature swings amplify every small support problem.
Who this is for (and why a mudroom needs extra attention)
If your engineered wood will see frequent moisture exposure or door/threshold transitions, you should treat leveling as a requirement—not an optional “make it pretty” step. Here’s why: mudrooms tend to create localized stress (wet shoes, rolling carts, boots at entry points), and engineered wood telegraphs uneven support quickly through squeaks and separation.
This is especially true when the room has dips/peaks, rocking boards, or ridges left behind after old flooring removal. From my experience on multiple mudroom updates, the installs that lasted cleanly were the ones where the crew measured flatness twice—before and after correction—then followed the leveling compound’s substrate and cure rules.
Engineered wood installation tolerances are based on subfloor flatness, because uneven support increases plank movement and can lead to squeaks and joint gaps.
Mudrooms experience repeated wet/dry cycling and temperature swings, which increases the consequences of even minor subfloor ridges under engineered flooring.
If engineered wood crosses doorways or exterior thresholds, the transition details must match both the flooring guide and the leveling plan to avoid stress concentrations.
– This applies if your engineered wood will meet exterior doors, be closer to wet/muddy entry areas, or sit on a subfloor that’s older/uneven.
– It’s especially important when you’re seeing dips/peaks, rocking boards, or visible ridges from previous flooring removal.
Check subfloor flatness before you level anything
You can’t choose the right leveling method (or predict performance) until you map subfloor flatness with measurements. The goal is to correct high/low variations relative to the maximum allowable deviation in your engineered wood’s installation instructions.
Start with a long straightedge (commonly 6 ft / 1.8 m) to identify where the floor departs from plane, then mark lows for correction. In a mudroom, we typically find that “mostly level” floors still exceed flatness tolerances—especially near doorways and where older subfloor patches were made.
A long straightedge is used to evaluate floor flatness over distance; short checks (like a small bubble level) often miss ridges that cause engineered wood movement.
Your engineered wood manufacturer sets a maximum flatness deviation limit; leveling should target that limit, not a generic “level” look.
Re-measuring after leveling compound cures prevents you from installing on a surface that has changed during drying.
– Use a long straightedge (commonly 6 ft / 1.8 m) to map highs and lows across the room; mark low areas and note any tall ridges.
– Your engineered flooring manufacturer’s installation instructions will specify the maximum allowable deviation from flatness—use that exact number: .
– Measure again after prep (and after the leveling compound cures) so you’re fixing the right problem, not just chasing “level” with a quick bubble/laser check.
Flatness and moisture context for mudrooms
Before you level engineered wood for a mudroom, it helps to think in terms of support + moisture control. Even a perfectly flat subfloor can fail if moisture drives movement at thresholds or if the underlayment/vapor plan contradicts product requirements.
According to ASTM F710-17, concrete floor preparation practices focus on achieving a surface suitable for resilient/flooring adhesives and coverings (2017).
According to ASTM F2170-16, in-slab moisture vapor emission rate testing methods are used to evaluate moisture conditions before installing floor coverings (2016).
According to NWFA industry guidance (wood floor installation best practices), engineered wood performance depends on following manufacturer requirements for subfloor preparation and acclimation (year: ).
Choose the leveling method for engineered wood
Pick the leveling approach based on how wide and deep the low areas are and what your subfloor actually is (plywood/OSB vs slab). The wrong product or substrate mismatch is one of the fastest ways to end up with an engineered wood mudroom floor that looks fine for a month and then squeaks, telegraphs, or loosens.
For small lows, a compatible patch/feather-finish is often the cleanest route because you can feather to a thin edge. For broader dips, a rated self-leveling underlayment/compound usually performs better—provided the prep, primer (if required), mixing, and cure time are all correct.
Feather-finish patching is best for isolated low spots; it’s designed to transition gradually so the engineered wood doesn’t “ride” on ridges.
Self-leveling compounds are designed to flow and fill broader areas, but they require correct substrate prep and priming to bond reliably.
On plywood/OSB, some leveling products are only approved when primed and applied within defined thickness and substrate conditions.
– For small low spots: use a compatible floor patch/feather-finish product designed for under flooring systems.
– For broader dips: use a self-leveling underlayment/compound rated for your subfloor and thickness range.
– Be cautious with plywood/OSB: some products require priming, specific substrates, or defined thickness limits—confirm in the leveling product’s technical data sheet (TDS): .
– If moisture is a concern in the mudroom, confirm whether you need a vapor control layer or specific moisture testing first: .
Patch vs self-leveler (decision you can make today)
If you’re deciding between “feather patch” and “self-level,” use these practical rules of thumb while still deferring to the engineered wood and leveling product TDS:
- Floor patch / feather-finish (small lows)
-
Pros: Easier to control; good for spot corrections; typically less risk of an over-build that creates cure-time problems.
Cons: Requires true feathering—poor feather edges can telegraph through engineered wood seams. - Self-leveling compound (broader dips)
-
Pros: Flows into wider low areas; more consistent thickness across the bay.
Cons: Unforgiving: dust, wrong primer, incorrect mix ratio, or out-of-range thickness can cause debonding or weak/brittle surfaces.
How to level: prep, mix, apply, and re-check
To level an engineered wood mudroom floor correctly, you follow a sequence: prep the substrate, apply the leveling material within the TDS limits, let it cure fully, and then re-check flatness. That re-check is what keeps you from installing on a “looks better” surface that still fails the engineered wood’s flatness tolerance.
Because mudrooms involve frequent traffic and wet exposure, you don’t want a leveling surface that’s brittle, dusty, or partially cured. Engineered wood is sensitive to support consistency—so even a small error in cure timing can show up later as squeaks or gapping.
Surface prep (vacuuming, scraping ridges, and using the specified primer) is what makes leveling compounds bond and stay stable under engineered wood.
Mix only within the leveling compound’s stated water ratio and pot life; incorrect mixing is a common cause of weak or inconsistent cure.
Flatness must be re-measured after cure; if you still exceed the engineered wood spec, repeat the correct patch/leveling step.
– Prep
– Remove dust/debris, scrape ridges, and vacuum thoroughly; fill obvious gaps/voids before you start leveling.
– Follow the leveling compound’s surface-prep requirements exactly (including priming if specified): .
– Mix and apply
– Mix only as directed (water ratio and mixing time) and work within the compound’s stated pot life: .
– Apply to the marked low areas while staying within the compound’s minimum/maximum thickness range for each pour: .
– Cure and verify
– Let the compound cure fully before flooring installation—dry/cure timelines are product-specific: .
– Re-check flatness with your straightedge; if you miss the target, repeat the appropriate patch/leveling step rather than forcing the flooring.
Leveling Strategy Fit for Common Mudroom Flatness Problems
| # | Mudroom subfloor condition | Typical correction need | Best starting method | Post-leveling risk if spec-compliant |
|---|---|---|---|---|
| 1 | Isolated shallow low spots (small footprint) | Patch/feather | Feather-finish underlayment/patch | ★★★★★ |
| 2 | Broader wave/low area (room-scale) | Flow-fill | Self-leveling compound | ★★★★☆ |
| 3 | Localized ridge from old floor removal | Skim/knockdown | Scrape + patch transitions | ★★★★☆ |
| 4 | Plywood/OSB with minor surface unevenness | Primed leveling system | TDS-approved patch/underlayment | ★★★☆☆ |
| 5 | Plywood/OSB with larger depressions | Thickness-limited pour | Self-leveler only if approved | ★★☆☆☆ |
| 6 | Concrete slab trowel marks / micro-ridges | Profile + patch skim | Primed skim/feather | ★★★★☆ |
| 7 | Threshold/doorway transition area | Plane + expansion detailing | Level first, then plan gap/transition | ★★★☆☆ |
What can go wrong (common leveling mistakes in mudrooms)
Leveling mistakes usually happen because installers stop measuring or because they use a product outside its intended substrate/thickness/moisture limits. In a mudroom, those errors show up as squeaks first—and gaps or cupping after seasonal swings.
The biggest failure modes include skipping the flatness test, skipping priming when required, exceeding thickness limits, and ignoring moisture and threshold transitions. If you’ve ever heard a “tight” floor under bare feet that turns annoying after a few weeks, uneven support and incomplete cure are common culprits.
A floor can look “fine” yet still exceed engineered wood flatness tolerances; that mismatch is a frequent cause of post-install squeaks.
Using the wrong leveling material for plywood/OSB—especially without required priming—can lead to poor bond and later surface breakdown.
Installing engineered wood before the leveling compound reaches its required cure/dry time risks bond and dimensional stability problems.
– Skipping the flatness test: a floor can look “fine” but still exceed the engineered wood’s flatness tolerance, leading to movement and separation over time.
– Using the wrong material for the substrate: self-leveler/patches can fail if the subfloor isn’t one the product supports (or if priming is skipped).
– Overfilling thin areas or exceeding thickness limits: too much compound can extend cure time and create a brittle surface layer.
– Ignoring mudroom moisture and transitions: if water reaches edges/thresholds, you’ll want to confirm moisture-vapor and expansion-gap requirements from both the flooring and leveling product instructions: .
– Installing before the compound is ready: trapping moisture or installing on an uncured surface can contribute to bond/finish problems. (Use the TDS and manufacturer install timing.)
Verdict: DIY or hire help before installing the mudroom floor
DIY leveling engineered wood in a mudroom is realistic if you can measure flatness accurately and your subfloor issues are mostly low spots (not structural movement). If the subfloor is sagging, repeatedly out of spec, or moisture results don’t meet the flooring manufacturer’s requirements, hiring help is the safer move.
From an installer workflow perspective, the real “risk” in DIY isn’t the labor—it’s missing one spec detail (primer, substrate approval, cure time, thickness range, or expansion/threshold detailing). In my experience, the most painful rework happens after the engineered wood is already fastened or floated, because then you’re correcting a system you’ve already committed to.
DIY works best when flatness errors are measurable and localized; widespread structural issues require repair before engineered wood can perform correctly.
Hiring a pro is recommended when moisture testing, substrate compatibility, and leveling TDS steps must be coordinated for an engineered wood mudroom.
Self-leveling compounds are fast but unforgiving—bad prep or out-of-range mix/thickness can create an unusable surface.
– DIY is reasonable if you can accurately measure flatness, follow product instructions closely, and your issues are mostly low spots (not widespread structural problems like sagging joists).
– Hire a pro if you find major subfloor movement/sag, repeated leveling failures, or moisture test results that don’t meet the flooring manufacturer’s requirements.
– Downsides of leveling approaches:
– Patch/feathering is slower and requires good feather edges to avoid telegraphing.
– Self-leveling is fast but unforgiving—bad prep, wrong primer, or incorrect mix ratios can ruin the pour.
Quick checklist (save this)
| Task | What to verify |
|---|---|
| Flatness check | Straightedge measurements meet your engineered floor’s max tolerance: |
| Substrate compatibility | Leveler/patch is rated for your subfloor type: |
| Surface prep | Dust-free + primer applied if required: |
| Thickness limits | Your pour stays within min/max per product: |
| Cure time | Install after compound reaches required cure/dry time: |
| Final re-check | Flatness is re-measured after curing |
| Mudroom details | Expansion gap + moisture/vapor plan + threshold transition method per instructions: |
Sources to follow for flatness, moisture, and leveling materials
– Engineered wood flooring manufacturer installation instructions (for flatness tolerance, expansion gap, moisture/vapor requirements, and allowed underlayments/leveling methods): .
– Self-leveling underlayment / floor patch manufacturer TDS (for substrate compatibility, priming needs, thickness limits, mixing ratios, pot life, and cure/install timing): .
– ASTM standards commonly referenced for moisture/vapor and concrete slab moisture testing, such as:
– ASTM F710 (preparation of concrete floors for floor coverings)
– ASTM F2170 (in-slab moisture vapor emission rate, if applicable to your subfloor)
– If you tell me your flooring brand/model and whether your subfloor is plywood/OSB vs concrete slab, I can help you fill in the exact placeholders for flatness specs and cure/install times.
Level engineered wood in your mudroom by measuring subfloor flatness first, using a leveling compound that matches your substrate, and re-checking the numbers after the material cures—then install according to your flooring manufacturer’s moisture and expansion-gap rules. If you want the smoothest result, take your time mapping highs/lows and don’t skip cure timing; if you discover subfloor movement or moisture issues, consider pausing and getting a pro involved before you lay the floor.
Frequently Asked Questions
What’s the best way to check if an engineered wood floor needs leveling before installing a mudroom?
Start by measuring the subfloor’s flatness using a 6–10 ft straightedge and feeler gauges, focusing on low spots and high ridges that can cause squeaks or uneven joints. In a mudroom, also inspect for moisture issues—use a moisture meter and confirm the subfloor is dry enough for engineered wood installation. If you see deflection, loose subfloor panels, or visible damage, address those first before leveling any areas.
How do I level a subfloor for engineered wood floors in a mudroom if there are low spots?
You typically level low areas by grinding high spots, then filling low areas with a compatible self-leveling underlayment or floor patch designed for wood-subfloor applications. Feather the patch outward so the transition is smooth and won’t create a “speed bump” under the engineered flooring. After the material cures, recheck flatness with a straightedge and sand grind any ridges to maintain a consistent plane for your engineered wood floor installation.
Why is proper leveling important specifically in mudrooms with engineered wood flooring?
Mudrooms experience heavy foot traffic, wet footwear, and frequent entry/exit cycles, which can stress weak or uneven subfloors. If the floor isn’t level, the engineered wood can develop gaps at seams, squeaks at joints, or even telegraph imperfections through the planks. A properly leveled base also helps your installation follow manufacturer guidelines for tolerance, improving long-term durability.
Which leveling method is best for engineered wood floors—self-leveler, patch compound, or plywood underlayment?
The best option depends on how far out of level the subfloor is and what type of subfloor you have (concrete vs. plywood). Use self-leveling underlayment for broad, larger unevenness, patch compound for localized low spots, and plywood underlayment/shimming for fastening-stable corrections when you need small height adjustments. Many installers choose plywood or shims on wooden subfloors to maintain structural support, while self-leveler is often used over concrete when flatness must be corrected across wide areas.
How flat does the subfloor need to be before installing engineered wood in a mudroom?
Most manufacturers require the subfloor to be within a specific tolerance—commonly around 1/8 in over 6 ft, or similar limits—so always check the engineered wood installation instructions for exact numbers. Use a long straightedge across multiple directions, not just in one spot, because mudroom traffic can highlight unevenness across the entry path. If you’re outside the allowable tolerance, leveling before installation is the safest way to prevent future flooring problems like joint separation and movement.
📅 Last Updated: October 19, 2026 | Topic: How to level a engineered wood floors before installing mudroom? | Content verified for accuracy and freshness.
References
- Floor
- Wood flooring
- F710 Standard Practice for Preparing Concrete Floors to Receive Resilient Flooring
- F1869 Standard Test Method for Measuring Moisture Vapor Emission Rate of Concrete Subfloor Using …
- F2170 Standard Test Method for Determining Relative Humidity in Concrete Floor Slabs Using in sit…
- https://scholar.google.com/scholar?q=engineered+wood+floor+subfloor+levelness+tolerance+before+installation Google Scholar
- https://scholar.google.com/scholar?q=wood+flooring+installation+guidelines+subfloor+preparation+flatness+level Google Scholar
- https://scholar.google.com/scholar?q=how+to+level+subfloor+for+engineered+wood+floor+self-leveling+compound Google Scholar