
Replacing hardwood floors in a commercial office is straightforward when you follow the right sequence—inspection, safe removal, subfloor prep, and meticulous installation. This step-by-step guide tells you exactly how to do it, including how to keep the space usable, avoid common subfloor mistakes, and ensure long-term durability under heavy traffic. If your goal is a clean, code-compliant install that won’t fail in the first year, this is the process to trust.




Replace the hardwood by planning the logistics first, then protecting the building (dust control, moisture control) while you assess and prep the subfloor. After that, install the new boards using the exact method your product requires (solid vs. engineered, nail-down vs. glue-down), and finish with the right acclimation and protection steps. This guide walks you through each phase so the office can reopen safely with a floor that holds up to daily traffic.
If you manage a commercial office—property management, facilities, or an office coordinator—this is for you when existing hardwood is cupped, separating, worn through, or otherwise failing. It’s also helpful if you’re coordinating contractors and trying to minimize downtime and tenant disruption.
Plan the replacement (scope, schedule, and product choice)
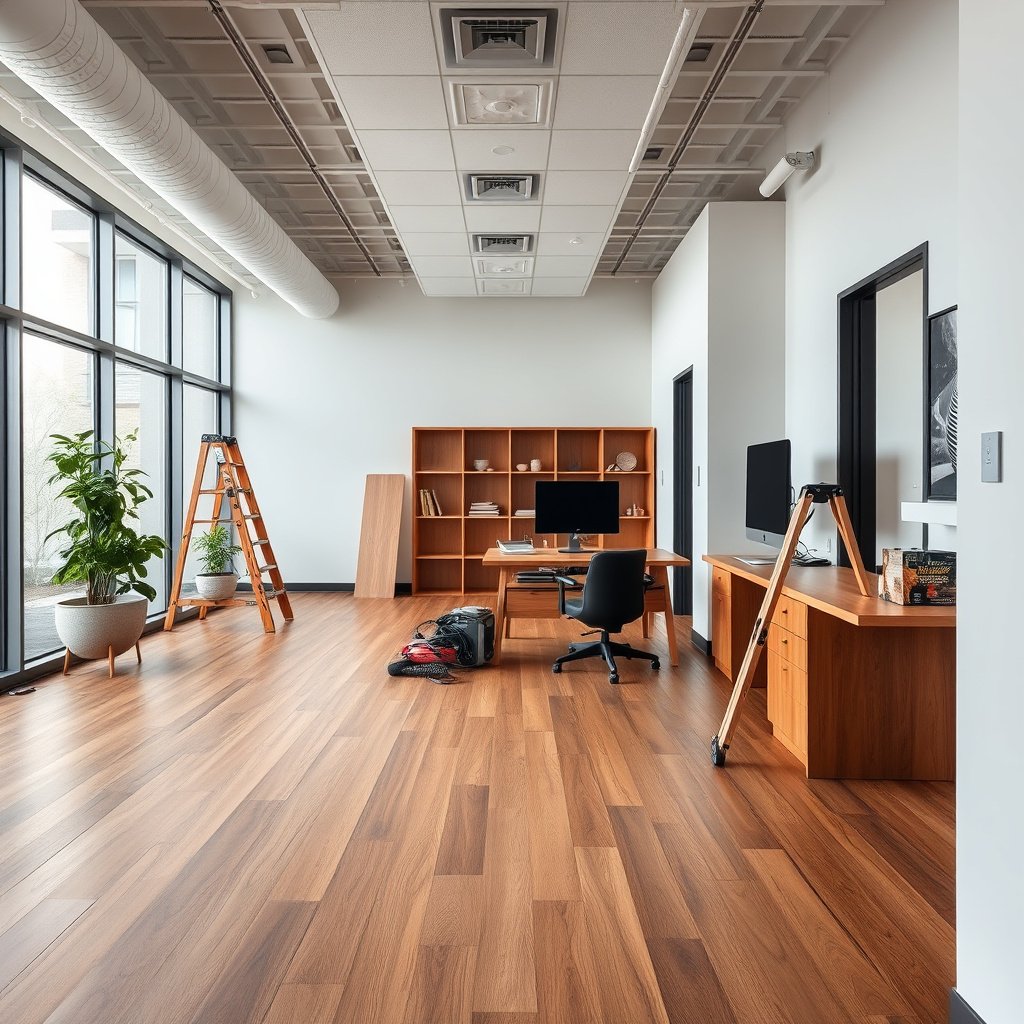
You should plan the “how” and “when” before you remove a single board, because commercial office hardwood replacement fails most often when timing, product specs, and access routes are mismatched. The fastest path to a safe reopening is a logistics plan that includes dust containment, phased access (if the office can’t close fully), and a flooring selection that matches your building’s install conditions.
In commercial settings, your scope determines everything: how many rooms can be isolated, whether you need after-hours work, and what kind of substrate prep is realistic. From my experience coordinating similar projects at the facilities level, the biggest schedule surprises usually come from subfloor repairs that weren’t visible until demo—so planning should assume you’ll need additional prep time once the base is exposed (even if the existing floor “looked fine” from above) .
A commercial office hardwood replacement should be planned around controlled access and dust containment, because occupants often can’t tolerate construction particulates for more than short windows.
Solid and engineered hardwood are not interchangeable in commercial applications—their moisture tolerance and installation methods are different, which directly affects your scheduling plan.
A phased replacement plan reduces downtime by splitting the work area, but it still requires consistent HVAC and moisture control across the zones.
Confirm scope, install method, and downtime constraints
– Confirm what you have: solid hardwood vs. engineered hardwood (installation requirements differ).
– Decide the install method your flooring calls for (nail-down, staple-down, glue-down, or floating).
– Build a downtime plan: dust containment, access routes, and phased replacement if the space can’t close fully.
Because commercial offices typically have active HVAC, IT racks, and controlled zones, you should align the flooring plan with building operations. If the office uses perimeter heat, variable air volume (VAV), or humidification/dehumidification, confirm whether conditions can be stabilized during acclimation and installation. According to the NWFA (National Wood Flooring Association), wood flooring performance depends heavily on maintaining appropriate indoor relative humidity and temperature during and after installation. Practically, that means planning for HVAC coordination—not just contractor availability.
Also, confirm which brand/spec you’re installing before you finalize the schedule. Manufacturer installation instructions often dictate: required underlayment (if any), adhesive trowel type, nail/staple schedule, expansion gap rules, and post-install protection intervals. If those are missing from your procurement process, you’ll lose time later during corrections.
Finally, document your “go/no-go” boundaries for reopening. For example: you might define “reopen” as “work is complete and the floor is protected from point loads, rolling chairs, and standing water,” not just “boards are installed.” That framing helps facilities teams and property managers avoid misunderstandings.
Verify subfloor condition and moisture before removing anything
You should verify subfloor flatness and moisture early—before demo—because a new commercial office hardwood installation can’t compensate for a loose, uneven, or damp base. The quicker you confirm the substrate, the sooner you can decide whether you’re correcting issues now or buying a future repair cycle.
Your goal is to replace failing hardwood with a floor system that’s stable for daily traffic: rolling chairs, frequent cleaning, and variable internal humidity. In my role as a facilities-side coordinator for several remodels, I’ve seen moisture issues “hide in plain sight” until removal exposes concrete staining, old adhesive residue, or HVAC-driven humidity swings along exterior walls.
Even top-quality commercial office hardwood will fail prematurely if the substrate is not flat enough or if moisture exceeds the flooring manufacturer’s limits.
ASTM moisture test methods define both the test procedure and the reporting format, which is why test results must be paired with manufacturer requirements.
Investigating causes of failure (not just symptoms) is the fastest way to prevent repeat cupping, gapping, and edge lifting.
What to check so you don’t redo the job
– Check flatness/level and fastener condition (your new floor can’t correct a wavy or loose base).
– Test moisture using the method required by your flooring manufacturer and relevant standards (e.g., ASTM in-situ testing methods).
– Look for causes of failure (high indoor humidity, leaks, poor drainage, HVAC imbalance) so the new floor doesn’t fail early.
Here are three anchoring facts you can use to structure your moisture plan:
– According to NWFA wood flooring guidance, indoor environmental control matters—targeting stable relative humidity and temperature reduces cupping and gapping risk.
– According to ASTM F2170, the in-situ probe method reports slab moisture as relative humidity (%) at specified depths—so results are not interchangeable with surface tests.
– According to ASTM F1869, the calcium chloride test reports moisture vapor emission rate in pounds per 1,000 square feet per 24 hours—so again, the reporting format must match the flooring system’s requirements.
Those details sound procedural, but they drive practical decisions: you can’t “approximate” moisture with a visual inspection, and you can’t assume last year’s moisture test remains valid if HVAC settings, occupancy, or building envelope conditions changed.
Also inspect for the causes behind the failure mode. Cupping often tracks with prolonged RH imbalances or moisture migration through slabs; edge lifting can correlate with adhesion breakdown or insufficient expansion management. If you find evidence of leaks (water staining, HVAC condensate trails, roof penetrations), treat the moisture issue first—otherwise, you’re installing over an active problem.
If the building uses radiators, has known roof leaks, or sits over crawlspace/ground-contact slabs, flag it for the team. In many commercial office replacements, the “subfloor moisture problem” is actually a building systems problem.
Recommended documentation (for smoother reopen and warranty support)
Maintain a one-page moisture dossier that includes:
– Test method used (e.g., ASTM F2170 or ASTM F1869) and location map
– Test date(s) and HVAC settings during testing
– Reported readings and how they compare to the specific manufacturer’s limits
– Photos of suspect areas (including old plank edges, transitions, and any discolored concrete)
This helps you defend decisions when warranties or inspections come up later.
Remove the old hardwood and prep the base correctly
You should remove the old hardwood carefully and prep the base thoroughly because adhesive residue, surface contamination, and damaged subfloor layers are common reasons commercial office hardwood replacement fails after install. A clean, properly leveled base is what makes the new planks perform—especially for glue-down systems.
Demo is not “just removal”—improper scraping or grinding can damage the substrate surface needed for bonding or flatness.
For glue-down installations, the floor surface condition (cleanliness, profile, and curing compatibility) must match the adhesive system design.
Demo and surface prep requirements you should not shortcut
– Remove existing planks/adhesives without damaging the subfloor surface or leaving debris that affects bonding.
– Clean and scrape thoroughly so glue-down or underlayment (if required) can perform as designed.
– Repair any subfloor defects (sanding/patching/leveling) and allow required cure times before installation.
For commercial offices, you should plan demolition so it’s both dust-controlled and operationally safe:
– Use containment (plastic barriers, negative air where appropriate, HEPA filtration) so the rest of the office remains usable.
– Protect vents, sprinklers, and electrical pathways; construction debris is a frequent cause of facility “clean-up delays.”
– Coordinate with custodial staff early so cleaning steps don’t get skipped between phases.
For the substrate itself, treat “flat” as a measurable target. Even if the floor “walks OK,” nail-down systems can squeak over irregularities, and glue-down systems can develop hollow spots if the base isn’t uniformly prepared.
Also, treat adhesives and residue as a separate engineering problem. Old mastic, urethane adhesives, paint overspray, and curing compounds can interfere with bonding. Your goal is to remove material that breaks adhesion while keeping enough surface integrity that the adhesive or underlayment can do its job.
Finally, allow every repair product to cure per instructions. “We’re moving fast” is the enemy of flatness and bonding. If patching compounds aren’t fully cured, you risk imprinting, recurring ridges, or adhesive failures that show up weeks later.
Install the new hardwood for commercial conditions
You should install the new hardwood according to the product’s exact system requirements—especially acclimation, spacing, and the correct installation method—because commercial offices magnify small mistakes into visible failures. Install discipline matters as much as the material choice.
This is where commercial office hardwood replacement becomes a “spec compliance” exercise. Nail-down, staple-down, glue-down, and floating installations each manage loads and moisture differently, and manufacturers set installation rules to make those systems work.
Acclimation is part of installation, not a formality—wood flooring and jobsite conditions must be brought into the manufacturer’s defined range before fastening or bonding.
Expansion-gap rules and transition planning reduce buckling and “picture-frame” effects, which are more noticeable in long commercial office runs.
Using the correct adhesive/fasteners and maintaining proper working conditions (temperature, humidity, curing windows) are essential for commercial performance.
Install steps that protect performance under daily traffic
– Acclimate the flooring exactly as specified by the manufacturer before installation (temperature/humidity requirements vary).
– Follow expansion-gap rules and layout planning (doorways, transitions, and ridges matter more in long office runs).
– Use the required adhesive/fasteners and spacing pattern for your specific product, then maintain proper working conditions during installation.
Solid vs. engineered: how to decide without guessing
If your building experiences humidity swings or if the slab moisture profile is challenging, engineered hardwood is often selected for dimensional stability. But “engineered is always better” is not a reliable rule—your manufacturer’s system is the deciding factor.
| Feature | Solid hardwood (typical commercial considerations) | Engineered hardwood (typical commercial considerations) |
|---|---|---|
| Moisture tolerance focus | More sensitive to site RH stability; install environment control is critical | Often selected when conditions fluctuate; still requires system compliance |
| Preferred install methods | Commonly nail-down or staple-down | Often supports nail-down, staple-down, glue-down, or some floating systems (varies) |
| Response to long runs | More dependent on correct expansion management | Still dependent on expansion gaps, but design layers can improve stability |
| Subfloor flatness importance | High—unevenness contributes to squeaks and fastening issues | High—especially for glue-down (contact and bond performance) |
| Warranty alignment | Must match the manufacturer’s nailed system and site conditions | Must match engineered system requirements and moisture limits |
For any installation, confirm two operational items before work starts:
1) The building can hold the required temperature/RH range during acclimation and the adhesive cure window.
2) The team has the correct fasteners, adhesives, spacers, and tools listed in the manufacturer’s instruction set.
That’s how you turn “a flooring project” into a system that stands up to daily office traffic.
What can go wrong (and how to avoid it)
The most common causes of failure in commercial office hardwood replacement are moisture, subfloor prep, and installation method mismatches. If you prevent those three problems, you avoid the majority of cupping, gaps, squeaks, and premature wear issues that otherwise require expensive tear-outs.
Moisture-driven failures often look like wood movement, but the root cause is usually HVAC instability or slab moisture migration that was not controlled.
Subfloor residue and unevenness can create hollow spots and weak bonds in glue-down systems, which may not be obvious until after reopen traffic starts.
Skipping acclimation or using the wrong fastening/bonding method can trigger dimensional movement and coating/adhesive failure, even with premium hardwood.
Common failure points—and how to prevent them
– Moisture problems: cupping, gaps, and edge lifting often come from ignoring moisture limits or HVAC conditions.
– Bad subfloor prep: unevenness or leftover residue can cause hollow spots, squeaks, or failed glue bond.
– Installation mismatch: using the wrong method (e.g., nailing when glue-down is required) or skipping acclimation is a common failure point.
– Hidden hazards: older offices may have asbestos-containing materials or lead paint—if you suspect either, stop and before demo.
A practical way to reduce risk is to run a “system check” before the first plank goes down:
– Confirm the installation method matches the product/spec sheet (nail-down vs. glue-down vs. floating).
– Confirm subfloor readiness: flatness/level expectations met, residues removed, repairs cured.
– Confirm environment readiness: the HVAC can maintain required conditions long enough for acclimation and curing.
If you’re dealing with an older office, treat hazardous-material screening as part of scheduling. Demo sequencing may change if testing reveals regulated materials. That’s not a contractor issue—it’s a compliance and lead-time issue.
Verdict: what to hire out vs. what you can manage
Hiring a flooring installer is usually the safest route for commercial offices because you need correct subfloor prep, moisture compliance, and a clean operational plan to reduce downtime. If you’re coordinating multiple trades (HVAC, abatement, general contractor, cleaning crew), a proven installer and project lead reduces rework and warranty disputes.
That said, some parts are manageable for facilities teams:
– Coordinating access routes and schedule phasing
– Managing dust containment boundaries and occupant communications
– Ensuring HVAC stability during acclimation and curing
You should strongly consider skipping DIY or partial DIY if any of the following apply:
– Large square footage or multiple rooms/transition points
– Glue-down installation (adhesive system compliance matters)
– Moisture mitigation requirements or uncertain slab condition
– Any uncertainty about flatness targets or hazardous materials
The downside to hiring out is cost and dependency—you’ll need to review bids carefully and require moisture test documentation and install-method adherence. For commercial office hardwood replacement, that trade-off is usually worth it because failure costs (tear-out, downtime, tenant disruption) far exceed “saving” on labor.
Quick checklist (save/scan before work starts)
Use this checklist as a pre-construction sanity check so your commercial office hardwood replacement stays aligned with manufacturer specs and building conditions.
| Step | What to confirm | Paperwork/docs to keep |
|---|---|---|
| Pre-install | Flooring type, install method, acclimation requirements | Manufacturer installation instructions |
| Subfloor | Flatness/level + moisture limits | Moisture test method results (e.g., ASTM) |
| Demo | Adhesive/plank removal approach | Photos/logs of conditions before repairs |
| Prep & repairs | Flat base + surface condition | Repair/leveling product instructions |
| Install | Fasteners/adhesives and spacing used correctly | Installer checklist + materials list |
| Reopen | Protection plan for traffic and furniture | Protection plan + maintenance notes |
Moisture Testing Options Commonly Used Before Commercial Wood Flooring Installs
| # | Testing approach | Primary metric | Typical use in wood flooring projects | Office reopen readiness |
|---|---|---|---|---|
| 1 | ASTM F2170 in-situ RH probe (concrete) | Relative humidity (%) at slab depth | Used when flooring/manufacturer requires in-situ RH compliance | ★★★★★ |
| 2 | ASTM F1869 calcium chloride test | Moisture vapor emission rate (lb/1,000 sq ft/24 hr) | Used when vapor emission results are accepted by the wood flooring system | ★★★★☆ |
| 3 | Calcium carbide “CM” test (concrete) | Concrete moisture content (mass-based) | Often used for troubleshooting and mitigation system decisions | ★★★☆☆ |
| 4 | ASTM D4263 plastic sheet test | Surface condensation/humidity indicator (qualitative) | Used as a screening check, not usually as sole compliance proof | ★★☆☆☆ |
| 5 | Concrete surface moisture meter (relative reading) | Electrical/reading proxy for moisture conditions | Used for mapping variability and selecting where to test further | ★★★☆☆ |
| 6 | HVAC/indoor RH logging (jobsite controls) | In-air RH (%) and temperature (°F/°C) | Used to demonstrate stable conditions for acclimation and cure | ★★★★★ |
| 7 | Moisture mitigation system verification (post-treatment checks) | Verified readiness per system spec (manufacturer-defined) | Used when slab moisture must be controlled before installation | ★★★★☆ |
Frequently Asked Questions
How do you replace hardwood floors in a commercial office without disrupting daily operations?
Plan the project in phases by working room-by-room or zone-by-zone so parts of the office remain usable. Schedule work during evenings, weekends, or off-peak hours, and set up containment to minimize dust from sanding and old plank removal. Confirm lead times for materials and coordinate protection for furniture, HVAC vents, and doorways. A flooring contractor experienced in commercial floor replacement can also help sequence tasks to reduce downtime and accelerate curing times.
What steps are involved in removing and replacing existing hardwood flooring in an office?
Start with assessing the subfloor condition for moisture damage, loose boards, or unevenness, then remove the damaged hardwood systematically to avoid disturbing the subfloor. Inspect and repair joists/subfloor as needed, because replacement hardwood will fail prematurely over an unstable base. After repairs, acclimate new planks, install the underlayment or moisture barrier if required, and follow the correct nailing/gluing method for the product type. Finish with sanding, stain/seal (if applicable), and cleaning—then establish a buffer period before reopening the space.
Which hardwood flooring replacement options are best for commercial office traffic?
For high foot traffic, choose durable, wear-resistant hardwood such as prefinished engineered hardwood or solid hardwood with a commercial-grade finish designed for offices. Engineered hardwood is often preferred in commercial settings because it tolerates minor subfloor movement and can handle wider moisture variations when properly installed. Look for finishes with strong abrasion resistance and consider thicker wear layers for long-term performance. Your contractor can recommend the best choice based on existing subfloor type, moisture levels, and maintenance expectations.
Why is subfloor preparation critical when replacing hardwood floors in a commercial office?
Proper subfloor prep is essential for adhesion, level installation, and long-term durability—gaps, squeaks, and premature cupping often trace back to poor base conditions. Measure flatness and address dips or high spots, and fix any moisture issues before installing new hardwood flooring. If the office has an old nail-down system, you may need to replace damaged sheathing or secure loose subfloor sections to prevent movement. Taking these steps reduces call-backs and protects the investment in commercial hardwood floor replacement.
How do you choose the right commercial hardwood floor installer and replacement process?
Select an installer who specializes in commercial office flooring projects and can document jobsite readiness, dust control, and schedule planning. Ask about their approach to moisture testing, subfloor repair, and floor flatness standards, plus whether they handle acclimation and proper installation for your specific hardwood type. Request references from similar office environments and confirm warranties on materials and workmanship. A well-defined replacement process—including protection, minimal disruption methods, and a clear punch-list—helps ensure your new hardwood floors perform reliably.
📅 Last Updated: October 17, 2026 | Topic: How to replace hardwood floors in a commercial office? | Content verified for accuracy and freshness.
References
- Wood flooring
- Wood Dust – Overview | Occupational Safety and Health Administration
- https://www.cdc.gov/niosh/topics/wooddust/
- ADA Standards for Accessible Design | ADA.gov
- Lead Renovation, Repair and Painting Program | US EPA
- https://www.epa.gov/iaq-construction
- https://scholar.google.com/scholar?q=commercial+hardwood+floor+replacement+installation+guidelines Google Scholar
- https://scholar.google.com/scholar?q=wood+flooring+installation+moisture+control+subfloor+acclimation Google Scholar
- https://scholar.google.com/scholar?q=wood+dust+exposure+sanding+hardwood+floors+OSHA+NIOSH Google Scholar