Need to repair hardwood floors in a commercial office fast and correctly? If you have localized damage—scuffs, scratches, lifting boards, or small gaps—the most reliable path is targeted sanding, board-level repair, and matching finish work, not full replacement. Follow the practical steps below to stabilize the affected area, fix subfloor issues, and restore a durable, office-ready surface.



Repairing hardwood floors in a commercial office is usually fastest and most durable when you diagnose why the floor failed (finish wear vs. board/structure movement) and then choose the least disruptive fix—spot repair for localized damage or sanding/screen-and-recoat for broader finish issues. Start with inspection under real office traffic patterns (workstations, doorways, and corridor routes), confirm whether boards are moving, and match the existing finish system so the patch doesn’t telegraph or fail early.
If you’re dealing with scratched finishes, dents from chairs, small gaps, or squeaks in a workplace, this guide walks you through what to check first, how to repair common issues, and how to plan the work so you don’t derail operations.
A commercial office repair job also has a different constraint than a residential one: the floor must return to service quickly, but not before finishes cure and dust exposure is controlled. As of 2026, many offices also run tighter HVAC cycles (start-stop economizers, night setbacks), which can widen gaps or accelerate finish wear if the underlying movement isn’t corrected.
Assess the damage and what’s actually broken
The best repair strategy starts with a direct classification: is the problem mostly finish/appearance damage or wood/subfloor damage, and is the floor currently moving? In most offices, the “right” product matters less than fixing the cause—especially squeaks, widening gaps, or finish failure after HVAC changes.
Wood flooring repairs last longer when you separate finish wear (sheen loss, scuffs) from structural issues (loose boards, splits, cupping) before choosing materials.
If gaps widen after HVAC schedule changes, the root issue is usually seasonal movement plus subfloor flatness—not just cosmetic damage.
Dust left in the pores or between layers is a common reason spot repairs fail to bond or blend cleanly.
Finish wear vs. wood damage: don’t mix the causes
– Check whether the problem is mostly surface/finish damage (scratches, worn sheen) or wood damage (chips, cupping, splits).
– Look for exposed fibers, edge lifting, or visible cracks that indicate the topcoat is only the “symptom,” not the cause.
– In a commercial office, chair legs and rolling casters often cause finish wear first; if the same area is repeatedly re-dented, the underlying finish thickness and surface hardness may be insufficient for the traffic profile.
Look for movement signatures (gaps, squeaks, lifting)
– Look for signs of board movement—gaps that widen after HVAC changes, squeaks that shift when stepped on, or edges lifting near doorways.
– A simple field check: step along the plank length and edges while watching for micro-gaps, then repeat after the HVAC has cycled (or compare morning vs. afternoon observations).
– If you can reproduce squeaks consistently, treat them as movement/fastening issues—sealants and patches won’t stop board motion.
Confirm contamination and repair-prep realism
– Identify contamination from the office environment (e.g., grit trapped in finish) because repairs often fail when debris is left behind.
– Office grit behaves like sandpaper; it embeds in matte or worn topcoats and keeps scuffing even after touch-ups.
– Before you plan a finish blend, verify how far contamination has penetrated the finish layer. A “clean-looking” patch can still fail if oils/cleaners or embedded dust remain in the repair zone.
Quick analytical comparison: what you’re seeing determines the workflow
Below is a practical decision contrast you can use to avoid trial-and-error.
| Symptom pattern | Likely issue type | Best first repair lane | Why it works |
|---|---|---|---|
| Loss of sheen, light scuffs, chair-track dulling | Finish wear | Spot touch-up or screen-and-recoat | Restores topcoat uniformity without disturbing structure |
| Chips at plank edges, visible compressed wood fibers | Wood surface damage | Local fill + careful sanding + blend | Preserves continuity of the finish system while leveling the impact site |
| Squeaks that change when the board is loaded | Loose boards/subfloor movement | Secure movement cause first | Prevents repeat rubbing that reopens the repair seam |
| Gaps that grow with HVAC schedule | Seasonal movement / flatness limits | Address flatness and fastening; then recoat | Stabilizes the substrate so coatings and fillers don’t crack |
Secure the office area before you touch the floor
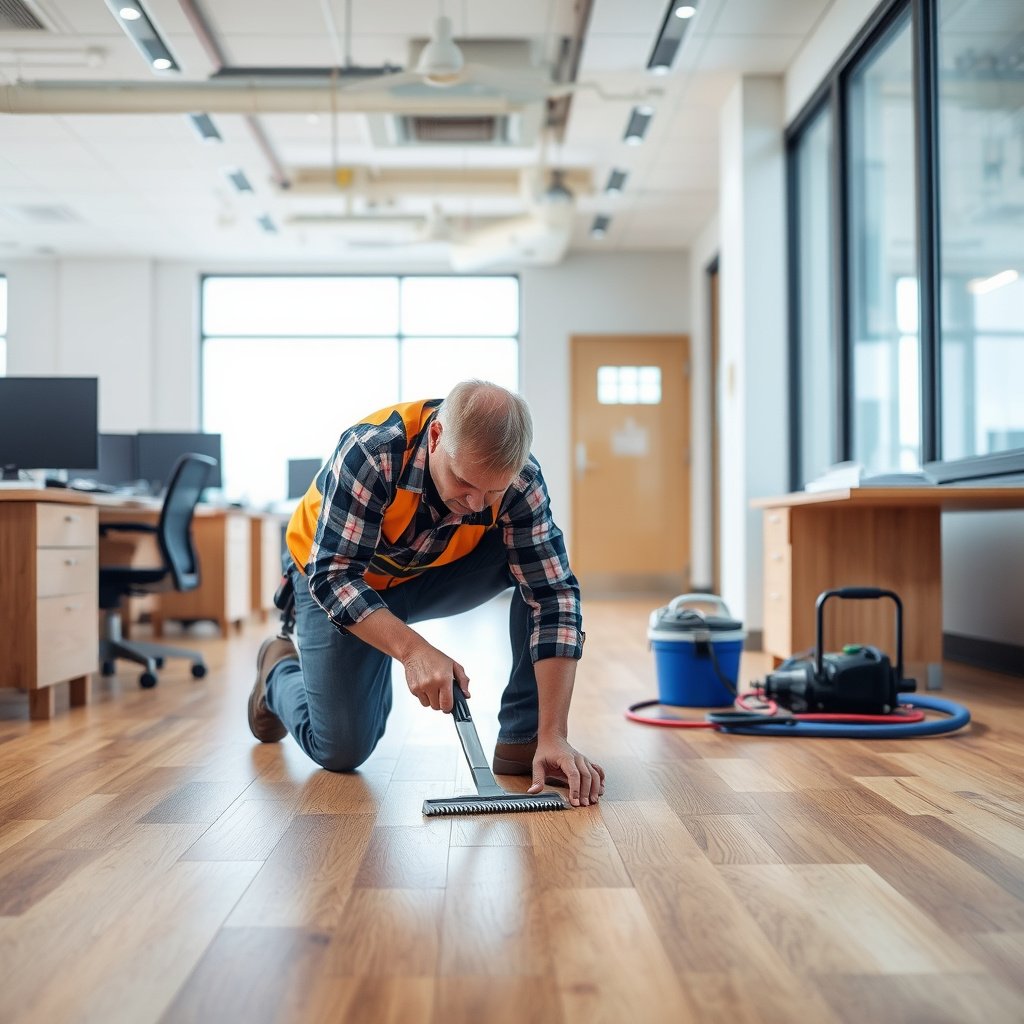
The most important first step in a commercial office is controlling access, dust, and cure-time so occupants aren’t exposed and the repair isn’t compromised. Plan for containment and airflow early because sanding and scraping can generate airborne dust, and finish products require time to cure before foot traffic.
HEPA extraction and dust containment are practical controls because wood/finish sanding produces respirable particulate, which is regulated under OSHA workplace safety.
Finish curing time is not the same as “dry to the touch,” so a repair can look set while still denting under office traffic.
Commercial work orders often fail when the area isn’t isolated from daily routes—people unknowingly track grit into wet or newly sanded zones.
Protect occupants, furniture, and the repair edge
– Protect occupants and furniture: cordon off the work zone, cover desks/fixtures, and plan foot traffic routes so people aren’t walking over prep dust or wet finishes.
– Use physical barriers (tape isn’t enough by itself in offices with frequent foot traffic) and verify routes with facilities staff.
– Cover HVAC diffusers near the work area when dust control requires it—airflow can spread fine particles beyond the work zone.
Address dust control as a safety and quality requirement
– Address dust control: use containment and proper extraction when sanding or scraping; hardwood/wood dust can be hazardous, and safety requirements vary by jurisdiction.
– According to OSHA, wood dust is covered under the workplace particulate exposure limits in 29 CFR 1910.1000 Table Z-3 (8-hour TWA: 15 mg/m³ total and 5 mg/m³ respirable). (OSHA, 29 CFR 1910.1000 Table Z-3)
– Plan for respiratory protection and housekeeping methods that match your local compliance requirements; if you’re unsure, coordinate with an industrial hygienist or qualified safety contact.
Choose work timing to avoid cure and humidity surprises
– Choose work timing to reduce disruption (after hours/weekends if possible) since finish curing and ventilation are major constraints in commercial spaces.
– As of 2026, many buildings use “night setback” HVAC schedules; that can change indoor humidity quickly and worsen gap formation before finishes fully cure.
– Schedule sanding and recoating so you can maintain stable conditions throughout cure. If facilities can hold a steady setpoint, ask for it in writing.
Repair common issues: scratches, dents, gaps, and squeaks
The most durable repairs match the type of damage and fix the cause before you chase appearance. In practice, you repair surface defects (scratches/dents) only after you confirm the boards aren’t moving; otherwise the patch edges reappear as the floor flexes.
Filling over movement (gaps that widen or squeaks that shift) is a common reason repaired areas re-crack or telegraph within weeks.
For dent repairs, careful leveling and blending prevent the “lip effect,” where wheels or heels catch on the repaired edge.
Before sealing or patching, you must remove grit and confirm compatibility between fillers and the existing finish system.
Scratches and scuffs: clean first, then blend for the finish system
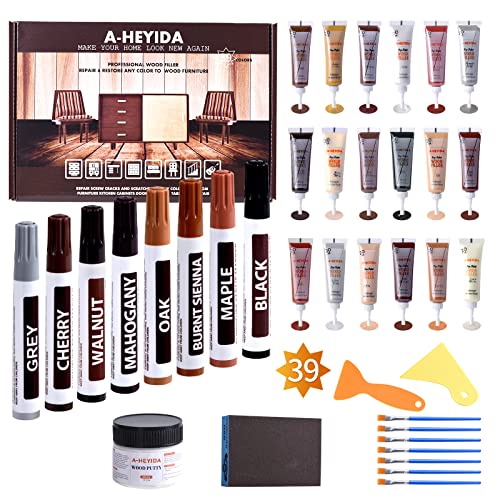
– Scratches/scuffs: Clean and degrease, then use a color-matched wood/finish repair method appropriate to your existing system (e.g., filler for gouges; touch-up for surface scuffs).
– If the floor is polyurethane-coated, the correct approach typically involves: remove contamination, spot-level only as needed, then apply a compatible topcoat in the correct sheen.
– If the floor is an oil/penetrating system, conventional “poly” touch-up can create glossy islands—so always confirm finish type before selecting products.
Dents and gouges: remove only what you must, then spot-sand/blend
– Dents and gouges: Remove loose finish only where needed, fill with a repair product compatible with the floor finish type, level it carefully, then spot-sand and blend.
– A practical workflow is to feather edges gradually so you don’t create an abrupt thickness step.
– In chair-impact zones, verify whether the finish has worn through. If you’re only filling the dent but not restoring the protective layer, the area will re-damage quickly.
Gaps and squeaks: movement comes first
– Gaps/squeaks: If boards are loose or moving, address movement before aesthetics—tighten/secure where appropriate and don’t just “seal over” gaps caused by subfloor issues.
– For squeaks, look for the common pattern: loose boards over a subfloor that doesn’t support fasteners consistently. Tightening fasteners or correcting flatness may be required before any cosmetic blend.
– For gaps, check whether they align with traffic lines (installation/layout) or HVAC-driven seasonal changes. Then verify flatness/fastening rather than applying gap-filling caulk as the first move.
Pros/cons: spot repair vs. screen-and-recoat (commercial reality check)
| Approach | Best for | Main pro | Main con |
|---|---|---|---|
| Spot repair / touch-up | Isolated dents, localized chair marks | Least disruption; targeted materials | Harder to make sheen/toning perfectly uniform in bright office lighting |
| Screen-and-recoat | Several boards with similar finish wear | Faster than full refinishing; blends sheen more consistently | Doesn’t correct deep wood damage or structural movement |
| Full refinish | Widespread finish failure or major sanding is needed | Most uniform appearance | Highest downtime; requires strong dust control and longer cure scheduling |
Refinish only what you must (and match the finish correctly)
The safest way to get a seamless repair is to refinish only the affected footprint and match the existing finish system so the repaired area behaves like the rest of the floor. Choose between spot repair, screen-and-recoat, or full refinish based on how many boards are affected and whether sheen/toning can be made uniform.
Finish compatibility is a top driver of success: applying a new topcoat over an incompatible system can lead to peeling, clouding, or poor adhesion.
Spot sanding must be feathered to avoid “witness lines,” especially under overhead office lighting.
The correct sheen matters in offices—matte-to-semi-gloss transitions are more noticeable than small color differences.
Decide the scope: spot repair, screen-and-recoat, or full refinish
– Decide between spot repair vs screen-and-recoat vs full refinish by evaluating how many boards are affected and whether the sheen/toning can be made uniform.
– In an office corridor, a small failure can still look large because the floor is viewed at an angle with bright lighting. Scope decisions should consider visibility, not just square footage.
Match the finish system (the “blend” depends on it)
– Match the existing finish system: solids vs water-based vs penetrating/oil-type finishes all behave differently, so blending depends on knowing what’s on the floor.
– If you can’t identify the finish confidently, take a sample approach (in a hidden area) or consult the building’s maintenance records and prior refinishing documentation.
Plan blending to avoid a visible patch edge
– Plan blending: spot sanding should be feathered to avoid witness lines; then apply the same (or closely compatible) topcoat in the correct sheen.
– Blend sanding should remove the surface unevenness without thinning the surrounding finish enough to create a “halo.”
– For commercial spaces, confirm sheen by comparing under the same lighting conditions used in the office (not just near a doorway).
Practical move if you can’t find the finish spec
If prior documentation is missing, your best path is conservative: treat the floor as “unknown finish,” test in a hidden spot, and prioritize adhesion checks before committing to a broader recoat plan.
Keep downtime short in a commercial setting
The key to short downtime is scheduling repairs around cure timing and HVAC stability, not around what looks dry. Commercial office floors can be reopened when the finish is fully cured enough to resist dents and when dust and debris are cleared safely.
Finishes can feel dry while still vulnerable—early reopening is a common cause of denting that forces redo work.
Stable HVAC conditions reduce repeat gaps and finish failures because wood expands/contracts with indoor humidity swings.
Documenting the repair process helps future teams avoid incompatible cleaners or topcoats that can break adhesion.
Set a clear work plan: prep, cure, and re-open steps
– Set a clear work plan: prep time, drying/curing time, and re-opening steps—finishes typically require more than “dry to touch” time before full traffic.
– Build a conservative buffer into the schedule. In offices, “one more hour” can be the difference between a clean reopen and a dented patch.
Coordinate HVAC stability with building maintenance
– Coordinate with building maintenance for HVAC stability; commercial offices often experience dryness/humidity swings that contribute to gaps and finish failure.
– NWFA-style maintenance guidance commonly emphasizes keeping indoor relative humidity within a controlled band; research and training materials frequently cite ~35%–55% RH as a target range to reduce seasonal gapping. (National Wood Flooring Association, RH guidance)
– If you can’t hold RH precisely, at least avoid rapid swings during sanding/recoat windows.
Document so maintenance doesn’t undo your work
– Document the repair area and process so future maintenance staff can avoid incompatible cleaners or topcoats.
– Provide the sheen type and finish family (e.g., water-based polyurethane vs. penetrating oil/wax) and share any restrictions on early cleaning.
A useful moisture-testing reminder (for subfloor or concrete cases)
When repair scope touches concrete slabs (common in office additions/renovations), moisture testing affects floor longevity. ASTM calcium chloride testing is typically run for 60–72 hours before results are calculated. (ASTM F1869, calcium chloride test duration)
What can go wrong (and how to prevent it)
Most repair failures in commercial offices come from mismatched products or unresolved movement beneath the surface. If you prevent compatibility mistakes and don’t treat symptoms as causes, your repaired area is far more likely to stay consistent through traffic.
Mismatched topcoats are a frequent failure mode because incompatible chemistries can prevent proper bonding.
Over-sanding in traffic aisles can create thickness variation, making repaired zones stand out sooner under real wear.
Ignoring dust control creates both safety risk and quality risk, since grit can contaminate bonding surfaces.
Common mistakes and the prevention playbook
– Mismatched finish: Applying a topcoat that isn’t compatible with the existing system can cause peeling, clouding, or poor adhesion—confirm finish type first.
– Skipping movement fixes: Filling gaps or squeaks without addressing the cause (subfloor flatness, loose boards, seasonal movement) leads to rapid re-damage.
– Over-sanding in traffic zones: Aggressive sanding to “make it disappear” can create uneven thickness and make the patch stand out longer, especially in high-wear aisles.
– Dust and safety oversights: In offices, sanding/patching can aerosolize wood dust and create slip hazards—follow local safety requirements and use dust control.
– Traffic too soon: Even if the surface looks dry, early foot traffic can leave dents in fresh finish and force redo work.
Limits of what spot repairs can achieve
Spot repairs do not always guarantee “invisible” blending, especially on naturally variable species or floors with prior toning. In 2026, many offices also use brighter LED task lighting, which makes sheen differences more apparent. If you need a perfect match across a large visual corridor, plan for screen-and-recoat or a larger scope rather than chasing a tiny seam.
Quick checklist: decide, repair, blend, and re-open safely
Use this checklist to keep decisions consistent—from diagnosis through reopening—so the repair stays durable under commercial traffic.
Commercial repairs succeed when the plan is cause-first: identify movement, stabilize the substrate, then match finish and sheen.
Before reopening, inspect the repaired area under office lighting to confirm no roughness, witness lines, or sheen mismatch.
– Identify: finish type + scope (surface vs wood damage) + whether boards are moving.
– Protect: isolate the area, control dust, and secure ventilation/airflow.
– Fix: use compatible fillers/patches; level and blend edges to avoid witness lines.
– Finish: match sheen and product system; allow full curing before opening to traffic.
– Verify: inspect under office lighting and check for roughness in the repaired zone.
| Issue you see | Likely cause | Best first move | When to call a pro |
|---|---|---|---|
| Light scratches/scuffs | Finish wear | Clean + touch-up/blend | If many boards show hazing/uneven sheen |
| Gouges/dents | Impact damage | Fill/patch + spot level/sand + blend | If damage reached deep or board is split |
| Hairline gaps | Seasonal movement/installation limits | Check HVAC/humidity + inspect subfloor | If gaps are widening or boards are lifting |
| Squeaks | Loose boards/insufficient fastening | Confirm movement source, then secure appropriately | If subfloor is out of flat or widespread |
| Peeling/cloudy finish | Compatibility/moisture/adhesion failure | Stop and identify finish system + moisture source | If failure is spreading across rooms |
Common Commercial Coating Families: Recoat & Traffic Readiness (Typical)
| # | Coating family used on hardwood | Typical recoat window | Typical full cure | Traffic-readiness rating |
|---|---|---|---|---|
| 1 | Water-based polyurethane | 2–4 hrs | 24–48 hrs | ★★★★★ |
| 2 | Solvent-based polyurethane | 4–12 hrs | 3–7 days | ★★★☆☆ |
| 3 | Oil-modified urethane (water/solvent hybrid) | 6–16 hrs | 2–5 days | ★★★★☆ |
| 4 | Two-part catalyzed urethane | 1–4 hrs | 24–72 hrs | ★★★★★ |
| 5 | Penetrating hardwax oil | 6–12 hrs | 2–3 days | ★★★★☆ |
| 6 | Penetrating oil/wax (traditional oil) | 12–24 hrs | 3–7 days | ★★★☆☆ |
| 7 | Lacquer (where used) | 1–3 hrs | 2–5 days | ★★★★☆ |
Note: Always confirm exact recoat and cure windows from the specific manufacturer’s technical data sheet for your floor finish and site conditions (temperature, humidity, ventilation).
Hardwood floor repairs in a commercial office work best when you treat the problem first (movement, gouges, or finish failure) and only then focus on appearance—using compatible materials, careful blending, and realistic curing/traffic scheduling. If the damage is localized, spot repair and controlled refinishing can minimize downtime; if you see widespread lifting/finish failure or suspect subfloor issues, bring in a qualified wood flooring contractor to avoid costly redo work. Start by inspecting and identifying the finish system, then map your repair plan around safety, dust control, and opening times.
Sources
– OSHA: requirements and guidance related to workplace safety when working with combustible materials and wood/wood dust (use official OSHA wood dust/respirable dust guidance applicable to your jurisdiction).
– National Wood Flooring Association (NWFA): maintenance, refinishing, and best-practice guidance for wood floors.
– Manufacturer documentation for the specific floor finish/repair system you plan to use (topcoats, fillers/patches, and any primers).
Frequently Asked Questions
What are the most common hardwood floor problems in a commercial office, and how do you identify them?
In commercial offices, you’ll typically see scratches from chair and desk traffic, worn finish from frequent cleaning, gaps from humidity changes, and squeaks from loose subfloor boards. To identify the issue, inspect the surface under bright light for dents and finish wear, check edges and joints for lifting or separations, and walk the area to pinpoint squeaks. Spot the moisture cause early by testing for relative humidity and comparing it to the wood’s expected range before choosing a repair method.
How do you repair scratches and worn finish on commercial hardwood floors without damaging the surrounding area?
Start by cleaning the area thoroughly and lightly sanding only the affected scratch marks to remove damage to the clear coat or finish layer. Use a color-matched wood filler or repair putty for deeper scratches, let it cure, and sand smooth feathering into the surrounding finish. Then apply a matching stain touch-up if needed and finish with a commercial-grade urethane or floor finish compatible with the existing system, ensuring proper dry times for daytime office use. For best results, blend the repair by buffing lightly around the edges to reduce visible transitions.
Why do hardwood floor gaps and cupping happen in office buildings, and what should you do first before repairing?
Hardwood floors in commercial office environments often gap or cup due to seasonal humidity swings, HVAC airflow changes, or water intrusion near windows and exterior doors. Before repairing, verify moisture conditions by measuring indoor relative humidity and checking for leaks or wet areas under desks, near sinks, or along perimeter walls. If moisture is the root cause, repairs will fail quickly, so stabilize humidity and address leaks before filling gaps or refinishing. Once conditions are stable, you can proceed with targeted repairs like wood filler, board adjustments, or localized refinishing.
How can you fix loose boards and squeaks in a commercial hardwood floor safely for daily operations?
Squeaks and loose boards usually come from subfloor separation or fasteners that have worked loose over time. The safest approach is to locate the squeak areas, then secure the boards using appropriate screws or nails through the subfloor (or, if needed, from the top using a minimal set of access holes that can be filled). To minimize downtime, use spot repairs rather than full-room shutdowns and cordon off the area until the fasteners are set and any patch material has cured. After securing, sand and refinish the repaired spots to restore the surface uniformity and protect against further wear.
What is the best way to replace a damaged plank in an office hardwood floor—glued, nailed, or floating—and which method should you choose?
The “best” replacement approach depends on how the floor was installed—whether it’s nailed-down, glued-down, or a click/floating system—because each requires different extraction and adhesion steps. For nailed-down hardwood, carefully remove the damaged plank by cutting along the edges, then detach nails, install a replacement board, and secure it back into the subfloor. For glued-down flooring, you’ll need to remove the plank without damaging surrounding tongues/grooves and use a compatible adhesive for reinstatement. For floating systems, replace the plank by unlocking neighboring sections, keeping alignment tight, and then finish with surface blending if needed to match commercial floor wear patterns.
📅 Last Updated: October 17, 2026 | Topic: How to repair hardwood floors in a commercial office? | Content verified for accuracy and freshness.
References
- Wood flooring
- Floor sanding
- https://en.wikipedia.org/wiki/Floor_refinishing
- Wood finishing
- https://www.epa.gov/lead/renovations-repainting-and-remodeling-program
- Wood Dust – Overview | Occupational Safety and Health Administration
- https://www.cdc.gov/niosh/topics/wooddust/
- https://scholar.google.com/scholar?q=hardwood+floor+repair+commercial+office Google Scholar
- https://scholar.google.com/scholar?q=hardwood+floor+refinishing+sanding+repair+workplace+guidelines Google Scholar
- https://scholar.google.com/scholar?q=wood+dust+health+hazards+sanding+floors+NIOSH+OSHA Google Scholar