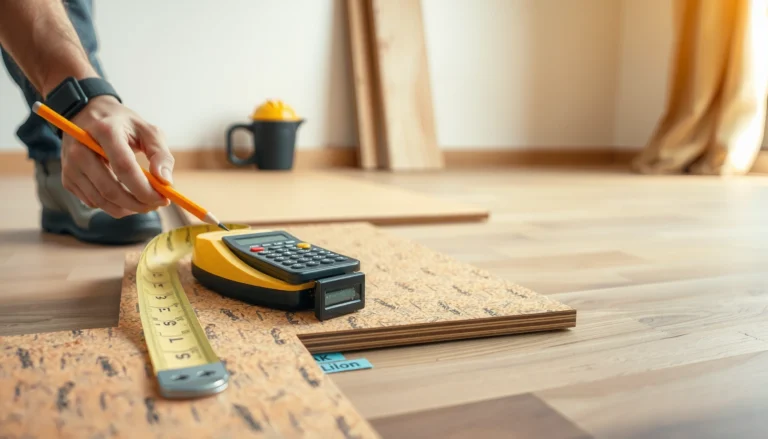
Need to remove hardwood floors from a bedroom and want to do it correctly the first time? This step-by-step guide shows the fastest, least-damaging way to lift boards, handle underlayment, and remove nails or staples without wrecking the subfloor. Follow it and you’ll know exactly what to do from prep and tools through clean-up.



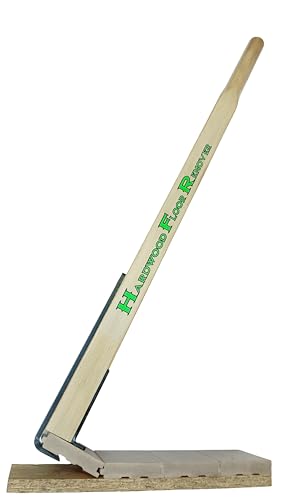
This guide is for homeowners tackling a bedroom demo themselves—especially when you’re planning to replace flooring, expose subflooring, or remove old engineered/nail-down hardwood. The steps vary depending on whether the boards are nailed or glued, so you’ll learn how to tell what you’re working with before you start.
Prep first: safety, protection, and what to check

Start by controlling dust and protecting yourself before you remove a single board—hardwood demolition is messy, and some older materials can be hazardous. The best order is: set up containment first, then confirm what hazards may be present, then gather the right tools for the attachment method you’ll encounter.
OSHA requires a respirator program (including medical evaluation and fit testing) under 29 CFR 1910.134 when respirators are used. [OSHA 29 CFR 1910.134]
OSHA’s silica standard (29 CFR 1926.1153) uses a respirable crystalline silica PEL of 50 µg/m³ as a time-weighted average (TWA) (and an action level of 25 µg/m³). [OSHA 29 CFR 1926.1153]
EPA’s asbestos NESHAP covers regulated asbestos-containing material (ACM), which includes material with more than 1% asbestos by weight (as defined in 40 CFR Part 61). [EPA 40 CFR 61 Subpart M]
Before demolition, plan for three realities: (1) you’ll generate fine dust, (2) you can’t rely on “it looks clean,” and (3) your bedroom is connected to the rest of the home. Wear a respirator (correct fit and cartridge type matter), eye protection, and gloves. Even if you’re only prying and scraping, dust still becomes airborne when old finishes and underlayment break up. If you’re working around doorways, use sealed plastic at the room boundary so dust doesn’t migrate.
Hazard checks for older homes
If your home is older, don’t skip a hazard review. Lead-based paint (especially on trim and sometimes on surfaces around flooring) is addressed by the EPA RRP rule when renovation activities disturb painted components in regulated settings. [EPA 40 CFR Part 745] For asbestos, the EPA Asbestos NESHAP is triggered when you’re dealing with regulated ACM during renovation/demolition activities. [EPA 40 CFR 61 Subpart M] If you’re unsure, get testing guidance before you start demolition—this is one of the few times “slower” is actually the safest way to move forward.
Tools you should gather up front
Use a “demo-ready” staging area so you’re not searching mid-project (where small mistakes become bigger). Typical essentials for removing hardwood floors from a bedroom include: a pry bar/flat bar (not a rounded claw hammer alone), an oscillating multi-tool with wood-cutting and metal-cutting blades, a hammer or nail puller, a utility knife, a floor scraper, a HEPA vacuum, and heavy-duty trash bags for debris.
If your plan includes sanding or leveling after removal, remember OSHA silica concerns apply to tasks that create hazardous dust (cutting/sanding). [OSHA 29 CFR 1926.1153] That affects both your PPE and cleanup workflow.
Identify the flooring type: nail-down vs glue-down vs floating
Identify the attachment method early because it determines whether you pry or cut. Nail-down hardwood is usually lifted with controlled prying at seams; glue-down hardwood typically requires cutting the bond line and scraping residue to protect the subfloor.
Nail-down hardwood is typically fastened with nails or staples, so removal focuses on freeing boards at seams while cutting nails/staples if they won’t release.
Glue-down hardwood often requires cutting the adhesive bond line (commonly with an oscillating multi-tool) before scraping, because prying alone can tear subfloor or destroy the board tongues/grooves.
When a floor system is “floating,” removal may involve unlocking interlocking edges rather than lifting individual fastened boards—confirm the product build before you force it.
Nail-down hardwood: what to expect
In nail-down installs, nails or staples hold each board to the subfloor or underlayment. In practice, you’ll often see a tighter “lock” at board edges, and prying from the wrong spot makes boards crack or splinter. Your best results come from starting at an edge, seam, or transition where the first fasteners are exposed and you can work progressively.
Glue-down hardwood: what to expect
In glue-down installs, the boards may feel “stuck” across the whole surface rather than only at fastening points. When you pry a glue-down board, it often resists until the bond finally releases—and then it may release suddenly, taking finish and sometimes thin layers of subfloor with it. That’s why glue-down removal usually depends on cutting the adhesive line first, followed by scraping residue gradually.
Floating systems (if applicable)
Some engineered/floating systems are interlocking and are installed to “float” over an underlayment. You still need to be careful—edges can be glued in certain products, or there can be transition strips and end-molding that must be removed first. If you see an underlayment and no obvious fastening at edges, confirm with the product’s build details or install documentation.
Quick comparison: which removal approach matches the attachment method?
| Attachment type | What to do first | Main risk | Best tool emphasis |
|---|---|---|---|
| Nail-down | Pry at a seam/edge after trim removal | Cracked tongues/grooves from forcing | Pry bar + oscillating tool for nails |
| Glue-down | Cut bond line, then scrape residue | Subfloor gouging + tacky residue | Oscillating multi-tool + floor scraper |
| Floating | Unlock edges starting at a perimeter | Breaking interlocks if you yank | Pulling leverage + careful edge separation |
U.S. Compliance Priorities for Hardwood Floor Demo (Rules That Affect Your Job)
| # | Rule / Standard | Applies to | Key trigger or threshold | Priority for bedroom demo |
|---|---|---|---|---|
| 1 | OSHA Respiratory Protection (29 CFR 1910.134) | Respirator use | Medical evaluation + fit testing requirements | ★★★★★ |
| 2 | OSHA Silica (29 CFR 1926.1153) | Silica-generating tasks | PEL = 50 µg/m³ TWA | ★★★★★ |
| 3 | OSHA Silica (29 CFR 1926.1153) | Silica exposure planning | Action level = 25 µg/m³ TWA | ★★★★☆ |
| 4 | EPA RRP Rule (40 CFR Part 745) | Lead-safe renovation work | Target housing built before 1978 | ★★★★☆ |
| 5 | EPA RRP Rule (40 CFR Part 745) | Renovation providers | Certified renovator + containment/work practices | ★★★★☆ |
| 6 | EPA Asbestos NESHAP (40 CFR 61 Subpart M) | Asbestos-containing material | Regulates activities involving ACM | ★★★★★ |
| 7 | Manufacturer removal/installation instructions | Product-specific method | Use product manual for attachment type | ★★★☆☆ |
Remove baseboards and access points without wrecking everything
Remove the trim first so you can lift hardwood boards without ripping drywall or damaging the wall finish. If you treat trim removal as optional, you’ll usually pay for it later with extra patching, sanding, and repainting.
Cutting caulk/paint lines around baseboards before prying helps prevent drywall paper tearing and wall damage.
Starting the demo near a doorway, closet opening, or threshold creates a natural “release point” that reduces force on board edges.
Quarter round and baseboard trim can act like a mechanical “lock,” so removing them first is standard practice for both nail-down and glue-down hardwood removal.
Protect the walls and surrounding surfaces
Remove baseboards and quarter round (if present) before you pry any hardwood. Use a thin putty knife or utility knife to slice caulk seams, then pry gently from the bottom and work along the wall. If you find painted trim, cut the paint line to avoid peeling drywall compound.
When protecting the room, cover nearby vents, windowsills, and any items that can’t be moved. During hardwood floor removal, small debris travels—especially when you remove trim and work near transitions.
Find access points and “break points”
Start near natural break points: a doorway opening, a closet threshold, or any existing gap. This gives you your first board edge to lift without levering across long board lengths. If your bedroom includes transitions to hall flooring, plan removal so you don’t destroy the transition strip you’ll need to reinstall or replace.
Lift the hardwood boards (the method depends on how they’re attached)
Lift hardwood boards by matching your leverage method to the attachment type—nail-down floors lift with controlled prying, while glue-down floors typically need bond-line cutting plus scraping. If a board doesn’t release, it’s usually a sign you’re still hitting nails/staples or adhesive, not “stubborn wood.”
For nail-down hardwood, pry at a seam/edge first; resistance often indicates nails/staples, which should be cut or removed rather than forced out.
For glue-down hardwood, cut the adhesive bond line with an oscillating multi-tool, then remove boards in stages to reduce subfloor tearing.
Removing boards in sequence (row by row) reduces splintering and makes stacking debris and managing disposal easier.
Nail-down approach: pry, then cut fasteners when needed
Start at a seam or transition and use a pry bar at the board edge. If you feel normal creaking and movement, continue—but if the board won’t move and you’re increasing force, stop. Switch tactics: use an oscillating multi-tool to cut through fasteners near the stubborn zone. This avoids crushing board tongues/grooves, and it helps protect the subfloor surface underneath.
As you lift boards, keep them organized by row and direction. That matters because board edges may break differently depending on where nails land.
Glue-down approach: loosen, cut bond, scrape residue
For glue-down floors, you usually need to “break” the adhesive bond at the perimeter. Start by loosening the edge, then immediately cut the bond line with an oscillating tool as you progress. Once a section lifts, use a floor scraper to remove residue gradually—don’t rush to the point where you dig into plywood/OSB.
Glue-down demo is often where projects expand in scope: the boards might come up, but adhesive cleanup can be a time-consuming second job.
Keep boards organized (even if you’re discarding)
Even if you’re not reusing the boards, organization still saves time. Place broken pieces in designated piles (to separate larger planks from dust and backing materials). That improves cleanup, reduces loose debris around the base of walls, and helps you see what the subfloor needs next.
Remove nails/staples and clean the subfloor for the next floor
After you remove the hardwood, treat subfloor prep as the real “foundation work.” A flat, clean surface is what determines whether your next floor install looks professional—or starts squeaking, lifting, or failing early.
After demolition, remove remaining nails/staples and scrape adhesive residue to ensure the subfloor is flat and bond-ready for a new installation.
Using a HEPA vacuum during cleanup helps capture fine dust that can interfere with adhesives and underlayment performance.
If the subfloor is damaged, repairing uneven areas before installing new flooring helps prevent telegraphing of bumps and gaps.
Pull fasteners and scrape residue
For nail-down flooring, remove remaining nails/staples with a nail puller, pliers, or a specialized pry extraction tool. Check along the seams and board edges—fasteners often remain where boards snapped.
For glue-down floors, scrape adhesive residue in stages. If residue is stubborn, you may need a second pass, but the goal is a surface that’s not tacky and not raised in ridges. Avoid deep gouges—new floors don’t forgive soft spots.
Vacuum and inspect before repairs or leveling
Use a HEPA vacuum to capture fine dust before any patching or underlayment goes down. Then inspect the subfloor: look for soft spots, damaged plywood/OSB edges, and high/low areas.
If you plan to sand or level, follow the appropriate safety guidance for dust generation. OSHA’s silica standard is especially relevant if leveling methods create hazardous dust. [OSHA 29 CFR 1926.1153]
What can go wrong (and how to avoid it)
The most common problems come from forcing boards that are still attached—either by hidden fasteners or adhesive bond. If you feel yourself “winning by brute force,” stop and switch to cutting or controlled removal, because subfloor damage is hard to undo.
Prying too aggressively can gouge plywood/OSB; shifting from prying to cutting fasteners/adhesive at points of resistance reduces subfloor damage risk.
Hidden nails or staples may sit deeper than expected; if a board won’t release, cutting fasteners with an oscillating tool is typically safer than repeated levering.
Glue-down removals often leave a tacky film; failure to remove residue can compromise adhesion for new flooring systems.
Subfloor damage from wrong leverage
This is the classic failure mode: you pry a board, it won’t lift, and you keep levering. Over time, pry points can permanently scar subfloor panels. To avoid this, move slowly and treat resistance as information: it means nails/staples or adhesive are still present.
Hidden fasteners
Some boards have fasteners closer to the center or angled in ways that aren’t obvious until you try to lift. If you meet resistance that doesn’t “break” as you pry, don’t keep escalating force—cut rather than crush.
Adhesive residue problems (glue-down)
Glue-down floors can look “removed” while leaving invisible residue that interferes with new adhesives. In glue-down projects, plan extra time for scraping, re-scraping, and HEPA vacuuming until the surface is truly clean.
Hazardous dust (lead/asbestos)
Cutting and sanding can increase airborne particulates. If your home is older or you suspect lead paint or asbestos-containing materials, follow the correct rule set rather than general demolition habits. OSHA’s respirator framework [OSHA 29 CFR 1910.134] and OSHA silica requirements [OSHA 29 CFR 1926.1153] govern respiratory protection and hazardous dust controls, while EPA rules govern lead-safe and asbestos-safe work practices. [EPA 40 CFR Part 745] [EPA 40 CFR 61 Subpart M]
Uneven transitions
Transitions and thresholds (often the most visible part of the finished room) require careful removal. If you pull transition pieces poorly, you can damage framing or leave gaps that later force heavy leveling or custom trim work.
Verdict / tip: DIY is doable—if you choose the right method
DIY removal is realistic for a single bedroom when you can identify whether the hardwood is nail-down or glue-down and you’re prepared for dust and subfloor cleanup. The tradeoffs are time, mess, and the risk of damaging the subfloor if you pry past fasteners/adhesive instead of cutting them.
Consider hiring help (or at least getting a pro opinion) if: the floor is heavily glued, the subfloor is already failing, you suspect hazardous materials (lead/asbestos), you need to keep the hardwood for reuse, or you’re planning a finish floor install that requires a very smooth, clean substrate.
From my experience with similar demo workflows, the biggest “preventable” issue isn’t removing boards—it’s underestimating adhesive cleanup and subfloor flatness prep.
Quick checklist (scan/save)
| Step | Quick check | Stop/adjust if… |
|---|---|---|
| Protect the area | Doorways sealed, floors covered | Dust is spreading beyond the room |
| Remove trim | Caulk/paint lines cut first | Baseboards crack or drywall chips |
| Identify attachment | Nail pops vs adhesive bond | Boards “won’t move” without forcing |
| Lift boards in order | Start at a seam/edge | You’re splintering boards repeatedly |
| Cut fasteners/adhesive | Oscillating tool used at resistance | You’re prying hard instead of cutting |
| Clean & inspect | HEPA vacuum + scrape residue | Surface is still sticky or uneven |
| Repair subfloor | Flatness checked before new install | New flooring will telegraph bumps |
Can I remove hardwood floors without damaging the subfloor?
You can often minimize damage by cutting nails/adhesive instead of brute-forcing boards, but some subfloor wear or residue cleanup is common. If the subfloor is old or already softened, damage risk goes up.
What if the hardwood is glued down and won’t lift?
Assume adhesive is still holding: loosen an edge, then cut the bond line with an oscillating multi-tool and scrape residue gradually. For safety and cleanliness, use HEPA vacuuming while you work.
Do I need to test for lead or asbestos before removal?
If your home is older or you’re unsure about materials in the floor/underlayment area, it’s smart to follow local guidance and testing requirements. Regulatory work practices for lead/asbestos exist—use the correct rule set rather than general demolition habits.
How should I dispose of the removed hardwood?
Separate waste types if your area requires it, and follow local disposal rules for construction debris. If you find contaminated residue, treat it according to the relevant guidance—don’t assume it can go to normal household trash.
What tools make the job easier?
A pry bar (or flat bar), oscillating multi-tool, utility knife, scraper, hammer/nail puller, and a HEPA vacuum usually cover most situations for bedroom-scale demo.
Finally, plan your hardwood floor removal like a controlled sequence: prep the space, confirm nail-down vs glue-down, remove trim, lift in order while cutting at resistance points, then clean and inspect for a truly ready subfloor. If you follow that workflow, you’ll reduce mess, minimize damage, and set yourself up for a smoother (and safer) next flooring installation.
Sources:
– OSHA Respiratory Protection Standard (29 CFR 1910.134). [Source: OSHA official regulations]
– OSHA Silica standard (29 CFR 1926.1153) for tasks that may create hazardous dust (cutting/sanding). [Source: OSHA official regulations]
– EPA Lead-Based Paint Renovation, Repair and Painting (RRP) Rule (40 CFR Part 745) for lead-safe practices when disturbing painted surfaces/materials in affected settings. [Source: EPA official rule text]
– EPA Asbestos NESHAP (40 CFR 61 Subpart M) for asbestos handling requirements when applicable. [Source: EPA official regulation]
– Flooring attachment/removal guidance for your specific product type (nail-down vs glue-down) from the manufacturer’s installation/manual documentation: .
Frequently Asked Questions
What tools do I need to remove hardwood floors from a bedroom?
To remove hardwood flooring, you’ll typically need a pry bar, floor scraper, hammer, utility knife, oscillating multitool, and a hammer drill (for stubborn boards or nails). A circular saw or jigsaw can help cut boards near walls, and a shop vacuum with a HEPA filter is strongly recommended to control dust. If you’re working over nails or staples, have a nail puller and metal pry bar ready, and consider knee pads and safety glasses for protection.
How do I remove hardwood floor planks without damaging the subfloor?
Start by removing baseboards and shoe molding so you can lift boards from the edge without forcing them. Use a pry bar carefully under plank seams and cut any boards glued to the subfloor with a utility knife or oscillating tool to reduce tearing. Work board by board, pulling nails and staples as you go, and keep the floor scraper handy to remove remaining adhesive or finish residue without gouging the subfloor.
Why is it important to identify whether the hardwood is nailed, stapled, or glued down?
The removal method changes significantly depending on whether the hardwood floor is nailed, stapled, or glued, especially in a bedroom where you may have subfloor materials like plywood or OSB. Nail- and staple-down hardwood usually comes up with careful prying, while glue-down hardwood often requires scraping and may need heat or chemical adhesive remover. Misidentifying the installation can lead to unnecessary subfloor damage, wasted time, and higher repair costs.
Which is the best way to handle glue-down hardwood when removing hardwood floors?
For glue-down hardwood removal, begin by cutting the planks into smaller sections to reduce stress on the subfloor. Use an oscillating multitool or scraper to loosen edges, then remove adhesive using a floor scraper and, if needed, a manufacturer-approved adhesive remover or heat method. Work slowly to avoid damaging plywood, and vacuum frequently to keep the work area clean and reduce exposure to dust and fumes.
Best practices for removing hardwood floors in a bedroom—how do I minimize dust and cleanup?
Minimize dust by sealing doorways with plastic sheeting, using a HEPA shop vacuum during cutting and scraping, and wearing a proper respirator and eye protection. Keep demolition contained by using drop cloths, covering vents, and turning off HVAC systems to prevent particles from spreading. Label and stack usable boards if you plan to reuse them, then do a thorough post-removal scrape and vacuum so the new flooring installation can start with a clean, level surface.
📅 Last Updated: October 16, 2026 | Topic: How to remove hardwood floors from a bedroom? | Content verified for accuracy and freshness.