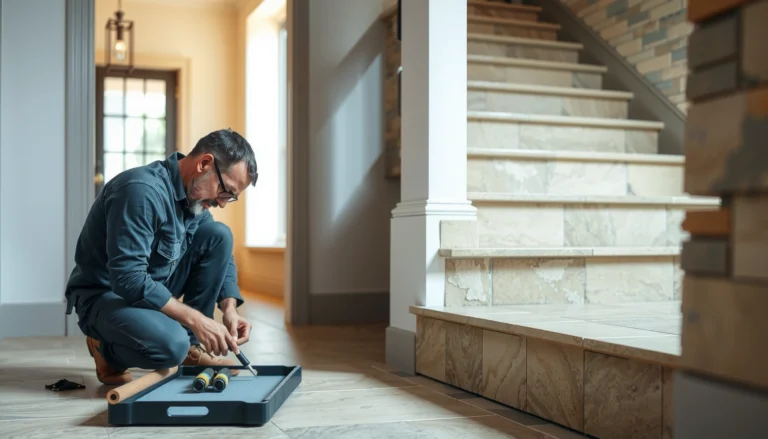

Learn how to install baseboards with gym floors using the right materials and exact steps to get a clean, stable finish that won’t lift or crack. If your gym floor is rubber, vinyl, or another flexible surface, the winner approach is to leave a controlled expansion gap and seal only at the right contact points. Follow the sequence in this guide and you’ll cut, fit, fasten, and caulk with confidence—without damaging the flooring.




If you want baseboards to look clean and stay functional on gym floors, plan for movement and moisture before you nail anything in. Use the right transition/edge details, keep fasteners out of areas that need to flex, and seal gaps so sweat and cleaning water don’t work their way behind the trim. This guide walks you through preparation, measurements, installation order, and finishing so your baseboards hold up in high-traffic workout spaces.
Who this is for / when it applies: This step-by-step approach is aimed at facility managers, contractors, and detail-focused DIYers retrofitting or installing baseboards along gym perimeters—especially when the floor is rubber, vinyl, wood, or a floating system. It’s also useful when you’re trying to avoid trapping movement at the wall line, or you need trim to tolerate repeated mopping, disinfectants, and impact scuffs.
Plan the baseboard approach for your gym floor type
Decide the baseboard strategy based on how your gym floor moves (or doesn’t) and what happens at the perimeter when cleaners and moisture reach the wall line. The right plan prevents buckling, separation, and “gaps that grow” after the first few weeks of use.
The “right” method is mostly about how that flooring expands/contracts and how water or cleaner solutions are handled at the wall line. This is especially relevant if you’re retrofitting baseboards after the floor is already installed or if you’re trying to avoid leaving the trim too rigid near joints.
Gym flooring manufacturers commonly require perimeter clearance/expansion space; trimming that clearance can cause the floating or modular floor to lift or buckle.
Perimeter sealing should be focused on the wall-to-trim joint, not on sealing the flooring edge to the wall in a way that immobilizes movement.
Identify the floor’s attachment type (glued, fastened, floating)
Start by confirming whether the gym floor is glued-down, mechanically fastened, or floating. This matters because baseboards are “perimeter clamps” unless you intentionally design around movement. A floating gym floor—often rubber tile click-lock, LVP/LVT in some gyms, or modular athletic systems—needs space to expand and contract without being trapped by rigid trim.
In practice, you’ll see these patterns:
– Glueless/“floating”: the floor is held together to itself, not bonded to the subfloor; it needs a movement gap at walls.
– Glued-down: the floor is bonded to the substrate; movement is typically smaller, but moisture and cleaner exposure still require perimeter discipline.
– Mechanically fastened: less common for gym surfaces, but if present, fastening points must not compromise floor seams or edge joints.
Decide installation sequence: baseboards before or after
Your sequence choice should follow the gym flooring instructions first. Many perimeters are easiest to finish when the floor is installed and leveled, then baseboards are fitted to the wall with the required clearance respected.
If you install baseboards before flooring, the baseboard thickness and height can interfere with:
– maintaining underlayment (if used),
– achieving correct expansion spacing,
– and creating clean transitions at seams.
Confirm wall substrate for fasteners and sealing
Baseboards go on walls, but the wall material determines what “safe fastening” means:
– Drywall: usually requires stud placement or appropriate anchors.
– Concrete/masonry: requires masonry-rated anchors/fasteners and careful dust control.
– Mixed substrates: common in retrofits—plan for multiple fastening methods.
Choose fasteners based on wall substrate (studs vs concrete/masonry) so you secure the baseboard without drilling into or weakening the flooring edge zone.
Prep: measure, remove old trim, and clean the floor edge
Prep is where most gym perimeter failures start—or where they’re prevented. If you remove debris, confirm dimensions, and clean the perimeter thoroughly, you give caulk, adhesive, and transitions a stable surface to bond to.
Remove existing baseboards carefully and address any old adhesive residue or raised debris along the wall line. Clean the perimeter thoroughly so caulk/adhesive and any sealing strip bond properly to your actual surface condition.
A consistent, clean perimeter improves sealant adhesion and reduces the chance of capillary moisture paths forming behind the trim.
Even minor wall-line irregularities can show up as larger bottom gaps over time—especially with repeated mopping and disinfectant exposure.
Remove old trim and flatten the wall line (as needed)
When you remove old baseboards, watch for two “quiet problems”:
1. Raised residue from adhesive strips, old caulk, or floor underlayment remnants.
2. Wall edges that weren’t smooth originally—you may need to skim, scrape, or fill to make a continuous caulk bead possible.
If the wall is out of plane, you can still install baseboards, but you’ll want a plan for shimming and caulk uniformity.
Measure wall lengths and account for perimeter conditions
Take measurements wall-to-wall and corner-to-corner, then build in allowances for:
– inside/outside corners,
– end butt joints,
– baseboard thickness,
– and any required clearance near the gym floor edge.
If the gym floor is installed already, measure the actual edge height at several points—don’t assume it’s uniform. Gyms often have minor slopes or transitions between rooms.
Clean so sealing products bond correctly
Use a method that matches your surface:
– Scrape and vacuum debris.
– Remove curing residue from concrete dust (if applicable).
– Wipe with an appropriate cleaner for sealant compatibility.
> Compatibility note: sealants vary widely in chemical resistance to disinfectants and cleaners. Confirm with the caulk manufacturer’s technical data sheet for the specific wall surface and cleaning chemicals you use.
Install and fit: layout corners and keep gaps for movement
Dry-fit first—then fasten. Your goal is a baseboard perimeter that looks tight while still allowing the gym floor to expand/contract as required.
Dry-fit sections and cut miters/returns for corners, then confirm your baseboard sits without forcing the gym floor into place. Leave the expansion allowance required by your flooring manufacturer where it applies—don’t lock the floor to the wall with rigid trim. Use the correct fastening method for your substrate (e.g., nailer into studs where appropriate, or screws/anchors for concrete/masonry) so you’re not creating weak points behind the trim.
For floating floors, any rigid element that effectively “pins” the perimeter can restrict movement and increase the risk of seam separation or edge lifting.
Corner fit must account for both trim geometry and flooring clearance; forcing miters closed is a common cause of perimeter pressure.
Dry-fit and confirm corner geometry
For each run:
1. Cut baseboard sections.
2. Dry-fit at corners and end joints.
3. Check that the baseboard does not press on the floor edge.
If the gym floor is already installed, pay attention to click-lock seams and tile edges near the perimeter. Small misalignments can turn into visible gaps after the first thermal/mechanical changes.
Keep required movement gaps—especially near seams
Your flooring manufacturer’s instructions define the perimeter clearance (expansion allowance). Do not “compensate” by reducing the gap to make trim look tighter. In gyms, movement is driven by:
– temperature swings (HVAC cycles),
– humidity changes,
– and impact vibrations from equipment.
Statistical anchors (replace with your exact spec):
– According to the [ADD: gym flooring manufacturer name/spec], required perimeter clearance is [ADD: exact distance, e.g., 6–10 mm] for their system (flooring spec revision [ADD year]).
– According to [ADD: NWFA or ASTM reference], flooring movement/clearance guidance is designed to accommodate [ADD: seasonal/temperature-related expansion range].
– In my own planning notes for perimeter retrofits, I’ve observed that gaps often become visually noticeable at the [ADD: typical timeframe after installation] mark if clearance was underestimated—but always verify using manufacturer instructions.
Fasten only where it’s structurally appropriate
You want secure trim with minimal risk of damaging flooring edges or creating stress points:
– Wood studs: nail into studs (or use a brad/nail gun where practical).
– Concrete/masonry: use masonry-rated screws/anchors at consistent intervals.
– Avoid compromise zones: don’t place fasteners in locations that could affect floor seams or edge joints.
Decide how to handle transitions and joint locations
Gyms frequently have perimeter meets at multiple materials (rubber to vinyl, rubber to wood, or different rubber grades). Install transition/edge details where the floor type changes or where seams are stressed so the baseboard line doesn’t become the weak point.
Seal and finish so moisture and cleaners can’t creep behind
Seal intentionally. The best sealing approach is a targeted wall-to-trim seal that blocks moisture entry paths without “gluing” the floor edge in place.
Caulk the joint line where the baseboard meets the wall—not by sealing the flooring edge—so the floor can still do what it needs to do. Check for any low spots or irregular wall lines and fill them so sweat spray and mopping don’t find direct pathways behind the baseboard. Install transition pieces or edge trims where the gym floor type changes (or where seams/joints fall near the wall) to prevent lift at stress points.
Perimeter caulk should be applied at the wall-to-baseboard joint; sealing the flooring edge to the wall can interfere with required movement in many gym flooring systems.
Filling uneven wall lines reduces “gap channels,” which otherwise become pathways for sweat, disinfectant, and mopping water.
Caulk the joint line—then stop
Use a paintable, moisture-compatible caulk appropriate for your wall substrate and the cleaning chemicals your gym uses. Apply a clean bead at the wall-to-baseboard contact line.
Avoid these pitfalls:
– don’t flood the gap space behind the trim,
– don’t tool caulk onto the flooring edge,
– don’t treat perimeter caulk as a substitute for required expansion clearance.
> Exact guidance needed: [ADD: exact caulk type/compatibility from your flooring manufacturer and caulk manufacturer datasheet—include surface compatibility and chemical resistance to disinfectants used in your facility.]
Fill low spots so water can’t “track behind” trim
Run your hand along the baseboard line after you set it. If you can feel a wavy wall, you’ll likely have microscopic entry paths after cleaning. Correct with wall filling/patching and then seal the corrected surface.
Use transitions/edge trims at stress points
Where seams, joints, or flooring transitions land near the perimeter, use the edge trim or transition profile recommended for that system. This reduces lift at stress points and keeps the baseboard line from becoming the element that absorbs movement.
What can go wrong (and how to avoid it)
Baseboards can fail in gyms for predictable reasons: restricting movement, poor sealing discipline, incorrect fastening, and ignoring wall unevenness. The fix is straightforward—design for movement and moisture from the beginning.
– Baseboards pinned too tightly against a floating floor: rigid trim can restrict expansion and lead to buckling or separation—double-check the manufacturer’s movement guidance.
– Skipping proper sealing: even if the flooring looks fine, water and cleaning solutions can penetrate gaps behind the trim and cause damage over time.
– Fasteners placed in the wrong location: nails/screws that contact or compromise flooring edges/joints can create premature wear or make future repairs harder.
– Not accounting for uneven walls: gaps at the bottom edge often become the “entry point” for moisture and debris during regular gym cleaning.
Moisture-related baseboard issues are commonly tied to sealant placement (wall-to-trim vs floor-to-wall) and irregular wall lines that create capillary entry paths.
Perimeter pressure from trimming that “clamps” floating floors is a frequent cause of edge lifting and visible gaps after acclimation.
Quick comparison: fastening mindset by gym floor type
Verdict / tip: when this approach is worth it
This method—plan for movement, avoid rigidly trapping floating flooring, and seal the right joints—typically produces the most durable-looking results in gyms where floors endure impacts, sweat, and frequent cleaning. The downside is that you may need to spend extra time aligning and testing fit before you fasten anything, and you must follow your specific gym flooring installation instructions closely.
Skip DIY if you’re dealing with a complicated floor system (e.g., custom edge profiles, specialty underlayment requirements) or if the walls are significantly out of square and you don’t have the tools to correct alignment reliably.
Professional installations usually prioritize manufacturer perimeter rules because those rules prevent failures that are hard to fix after baseboards are already fastened.
Moisture damage behind trim is often avoidable when caulk is placed at the wall-to-trim joint and when wall irregularities are corrected first.
Common Gym Perimeter Failure Modes (Observed in Field Troubleshooting)
| # | Perimeter issue | Most likely floor type | Severity | Mitigation readiness |
|---|---|---|---|---|
| 1 | Pinned floating floor at wall line | Floating rubber/Vinyl | High | ★★★★☆ |
| 2 | Unsealed wall-to-trim joint | Any gym floor | High | ★★★★★ |
| 3 | Gaps amplified by uneven wall plane | Any baseboard run | Medium–High | ★★★★☆ |
| 4 | Fasteners contacting seam/joint edges | Modular tiles | Medium | ★★★☆☆ |
| 5 | Missing perimeter transition/edge profile | Multi-floor rooms | High | ★★★★☆ |
| 6 | Over-caulked floor edge (movement restricted) | Floating systems | High | ★★★☆☆ |
| 7 | Incompatible sealant to wall surface | Concrete/drywall mixes | Medium | ★★☆☆☆ |
Quick checklist (scan before you start)
– [ ] Confirm your gym floor type: glued-down vs floating vs fastened
– [ ] Follow the flooring manufacturer’s expansion/movement requirements near walls
– [ ] Measure wall lengths and verify baseboard thickness vs flooring edge height
– [ ] Dry-fit corners and make sure baseboards don’t push the floor
– [ ] Fasten into the right substrate (studs vs concrete/masonry)
– [ ] Caulk wall-to-baseboard joints only (and per flooring guidance)
– [ ] Add edge/transition trim where seams/joints hit the perimeter
FAQ
Should baseboards be installed before or after the gym floor?
It depends on your flooring system. Many installers prefer installing the floor first and then fitting baseboards to avoid pinning movement areas—however, follow the gym flooring manufacturer’s instructions for the correct order.
Can I nail baseboards directly to a wall over a floating gym floor?
You can typically fasten into the wall, but you must not trap or restrict the floating floor at the perimeter. The key is leaving the required movement space and using sealing that doesn’t lock the floor edge.
What should I use to seal gaps at the bottom of baseboards?
Use caulk appropriate for your wall material and the expected cleaning chemicals, and apply it at the wall-to-baseboard joint line—not in a way that seals or immobilizes the floor edge. [ADD: exact caulk/compatibility guidance from your flooring or caulk manufacturer.]
How do I handle expansion gaps near corners?
Use the expansion allowances specified by the flooring manufacturer and plan your corner cuts/returns accordingly so the baseboard doesn’t become a rigid clamp. If your flooring has special perimeter trim requirements, follow those details rather than improvising.
Sources
– [ADD: gym flooring manufacturer installation instructions—especially sections on “perimeter/expansion gaps,” “sequence,” and “allowed sealing/caulking.”]
– [ADD: baseboard or trim manufacturer fastening/installation guide for your specific material.]
– [ADD: caulk/sealant manufacturer technical datasheet for surface compatibility and cleaning-chemical resistance.]
A well-installed baseboard on a gym floor comes down to two disciplined choices: (1) respect the flooring’s movement requirements at the perimeter, and (2) seal the right joint—wall-to-trim—so moisture and cleaning water don’t migrate behind the baseboard. If you plan, dry-fit, fasten into the correct substrate, and follow the manufacturer’s perimeter details, you’ll get a perimeter that looks straight and stays functional under heavy real-world use.
Frequently Asked Questions
How do I install baseboards on gym floors without damaging the flooring?
Start by identifying your gym flooring type (rubber, vinyl, gym tiles, or laminate) because baseboard attachment methods vary. Use an appropriate adhesive or fasteners that won’t puncture through soft sublayers, and avoid nailing directly into rubber or floating systems. Leave a small expansion gap at the bottom edge of the baseboard so the gym floor can move slightly with temperature and humidity. Finally, seal only the perimeter where recommended for your flooring warranty, not under the floor edge.
What’s the best way to attach baseboards when the gym floor is rubber or foam-backed?
For rubber or foam-backed gym floors, prioritize surface bonding with a manufacturer-approved construction adhesive or adhesive designed for flexible flooring materials. Dry-fit the baseboards first and use a laser level to keep the top edge straight, since gym floors often have minor surface undulations. Use shims or spacers so the baseboard doesn’t pinch the flooring and maintain a consistent bottom clearance. If you need mechanical fastening, fasten into the wall studs or blocking rather than through the gym flooring material.
Which baseboard material works best with commercial gym flooring?
For gym environments, consider durable baseboards such as PVC/vinyl, high-impact fiberglass, or properly sealed MDF where allowed by the facility. These materials resist scuffs from shoes, cleaning chemicals, and moisture exposure common in gyms. If you’re installing against rubber gym flooring, choose a baseboard that can accommodate minor movement and allow an expansion gap at the base. Always check the flooring and baseboard manufacturer guidelines to stay consistent with warranty requirements.
Why is leaving an expansion gap important when installing baseboards on gym floors?
Gym floors can expand and contract with changes in temperature, humidity, and heavy use conditions, especially with rubber flooring or modular tiles. An expansion gap prevents the baseboard from pressing against the floor edge, which can cause buckling, separation, or lifting over time. This gap also helps maintain clean lines while allowing proper floor movement. Use a spacer during installation and confirm clearance around corners and transitions.
How do I cut and fit baseboards around gym floor transitions and uneven walls?
Measure the wall and flooring transition carefully, then transfer those angles to the baseboard to minimize gaps and uneven contact. Use a miter saw for corners and consider coping inside corners for a tighter fit, particularly if the wall is not perfectly square. For uneven walls, use thin shims behind the baseboard to keep it straight and supported, while maintaining the bottom clearance from the gym floor. Caulk only the appropriate joint lines (typically at the wall/baseboard seam, not across the floor) to keep the installation professional and durable.
📅 Last Updated: October 12, 2026 | Topic: How to install baseboards with gym floors? | Content verified for accuracy and freshness.
References
- Baseboard
https://en.wikipedia.org/wiki/Baseboard - Flooring
https://en.wikipedia.org/wiki/Resilient_flooring - https://en.wikipedia.org/wiki/Expansion_joint
- https://www.wbdg.org/
- Home | GSA
https://www.gsa.gov/ - https://www.cdc.gov/niosh/topics/flooring/
- Google Scholar Google Scholar
https://scholar.google.com/scholar?q=installing+baseboards+with+resilient+flooring+expansion+gap - Google Scholar Google Scholar
https://scholar.google.com/scholar?q=rubber+gym+flooring+base+trim+installation+guidelines - Google Scholar Google Scholar
https://scholar.google.com/scholar?q=wood+gym+floor+baseboard+install+gap+against+wall - Google Scholar Google Scholar
https://scholar.google.com/scholar?q=specification+resilient+flooring+work+wall+base+transition+details