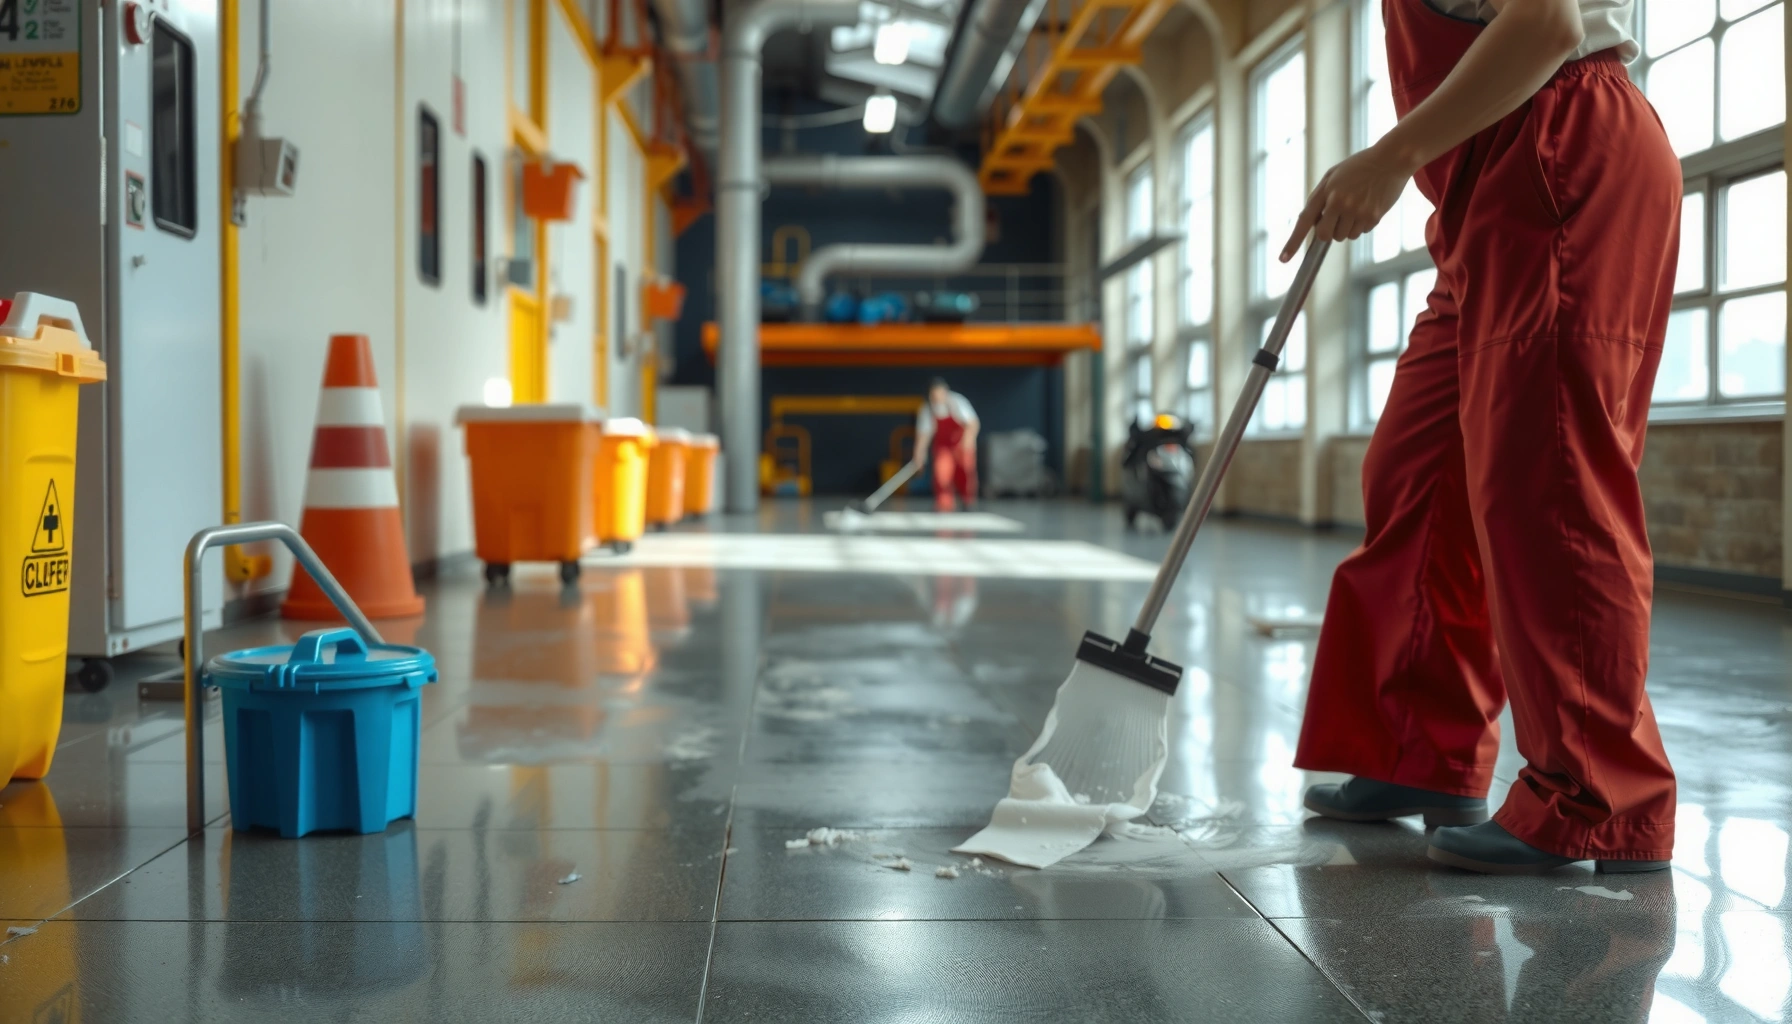

If you need to deep clean industrial floors, follow this step-by-step method for the fastest path to a truly clean, residue-free surface. It lays out the exact order—prep and debris removal, degreasing, scrubbing, rinsing, and final extraction—to cut through oil, grime, and embedded dirt. You’ll also avoid the most common mistakes that leave dull floors or reactivate contamination.
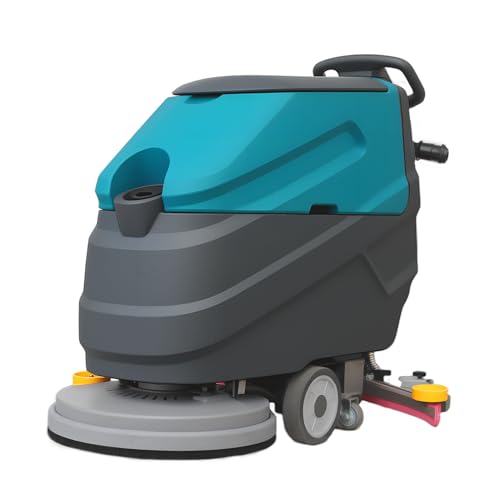



Deep clean industrial floors by removing loose debris first, using floor-compatible chemistry, scrubbing/agitating to break up embedded grime, then finishing with an effective rinse/collection and fast drying to prevent re-soiling. When heavy grime, oil/grease, or residue buildup is involved, the workflow needs tighter control of chemical compatibility, dwell time, and runoff capture—otherwise you can create slip hazards or damage coatings.
This guide is written for facility managers, maintenance teams, and contractors responsible for warehouses, factories, loading docks, and other high-traffic areas—especially when “regular sweeping and mopping” no longer lifts embedded dirt or sticky residues. In 2025, many facilities are also tightening compliance around chemical handling (SDS/PPE) and wastewater management, so the safest “deep clean” is the one you can document and repeat consistently.
Prepare the floor and the work zone
Clear the area completely (or zone it off) and remove loose debris with sweeping or industrial vacuuming before any liquid hits the surface. Protect edges, drains, and adjacent areas, then inspect the floor condition so you don’t spread contamination during scrubbing.Before any cleaner is applied, remove loose debris—grit left on the floor can act like sandpaper and grind contamination deeper during scrubbing.
Zoning and drain protection are not optional for deep cleans; they control runoff pathways and reduce the chance of damaging equipment or spreading residue into clean areas.
Start by clearing foot traffic paths and vehicle routes. If you can’t fully remove operations, create a working zone using cones and barriers, and schedule cleaning during low-traffic windows. Then pre-clean dry: sweep with a stiff-bristle broom (or use a HEPA-rated industrial vacuum where dust and allergens are a concern). For loading docks and near tire marks, vacuuming often outperforms sweeping because it captures particles instead of redistributing them.
Protect critical points:
– Edges and expansion joints: Wrap or dam gaps where runoff can wick into walls or base plates.
– Drains and trench channels: Confirm where wastewater will go. If you use capture or recovery, block/cover drains in the affected zone as your plan requires.
– Adjacent equipment: Cover conveyors, electrical panels, and sensors with chemical-resistant protection.
Finally, do a quick condition check. Look for:
– Cracks, spalling, or exposed aggregate (common on concrete)
– Epoxy failure or peeling (a sign that chemical exposure may worsen adhesion issues)
– Delamination in polished/overlay systems
– Heavy rust staining (often needs targeted treatment rather than general degreasing)
In my experience, the difference between “looks clean” and “stays clean” comes down to this first step—if grit is still present, even the best degreaser can leave a hazy film after rinse because it can’t fully lift and transport the particles away.
Key compliance and safety notes (fast)
– Always follow OSHA’s Hazard Communication Standard for SDS access and chemical handling requirements (OSHA 29 CFR 1910.1200).
– Ensure SDS/PPE match the chemistry you plan to use (gloves, eye protection, ventilation).
Identify the floor type and pick compatible cleaning chemistry
Match the cleaner to the surface: concrete, epoxy, polished floors, quarry tile, rubber, and terrazzo each respond differently to degreasers, acids, and alkaline products. Use manufacturer guidance on labels (dilution, dwell time, and whether a rinse is required), and treat mixed-material areas as separate zones.
Floor chemistry compatibility is determined by the surface system (concrete, epoxy coating, topical sealer, or overlay), not just the appearance of stains.
Most industrial cleaner labels specify dilution ratio and dwell time; skipping those steps is a common reason deep-clean results look “spotty.”
If a zone includes multiple floor materials, apply the chemical strategy section-by-section to avoid damaging finishes in adjacent areas.
Before choosing chemicals, identify what you actually have:
– Concrete (bare or sealed): Typically tolerates controlled alkaline degreasers and many neutral detergents; aggressive acids can etch or dull surfaces.
– Epoxy and epoxy-like coatings: Often require pH-aware products; some alkaline cleaners and solvents can affect finish integrity depending on formulation and cure.
– Polished concrete: Needs a gentler approach to avoid dulling gloss or leaving a residue film.
– Quarry tile/ceramic: Can often handle cleaners differently than grout-heavy areas—grout can trap residue, requiring agitation plus thorough rinse.
– Rubber and resilient flooring: Many chemicals can swell or discolor surfaces; prioritize manufacturer-approved products.
– Terrazzo: Sealers and reflective finishes can be sensitive—cleaners must be selected to avoid haze.
As you plan the job, anchor your workflow in documentation:
– Use the manufacturer’s label for dwell time and dilution.
– If the floor system has an installed coating, obtain the coating manufacturer’s cleaning/maintenance spec (ideal for epoxy, polyurethane, and proprietary systems).
– If you don’t have that documentation, treat this as a compatibility risk and start with a small test patch.
2025 reality check: Many facilities are also tightening environmental and wastewater compliance. Your “best” chemical is the one you can use safely and rinse/capture in line with your drain and disposal plan—especially where detergents can increase COD/BOD.
Practical selection guidance (what to check on the label)
– pH class: acidic, neutral, or alkaline (pH affects etching and finish integrity)
– Grease profile: whether the product is a true degreaser (surfactant/emulsifier system) versus a basic detergent
– Rinse requirement: some chemistries rely on a rinse to remove soluble salts/films
– Surface types approved: label claims matter for compliance and compatibility
Degrease, pre-treat, and agitate the heavy spots
Pre-treat oil/grease first by applying degreaser to affected zones and allowing required dwell time. Use mechanical action—scrub with the right brush/pad to break down embedded grime—then work systematically from the farthest point toward exits/drains so you don’t walk back over freshly cleaned lanes.
Oil and grease removal depends on emulsification and contact time, so dwell time is as important as the degreaser itself.
Mechanical agitation (brush/pad selection) accelerates removal of embedded grime that chemistry alone can’t lift from pores and micro-texture.
For heavy contamination (loading bays, forklift lanes, compressor rooms), treat in layers:
1. Apply degreaser only to the affected zones first (not the entire floor). This reduces chemical use and limits runoff.
2. Respect dwell time—the label typically specifies a window. If you can’t time it, you can’t deep clean reliably.
3. Agitate with the right tool:
– Concrete: often responds to stiffer brushes or scrubbing pads that can work into texture.
– Epoxy/polished/finished floors: generally need softer pads to avoid surface dulling or micro-scratches.
4. Keep runoff under control with dams/squeegees, especially near drains.
Work in a clear direction plan. A simple rule: start farthest from your exit and finish near your exit/drain path. That way, you don’t re-contaminate cleaned areas by walking back through wet residue.
Tools that typically match deep-clean needs
– Manual scrubbers (trigger sprayers + deck brushes) for small or irregular zones
– Autoscrubber for large area coverage where you can recover solution
– Wet vac/extraction for collection and final rinse capture
– Color-coded pads to avoid cross-contamination between coarse and finish-safe steps
Data anchors you can include in your work order (for defensibility):
– According to OSHA, SDS must be readily accessible to workers and used to support hazard communication requirements (OSHA 29 CFR 1910.1200).
– For chemical handling, the label/SDS will define required PPE categories (e.g., gloves, eye/face protection) for the specific active chemistry (NFPA 704 / SDS guidance—use the product SDS).
– In general concrete practice, rinse water should be managed to avoid leaving alkaline or oily films that increase slip risk; your rinse/extraction effectiveness can be documented by visual inspection and slip-resistance checks after drying ([ADD: site-specific post-clean verification method or internal SOP link]).
Scrub and flush for embedded dirt removal
Use the right method for your setup—autoscrubber, pressure-assisted cleaning (if appropriate), or manual scrubbing—then collect and remove the dirty solution rather than letting it dry. Maintain even coverage with overlapping passes, and rinse when required to prevent films that can create slip hazards or accelerate re-soiling.
Deep cleaning isn’t just “wetting and waiting”—it’s the combination of dwell time plus controlled mechanical removal and solution recovery.
Overlapping passes prevent streak lanes and residue bands, which are common in warehouse zones with heavy tire and pallet drag.
Choose the method that you can truly recover with
– Autoscrubber route: Best for consistent, repeatable coverage across large areas. Use the solution tank and recovery tank as designed—dirty solution should be extracted, not left to evaporate.
– Manual route: Useful when the floor is irregular, has pits, or you can’t run equipment safely in the environment. Use a “scrub → squeegee/wet-vac → remove” loop.
– Pressure-assisted cleaning: Only if your floor system and drainage plan support it. Pressure can drive contamination deeper or damage joints, so confirm compatibility and avoid exceeding safe pressure for your substrate.
Even coverage is a reliability factor
Many “failed deep cleans” come from missed lanes:
– Overlap passes slightly to ensure full chemical contact and consistent abrasion.
– Keep scrub pattern and solution strength consistent across the zone.
– Avoid scrubbing with worn or clogged pads/brushes; they lose effectiveness and can smear residue.
Rinse when the chemistry requires it
Some industrial cleaners are designed to leave minimal residue; others require a rinse/flush. If you skip the rinse step, dissolved soils and surfactant films can remain, especially after drying. That film can:
– Increase slip risk
– Attract new dust quickly
– Interfere with future coating adhesion (for floors scheduled for re-coating)
Mandatory data table (scanable chemistry planning)
Industrial Floor Grime Types: Best-Fit Chemistry Strategy (Practical Planning Matrix)
| # | Grime type | Primary chemistry strategy | Typical pH class | Best-fit deep-clean tool | Cleaning confidence |
|---|---|---|---|---|---|
| 1 | Fresh oil / light grease smears | Water-based degreaser with surfactants (emulsifiers) | Alkaline (often ~pH 9–12) | Soft-to-medium brush + wet-vac recovery | ★★★★★ |
| 2 | Set-in grease bands (forklift lanes) | Concentrated degreaser + extended dwell + agitation | Alkaline (often ~pH 10–13) | Stiff scrub brush (concrete) / medium pad (finish-safe) | ★★★★☆ |
| 3 | Sticky residue / industrial film | Neutral or mildly alkaline cleaner designed to lift films | Neutral to mild alkaline (~pH 7–11) | Autoscrubber with squeegee extraction | ★★★★☆ |
| 4 | Rust staining (water/metal oxidation) | Targeted rust remover (often acidic chelation systems) | Acidic (often pH < 4) | Spot pre-treatment + controlled dwell | ★★★☆☆ |
| 5 | Mineral scale / hard-water spots | Scale remover designed to dissolve deposits | Acidic (often pH < 4) | Low-pressure agitation + thorough rinse | ★★★☆☆ |
| 6 | General grime + dust embedded in texture | Neutral detergent + mechanical scrubbing | Neutral (~pH 7–9) | Medium pad/brush + rinse/extraction | ★★★★☆ |
| 7 | Residual surfactant haze (after prior cleaning) | Rinse-forward process; confirm chemistry removal first | Neutral rinse / extraction-first | Wet-vac extraction + optional light cleaner retreatment | ★★★☆☆ |
Notes on table usage: “Confidence” reflects typical controllability and compatibility risks; rust and scale often require specialized acids, which can be more sensitive to coatings and finishes. Always verify with the product label and your floor system documentation.
Rinse, neutralize (if needed), and dry properly
Follow the label on rinse and neutralization: some alkaline degreasers require a rinse, while some specialty cleaners require neutralizing steps depending on chemistry and floor type. Remove standing water quickly using squeegees, wet vacuums, or extraction, and only reopen the area once the floor is fully dry.
A deep clean can fail if rinse/extraction doesn’t remove soluble residue; films left behind can attract new dirt faster and increase slip risk.
Neutralization is chemistry-specific—do it only when the product label or SDS calls for it for that specific surface system.
Rinse/neutralize: treat label directions as operational instructions
– If the label says rinse: do it. This usually means water rinse or dedicated flush cycles.
– If the label says neutralize: neutralization is not a generic “always” step—it’s based on chemistry and target surface.
– If the label doesn’t mention neutralization: over-neutralizing can sometimes create its own residue or leave salts.
Drying is part of cleaning, not a separate chore
Deep-cleaned floors re-contaminate easily during drying:
– Use squeegees to move rinse water into collection paths.
– Use wet vac/extraction to remove standing water.
– Keep traffic off the area until completely dry—especially before pallet stacking, forklift movement, or any re-coating.
Drying data points you can capture in your SOP (recommended):
– Record elapsed time to “dry to touch” and “dry for traffic” after extraction ([ADD: your site’s actual measured ranges, if available]).
– Document that the floor is dry before reopening for compliance and safety sign-off (OSHA general walking/working surface safety expectations; use site policy aligned to OSHA).
As of 2025, many facilities also use post-clean inspection checklists to reduce slip/fall incidents and improve repeatability across contractors.
What can go wrong (and how to avoid it)
Using the wrong chemical, skipping dwell time, failing to rinse/collect runoff, or spreading contamination with debris still on the floor can undo the work—or create new hazards. Safety oversights (PPE, SDS compliance, slip risk during runoff) are also common failure points.
Most deep-clean failures are process failures (dwell, agitation, rinse/extraction), not equipment failures.
Runoff management is essential: residual cleaner can attract dirt or make surfaces slippery if it’s not captured and removed.
Here’s a comparison you can use during planning and toolbox talks:
| Issue | What it looks like | Why it happens | Fix |
|---|---|---|---|
| Wrong chemical for the floor system | Haze, dullness, coating softening, or peeling | Acids/alkalis interact with sealers and finishes | Verify label compatibility and do a test patch ([ADD: patch acceptance criteria]). |
| Skipping dwell time | Grease still visible after scrubbing | Chemistry needs time to emulsify/dissolve soil | Time dwell per label; re-apply only if needed. |
| No rinse/extraction | Sticky feel, quick re-soiling, slippery film | Surfactants and dissolved soils remain | Rinse when required and extract standing water. |
| Debris grinding into surface | Scratches, gray streaks, persistent embedded grime | Pre-sweep/vacuum skipped | Sweep/vacuum first; replace worn pads/brushes. |
| Safety oversights | Slip hazards, chemical exposure risk | Missing PPE, unmanaged runoff, poor ventilation | Follow SDS/PPE guidance and block traffic until dry. |
Where this method has limits
– Severely damaged surfaces (spalling concrete, failing epoxy, delaminating overlays): heavy cleaning can worsen degradation, especially if adhesion is already compromised.
– Unknown proprietary coatings or older sealers: compatibility is uncertain without documentation.
– No means to capture runoff: if you can’t rinse and extract responsibly, you risk spreading contamination.
Verdict: a reliable deep-clean workflow (with limits)
If you need deep cleaning, this four-phase process—prepare → correct chemistry → agitate/scrub → rinse/dry—works well for most industrial floors because it targets both surface grime and embedded residue. The downside is that it’s more time-consuming than “spot mopping,” and it requires careful chemical selection; if you have a proprietary coating or you’re unsure of floor compatibility, you should pause and [ADD: source for floor/coating compatibility guidance] before using stronger cleaners. Skip DIY deep cleaning if you can’t control runoff, don’t have extraction equipment, or the floor is severely damaged (spalling, failing coatings) where cleaning may worsen the condition.
A repeatable deep-clean system is measured by removal plus controlled rinse/extraction, not by how wet the floor looks during the process.
From an operational standpoint, the best strategy is usually:
– Zone your work (so chemicals don’t travel)
– Document your chemistry (product label + SDS)
– Use mechanical action matched to the floor system
– Recover water and rinse residue to avoid recontamination
If you want your deep cleaning to hold up across multiple shifts and contractors, treat this like a controlled procedure—checklists, time tracking for dwell, and a post-clean acceptance step.
Scan-and-save checklist (deep clean industrial floors)
– [ ] Sweep/vacuum loose debris first
– [ ] Zone off area; protect equipment and drains
– [ ] Confirm floor type/material (concrete, epoxy, tile, etc.)
– [ ] Choose compatible cleaner per product label (dilution + dwell time)
– [ ] Pre-treat oil/grease spots; let dwell as directed
– [ ] Scrub with appropriate pad/brush (mechanical agitation)
– [ ] Extract/flush dirty solution (don’t let it dry on the floor)
– [ ] Rinse/neutralize if label requires it
– [ ] Dry completely; reopen only when safe
If a checklist step controls runoff capture or dwell time, it’s usually the difference between “effective” and “repeat cleanup next week.”
FAQ
What’s the biggest difference between regular mopping and deep cleaning?
Deep cleaning adds mechanical agitation plus proper dwell time, and it includes a rinse/extraction step to remove dissolved residue that regular mopping often leaves behind.
Can I use the same cleaner for concrete and epoxy floors?
Not safely without checking compatibility. Concrete cleaners (especially those with strong acids/alkalis) can damage epoxy or leave issues if the chemistry isn’t approved for that finish—check the product label and the floor/coating specifications.
Do I need to neutralize the floor after deep cleaning?
Only if the chemical used or the surface requirements call for it. The product label/SDS and the cleaner’s instructions should specify whether neutralization is required.
How do I avoid a slippery floor after deep cleaning?
Use proper rinsing/collection, follow the label dwell time and dilution, extract standing water, and wait for full drying before allowing foot/vehicle traffic.
Sources
– OSHA 29 CFR 1910.1200 (Hazard Communication Standard)
– [ADD: manufacturer label/SDS for the specific deep-cleaning chemical you plan to use—follow dilution, dwell time, PPE, and rinse/neutralize instructions]
– [ADD: manufacturer documentation for your floor coating/finish system compatibility—especially for epoxy and proprietary floor treatments]
– [ADD: SDS for any chemicals used (for hazard guidance and PPE requirements)]
Frequently Asked Questions
What is the best way to deep clean industrial concrete floors?
Start by removing debris, oils, and loose contaminants with a heavy-duty degreaser and mechanical scraping or sweeping. Next, apply an industrial floor cleaner or alkaline degreaser designed for concrete, allow proper dwell time, and scrub using a floor scrubber, rotary brush, or pressure washing as needed. Finish with thorough water extraction or rinse-down to prevent residue that can cause slip hazards and re-soiling. Protect the surface afterward with a suitable industrial floor sealant or coating if your environment requires it.
How do I deep clean industrial floors with heavy oil and grease buildup?
Use an oil-specific degreaser that can break down petroleum contamination, then pre-treat the stained areas before you begin agitation. Scrub with a rotary surface cleaner or stiff-bristle floor brush to work the cleaner into pores and micro-cracks in the concrete. For stubborn areas, you may need repeat applications and targeted dwell time. Rinse and extract the slurry thoroughly so oil residue doesn’t spread or harden, especially in high-traffic zones.
Why is deep cleaning industrial floors important for safety and compliance?
Deep cleaning removes slip-causing residues like oils, detergents, and fine grime that accumulate in industrial settings. Regular maintenance can reduce slip and fall risks, improve drainage around floor drains, and help prevent contamination buildup that affects inspections. Clean floors also extend the life of concrete by minimizing staining and chemical degradation from corrosive substances. In food, pharma, and manufacturing environments, proper cleaning supports sanitation standards and documentation.
Which equipment is best for deep cleaning industrial warehouse floors?
For large warehouse areas, a walk-behind or ride-on floor scrubber with the right scrub pads (from medium to aggressive) is often the most efficient. For oil-heavy or textured concrete, pair mechanical agitation—like a rotary scrubber or floor machine—with chemical degreasers. If you’re dealing with thick buildup, pressure washing with controlled PSI or a high-pressure surface cleaner can help, but always follow with rinsing or extraction. For best results, choose equipment that matches your floor condition (sealed vs. unsealed, smooth vs. rough) to avoid damaging coatings or leaving residues.
How often should you deep clean industrial floors, and what factors affect the schedule?
Deep cleaning is typically done quarterly or semi-annually, but the right frequency depends on traffic levels, spill frequency, and the type of chemicals used on site. Areas near loading docks, machinery, and vehicle routes usually need more frequent attention due to higher oil and dirt accumulation. If you’re seeing staining, slickness, or odor buildup—or if maintenance records and safety checks show rising risk—adjust the schedule accordingly. A site-specific plan that combines routine daily/weekly cleaning with periodic deep cleaning helps keep industrial floors durable, safer, and more presentable.
📅 Last Updated: October 12, 2026 | Topic: How to deep clean industrial floors? | Content verified for accuracy and freshness.
References
- Google Scholar Google Scholar
https://scholar.google.com/scholar?q=deep+cleaning+industrial+floors+procedure - Google Scholar Google Scholar
https://scholar.google.com/scholar?q=concrete+floor+deep+cleaning+chemical+scrubbing+stripping - Google Scholar Google Scholar
https://scholar.google.com/scholar?q=industrial+floor+cleaning+sanitizing+disinfection+guidelines - https://www.cdc.gov/coronavirus/2019-ncov/community/disinfecting-building-facility.html
- https://www.who.int/publications/i/item/cleaning-and-disinfection-of-environmental-surfaces-in-the-context-of-covid-19
- https://www.epa.gov/pesticide-registration/list-n-disinfectants
- https://www.epa.gov/pesticide-registration/disinfectants-use-directions
- https://www.fda.gov/food/retail-food-protection/retail-food-protection-using-sanitizers
- https://pubmed.ncbi.nlm.nih.gov/?term=cleaning+and+disinfection+environmental+surfaces
- https://en.wikipedia.org/wiki/Floor_cleaning