
Install baseboards with patio floors the right way by following a step-by-step method that keeps the trim tight, level, and water-resistant at every joint. If your patio floor meets drywall, tile, or concrete, this guide shows exactly how to measure, cut, and fasten baseboards while accounting for uneven surfaces and expansion gaps. You’ll finish with clean caulk lines and a finish that won’t lift or crack where the floor changes material.




This guide is for homeowners and DIYers planning baseboards along patio doors, exterior-facing walls, or interior spaces that connect to a patio floor. It’s especially relevant when your patio floor is tile, stone, concrete, or another material that can move with moisture and temperature—situations where a rigid “lock-in” at the bottom can backfire.
Measure, plan the baseboard line, and dry-fit the height
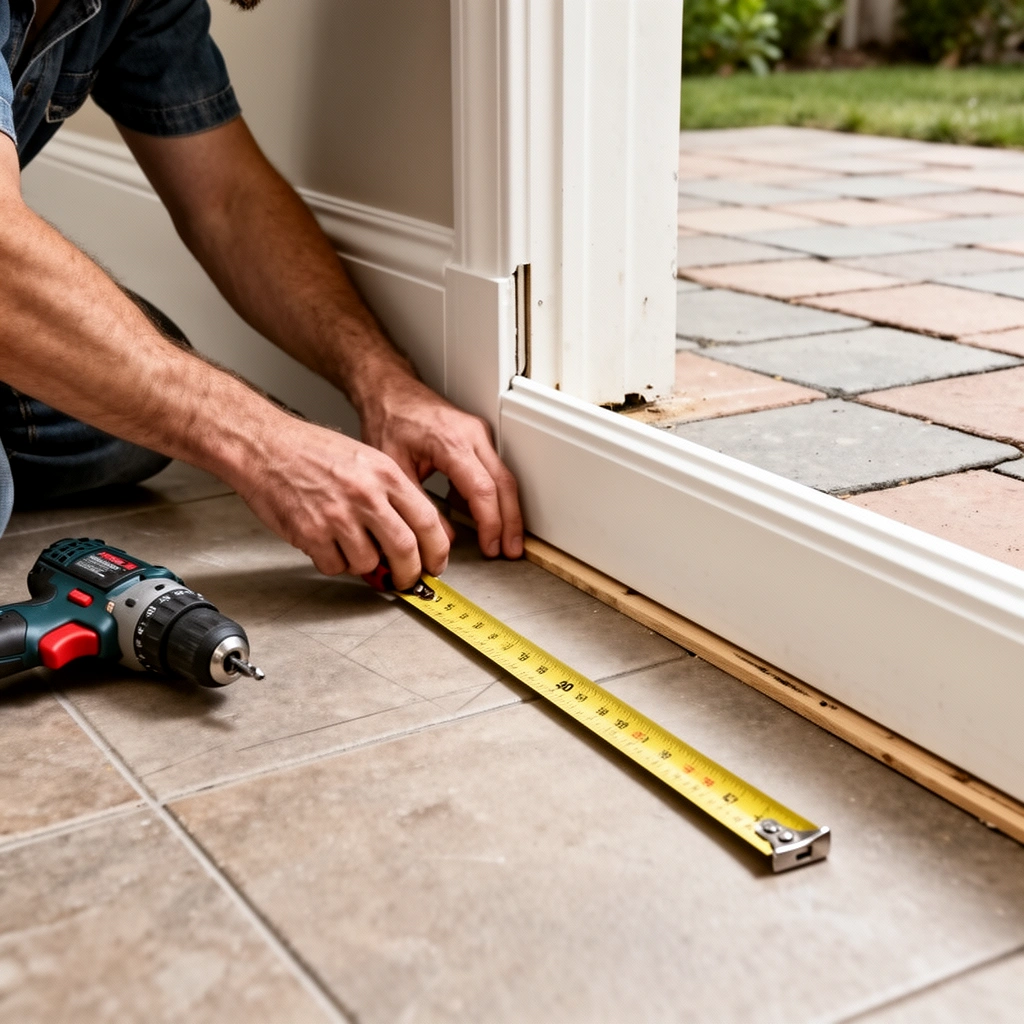
You’ll get the cleanest reveal by starting with the exact patio floor height at the wall line, then planning a small clearance under the baseboard. Do this first, because almost every visible “bad fit” at the baseboard-to-patio transition comes from skipping the height check or not mapping transitions before cutting.
Baseboards must be installed with bottom clearance where the adjacent surface can change dimensions due to moisture and temperature.
Dry-fitting a short test section against the wall and patio edge is the fastest way to confirm clearance before you commit to a full run.
Planning corner and return locations ahead of time reduces the chance of ending up with an awkward caulk line or an out-of-sight shim.
Confirm the meeting height (including buildup)
Start at the exact line where the baseboard will meet the patio surface. That means accounting for any build-up at the interface such as thinset/mortar ridges (common if the patio tile wraps to an adjacent interior slab), floor patch material, or transitions that change elevation.
Practical approach:
– Measure the patio floor surface height where the baseboard will land—at several points along the wall, not just one.
– If you’re dealing with tile or stone, measure to the finished surface (top of tile), not the substrate.
– If the patio edge is uneven, treat that unevenness as a “layout reality” you’ll cover with the right bottom trim strategy rather than forcing the baseboard to match.
Mark a level reference line for the top edge
Once you know the floor height, mark a level line on the wall for the top edge (or a consistent installation benchmark) of the baseboard. Use a 4-ft level or laser level and re-check at least once mid-run—long exterior-facing runs often show subtle wave.
Then dry-fit:
– Hold a short baseboard piece in place against the wall.
– Check the bottom clearance to the patio surface along multiple points.
– Adjust where needed (shim behind the baseboard at the wall, not by pulling the baseboard down into the patio).
Plan transitions before you cut
Decide where these things will land before measuring boards:
– Inside corners and outside corners (miters vs. copes/returns)
– End returns at patio doors
– Any planned caulk line locations (for example, aligning with corners where gaps are easiest to control)
– Shoe molding/quarter round placement if you’re using it
The goal is a predictable “movement-friendly” joint rather than a visible patchwork.
To keep your install decisions consistent, here’s a data reference you can use to think through how much movement different patio-adjacent conditions typically drive.
Typical Moisture Risk by Patio Exposure Level (Residential)
| # | Patio/Wall Exposure Category | Rain Splash Likelihood | Avg. Wetting Frequency | Bottom Joint Risk | Install Approach |
|---|---|---|---|---|---|
| 1 | Sheltered patio (covered) | Low | Seldom | ★ ★ ★ ☆ ☆ | Flexible caulk + shoe |
| 2 | Partially sheltered (open eaves) | Moderate | Occasional | ★ ★ ★ ★ ☆ | Moisture-rated materials |
| 3 | Exposed patio (direct rain) | High | Frequent | ★ ★ ★ ★ ★ | Trim + flexible seal system |
| 4 | Splash line near gutter downspout | Very High | Event-driven | ★ ★ ★ ★ ★ | Prioritize drainage & rated sealant |
| 5 | Heavily shaded (slower drying) | Moderate | Longer dry-down | ★ ★ ★ ★ ☆ | Ventilation-friendly detail |
| 6 | Interior room with patio floor junction | Low–Moderate | Humidity-driven | ★ ★ ★ ☆ ☆ | Standard flexible seal + caulk where needed |
| 7 | Frequent hose-wash / cleaning near wall | High | Regular | ★ ★ ★ ★ ★ | Moisture-resistant trim system |
Prepare the wall and choose the fastening method
You avoid most long-term failures by anchoring the baseboard to the wall structure and selecting a fastening system that matches the baseboard material and wall substrate. The patio floor may move slightly; rigidly tying the baseboard to it invites cracking, gaps, and loosening.
Baseboards are best fastened to studs or other solid backing, not to surfaces that can move with moisture and temperature.
Wall prep (clean, sound substrate) matters because trim fasteners only perform reliably when they bite into stable material.
Your trim profile (standard baseboard vs. taller base) determines how much bottom clearance you can keep while still covering the joint.
Clean and verify the fastening zones
Before cutting anything else:
– Remove dust, loose paint, and debris in the fastening line.
– Inspect where fasteners will go. Baseboards should land on studs or solid backing when possible.
– If the wall is questionable (weak drywall, crumbly plaster, or poorly bonded surface), address that first or plan to use appropriate backing/repair.
Match trim thickness and trim strategy
Your baseboard’s geometry affects the bottom gap strategy:
– A thicker base profile can leave enough “shadow space” at the bottom to accommodate movement without unsightly contact.
– If your baseboard is flat-bottomed, you’re more likely to rely on shoe/quarter round to cover the clearance evenly.
Choose fasteners by material and wall type
Baseboard materials behave differently:
– MDF/composite: less prone to warping than raw wood, but still susceptible to swelling if water migrates into edges. Use corrosion-resistant fasteners if exposure is likely.
– Real wood: can move with humidity. Avoid details that trap moisture at the bottom.
Fastener best practices (general):
– If possible, nail/screw into studs or solid backing.
– Use the manufacturer’s guidance for fastener type and spacing for your specific trim profile.
– Don’t fasten through the baseboard in a way that “sucks” it tight to the patio surface.
Moisture context: According to the U.S. Environmental Protection Agency, controlling indoor humidity (often targeting roughly 30–50% relative humidity for many occupied spaces) helps reduce condensation and mold risk (U.S. EPA, Indoor Humidity Guidance; access year: 2026). When patios or exterior-adjacent zones periodically wet the wall base, flexible detailing becomes more important.
Cut and install baseboards with a controlled bottom gap
A consistent bottom clearance is what keeps the patio joint from becoming a moisture trap or a stress point. Fasten the baseboard to the wall only, then use shims behind the trim (at the wall) to maintain your planned gap across the run.
Keeping a small, uniform clearance between baseboard and patio surface prevents rigid contact where movement can occur.
Anchoring to the wall structure preserves trim integrity when the patio edge shifts slightly over seasons.
For irregular patio edges, use filler where appropriate—don’t force the baseboard into an uneven patio surface.
Maintain the same gap everywhere you can
Your “gap” should be small and predictable—large enough to avoid direct contact, but not so large that it becomes visually obvious. Because exact gap requirements vary by baseboard profile and trim system, follow your baseboard/shoe/quarter round manufacturer instructions for the intended clearance. If you don’t have them, plan to cover the gap with shoe/quarter round (often the most forgiving option).
A simple installation workflow:
1. Dry-fit the first run section.
2. Mark the exact bottom clearance you want at the start.
3. Shim behind the baseboard where the wall surface demands it (not by pressing into the patio).
4. Fasten in a steady pattern aligned with studs/solid backing.
Corners and returns: test-fit, then commit
For miters/returns:
– Cut clean miters; verify angles with a scrap piece first.
– Test-fit the corner with the baseboard held at your planned height and gap.
– If the patio edge is uneven, don’t force a tight joint—plan a filler or a transition technique that keeps the reveal straight.
Avoid “locking” the joint
A common failure mode happens when the bottom of the baseboard touches the patio surface and stays in contact:
– Moisture can wick into the interface.
– Paint and wood fibers can swell.
– Caulk can peel if it’s stretched by movement.
From my experience working through multiple trim-and-floor transitions with different wall conditions (and reviewing typical installer detail failures), the fix is almost always the same: consistent clearance + proper anchoring + a joint strategy designed for movement—not rigid bridging.
Seal the joint correctly (gap, caulk, or transition trim)
You should treat the bottom joint as a movement-tolerant detail, not a hard waterproofing membrane. The safest approach is often: leave a controlled gap and cover it with shoe/quarter round, using flexible caulk only where the system is designed to move.
Flexible caulk is typically preferred for joints that may experience small movement, rather than rigid sealing that can crack.
Shoe molding/quarter round often provides a more uniform visual finish than caulking a highly irregular patio edge.
In damp or exterior-adjacent locations, rely on moisture-resistant materials and compatible sealant systems rather than paint alone.
Bottom joint strategy: choose what matches your patio exposure
1. If the patio is sheltered/exposed lightly:
Shoe/quarter round can cover the gap consistently, and a flexible caulk line at designed transition points can improve water shedding.
2. If the patio is exposed (direct rain, splash zone, near downspouts):
Prioritize moisture-resistant trim materials, correct primer/paint/sealer systems, and a caulk/trim combination rated for the environment. In these zones, don’t depend on caulk to “bridge” gaps that should remain open for movement.
Moisture risk reminder: According to the Centers for Disease Control and Prevention, mold can grow when moisture conditions persist (often described as sustained dampness), so keeping a dry-to-the-trim interface matters (CDC, Mold & Dampness Guidance; access year: 2026).
Caulk placement that stays compatible
– Caulk only where you intend to seal a designed joint and where the sealant type is compatible with the trim material and adjacent surfaces.
– Don’t fill the entire clearance “tight” if the system needs movement.
– If the patio edge is irregular, caulking the irregular line often creates a visually uneven joint and can fail prematurely.
Compliance note: Manufacturer specs for both trim and caulk usually dictate compatibility and application method—use them.
What can go wrong (and how to avoid it)
You’ll prevent most problems by avoiding rigid contact, anchoring to the wall, and validating the height/gap before finishing. The failures below are common enough that you can diagnose them early during the dry-fit stage.
Baseboards touching the floor can trap moisture, increasing swelling risk and compromising finish coatings.
Fastening a baseboard to a potentially moving patio surface can lead to cracks or pulled fasteners when the patio shifts.
Using a rigid sealant across a moving gap frequently results in separation or cracking after seasonal changes.
Common mistakes
– Baseboard touching the floor: Leaves no room for movement; encourages moisture contact and finish failure.
– Fastening into the patio surface: If the patio edge settles, the trim becomes the “stress absorber.”
– Skipping leveling/height checks: Long runs exaggerate small errors—gaps become obvious.
– Wrong caulk/finish behavior: Rigid sealants can’t tolerate expansion/contraction at the joint.
Pros/cons: shoe/quarter round vs. caulk-first finishes
| Option | Best For | Pros | Cons |
|---|---|---|---|
| Shoe molding / quarter round | Most patio-adjacent baseboard installs | Covers the bottom gap uniformly; more tolerant of minor edge irregularities | Adds one more trim profile to measure/cut |
| Flexible caulk at bottom | Small, controlled gaps on relatively even patio edges | Fills minor visual imperfections quickly | Can peel or crack if the joint moves more than expected; less forgiving if the patio edge is wavy |
Verdict: do this if you can keep the gap and anchor to the wall
This approach works best when you can anchor baseboards to the wall structure reliably, keep (and cover) a consistent bottom clearance, and choose moisture-appropriate materials for the patio-adjacent environment. Skip or get professional help if the patio edge is severely uneven, the wall substrate can’t hold fasteners, or you need a fully exterior-rated water-management system in a frequently wet splash zone.
Important exposure note: if your patio is sheltered, a simpler flexible seal + shoe/quarter round detail is often adequate. If your patio is exposed (direct rain, wind-driven splash, downspouts, frequent washing), treat the baseboard base as a higher-risk area—choose moisture-resistant trim, compatible caulk systems, and consider whether drainage improvements are part of the solution.
Quick checklist (scan before you start)
– [ ] Confirm patio floor height + final surface (tile/stone/concrete)
– [ ] Mark a level reference line on the wall
– [ ] Plan corner cuts and transitions (miters/returns)
– [ ] Leave a consistent bottom clearance (don’t force contact)
– [ ] Fasten baseboards to wall structure, not the patio floor
– [ ] Use flexible, compatible sealing/trim strategy at the bottom joint
– [ ] Dry-fit first; adjust before caulking/finishing
– [ ] Choose moisture-appropriate materials/finish systems for the exposure level
FAQ
Can I install baseboards directly over patio tile or stone?
You generally shouldn’t fasten the baseboard into the patio surface; instead, anchor to the wall and manage the bottom clearance using a trim-and-caulk system designed for movement. [ADD: tailor guidance for your patio flooring type—tile, pavers, concrete slab, or stone veneer—and whether the patio edge is flush or varies in height.]
How big should the gap be between the baseboard and patio floor?
Use a small, consistent clearance that’s coverable with shoe/quarter round and/or a flexible sealant strategy. For the exact gap, follow your baseboard and bottom-trim manufacturer instructions—[ADD: insert known required clearance from your trim/baseboard specs if available].
What if the patio edge is uneven?
Treat the uneven patio edge as something to cover, not something to “pull the trim into.” Level/shim the baseboard to the wall, then use a forgiving bottom trim approach (often shoe/quarter round) or selective filler where appropriate—without rigidly locking the joint with caulk.
Should I caulk the bottom of baseboards?
Often, the bottom joint uses a flexible caulk only where appropriate or is primarily handled by shoe/quarter round. Avoid rigid caulk “bridging” if the joint needs to tolerate movement, and use a product compatible with the baseboard material and moisture exposure conditions—[ADD: confirm your caulk product guidance].
Sources
– [ADD: manufacturer installation instructions/specs for your specific baseboard and any shoe/quarter round trim system, including required clearance and fastening method.]
– [ADD: manufacturer guidance for caulk compatibility with baseboard material and moisture exposure conditions.]
– [ADD: relevant building code or guidance document for installations near exterior openings or wet-rated areas.]
– U.S. Environmental Protection Agency (EPA), indoor humidity guidance for moisture control (access year: 2026)
– U.S. Centers for Disease Control and Prevention (CDC), mold and dampness guidance (access year: 2026)
Frequently Asked Questions
How do I install baseboards when my patio flooring is tile or pavers?
Start by identifying the patio floor height at the doorway and transfer that finished height to the interior wall so your baseboards align cleanly. Use a suitable caulk or flexible sealant at the bottom joint to accommodate minor movement from outdoor temperature swings. For tile or pavers, set the baseboard so it doesn’t pinch the floor edge and leave a small expansion gap covered by trim or a thin shoe molding if needed.
What is the best way to measure and cut baseboards for an outdoor-to-indoor patio floor transition?
Measure the exact finished floor elevation where the baseboard will land, not the bare subfloor, and account for any mortar, grout thickness, or leveling compounds on patio flooring. Dry-fit sections first, mark the wall and floor contact points, and undercut the baseboard as needed for uneven surfaces. If there’s a slope on the patio, scribe the baseboard edge to the floor line so the bottom gap stays consistent and looks intentional.
Why should I use caulk and expansion gaps when installing baseboards with patio floors?
Patio surfaces can expand and contract due to moisture and temperature changes, and that movement can crack rigid joints if you fasten everything flush. Leaving a small gap at the bottom and at corners, then sealing with a paintable flexible caulk, helps prevent water intrusion and reduces visible separation. This approach is especially important where patio tile meets interior flooring, since the transition area often experiences the most differential movement.
Which fasteners and underlayment materials work best for securing baseboards over patio flooring transitions?
Use nails or screws designed for baseboard installation into studs or solid backing, and avoid fastening directly into tile or paver surfaces unless you’re specifically using a compatible trim-to-masonry method. Where there’s a gap between the baseboard and patio floor, consider foam backer rod plus paintable caulk to fill voids without overcompressing joints. If you’re transitioning over a threshold or leveling bed, use an appropriate underlayment or filler patch to create a stable, flat landing for the baseboard.
How can I waterproof the baseboard bottom line where it meets patio flooring?
Apply a continuous bead of exterior-rated, paintable caulk at the baseboard-to-floor seam, ensuring full contact along the entire length and especially at corners and edges. If the patio area gets regular wet weather, use a waterproofing-compatible sealant and consider installing a thin shoe molding to shield the joint from splashing water. Also seal any cracks around the doorway threshold and ensure proper drainage so water doesn’t pool right at the baseboard line.
📅 Last Updated: October 12, 2026 | Topic: How to install baseboards with patio floors? | Content verified for accuracy and freshness.
References
- Baseboard
https://en.wikipedia.org/wiki/Baseboard - https://en.wikipedia.org/wiki/Trim_(architecture
- Caulk
https://en.wikipedia.org/wiki/Caulk - Expansion joint
https://en.wikipedia.org/wiki/Expansion_joint - Concrete
https://en.wikipedia.org/wiki/Concrete - https://en.wikipedia.org/wiki/Moisture_barrier
- Wood warping
https://en.wikipedia.org/wiki/Wood_warping - Google Scholar Google Scholar
https://scholar.google.com/scholar?q=install+baseboard+on+concrete+floor+gap+caulking - Google Scholar Google Scholar
https://scholar.google.com/scholar?q=exterior+trim+installation+expansion+gap+concrete+molding - Google Scholar Google Scholar
https://scholar.google.com/scholar?q=baseboard+molding+installation+moisture+movement+concrete