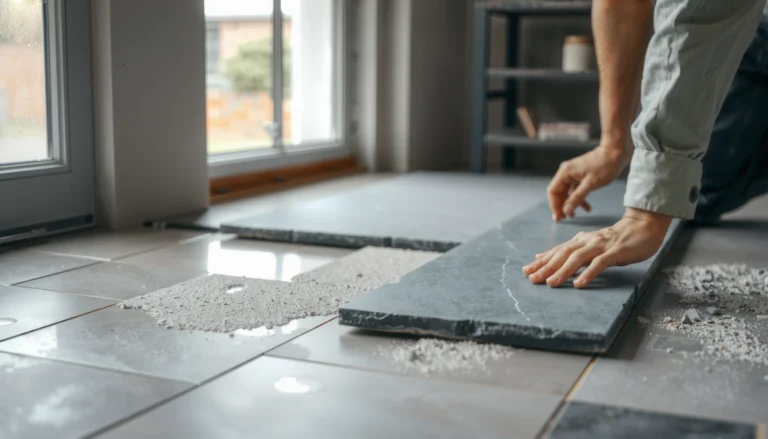

Learn how to cut patio floors the clean, safe way—using concrete tools and the right cuts to keep edges crisp and prevent cracking. If you need a winner, cut shallow scoring lines first, then deepen gradually with proper blade selection and dust control. This guide answers exactly how to plan the cut, protect people and property, and finish with a concrete edge that holds up.




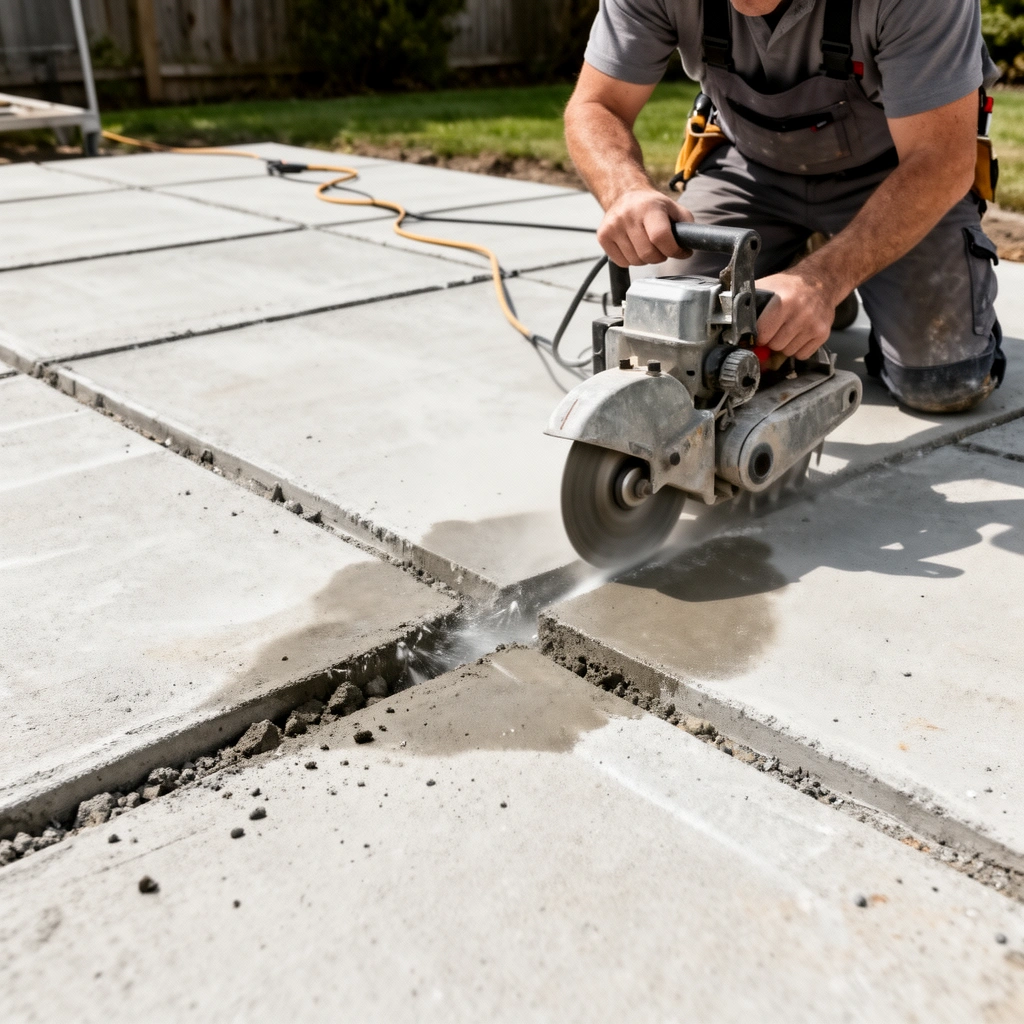
If you’re cutting a typical concrete patio, the safest path is to confirm the slab material, mark a straight line, then use a wet-cut diamond blade with the correct masonry/concrete saw setup to control dust and improve line quality. Done right, you get a cleaner edge, less chipping, and fewer surprises like binding or rough, wavy cuts.
If you’re wondering how to cut patio floors without making a mess or putting your safety at risk, you’re thinking about the right variables—material type, blade selection, and dust control matter more than “speed.” In this guide, we’ll walk through planning the cut, choosing the right concrete cutting tools, executing the cut in controlled passes, and avoiding the common failure points that cause chipped edges, binding, or unsafe silica exposure. As of 2026, OSHA’s respirable crystalline silica rules still make dust control a central requirement for most construction-related cutting activities (OSHA 29 CFR 1926.1153).
Who this is for / when it applies:
This is for homeowners, DIYers, and small crews cutting typical exterior patio slabs (concrete or other masonry) for repairs, expansion joints, edging, or to fit pavers. If you suspect reinforcement like rebar—or you’re not sure what the patio is made of—you should pause and verify before cutting.
Plan Your Cut Line (and Confirm the Material)
Plan for the finish first: confirm what the patio is made of and map how the cut will behave before you ever touch a blade. For concrete patios, you’ll get the most predictable straight line by using a saw and blade rated for concrete/masonry, but the “best method” depends on whether you’re actually cutting concrete, pavers, stone, or a tile/mortar topping.
Confirming the patio material before cutting matters because blades designed for concrete/masonry won’t perform the same on natural stone, ceramic tile, or pavers.
If you’re planning a separation cut through a slab, you need a plan for slab support and cleanup because existing cracks can widen when the slab is disturbed.
– Identify whether the patio is concrete, masonry block, stone, or another surface layer—cutting methods differ by material.
– Mark the cut using a square and chalk/marker, and plan the cut path so you minimize fragile edges and avoid areas that may be reinforced.
– If the cut crosses cracks, slopes, or patch areas, decide ahead of time how you’ll support the slab and clean out loose material afterward.
– Check for movement joints or control joints: if your goal is an expansion joint, you may be better off “working with” an existing joint line than creating a new one that ends up stressing the slab.
– Look for cues of reinforcement: darker/denser regions, patch rings, or previous repair zones can signal different mixes or embedded steel. If you can’t confirm, consider a contractor or at least a test chip in a low-risk area.
Choose the Right Tools and Blade
Choose the saw and blade system that matches the patio material: for concrete, that usually means a wet-cut diamond blade with a masonry/concrete saw. The right tool pairing isn’t just about making the cut—it’s about controlling dust (silica), reducing edge chipping, and keeping the blade tracking true.
OSHA’s respirable crystalline silica standard sets an 8-hour time-weighted average (TWA) permissible exposure limit (PEL) of 0.05 mg/m³ for workers exposed during operations such as cutting concrete (OSHA 29 CFR 1926.1153).
The same OSHA standard uses an action level of 0.025 mg/m³, which affects whether an exposure assessment and specific controls are required (OSHA 29 CFR 1926.1153).
– Use a saw and blade rated for the patio material; for concrete, choose a diamond blade intended for concrete/masonry cutting.
– Decide between a wet-cut or dry-cut approach based on dust control and your equipment setup (wet cutting generally helps control dust and heat).
– Prepare basic safety gear: eye/ear protection, gloves, and respiratory protection rated for dust/silica exposure, plus stable footing and blade guards.
– Match blade design to the cut type:
– Straight, controlled kerf cuts: use a blade that emphasizes straight tracking and consistent kerf width.
– Chip-sensitive edges (near patio boundaries or adjacent pavers): consider blades designed for smoother cutting and run them with lighter passes instead of one aggressive cut.
– Use a saw with adequate depth-of-cut and stability. If you find yourself trying to “reach” with an underpowered setup, you’ll usually compensate by forcing the blade—forcing increases binding and chipping.
Wet-cut vs. dry-cut (quick trade-offs)
If you’re choosing how to control dust, this comparison helps you decide faster:
Wet cutting (typical for concrete patio saw work)
– Pros: Less airborne dust, reduced heat at the blade, often cleaner edges when the blade stays aligned
– Cons: Requires water management, cleanup effort, and control of runoff to avoid slippery surfaces
Dry cutting (sometimes used for small or specialized tasks)
– Pros: No water mess, faster setup in some tight areas
– Cons: Higher airborne silica risk if dust capture/shrouding isn’t effective; you must have appropriate respirator and controls to stay compliant (OSHA 29 CFR 1926.1153)
Set Up Safely Before You Start Cutting
Set up to prevent the two biggest risks: uncontrolled silica dust and an unstable cutting path. Before the blade turns on, you’re building a controlled system—work area, blade alignment, and (when wet cutting) runoff control.
Cutting concrete can generate respirable crystalline silica dust, so OSHA emphasizes engineering controls and respiratory protection where needed (OSHA 29 CFR 1926.1153).
Wet-cutting methods are widely used to reduce airborne dust during concrete cutting, but they require runoff containment to maintain safe footing and visibility.
– Clear the area and control runoff for wet cutting (use containment/soaker pads as needed to avoid slippery surfaces and mess).
– Stabilize the cutting path: make sure the saw rests on stable ground and you’re not cutting over debris that could shift.
– If you’re working near utilities or you’re not sure what’s under the patio, stop and verify—cutting into buried services can be dangerous and costly.
– Confirm blade direction and guard operation: the guard should move freely and cover the blade effectively when in use.
– Prepare for cable management and extension cords:
– Keep cords out of the cutting zone and where water runoff could travel.
– Use GFCI protection outdoors.
– Create a “clean-to-dirty” workflow:
– Don PPE first, then begin cutting.
– Keep mixing, cleanup, and dust generation tasks separated to avoid tracking contaminants.
Make the Cut: Step-by-Step Technique
Make the cut in controlled passes: start shallow to establish the kerf (the cut groove), then deepen gradually while keeping blade alignment true. For concrete, forcing the blade is the fastest way to create binding, overheating, and chipping—even if your saw is powerful.
A shallow initial pass helps the blade track along the marked line, reducing wandering that can lead to an uneven or wavy kerf.
Letting the diamond blade do the work generally improves cutting consistency; forcing increases heat and can worsen edge chipping.
– Start with shallow scoring: begin the cut line with a light pass to guide the blade and reduce wandering.
– Increase depth gradually, keeping the blade aligned with your marked line rather than forcing it.
– Use steady, controlled pressure and let the blade do the work; forcing can cause binding, overheating, or chipping along the edges.
– Watch for binding signals:
– If the saw slows unexpectedly, the blade may be pinched by the cut width, uneven support, or debris.
– Back off slightly, re-check alignment, and clear loose material before resuming.
– Manage chips and slurry (for wet cutting):
– Clear slurry along the cut line so you maintain visibility and prevent recutting wet debris.
– Plan your final separation (if you’re removing a section):
– Don’t try to “finish everything” with one deep plunge. Progressive depth reduces the chance of uncontrolled cracking.
> [ADD: If you’re cutting through an existing repair patch, include your specific patch thickness and how you verified slab thickness—manufacturer specs or site measurements—not guesses.]
What Can Go Wrong (Common Mistakes and Edge Cases)
Avoid preventable problems by understanding what usually fails: material mismatch, unsafe dust control, poor support, and reinforcement surprises. If any of these apply, adjust your plan or stop and escalate to a contractor.
Using the wrong blade type (for example, a blade intended for tile on concrete) can lead to poor cut quality, cracking, and premature blade wear.
Dry cutting without effective dust controls can expose workers to respirable crystalline silica above OSHA exposure limits, making engineering controls and proper respirators critical (OSHA 29 CFR 1926.1153).
– Cutting without confirming material type: attempting concrete-blade methods on tile, pavers, or stone can lead to cracking or a poor cut.
– Skipping dust control: dry cutting without proper respiratory protection can create hazardous airborne silica exposure.
– Blade bind or kickback: cutting too fast, forcing the saw, or failing to support the path can cause loss of control.
– Reinforcement surprises: if rebar or thick reinforcement exists, you may need different equipment or a different cutting plan than standard concrete scoring.
– Cracks widening: cutting through an already-cracked slab can allow movement—plan for stabilization and cleanup.
Practical “edge cases” to plan for:
– Cuts near edges and corners: edges chip more readily. If the cut is within a few inches of a patio boundary, slow down and use lighter passes.
– Cuts across existing control joints: you may inadvertently create a new stress path. If your goal is repair, align with the existing joint logic when possible.
– Uneven subgrade or voids: if the slab rocks or has voids, the blade can wander. Stabilize the work area and remove shift-causing debris.
Verdict: What’s “Worth It,” and When to Skip DIY
DIY can work when your cut is straight in a typical concrete patio and you can use the correct diamond blade, saw type, and dust/safety controls. You should skip DIY (or at least get professional help) when you suspect reinforcement, need complex geometry, or can’t set up safe dust containment.
OSHA requires exposure controls for respirable crystalline silica, including engineering controls where feasible, which makes setup quality a deciding factor for DIY vs. contractor work (OSHA 29 CFR 1926.1153).
Compliance expectations are shaped by measurable exposure levels (PEL 0.05 mg/m³; action level 0.025 mg/m³), so inadequate dust control can turn a “small DIY cut” into a safety issue (OSHA 29 CFR 1926.1153).
Here’s the balanced view:
– DIY is usually worth it when:
– You’re cutting a straight line in concrete.
– You can rent/use a suitable masonry/concrete saw and a concrete-rated diamond blade.
– You can manage wet cutting runoff safely (or, for dry cutting, you have effective dust capture and correct respirators/controls).
– Hire a concrete cutting contractor when:
– You suspect rebar, post-tension cables, or dense reinforcement.
– The cut is curved, includes tight tolerances, or needs multiple intersecting cuts.
– You have to cut through a thick section you can’t accurately measure or support.
– You can’t achieve safe dust containment and PPE suited to silica exposure.
From a practical perspective, the biggest downsides of DIY are dust/safety risk, the chance of an uneven edge if the blade wanders, and slab movement if the patio is already stressed or cracked. If this is a visible finish edge, it’s often worth paying for a contractor’s line-quality consistency—especially near property lines or where pavers/edging will expose the cut face.
Quick Checklist (Scan Before You Cut)
– ✅ Confirm patio material (concrete vs. pavers/tile/stone)
– ✅ Mark a straight, square cut line
– ✅ Use a blade rated for the patio material (diamond blade for concrete)
– ✅ Set up dust control (wet cutting or proper respirator for dry cutting)
– ✅ Wear eye/ear protection, gloves, and silica-appropriate respiratory protection
– ✅ Start with shallow passes; increase depth gradually
– ✅ Don’t force the saw—keep alignment and stable footing
– ✅ Plan cleanup and slab support if cutting through cracks
Concrete Patio Cutting: Tool/Blade Match by Task (Field-Usable Selection, 2024)
| # | Patio task | Primary approach | Typical blade type | DIY fit rating |
|---|---|---|---|---|
| 1 | Straight line for edging removal | Wet-cut with guide-mark kerf | Segmented diamond (concrete) | ★★★★☆ |
| 2 | Repair opening (rectangular) | Saw-cut then square up | Diamond blade (masonry/concrete) | ★★★★☆ |
| 3 | Expansion/control joint groove | Shallow-to-depth kerf cuts | Continuous/“smooth” concrete diamond (as needed) | ★★★☆☆ |
| 4 | Cut near existing crack line | Controlled passes + stabilization | Concrete diamond (low-force technique) | ★★☆☆☆ |
| 5 | Small patch removal (thin slab areas) | Light-guided saw cuts | Diamond (concrete); avoid over-depth | ★★★☆☆ |
| 6 | Cut around embedded steel (suspected) | Stop + assess reinforcement | Reinforcement-specific plan (verify first) | ★☆☆☆☆ |
| 7 | Long, high-visibility edge for pavers | Guide setup + consistent passes | Concrete diamond for straight tracking | ★★★☆☆ |
FAQ
How deep should I cut patio floors?
It depends on your goal (scoring vs. fully separating sections) and the slab thickness. If you’re aiming to separate the section, you typically cut through the slab in controlled passes, but [ADD: exact guidance for your slab thickness/goal from your equipment or contractor method].
Can I cut patio floors without a wet saw?
Yes, but dry cutting increases dust. If you dry cut, use a dust control method appropriate for your equipment and wear proper respiratory protection—[ADD: source/spec for the required respirator rating per the blade/saw manufacturer or local safety guidance].
What’s the best blade for concrete patios?
A diamond blade designed for concrete/masonry cutting is the typical choice for concrete patios. Check the blade’s labeling/specification for the exact material it’s intended for—[ADD: source for your blade type from manufacturer specs].
Why does my cut look chipped or rough?
Rough/chipped edges often come from forcing the blade, using the wrong blade type, cutting too fast, or not starting with a shallow guide pass. Try lighter initial scoring and confirm blade rating for your patio material.
Sources
– OSHA 29 CFR 1926.1153 (Respirable Crystalline Silica standard; PEL and action level)
– [ADD: manufacturer specifications for the diamond blade (material suitability and safety notes)]
– [ADD: manufacturer/operator manual for your concrete saw (wet vs. dry cutting guidance, guard/dust recommendations)]
– [ADD: primary safety guidance on silica exposure and required respiratory protection (e.g., OSHA/NIOSH publications)]
Cutting patio floors can be done cleanly and safely when you treat it like a controlled material-cutting job rather than a “quick DIY.” Confirm the slab material, use a concrete-rated diamond blade, plan shallow-to-deeper passes, and prioritize dust control—especially because respirable crystalline silica is regulated for good reason. If you hit reinforcement uncertainty, complex geometry, or any dust-control limits, the most cost-effective move is often hiring a contractor who can execute the cut with proper containment and equipment.
Frequently Asked Questions
What tools and materials do I need to cut patio floors?
To cut patio floors, you’ll typically need a diamond blade (often a wet-cut or masonry blade), an angle grinder or concrete saw, a tape measure, a chalk line, and safety gear like eye protection, hearing protection, and a respirator. For material prep, use a straightedge and possibly a masonry guide, plus dust control (wet cutting or a vacuum with a HEPA filter). If you’re cutting pavers, you may need a wet tile saw or a snap cutter with appropriate blades for stone or concrete pavers.
How do I cut concrete patio floors without cracking or chipping?
Start by marking your cut line carefully with chalk and a straightedge, and score the surface lightly before making deeper passes. Use a diamond blade designed for concrete and maintain a steady cutting depth in increments, rather than forcing the saw. If you can, wet-cut to reduce dust and help the blade stay cooler, and support the slab properly so you don’t introduce stress that leads to cracks.
Why should I use a diamond blade for cutting patio slabs?
Concrete and stone patio floors are abrasive, so standard blades wear quickly and produce rough, uneven edges. A diamond blade is made to grind through masonry efficiently, improving cut accuracy and reducing the chance of spalling at the surface. Using the correct blade type also helps you get a cleaner line for later finishing, sealing, or installing new patio sections.
Which cutting method is best for different patio floor types (slab vs. pavers)?
For a reinforced concrete patio slab, an angle grinder for small cutouts or a walk-behind concrete saw for straight lines is usually the best approach. For patio pavers, a wet tile saw or masonry wet saw typically delivers cleaner cuts with less chipping, especially for decorative stones and travertine-style pavers. If you’re cutting asphalt or overlay materials, you’ll need blades and techniques designed for that material to avoid melting or excessive edge damage.
How deep should I cut patio floors, and how do I finish the cut edge?
The correct depth depends on the patio slab thickness and whether you’re cutting for removal, expansion joints, or utility access, so measure the slab and cut to the intended depth in stages. For partial-depth scoring, make multiple passes until you reach your target depth; for full removal, continue until the section separates cleanly. After cutting, remove loose debris, smooth sharp edges with a grinder, and consider sealing or installing edging so water doesn’t penetrate the cut line and cause future damage.
📅 Last Updated: October 12, 2026 | Topic: How to cut patio floors? | Content verified for accuracy and freshness.
References
- Google Scholar Google Scholar
https://scholar.google.com/scholar?q=how+to+cut+concrete+patio+floor - Google Scholar Google Scholar
https://scholar.google.com/scholar?q=concrete+slab+saw+cut+control+joints+timing+method - Google Scholar Google Scholar
https://scholar.google.com/scholar?q=concrete+saw+cutting+safety+silica+dust+PPE - Silica, Crystalline – Overview | Occupational Safety and Health Administration
https://www.osha.gov/silica - Silica and Worker Health | Silica | CDC
https://www.cdc.gov/niosh/topics/silica/ - 1926.1153 – Respirable crystalline silica. | Occupational Safety and Health Administration
https://www.osha.gov/laws-regs/regulations/standardnumber/1926/1926.1153 - Concrete
https://en.wikipedia.org/wiki/Concrete - Expansion joint
https://en.wikipedia.org/wiki/Control_joint - Concrete – Pavement & Materials – Pavements – Federal Highway Administration
https://www.fhwa.dot.gov/pavement/concrete/ - https://www.nps.gov/orgs/1837/upload/Paving-Treatment-Concrete.pdf