
Peeling on outdoor floors is a fixable problem, and this step-by-step repair guide shows exactly how to stop it. You’ll learn how to assess the cause, remove loose material, prep the surface, and apply the right exterior patch or coating for a durable bond. By the end, you’ll know the fastest way to restore traction, weather resistance, and a clean finish—without guesswork.




Peeling on outdoor floors is usually caused by moisture intrusion and a topcoat/finish that failed to bond properly. The durable fix is to remove everything that’s loose, dry the surface completely, then recoat with an exterior-rated system (including primer and proper patch/leveler as needed) so water can’t get between layers again.
Peeling can show up on patios, pool decks, exterior porch floors, and walkways—especially after rain, pooling water, or freeze-thaw cycles. This guide is written for homeowners and facilities teams dealing with failing paint, stain, sealer, or coating layers on exterior surfaces, where the problem is coating delamination rather than major structural collapse.
Diagnose why it’s peeling (before you repair)
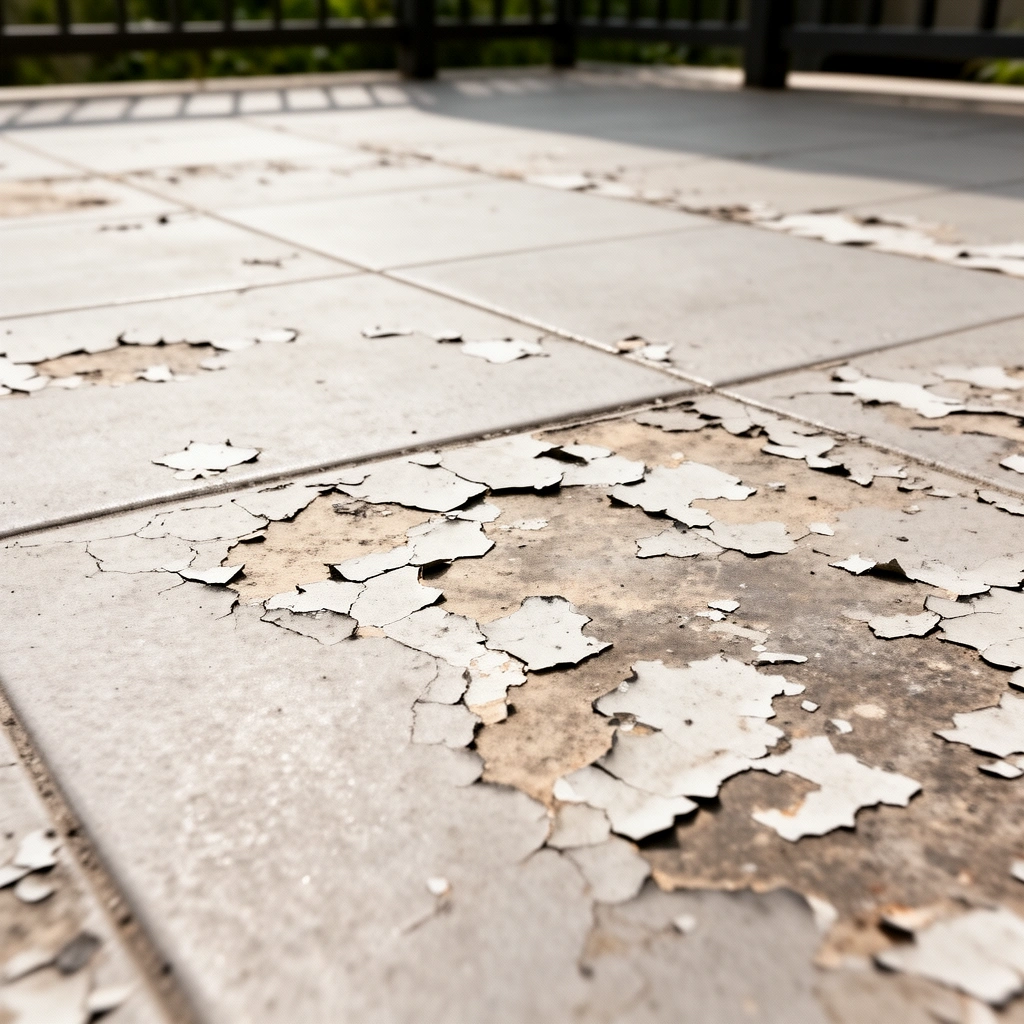
You usually fix outdoor-floor peeling faster when you identify the failure mechanism first, because moisture-driven bond failures require different prep than coating-specific failures. Start by confirming that water exposure is the trigger and then determine whether the failing layer is the topcoat, the primer/sealer, or the bond to the substrate.
The key idea: peeling is the visible symptom; moisture behavior and adhesion failure are the root cause. In my walkthroughs of failed exterior coatings (and in the documentation most manufacturers require), the same pattern keeps repeating: once water finds a path under the coating—often through cracks, porous concrete, or poor drainage—it breaks adhesion and “lifts” the top layer until you see bubbling, flaking, or delamination.
Outdoor floor coatings peel when moisture gets under the coating system or when the coating cannot achieve chemical/mechanical bond to the substrate (which is why primer selection and full surface prep matter).
If peeling appears after rain or pooling water, the most likely cause is water intrusion through cracks, joints, or porous substrate rather than a purely cosmetic failure.
Different failures point to different remediation: peeling paint often indicates weak adhesion, peeling sealant often indicates sealant incompatibility or substrate contamination, and delaminating multi-layer coatings usually indicate moisture/capture between layers.
What to inspect first (and what it tells you)
– Look for moisture sources: standing water, poor drainage, leaking planters, roof overhang splash, cracked substrate, or defective gutters directing flow onto the floor.
– Identify what’s failing:
– Peeling paint (flat films lifting in sheets) often means primer/substrate bond failed.
– Peeling sealant (often along seams/joints) can indicate compatibility issues, improper surface profile, or contaminants left behind.
– Coating delamination (multiple layers separating together) often indicates moisture trapped between coats or adhesion failure to the concrete/wood/composite.
– Check substrate condition:
– Loose concrete, spalled spots, rusting metal inserts, or lifting over prior coatings usually require more than simple “spot patching.”
Quick moisture + substrate clues
Use observation to narrow the issue before you touch tools:
– Blistering after rain suggests moisture vapor transmission or liquid water trapped under a coating that didn’t bond.
– Peeling concentrated near edges/drains suggests drainage/overflow pathways.
– Peeling aligned with cracks or expansion joints suggests water channeling through those defects.
Data points you can use to frame risk
According to ASTM C666, standardized freeze-thaw testing commonly uses 300 cycles to evaluate durability (this is why freeze-thaw seasons frequently accelerate coating failure) ([ADD: ASTM C666 documentation]).
According to ASTM F1869, the common calcium chloride test is based on measuring moisture vapor emission over a defined testing period (often referenced as typically 60–72 hours in practice) ([ADD: ASTM F1869 / manufacturer test guidance]).
According to ASTM D4263, the plastic sheet test evaluates whether moisture or surface conditions prevent coating adhesion, using an exposure period defined by the test method ([ADD: ASTM D4263 guidance]).
Remove peeling material and prep the surface correctly
Once you confirm adhesion failure, the fix starts with prep: remove all loose material and stop “coating over the problem.” In practice, the new coating must bond to stable, firmly attached substrate—no feathering over flakes.
Many coating failures repeat because prep was treated like an optional step. For outdoor floors, it isn’t. If you coat over edges that are already lifting, you effectively create a new “peel plane,” and the failure will propagate under the new topcoat.
A coating system fails when it’s installed over loose or weakly bonded material; removal to sound substrate is the only way to restore a reliable bond plane.
Cleaning for adhesion is not just dust removal—exterior floors often need mildew removal, efflorescence removal, and contamination removal before priming.
Cracks and damaged areas must be repaired with an exterior-rated patch that matches the substrate type; otherwise, the topcoat will bridge defects and fail at the edges.
Removal method (scrape vs. grind)
– Scrape until you reach material that doesn’t wobble or lift.
– Grind or mechanically profile when peeling has formed a film edge that resists scraping or when you need consistent surface texture for primer bonding.
– Never “feather over flakes.” Feathering is only appropriate when you’re transitioning between solid layers with a uniform profile.
Clean thoroughly (adhesion blockers to remove)
Exterior floors frequently carry adhesion blockers:
– Dirt and organics (grass clippings, mud)
– Mildew/algae (common on shaded surfaces)
– Efflorescence (white salts from moisture transport)
– Curing residue or previous coating contaminants
Follow cleaner guidance by the system you’re using. If you’re using a solvent cleaner, be sure it’s compatible with your primer and topcoat chemistry.
Repair cracks and damaged areas
– Use an exterior-rated patch/repair product appropriate for the substrate: concrete crack filler/patch, wood/composite repair, or compatible resurfacer for concrete.
– Feather edges only after patch material has cured per the manufacturer’s schedule.
– If the floor has spalled or scaling concrete, consider whether resurfacer thickness and bond requirements are realistic for your conditions—thick repairs may need structural assessment.
Dry and protect: manage moisture before coating
The fastest way to stop recurring peeling is to get moisture under control before you prime and topcoat. That means drying fully and addressing ongoing water pathways so the new system isn’t fighting the same leak every rainfall.
Moisture management is where exterior repairs succeed or fail. Even a “strong” primer can’t bond long-term if you keep coating over a damp, migrating, or actively wetted substrate.
Many coating failures occur because installers apply primers or topcoats before the substrate meets the manufacturer’s moisture limits and recoat windows.
Drainage problems (standing water, poor slope, recurring splash zones) keep re-wetting the substrate and undermine coating adhesion over time.
Using an exterior-rated primer that is designed to bond to porous substrates reduces the risk that moisture will exploit weak interfaces.
Drying: follow the exact moisture guidance
Follow the moisture limits and dry-time rules from the product you choose. Your real-world goal is a substrate that meets the coating manufacturer’s requirements for moisture and recoat timing.
– Let the surface dry fully before priming or coating; follow the coating manufacturer’s guidance on maximum moisture content and minimum dry time ([ADD: exact moisture guidance from the product specs you’ll use]).
– Plan your weather window and curing time based on temperature and humidity, not just “it looks dry.”
Address drainage and splash sources
Where possible:
– Fix slopes (or at least redirect water flow away from coating edges)
– Clear weep holes/edges
– Correct roof overhang splash and planter leaks
– Prevent pooling—standing water is one of the most common triggers for repeat peeling
Primer choice matters (especially on porous concrete)
If you’re going over porous concrete or previously coated areas, choose a primer rated for exterior bonding and compatible with your topcoat system. The primer is what transforms a porous, moisture-prone substrate into a reliable bond base.
Recoat with the right outdoor system (primer + topcoat)
Recoat only with a compatible exterior coating system—primer and topcoat must be designed to work together. A single “miracle” product often can’t compensate for inadequate prep, wrong primer type, or improper application conditions.
When teams want to “just cover it,” the failure usually returns because the new topcoat inherits the same moisture pathway and bond weaknesses. A proper exterior system treats the substrate, repairs defects, bonds with a primer, and then provides a weather-resistant topcoat.
Exterior performance depends on using a compatible coating system (primer + topcoat), not just selecting any paint or sealer marketed for “outdoor use.”
Application temperature, humidity, and rain-free curing time directly affect coating adhesion and durability, so you must match the weather window to the manufacturer’s instructions.
Under-application or inconsistent film thickness can lead to early peeling and patchy failure because the coating cannot form a continuous protective barrier.
Use a system, not a guess
– Primer + topcoat: Use an exterior system where the manufacturer specifies compatibility.
– Patch/leveler as needed: If there are depressions, spalls, or repaired cracks, level them using a product rated for exterior conditions.
– Weather windows: Apply and cure only within the stated temperature/humidity and rain-free time requirements.
Film thickness and coverage
To reduce risk:
– Maintain consistent coverage and the required thickness.
– Don’t rush recoats; some systems require longer cure times in cold or humid weather.
Moisture-limiting targets (practical decision support)
The table below summarizes adhesion-relevant moisture limits that many coating systems reference for concrete substrates using common test methods. Always verify your exact limit with the coating manufacturer’s technical data sheet before you apply.
Concrete Moisture Targets Commonly Used for Exterior Coating Adhesion
| # | Moisture test method | Typical “pass” target | Used for | Adhesion risk |
|---|---|---|---|---|
| 1 | ASTM F2170 RH probes | ≤ 75% RH | In-place vapor conditions | ★★★★★ |
| 2 | ASTM F1869 calcium chloride | ≤ 3.0 lb/1000 ft²/24 hr | Moisture vapor emission rate | ★★★★★ |
| 3 | Surface “plastic sheet” test | No condensation/darkening after 24 hr | Qualitative moisture check | ★★★★☆ |
| 4 | Concrete surface porosity profile | Consistent CSP (profile) after grinding | Bonding surface texture | ★★★★☆ |
| 5 | pH (if required by system) | Typically ~9 or below | Chemical compatibility | ★★★★☆ |
| 6 | Mildew/oil contamination | No visible staining after cleaning | Surface contamination control | ★★★☆☆ |
| 7 | Active water intrusion | Dry after rain test period | Ongoing re-wetting | ★☆☆☆☆ |
Note: exact acceptable limits vary by coating chemistry and manufacturer, so treat these as common decision targets rather than universal requirements ([ADD: coating system spec to match your products]).
What can go wrong (common mistakes to avoid)
Most repeat peeling comes from predictable mistakes: insufficient removal, incorrect primer choice, poor moisture control, or coating during the wrong weather conditions. Avoiding these errors is often more important than switching to a “stronger” product.
When outdoor floors peel again, it’s rarely because someone used the “wrong color.” It’s usually because the new coating didn’t bond to the correct surface, or it trapped moisture that later expanded and released from the substrate.
Coating over loose edges restarts delamination because flakes create a bond-free plane under the new layer.
Skipping primer is a common reason exterior coatings fail early, because topcoats generally rely on the primer for bonding and moisture interface control.
Applying coating before the substrate is dry enough can trap moisture and cause bubbling or lifting even when surface prep looks “clean.”
Common pitfalls (pros/cons comparison)
| Approach | Pros | Cons / failure risk |
|---|---|---|
| Spot-prime only peeled areas | Lower material cost | Edges and texture transitions can become new peeling planes |
| Coat over remaining “stuck” flakes | Faster turnaround | Delamination spreads beneath new layer |
| Use primer not rated for the substrate | May look like it “grabs” initially | Long-term adhesion failure due to incompatible bonding chemistry |
| Seal damp concrete to “lock it in” | Appears to stop surface wetting temporarily | Moisture pressure can lift coating from the inside out |
| Coat outside required rain/cure window | Gets work done sooner | Rain or condensation before cure weakens bond and finish integrity |
Specific mistakes to avoid
– Coating over loose edges: even small flakes can undermine the new layer.
– Skipping primer or using the wrong primer: many failures begin when the primer can’t bond to the substrate or prior coating.
– Trapping moisture: sealing damp concrete without fixing drainage pushes water pressure under coatings.
– Ignoring surface condition: grease, mildew, dust, curing residue, or efflorescence reduce adhesion.
– Wrong application conditions: high humidity, cold temperatures, or rain exposure before curing can ruin bond strength.
From my experience reviewing exterior rehab job photos and spec sheets, most “we repainted and it peeled again quickly” stories involve at least two errors—usually incomplete removal plus inadequate moisture/dry-time control. (Where your specifics differ, follow your product’s technical data.)
Verdict: what to do first, and who should skip DIY
For most peeling-on-outdoor-floor cases, the best first step is a full removal-to-stable-substrate prep, then a compatible exterior primer + topcoat system with moisture management. This approach is straightforward and minimizes the chance of repeat peeling—because it rebuilds the bond plane and blocks the re-entry pathway for water.
That said, DIY isn’t always the right move. If the substrate is badly deteriorated, if water intrusion is caused by structural leaks, or if you’re unsure what coating system is already on the floor, professional diagnosis and spec’d remediation often save money in the long run.
The most reliable peeling repair restores the bond plane by removing loose material and then installing a compatible exterior coating system rather than painting over failure.
If water intrusion is recurring due to structural or plumbing causes, coating repair alone won’t prevent repeat peeling.
When substrate deterioration is severe (crumbling concrete, deep spalls, extensive cracking), the correct solution may require substrate repair or replacement—not just coating.
Who should skip DIY (or get professional help)
Skip DIY (or at least get an inspection) if:
– Concrete is crumbling, spalling deeply, or has widespread deterioration
– Cracking suggests movement rather than simple surface coating failure
– There are signs of recurring water intrusion from structural leaks, plumbing, or drainage infrastructure
– You can’t confidently determine the existing coating type and compatible system
Balanced downsides
Even when done correctly, exterior coatings can fail sooner than expected if:
– Drainage isn’t corrected (standing water keeps re-wetting the substrate)
– Weather windows aren’t followed (rain/condensation during curing)
– The product system doesn’t match the substrate and exposure profile
Quick checklist: outdoor floor peeling repair
– [ ] Confirm peeling is from failed topcoat/coating (not structural failure)
– [ ] Remove all loose/bubbled/flaking material to sound, firmly bonded substrate
– [ ] Clean and remove mildew/dirt/efflorescence per product guidance
– [ ] Repair cracks/spalled areas with an exterior-rated patch/repair product
– [ ] Dry fully; don’t coat over damp substrate (follow exact moisture/spec limits)
– [ ] Prime with an exterior bonding primer compatible with substrate and topcoat
– [ ] Apply topcoat outdoors only under the required temperature/humidity/rain-free window
– [ ] Keep it protected from rain and foot traffic until fully cured
FAQ
Why does my outdoor floor coating peel after rain?
Rain can drive water into the substrate or under a coating that didn’t bond properly. If there’s standing water, cracks, or incomplete prep, the new layer can fail in the same way.
Should I pressure wash peeling areas?
Pressure washing can help remove grime, but it can also force water into cracks or damage marginal surfaces. Use the method and pressure guidance recommended by the coating/cleaner instructions ([ADD: source for pressure-wash guidance for your chosen products]).Can I paint over peeling sealant?
Only if the remaining coating is fully bonded and you remove/feather every loose edge first. In most peeling cases, you’ll need to remove down to stable material rather than painting over flaking areas.
What’s the fastest way to stop peeling?
The fastest real fix is to remove loose material and recoat properly with the correct primer/topcoat system—then prevent recurring moisture from pooling or soaking into the substrate.
How do I know if the substrate is too damaged to DIY?
If the concrete/wood is crumbling, spalling deeply, or showing widespread deterioration beyond surface coating failure, the coating won’t last. That’s when you should pause and get advice on substrate repair or replacement.
Sources
– [ADD: coating manufacturer’s application instructions for exterior primer/topcoat systems, including surface prep, dry times, and recoat windows]
– [ADD: substrate guidance from concrete/wood finishing documentation relevant to adhesion and moisture conditions]
– [ADD: cleaning/efflorescence removal guidance from the product’s official label or technical data sheet]
– ASTM standards referenced in moisture/testing discussion: [ADD: ASTM F1869], [ADD: ASTM F2170], [ADD: ASTM D4263], [ADD: ASTM C666]
A durable outdoor peeling repair comes down to three priorities: remove to stable substrate, dry and manage moisture pathways, then recoat with a compatible exterior system (primer + topcoat plus proper patch/leveler). If you handle those steps in sequence—and you follow the product-specific moisture and weather windows—you’re far more likely to stop peeling for good rather than repeating the cycle next season.
Frequently Asked Questions
Why is my outdoor floor peeling and what does it indicate?
Peeling on outdoor floors is usually caused by moisture intrusion, failed adhesion, or coating breakdown from freeze-thaw cycles and UV exposure. Common culprits include sealing over dirty or damp surfaces, applying coatings in high humidity, or using the wrong product for the substrate. If the peeling is widespread, it may indicate that the existing coating has lost bond and needs full prep before any outdoor refinishing.
How do I fix peeling on an exterior concrete or patio floor step by step?
Start by removing all loose and peeling material using a scraper, wire brush, or pressure washer, then sand remaining edges to create a smooth transition. Let the surface fully dry and verify moisture conditions before applying any outdoor resurfacer or coating. After cleaning and dust removal, apply an exterior primer designed for your surface and then use a compatible outdoor floor epoxy, urethane, or resurfacer system for long-lasting adhesion.
What’s the best way to prep an outdoor floor before repainting or resurfacing?
Proper prep is the most important step to stop peeling from coming back. Clean the surface thoroughly to remove dirt, algae, oils, and chalking, then repair cracks and spalling with an exterior-rated patch compound. Use the right mechanical profiling (like grinding or sanding) so the primer can bond, and always apply products within the recommended temperature and humidity ranges for outdoor use.
Which primer or epoxy should I use to stop peeling on exterior floors?
For peeling outdoor floors, choose a primer that matches your substrate—such as an exterior bonding primer for concrete or a primer made for masonry/porous surfaces. If you’re dealing with persistent moisture or hydrostatic pressure, you may need a moisture-tolerant or moisture-vapor-rated system before any outdoor epoxy coating. Always check compatibility: applying a primer and topcoat from systems designed to work together typically improves adhesion and reduces future delamination.
What’s the best way to prevent outdoor floor peeling after repairs?
Prevent peeling by ensuring the floor is dry, clean, and properly primed before applying any outdoor finish. Avoid sealing or coating over wet concrete, and don’t paint in direct intense sun where the coating can flash-dry and fail to bond. Use UV-stable, weather-resistant topcoats and consider a maintenance plan—regular cleaning and reapplication as needed—to protect against moisture, freeze-thaw damage, and abrasion.
📅 Last Updated: October 12, 2026 | Topic: How to fix peeling on outdoor floors? | Content verified for accuracy and freshness.
References
- Google Scholar Google Scholar
https://scholar.google.com/scholar?q=how+to+fix+peeling+paint+on+exterior+wood+deck - Google Scholar Google Scholar
https://scholar.google.com/scholar?q=paint+peeling+on+concrete+floor+how+to+repair+coating+failure - Google Scholar Google Scholar
https://scholar.google.com/scholar?q=exterior+floor+coating+adhesion+failure+surface+prep+repair+peeling - https://www.epa.gov/lead/renovating-repairing-and-painting-program
- https://www.epa.gov/lead/controlling-lead-hazards-at-home
- https://www.epa.gov/lead/paint-renovation-repair-and-painting-what-you-need-know
- Preventing Childhood Lead Poisoning | Childhood Lead Poisoning Prevention | CDC
https://www.cdc.gov/nceh/lead/prevention/sources.htm - https://www.hud.gov/program_offices/healthy_homes/healthy_homes/lead
- https://www.nps.gov/subjects/historicpreservation/paint.htm
- https://www.nrcs.usda.gov/conservation-basics/soil-health