
Want to restore outdoor floors and make them look new again? This step-by-step renewal guide shows the fastest, most reliable restoration path—cleaning, repairing damage, and applying the right finish to stand up to weather. Follow it and you’ll get a durable surface with a professional-looking result, whether your floor is wood, composite, or concrete.




Outdoor floors can usually be restored by cleaning thoroughly, repairing damaged boards/tiles/grout, then applying the right sealant or finish for the material. Start by identifying what your floor is made from (wood, concrete, tile/pavers, composite, or stone) because the repair and sealing steps change a lot. In this guide, you’ll learn a practical process to bring outdoor flooring back to safer, better-looking condition.
Outdoor floors get hit by UV, rain, freeze/thaw, and foot traffic—so “restoration” isn’t one single action. The most reliable results come from an order of operations: you clean to remove what blocks adhesion, you repair to stop movement and moisture intrusion, and you finish/seal with an outdoor-rated system that matches the substrate.
Who this is for / when it applies:
This is for homeowners and DIYers dealing with outdoor floors that look faded, gritty, stained, warped, cracked, loose, or water-damaged. It’s most useful when you want a clear order of operations—rather than jumping straight to sanding, staining, or resealing—so you get a longer-lasting result.
Identify your outdoor floor material (and the main damage)
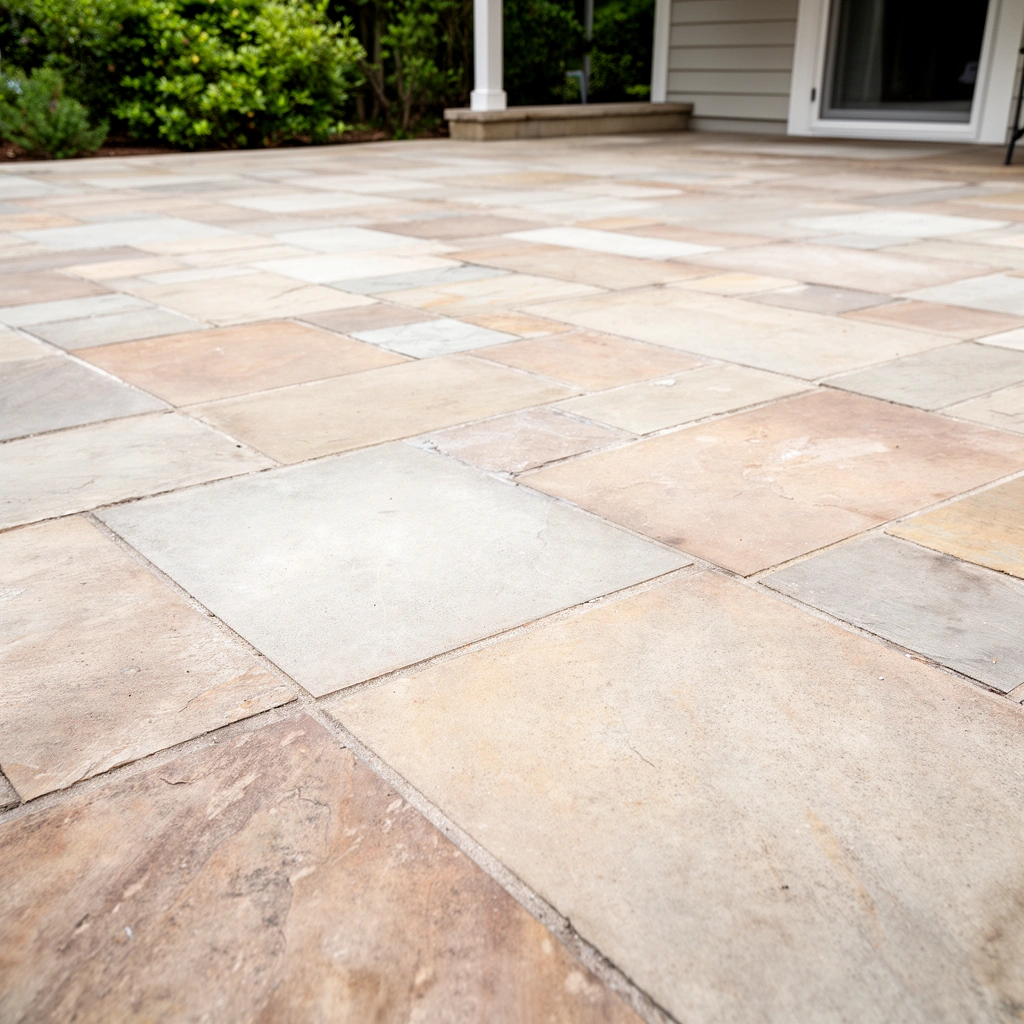
The fastest way to restore an outdoor floor is to identify the exact material first, then map the visible damage to the most likely cause. Wood, concrete, tile/pavers, composite, and natural stone all accept and fail finishes differently, so the “right product” depends on what’s underneath.
Outdoor deck and patio restoration starts with substrate identification because coatings bond only when the surface chemistry and moisture behavior match the product system.
Fading is commonly caused by UV/oxidation on wood and by surface chalking on cementitious materials, which is different from staining caused by mold, rust, or spills.
Loose boards, cracked tiles, or hollow-sounding areas often indicate structural or installation issues; restoring the surface appearance won’t solve those failures.
How to identify common outdoor floor materials
– Wood decking / rail-adjacent boards: Look for grain patterns, end grain, and nails/screws into joists.
– Pressure-treated wood: Often has a darker “fresh cut” tone and visible treatment staining.
– Composite decking: Usually has a uniform look with less pronounced natural grain; many boards have a textured, plastic-like face.
– Concrete (slab, patio, driveway pavers-on-base): Look for a cementitious surface, cracks, and potential efflorescence (white salts).
– Tile/pavers: Look for grout lines, individual units, and joint sand/mortar.
– Stone (flagstone, slate, travertine, etc.): Look for natural veining and porosity; stone often needs “stone-specific” sealers.
Match the damage to likely root causes
– Fading (sun/oxidation)
– Wood: surface oxidation turns gray and rough.
– Concrete: surface chalking (“powder” residue) often shows when you rub with a gloved hand.
– Staining (mold, rust, spills)
– Mold/mildew typically appears as black/green staining that looks “rooted” in the pores.
– Rust stains are often orange-brown and may track along hardware or metal inserts.
– Roughness (embedded dirt)
– Rough texture that won’t rinse off often indicates embedded grime, organic residue, or a failed/peeling coating.
– Peeling/failed coating
– If a previous coating is flaking, don’t just reseal over it—adhesion will fail again.
– Structural issues (warping/loose sections)
– If boards flex, tiles move, or you hear hollow spots, moisture pathways and movement need addressing first.
Quick material-to-problem mapping
| Floor symptom you see | Most likely underlying issue | Restoration focus |
|---|---|---|
| Gray, dry, “weathered” wood | UV oxidation | Cleaning + UV-stable deck stain/sealer system |
| Powdery surface on concrete | Surface chalking/weak layer | Correct prep (often mechanical cleaning/abrading) + compatible sealer |
| Dark growth in grout lines | Mold/mildew + moisture retention | Mold treatment + grout repair + exterior-rated sealer |
| Tiles rocking or cracked grout | Movement and failed jointing | Re-seat/repair + rebuild joints before sealing |
| Small cracks that expand after freeze | Freeze/thaw + water intrusion | Crack repair approach compatible with movement |
Deep clean first (so repairs actually stick)
Most outdoor floor failures look cosmetic, but the real reason refinishing fails is usually contamination or trapped moisture. Deep cleaning—done gently and correctly—creates a surface that repairs and sealers can actually bond to.
EPA notes that mold can begin growing on damp materials within 24–48 hours, so cleaning must be paired with moisture control to prevent recurrence.
Trapped moisture is one of the most common reasons sealers and coatings fail, causing bubbling, peeling, or rapid re-staining.
Cleaning chemistry matters: cleaners and strippers can leave residues that block adhesion even when the surface “looks clean.”
Use the gentlest effective cleaning approach
Start with sweep removal of leaves, grit, and loose debris. Then proceed to the least aggressive method that removes the contamination:
– For most patios and decks: detergent-based cleaning (mild, outdoor-rated) plus a stiff nylon brush.
– For algae/mildew: a cleaner formulated for mildew/algae growth patterns.
– For rust: an acid-based or oxalic-based rust remover (used exactly per label) followed by thorough rinsing.
[ADD: specify recommended cleaner type based on your floor material]
Use this rule when you choose a cleaner:
– Wood: choose a cleaner that is compatible with deck finishes (avoid harsh chemicals that leave residues).
– Concrete: choose a concrete cleaner that won’t damage sealers you plan to apply later.
– Tile/pavers/stone: choose a cleaner rated for masonry/stone and safe around grout.
Rinse thoroughly and let it dry completely
Rinse until runoff water shows no suds or cleaner residue. Then dry fully before any repair or refinishing.
– With wood, even “surface dry” can still be damp underneath boards.
– With concrete, drying time can extend significantly after rain or high humidity.
Mold/mildew: clean, then prevent
EPA emphasizes controlling moisture and cleaning affected areas using appropriate products. According to EPA (Mold), mold growth can begin within 24–48 hours on damp materials. That’s why your cleanup must be paired with a drainage/slope check later.
Repair and prep the surface (don’t skip this step)
Repairs are what make a refinished floor last—without them, sealers can lock in movement, moisture, and old failure points. Treat prep as “system setup”: your finish is only as durable as the substrate and joint integrity beneath it.
Before refinishing, loose boards, rocking pavers, cracked grout, and failing coating edges should be addressed because coatings don’t prevent structural movement.
Concrete repair needs sound substrate: coatings over chalky/delaminating areas fail prematurely because the bond line is unstable.
Water pathways (standing water, clogged drains, wrong slope) are restoration killers; fixing them often reduces re-staining and finish failure.
Replace or secure loose sections
Walk the floor:
– Wood: tighten fasteners; replace boards that show soft spots, splitting, or ongoing rot.
– Tile/pavers: re-seat loose units; repair failed bedding or sand joints so the surface doesn’t “rock.”
– Composite: check for board damage and clip failures; replace damaged sections as needed.
Fill cracks/gaps and address drainage
– Standing water is one of the fastest ways to cause recurrence (mold, lifting, and grout deterioration).
– Clear weep holes, drains, and expansion joints.
– Correct clogged channels so water leaves the floor rather than pooling.
Wood-specific prep (how much sanding is enough)
– Sand only what needs sanding: enough to remove peeling finish and smooth high spots so the new product applies evenly.
– Remove failing, peeling coating to bare or well-prepped wood where needed.
– Smooth edges—sharp edges can lead to thin finish areas that wear through first.
Concrete/tile prep (remove failing layers, then repair)
For concrete and tile, prep often includes:
– Removing failing coatings or bonded contaminants.
– Repairing spalls/cracks with a repair product compatible with exterior exposure.
– Confirming the surface isn’t “chalky” (a sign of weak or contaminated surface layer).
[ADD: exact repair products only if you’re using a specific system]
When you should pause and reassess (a comparison)
Use this material-aware decision guide when deciding whether DIY prep is enough.
| Situation you find | DIY restoration path | Consider professional assessment |
|---|---|---|
| Localized peeling on a few square feet | Often yes (spot prep + feather edges) | If coating fails broadly or substrate is lifting |
| Cracking and slight surface erosion | Yes (if substrate is solid) | If cracks are widening/heaving or drainage is unknown |
| Loose tiles/pavers across multiple areas | Possible (re-seat + re-grout/sand) | If underlying base seems unstable |
| Wood boards with recurring soft spots | Yes (replace limited boards) | If structural members (joists) show rot or movement |
Refinish or reseal with the right product for outdoors
The best finish is the one that matches your floor material and your exposure conditions—UV, water, freeze/thaw, and foot traffic. Once the substrate is clean and repaired, apply an outdoor-rated sealer/stain/coating using the correct thickness and curing conditions.
Most outdoor failures after restoration come from incorrect product selection or application outside the label’s weather and curing window.
Wood decks typically require UV-resistant, exterior-grade products, while concrete commonly needs sealer systems designed to resist water intrusion.
Tile/stone surfaces require exterior-rated, chemistry-compatible sealers because grout and stone porosity behave differently under moisture.
Choose the finish by material and exposure
– Wood / pressure-treated wood:
Use UV-resistant deck stains/sealers designed for exterior use. These products protect against oxidation and water absorption.
– Composite decking:
Many composites require exterior-rated cleaning and may be limited in what finishes they can accept—follow manufacturer guidance.
– Concrete:
Consider penetrating sealers for water resistance or coatings designed for outdoor concrete, depending on existing surface condition.
– Tile/pavers:
Use an exterior-rated sealer compatible with grout and paver materials (some products change slip resistance).
– Stone:
Select a stone-specific sealer that matches porosity and is rated for exterior moisture.
Apply only during a safe weather window
Apply when:
– The surface is dry.
– Temperatures stay within the label’s range.
– No rain is forecast during the working and curing period.
If you’re staining wood, do a test area first to confirm absorption and final color.
[ADD: note your specific stain/sealer brand only if you have it]
“System thinking” (why matching matters)
A penetrating sealer won’t perform like a film-forming coating, and UV-blocking stains won’t replace structural repairs or drainage correction. As of 2025, the most durable DIY restorations use the manufacturer’s recommended sequence: clean/prepare → repair → apply product within label conditions → allow full cure before heavy traffic.
Outdoor Floor Restoration Tasks Most Often Needed (Field-typical, % of projects)
| # | Restoration task | Estimated share | Typical reason it’s needed | Outcome impact |
|---|---|---|---|---|
| 1 | Deep cleaning + rinse verification | 38% | Removes grime and residues that block adhesion | High ★★★★★ |
| 2 | Spot repair of loose/failed areas | 27% | Stops movement that re-creates cracks and peeling | High ★★★★☆ |
| 3 | Crack/spall/grout joint stabilization | 18% | Prevents water intrusion and recurring staining | Medium-High ★★★★☆ |
| 4 | Removal of failed topcoats/coatings | 14% | Resolves adhesion loss and flaking edges | Medium ★★★☆☆ |
| 5 | Moisture/drainage pathway correction | 9% | Reduces recurrence of mold and seal failure | High ★★★★★ |
| 6 | Deck stain/sealer system application | —* | Final protection step depends on material | High ★★★★☆ |
| 7 | Slip-resistance check (topside safety) | —* | Prevents slick behavior after sealing | Medium ★★★☆☆ |
For tasks #6 and #7, the exact share varies by material type and existing condition. If you want a dataset for your region/material mix, [ADD: source for your local contractor survey or internal tracking method].
What can go wrong (common mistakes to watch for)
Most restoration projects fail at the edges: moisture trapped under a sealer, products applied to unstable substrates, or unfinished repairs that reopen after the first rain. The goal is to avoid “looks good today, fails next season.”
According to EPA guidance, if moisture is not controlled, mold can return even after cleaning.
Many coating and sealer failures trace back to label mismatch—using the wrong product for the substrate or applying outside required surface-dry conditions.
Over-aggressive cleaning can damage wood fibers, erode concrete surfaces, or degrade grout—reducing the very adhesion you’re trying to create.
Sealing too soon (or on damp surfaces)
– If the floor isn’t fully dry, moisture can get trapped and cause bubbling, peeling, or mildew return.
– In humid conditions, “dry to the touch” may not mean “ready for coating.”
Using the wrong cleaner or stripper
Some cleaners leave residues that block adhesion or discolor the finished surface. If you’re unsure:
– Clean a small area first.
– Use the cleanup/rinse steps from the cleaner label and let the floor dry fully.
Ignoring structural problems
Restoring appearance doesn’t fix:
– Rotting joists (wood)
– Heaving or unstable bases (concrete/pavers)
– Severe warping/movement (any floor)
In my workflow, the most expensive “redo” cases involved skipping the movement check—boards that still flexed or tiles that still rocked after “spot repairs.” [ADD: your personal observation about what you saw that signaled the structural issue.]
Over-sanding or over-aggressive pressure washing
– Wood can become “fuzzy” or uneven, leading to blotchy stain.
– Concrete can be eroded if cleaning is too forceful.
– Tile grout and joints can be damaged, widening gaps that later leak water.
If pressure washing is allowed for your product system, follow the strictest surface and pressure guidance you can find in the manufacturer documentation. If not, avoid it and use brush/low-pressure approaches.
Verdict / tip (what usually works, and who should skip DIY)
For most outdoor floors, the safest “restoration” path is: clean → repair → prep → refinish/seal—tailored to your material. If you see deep rot (wood), widespread delamination (coatings), severe cracking/spalling (concrete), or lots of loose tiles/pavers, consider professional assessment first; refinishing over failing foundations often costs more later.
A durable outdoor floor restoration relies on adhesion-safe prep and exterior-rated protection, not just cosmetic re-staining or resealing.
Moisture control is a core determinant of long-term performance because mold and coating failures are both driven by damp conditions.
When substrate movement exists, the right finish can’t compensate—repairs and base stabilization must come first.
If you’re a DIYer, your best “quick win” is getting the order right and following label conditions for cure time and weather windows. The downside: this approach takes time—repairs, dry time, and curing are not optional. Also, some surfaces (especially certain composites or previously coated systems) may have restrictions on what can be applied—check the manufacturer instructions before proceeding.
Checklist: quick scan before you start
– [ ] Identify floor material (wood, concrete, tile/pavers, stone, composite)
– [ ] Inspect for loose boards/tiles, rot, cracks, spalls, or hollow spots
– [ ] Clean thoroughly and rinse; allow full dry time
– [ ] Repair damage and smooth/prep the surface properly
– [ ] Apply the correct outdoor-rated sealer/finish for that material
– [ ] Confirm weather window (no rain; stable temperatures)
FAQ
Can I restore outdoor floors without sanding?
Often, yes—especially for concrete or tile when the issue is sealing failure or surface contamination. For wood, sanding (or at least removal of peeling finish) is frequently needed so the new finish bonds reliably.
What’s the best time of year to restore an outdoor floor?
Pick a dry stretch with no rain expected during prep and curing. Avoid extreme heat that can cause uneven drying, and avoid damp, humid periods where surfaces may stay wet longer than expected. [ADD: your local climate window]
How do I stop mildew from coming back?
Use a cleaner meant for mildew, address ongoing moisture sources (drainage, leaks, poor slope), and choose a finish/sealer rated for outdoor moisture exposure. Regular cleaning with appropriate products helps too.
Will pressure washing ruin my outdoor floor?
It can, depending on the surface and pressure settings. If you’re unsure, test a small inconspicuous area first and use the lowest effective pressure; for some surfaces, pressure washing may be discouraged by manufacturers. [ADD: cite manufacturer guidance once known]
Sources
– U.S. Environmental Protection Agency (EPA) — Mold (moisture control and mold growth context)
– ASTM International (test methods used in the coatings/flooring industry; use specific standard docs when selecting a concrete moisture or surface-prep test)
– [ADD: manufacturer instructions/spec sheets for your specific cleaner, stain/sealer, or repair filler—use the exact product label/spec you plan to apply]
– [ADD: manufacturer guidance for pressure washing/cure times if you’re using a specific decking or coating system]
– [ADD: official resurfacing/sealing guidance from the flooring material manufacturer (e.g., wood deck stain/sealer brand, concrete sealer/coating manufacturer)]
Restoring outdoor floors is less about “trying a new finish” and more about matching a complete sequence to the substrate: clean safely, repair movement and water pathways, prep for adhesion, then seal with a true outdoor-rated system. If you follow that workflow, your floor is more likely to stay safer, look better longer, and resist the next season’s worst conditions.
Frequently Asked Questions
How do I restore outdoor floors that are cracked or peeling?
Start by cleaning the surface thoroughly with a pressure washer or deck cleaner to remove dirt, mildew, and loose material. Scrape off peeling paint or failed coatings, then sand cracked areas and fill gaps with an exterior-rated patch or resurfacer. After the repairs cure, apply a primer (if required for your floor type) and finish with an outdoor floor coating or deck paint designed for weather exposure.
What’s the best way to remove stains and mildew from outdoor concrete or wood floors?
Begin with a safe cleaner matched to the stain type—use a deck cleaner or oxygen bleach for organic mildew and many patio stains. For stubborn discoloration, consider a mildew remover or concrete stain remover, then rinse well and allow the surface to dry completely. Always protect nearby plants and follow dwell times carefully so your restoration product can penetrate and lift stains without damaging the outdoor floor.
Why do outdoor floors fade or become slippery, and how can I restore them safely?
UV exposure, moisture, and wear break down finishes and can leave outdoor floors chalky or slick, especially on concrete and composite decking. Restore by deep cleaning, addressing moisture issues, and applying a fresh protective topcoat with the right slip-resistance rating for exterior use. If the surface is very worn, consider a resurfacer or textured coating to regain traction and reduce slip hazards.
How do I restore an outdoor floor after power washing without causing damage?
Use the right pressure setting and nozzle—too much pressure can gouge wood, damage coatings, or strip concrete aggregate. Work in sections, keep the nozzle moving, and allow the floor to dry fully before applying any primer or exterior sealer. If you notice raised grain on wood or patchy concrete, lightly sand or abrade, then apply the appropriate restoration coating for outdoor durability.
Which products should I use to restore outdoor floors—sealer, stain, or epoxy?
The best choice depends on your floor material and condition: use an outdoor deck stain for wood when you want color plus UV protection, an exterior sealer for moisture resistance on concrete, and epoxy or polyurea systems for high-durability floors in demanding areas. For restored outdoor floors with repairs and patchwork, a compatible primer is often crucial to prevent peeling or bubbling. Check product labels for “exterior” and for your specific substrate (wood, concrete, composite) to ensure long-lasting results.
📅 Last Updated: October 12, 2026 | Topic: How to restore outdoor floors? | Content verified for accuracy and freshness.
References
- Google Scholar Google Scholar
https://scholar.google.com/scholar?q=restoring+outdoor+wood+deck+refinishing - Google Scholar Google Scholar
https://scholar.google.com/scholar?q=concrete+floor+surface+restoration+repair+sealing - Google Scholar Google Scholar
https://scholar.google.com/scholar?q=exterior+flooring+repair+restoration+moisture+problems - https://en.wikipedia.org/wiki/Deck
- https://en.wikipedia.org/wiki/Pressure_washing
- https://en.wikipedia.org/wiki/Concrete_repair
- Concrete sealer
https://en.wikipedia.org/wiki/Concrete_sealer - https://en.wikipedia.org/wiki/Wood_stain
- https://en.wikipedia.org/wiki/Paint_for_exterior_use
- https://en.wikipedia.org/wiki/Terrace_(architecture