
Discoloration on kitchen floors doesn’t need guesswork—most cases are fixed quickly once you identify the cause (spill stain, grease film, mineral buildup, or water damage). This guide tells you exactly how to fix discoloration on kitchen floors with the right cleaning method and repair steps, so the surface looks even again. You’ll get a clear, practical path to results whether your floor is tile, vinyl, laminate, or wood.



If your kitchen floor looks discolored, the fastest path to a real fix is to first confirm whether the marks wipe off (surface residue) or spread/return (grime embedment or moisture damage), then clean with the safest method for your specific flooring type. Most discoloration is either a surface spill stain, grime buildup, or moisture-related damage—so the right treatment is about matching the cause, not just picking the strongest cleaner.
If you’re seeing dark spots, yellowing, white haze, or dull patches in traffic areas, this is for you. It’s especially useful if you’re not sure whether you should use a cleaner, a spot treatment, or a refinish—and you want a safer order of operations.
Step 1: Identify the discoloration (wipe test + pattern)
The first step is to determine whether the discoloration is sitting on top of the floor or has penetrated/affected the finish. The wipe test is your quickest diagnostic: if the color transfers or lightens, you’re dealing with residue or a surface stain; if it doesn’t change, you’re likely looking at embedded grime, finish wear, or a moisture-related effect.
A simple damp-cloth wipe test helps distinguish a surface contaminant from embedded discoloration because residue typically transfers and lightens while true etching/penetration won’t.
Localized, “spotty” staining usually points to spills, while discoloration that creeps from edges, under appliances, or near sinks often points to moisture exposure.
Broad dull patches in walking paths frequently indicate finish wear or a buildup of absorbed/ground-in soil rather than a single chemical stain.
Start with these observations (they matter more than the product label):
– Do a wipe test in an inconspicuous spot. Use a damp white microfiber cloth (water only) and gently press for 10–15 seconds.
– Watch what changes.
– Color transfers / lightens: surface residue, grease, dye, food, or cleaner buildup.
– No change: likely embedded grime, oxidation/finish alteration, mineral deposits, or etching on stone.
– Map the pattern.
– Single spots → spills and drips.
– Edge-only or “halo” around fixtures → leaks, damp mopping, or condensation at seams.
– Wide dull patches → finish wear, repeated cleaning residue, or soil grinding.
Also note timing: discoloration that develops quickly after a new spill behaves differently than gradual yellowing that correlates with repeated damp mopping.
According to the CDC, mold growth can begin within 24–48 hours after water damage, which is why moisture-related discoloration shouldn’t be treated as a “cosmetic only” issue [CDC: Mold basics / moisture timelines]. In kitchens, that timeline is often the difference between clean-up and a deeper moisture problem.
Step 2: Match the method to your floor type
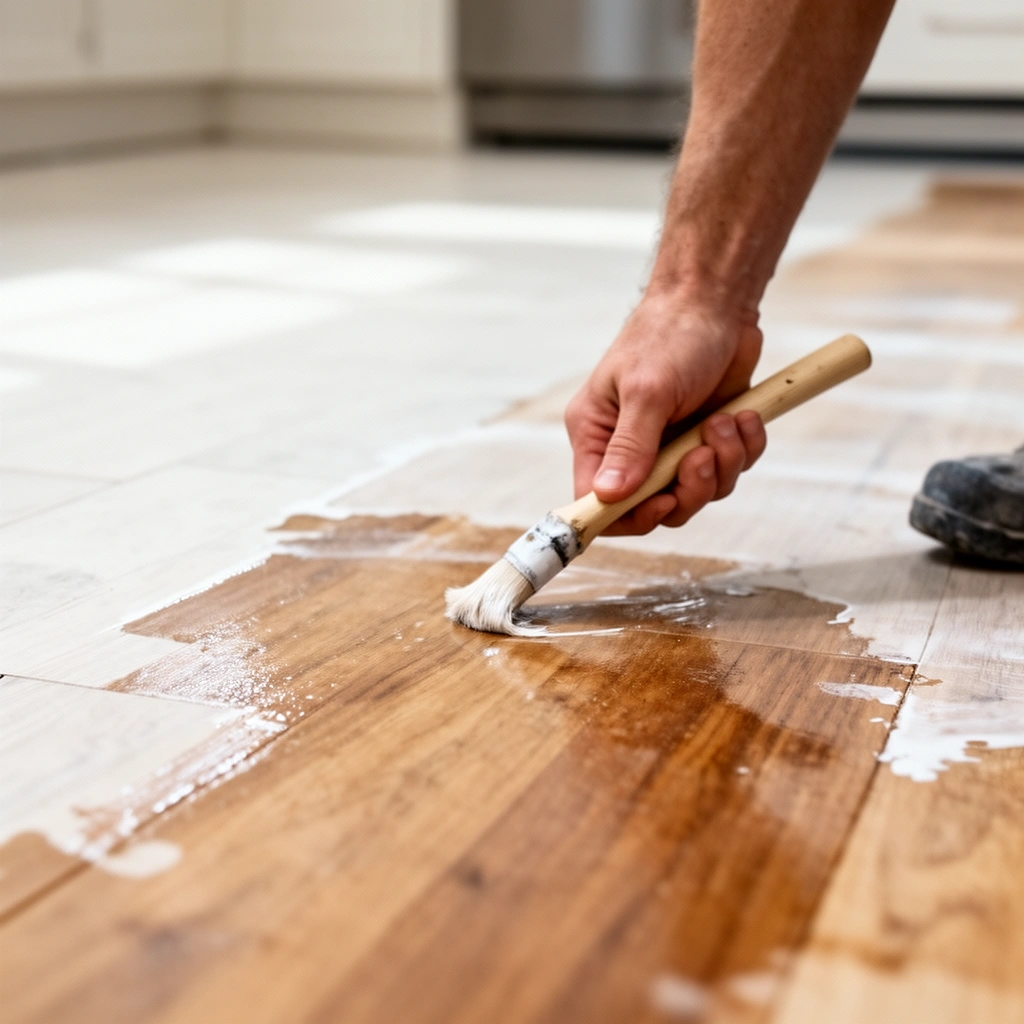
The right fix depends on your floor’s chemistry and finish—because the same cleaner can remove residue on one surface and permanently damage another. Matching the method to whether your floor is sealed (most resistance to staining) or unsealed/porous (higher risk of penetration) prevents “cleanup” from turning into etching or haze.
Sealed floors (commonly many LVP/vinyl, laminate, and most tile systems) typically respond best to pH-neutral cleaning because the finish limits penetration.
Porous or unsealed stone can absorb spills and oils, meaning stain removal may require material-specific chemistry rather than general-purpose floor cleaners.
Finish haze and dullness are frequently caused by residue, so the safest first attempt is thorough rinsing and drying before moving to aggressive spot treatments.
Use this quick decision logic:
If your floor is sealed hard surface (tile, many LVP/vinyl, most finishes)
– Focus on gentle cleaners, proper dilution, and complete rinsing.
– Avoid products that can strip or etch the finish unless your manufacturer explicitly approves them.
If your floor is unsealed/porous stone (natural stone without an effective topical barrier)
– Treat it like a material problem, not only a cleaning problem.
– Oil/grease-based discoloration may require a targeted stain remover for that stone type (e.g., marble vs. limestone vs. travertine), because general degreasers can spread the stain before they lift it.
If your floor is hardwood/engineered wood with a finish
– Discoloration often comes from finish wear, repeated damp exposure, or trapped residue that dulls the sheen.
– The “fix” is usually restoring clean conditions (and sometimes reconditioning/refinishing), not chemical stripping.
Step 3: Clean safely before “treating”
The safest and most effective first move is to clean using a chemistry that won’t damage your finish, then dry completely. Many “mystery stains” are actually detergent residue, grease film, or mineral haze—and if you treat before cleaning, you can lock that film in place.
For sealed flooring finishes, pH-neutral cleaners reduce the risk of finish dulling compared with acidic or alkaline products.
Rinsing matters: leaving cleaning solution residue can create a reflective haze that looks like discoloration even when the original stain has been removed.
Drying promptly prevents moisture from migrating at seams, grout joints, or edges where haze and edge yellowing commonly begin.
Here’s a practical, low-risk cleaning process you can apply to most kitchens:
1. Remove loose grit first
Sweep or vacuum with a soft head to avoid grinding abrasive particles into the surface.
2. Use warm water + pH-neutral cleaner (for sealed floors)
– Follow the dilution instructions on the bottle.
– Scrub gently using a non-scratch pad or a soft nylon brush.
3. Rinse thoroughly
– Even if the cleaner says “no rinse,” rinsing often improves haze outcomes because it removes surfactants (soap/residue-forming ingredients).
4. Dry completely
– Use clean towels or a microfiber mop head and avoid letting water sit near baseboards, under appliances, or along seams.
If discoloration disappears after Step 3, you’ve likely solved the problem—don’t immediately jump to spot chemistry.
If discoloration remains, the next step is targeted treatment based on the discoloration type (grease, haze, rust transfer, mineral deposits, or finish wear).
Step 4: Treat the most common causes
The best targeted treatment depends on what’s creating the discoloration: grease/food residue, white haze from residue/moisture, or rust/metal transfer. Once you’ve cleaned and dried, treat only what still remains—because over-treating is how floors end up permanently dull or patchy.
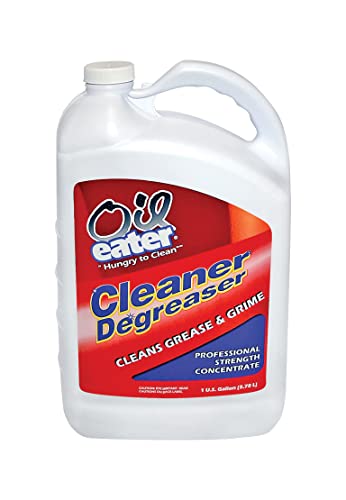
Grease stains often require a degreaser followed by a thorough rinse and dry, because oils can leave behind a film that re-soils and re-discolors.
White haze commonly comes from residue, hard-water/mineral deposits, or moisture-affected finish layers; rinsing is the first priority before stronger chemistry.
Rust transfer should be treated with rust-specific products and non-abrasive methods to avoid scratching or finish dulling.
Grease / food stains (darkened patches)
What to do
– Blot first (don’t scrub immediately), using paper towels or a microfiber cloth.
– Use a degreasing cleaner appropriate for your flooring type.
– Rinse thoroughly and dry.
Why it works
– Grease tends to behave like a film: it darkens when wet/oily, then leaves a residue that attracts additional dirt.
White haze (dull, cloudy areas)
What to do
– After cleaning, if the haze persists, try residue-removal chemistry that’s designed for your finish first (not random “magic erasers”).
– If the haze is actually finish-layer damage, you may need a finish-specific restoration process (or professional refinishing).
Rust / metal transfer (orange-brown specks or streaks)
What to do
– Use a product formulated specifically for rust stains on your flooring type.
– Avoid steel wool and aggressive abrasives that can scratch and amplify dullness.
Mineral deposits (sometimes look chalky or uneven)
What to do
– Treat with the right approach for your floor material—some stone and tile systems need specialized mineral deposit removers, while others can be damaged by the wrong acidity.
– If the flooring manufacturer prohibits acids/strong chelators, follow that guidance.
Quick comparison: what you’re likely dealing with
| Discoloration look | Most likely cause | Safest first action |
|---|---|---|
| Dark spot that wipes off | Surface grease/residue | Clean with pH-neutral + rinse |
| White haze after mopping | Soap/surfactant or mineral film | Rinse thoroughly; dry fast |
| Edge darkening near sink | Moisture exposure/leak | Fix source; then clean/dry |
| Orange-brown marks | Rust/metal transfer | Rust-specific remover + no abrasives |
Use chemistry wisely (pH and floor safety)
Different cleaners behave differently because their pH (how acidic/alkaline a liquid is) can affect finishes and stone. As a practical reference point, here are typical pH characteristics and how they relate to discoloration risk.
Typical Cleaner pH Ranges and Discoloration Risk on Finished Floors
| # | Cleaner / Chemical | Typical pH Range | Floor Finish Risk | Best Use Case |
|---|---|---|---|---|
| 1 | pH-neutral detergent (floor cleaner) | ~6–8 | ★ ★ ★ ★ ★ | Routine cleaning on sealed finishes |
| 2 | Mild alkaline degreaser | ~9–11 | ★ ★ ★ ★ ☆ | Grease film on robust sealed surfaces (follow label) |
| 3 | Household ammonia (diluted) | ~11–12 | ★ ★ ★ ☆ ☆ | Glass/spot cleaning; not a default for floor finishes |
| 4 | White vinegar (typical) | ~2.4–3.5 | ★ ★ ☆ ☆ ☆ | Only if manufacturer explicitly allows for your flooring |
| 5 | Citric acid cleaners | ~2–4 | ★ ★ ☆ ☆ ☆ | Mineral deposits on approved materials |
| 6 | Oxygen bleach cleaners | ~7–10 (formulation dependent) | ★ ★ ★ ☆ ☆ | Some disinfection/whitening tasks on approved finishes |
| 7 | Chlorine bleach solutions | ~11–13 | ★ ☆ ☆ ☆ ☆ | Usually NOT recommended for floor finishes unless manufacturer permits |
Note: “Finish risk” here is a practical risk ranking for discoloration/finish dulling based on pH and typical finish vulnerability. Always defer to your flooring manufacturer’s approved-cleaner list before using any chemical.
What can go wrong (and when to stop)
The most common reason discoloration persists is that the cleaning step was either too harsh for the finish or not thorough enough to remove residue. Stop and reassess when you see the discoloration spreading, reappearing quickly, or changing in texture (sharp edges, etching marks, or persistent haze).
Using bleach or strong acids can permanently dull or etch finishes and can cause uneven, patchy discoloration that’s harder to correct later.
Over-scrubbing can spread oil-based stains and create a “clean patch” with a different sheen, especially on coated floors.
If discoloration returns after drying or appears near baseboards/sink areas, the likely fix is moisture-source repair—not just stronger cleaning.
Watch for these failure modes:
– Wrong chemical, wrong material. Bleach, acids, and abrasive pads can cause irreversible dulling (especially on polished stone, delicate finishes, and some laminates).
– Scrubbing too hard. Aggressive scrubbing can grind residue into the pores or spread grease across a larger area.
– Skipping rinsing. Cleaner residue creates haze that looks like discoloration and often worsens over days.
– Ignoring moisture. If discoloration is near sink plumbing, under dishwashers, around refrigerator water lines, or along grout edges, treat it as a leak investigation first.
When to stop DIY:
– Discoloration spreads after treatment.
– You see signs of active moisture (soft flooring, bubbling, musty odor, recurring halos).
– The discoloration is consistent with finish layer damage (e.g., permanent sheen loss) where refinishing is usually the realistic remedy.
Verdict / tip: Use a cautious, floor-type-first approach
The best strategy is to start with the lowest-risk cleaning method, confirm what wipes off, and only move to targeted stain treatments if the discoloration is truly still there after proper cleaning. The downside is that this approach may take a couple of attempts—especially on porous materials or older finishes—so be patient and don’t jump straight to harsh products.
If you have unsealed stone, a damaged finish, or discoloration that’s tied to an active leak, skip DIY “miracle” chemicals and either consult your flooring manufacturer or a local flooring professional.
Quick checklist (scan/save)
– [ ] Do a small wipe test (does it lighten or transfer?)
– [ ] Identify floor type (sealed vs. unsealed; tile/stone/vinyl/wood)
– [ ] Clean first with pH-neutral cleaner (when appropriate); rinse and dry
– [ ] Treat only the likely cause (grease vs. haze/residue vs. rust)
– [ ] Test any product in a hidden area before full use
– [ ] If it spreads or keeps returning, check for moisture sources
FAQ
Will bleach remove discoloration on kitchen floors?
It depends on the flooring material and whether it’s sealed; bleach can permanently damage or dull many finishes and can react differently on stone. Check your flooring/manufacturer guidance first, and if you don’t have it, use a pH-neutral cleaner instead.
What if the stain won’t come out after cleaning?
If normal cleaning doesn’t change it, the discoloration may be embedded (especially on porous surfaces) or related to finish wear or moisture. Re-check the wipe test results and consider a treatment designed for your exact material; if there’s evidence of leaks, address the source.
Can I use a steam cleaner to remove kitchen floor stains?
Steam can be helpful on some sealed surfaces, but it can also drive moisture into grout lines or under flooring. [ADD: confirm your flooring manufacturer’s stance on steam for your exact product line] before using it.
Why do I see yellowing or darkening near the edges?
Edge discoloration often points to moisture exposure, cleaning residue buildup, or finish wear from repeated damp mopping. Look for drips, leaks, and wet-mopping habits; then clean and dry more consistently.
Sources
– CDC (Centers for Disease Control and Prevention): Mold basics and moisture-related growth timelines
– [ADD: Flooring manufacturer care/cleaning guidelines for your exact flooring type (LVP/vinyl, laminate, tile grout, sealed/unsealed stone, hardwood finish).]
– [ADD: Manufacturer documentation for approved cleaners/chemical compatibility, including whether bleach, acids, and steam are allowed.]
Discoloration on kitchen floors is usually fixable, but the “right” approach is cause-first: wipe test to confirm surface residue vs. true embedded/finish-moisture changes, then clean safely for your specific flooring type, and only then apply targeted stain treatment. If the marks spread or keep returning, treat it as a moisture or material-damage signal rather than a sign to use stronger chemicals.
Frequently Asked Questions
How do I remove water stains and discoloration on kitchen floors?
Start by identifying the type of discoloration—water stains often appear as light spots or rings and may be in the top surface. Blot (don’t scrub) with a pH-neutral cleaner and warm water, then try a stain-specific method like a vinegar-water solution for sealed surfaces or a hydrogen peroxide paste for light-colored spots on appropriate materials. If the stain doesn’t lift after gentle cleaning, you may need a professional-grade stone or floor refinishing product, especially for porous tile, grout, or unfinished wood.
What’s the best way to fix yellowing or dark spots on vinyl or linoleum kitchen floors?
Yellowing on vinyl or linoleum is commonly caused by UV exposure, cleaning residue, or spills that reacted with the floor finish. Use a vinyl-safe cleaner and a soft microfiber mop, and avoid harsh degreasers, bleach, or abrasive pads that can worsen discoloration. For stubborn marks, try an oxidation-remover formulated for vinyl flooring or a gentle paste cleaner recommended by the manufacturer, then rinse thoroughly and dry completely to prevent new haze.
Why do my hardwood or laminate kitchen floors look discolored after cleaning?
Discoloration after cleaning is often due to excess moisture, improper cleaners, or residue that builds up in high-traffic areas. Use a hardwood or laminate-approved cleaner and keep the floor dry—steam mops and soaking can cause permanent water spotting or finish dulling. For existing discoloration, gently clean with a manufacturer-recommended product first; deeper changes may require sanding and refinishing for hardwood or replacement for severely damaged laminate.
How can I clean and brighten discolored grout lines in a kitchen floor?
Grout discoloration usually comes from food grease, mildew, or everyday dirt that has settled into the pores. Apply a grout cleaner or a grout-safe oxygen bleach product, let it dwell per label instructions, then scrub with a stiff brush and rinse well. For ongoing discoloration, sealing grout after cleaning helps prevent grease and moisture from soaking in again and makes future kitchen floor maintenance easier.
Which home remedies are safe for fixing discoloration on tile kitchen floors?
For tile flooring, safer remedies include pH-neutral cleaners and oxygen-based cleaners (often more effective than vinegar for many grout and tile types). Avoid mixing chemicals, and steer clear of acidic solutions on natural stone like marble, limestone, or travertine because they can etch and create new discoloration. If the discoloration persists, use a tile-and-grout cleaner designed for your exact material or consider resealing grout to stop recurring staining.
📅 Last Updated: October 12, 2026 | Topic: How to fix discoloration on kitchen floors? | Content verified for accuracy and freshness.
References
- https://www.cdc.gov/mold/cleanup/index.html
- https://www.epa.gov/mold/mold-cleanup-guidance
- Wood flooring
https://en.wikipedia.org/wiki/Hardwood_floor - Concrete
https://en.wikipedia.org/wiki/Concrete - Vinyl flooring
https://en.wikipedia.org/wiki/Vinyl_flooring - Flooring
https://en.wikipedia.org/wiki/Flooring - Tile
https://en.wikipedia.org/wiki/Tile - Mold
https://en.wikipedia.org/wiki/Mold - Google Scholar Google Scholar
https://scholar.google.com/scholar?q=kitchen+floor+discoloration+stain+removal - Google Scholar Google Scholar
https://scholar.google.com/scholar?q=hardwood+floor+water+stain+repair+refinishing