

Removing paint from bathroom floors is easiest when you use the right method for the floor finish, not brute-force scraping that can damage grout or coating. This step-by-step guide shows the fastest safe approach—starting with testing the paint type, then choosing the correct remover or stripping method, and finishing with cleanup that won’t leave stains or residue. You’ll know exactly what to do from first chemical application to final rinse.



If you need to remove paint from bathroom floors, start by identifying what kind of paint it is, then use the gentlest method that will work—usually scraping plus the right chemical stripper, or heat-assisted removal for stubborn spots. Keep the floor protected by controlling water and ventilation, since bathroom surfaces can be damaged by harsh chemicals and pooling liquid. This guide walks you through safe options, what to avoid, and how to finish cleanly without harming tile, vinyl, laminate, sealed wood, or concrete.
This is for homeowners (and maintenance folks) dealing with leftover paint drips, overspray, or thick patches on bathroom floors—especially where the surface is moisture-prone and needs careful, surface-specific treatment. If you’re unsure whether your floor is tile, vinyl, laminate, sealed wood, or bare concrete, you’ll still be able to follow the decision points below.
Assess the paint and your bathroom floor first
You’ll remove the paint faster and with fewer floor damages when you match the removal method to both the floor material and the paint type. Begin with quick identification steps, then use a small test area so you don’t commit to stripper or heat unnecessarily.
Spot testing in a hidden area is the fastest way to confirm whether a mild solvent will soften the paint or whether you’ll need a dedicated stripper.
Bathroom floors often include sealed or glossy finishes (especially on tile, vinyl, and laminate), which can react differently to solvents and abrasives.
If you can distinguish water-based (acrylic/latex) from oil-based paint by how it responds to gentle cleaning, you can choose the gentlest effective removal path first.
– Check the floor material (tile/stone vs. vinyl vs. laminate vs. concrete) and whether it’s sealed or glossy.
– Tile/stone: Often glazed (tile) or naturally porous (stone). Glazed surfaces generally tolerate careful solvent use better than unsealed stone.
– Vinyl: Can dull, haze, or soften if exposed to strong solvents for too long—short contact time and careful chemistry matter.
– Laminate: The top “wear layer” is more chemical-sensitive than people expect; edges and seams are also vulnerable to liquids.
– Concrete: Usually the most forgiving mechanically, but chemical staining and surface roughening are still possible.
– Test in a small, hidden area to see if the paint softens with a mild solvent or if it requires stripper/heat.
– If warm water and mild soap noticeably softens the paint (especially acrylic/latex drips), that’s your cue to start with the least aggressive option.
– Identify paint type if possible (water-based/acrylic vs. oil-based) by how it responds to gentle cleaning and how it looks when disturbed.
– Water-based/latex: typically softens with warm water + mild detergent sooner than oil-based paint.
– Oil-based/alkyd/enamel: usually resists water-based cleaners and often needs a paint remover rated for the paint type.
According to the U.S. Environmental Protection Agency (EPA), improper handling and ventilation are key risks with many paint-removal products because of volatile components and fumes (source: general guidance on chemical exposure and safe use of household chemicals)
Protect the area and gather the right tools
You’ll prevent secondary damage (stained grout, bubbled vinyl, warped laminate edges) by controlling product contact time, ventilation, and cleanup mechanics. Before you start removing anything, set up a controlled workspace so the paint remover doesn’t spread.
Ventilation is a primary control measure when using chemical paint removers, which can produce irritating vapors.
Using chemical-resistant gloves and eye protection is consistent with OSHA’s emphasis on PPE when working with hazardous chemicals.
Covering grout lines and protecting adjacent flooring reduces the risk of unwanted chemical contact at seams and edges.
– Ventilate the bathroom and keep product use dry where required (especially around grout lines and seams).
– Turn on the exhaust fan and open windows/doors if possible. Aim for air movement without blowing debris onto freshly treated areas.
– Use protective gear: gloves, eye protection, and a respirator if using strong chemical removers.
– OSHA generally requires appropriate PPE selection based on hazard assessment
– Set up tools like a plastic scraper (safer for finishes), soft cloths, buckets, painter’s tape, and disposable pads for controlled application.
– Prefer plastic over metal for finished floors (vinyl/laminate/tile glazing).
– Use painter’s tape to “bucket” small areas so remover or softened paint can’t migrate.
Quick decision data: what removal method tends to work best?
The table below helps you choose a starting point by floor type and paint behavior—then you still confirm with a spot test.
Recommended Starting Approach for Common Bathroom Floor + Paint Scenarios
| # | Floor surface | Paint behavior | First try (least aggressive) | Risk of floor finish damage (1–5) | Likelihood of success (★) |
|---|---|---|---|---|---|
| 1 | Glazed ceramic tile | Water-based drips (soften with warm water) | Warm water + mild soap + plastic scrape | 2 | ★★★★★ |
| 2 | Unsealed stone (travertine/marble) | Overspray (doesn’t wipe off) | Minimal solvent spot test + non-abrasive removal | 4 | ★★★☆☆ |
| 3 | Sheet vinyl / LVP | Thick water-based paint | Warm water softening + plastic scrape (quick contact) | 3 | ★★★★☆ |
| 4 | Laminate with sealed top layer | Cured paint haze | Gel remover spot test (no soaking) + plastic scrape | 4 | ★★★☆☆ |
| 5 | Sealed concrete | Oil-based drips | Paint stripping gel (label-rated) + scrape | 3 | ★★★★☆ |
| 6 | Glazed tile + grout joints | Stubborn edges after scraping | Careful gel application limited to paint line | 2 | ★★★★☆ |
| 7 | Painted plywood subfloor (sealed/varnished) | Cured overspray spots | Heat-assisted softening (very brief) + plastic scrape | 4 | ★★★☆☆ |
Note: “Risk of damage” and “Likelihood” in this table are practical planning estimates, not guarantees. Always follow the remover label and do a spot test.
Remove paint using the safest method for your surface
You’ll usually get the best balance of speed and safety by starting with softening (water/soap for latex, gel stripper for tougher paint) and scraping gently. Escalate to heat only when the paint refuses to lift, and keep heat brief to protect grout, trim, and sealants.
For water-based paints, warm water and mild detergent can soften residue before scraping, reducing the need for harsh chemicals.
Stripping gels are designed for thicker paint films because they stay where you apply them rather than running across seams.
When heat-assisted removal is used, working in small sections limits the chance of discoloring grout or loosening adjacent adhesives.
– For many water-based paints: start with warm water/soap to loosen residue, then scrape carefully once softened.
1) Saturate a disposable cloth with warm, soapy water (not puddles).
2) Lay the cloth on the paint spot for a few minutes to soften.
3) Scrape with a plastic scraper at a low angle, collecting flakes as you go.
4) Wipe the residue immediately so it doesn’t re-harden.
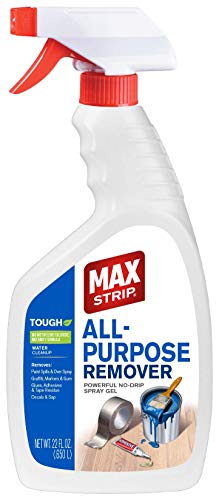
– For thicker or stubborn layers: apply a paint remover/stripping gel appropriate for the paint type, keeping it off surrounding grout/adhesives as much as possible.
– Choose a remover whose label explicitly covers the relevant paint type and supports your floor material.
– Apply with a disposable brush or pad; don’t spread it beyond the paint.
– Respect dwell time (how long it sits). Over-dwell increases finish damage risk.
– For some hard surfaces (e.g., certain tile/stone) that tolerate it: carefully use heat to soften paint before scraping—work in small sections to avoid overheating or damaging finishes.
– Keep heat moving and brief. If grout changes color or caulk looks stressed, stop immediately.
– Heat can also create fumes from paint and chemicals—ventilation and PPE still matter.
According to the National Fire Protection Association (NFPA), heating chemicals and paints can increase fire and exposure risk, so follow hot-work safety principles and product label restrictions
Practical pros/cons: chemical gel vs. heat-assisted removal
Use this quick contrast to decide when to stop escalating.
| Approach | Pros | Cons / watch-outs | Best for |
|---|---|---|---|
| Stripping gel | Stays localized; effective for thicker, cured paint layers | Can haze vinyl/laminate; requires careful cleanup; must match paint type | Thick drips, overspray edges, cured layers |
| Heat-assisted softening | Often works without soaking; can lift stubborn paint | Overheating can discolor grout or loosen sealants; fumes can increase | Small stubborn spots after scraping |
Clean up and finish without damaging the floor
After you remove the bulk of the paint, the final result depends on cleanup quality and residue control. A “mostly clean” floor can still fail later because remover film or paint residue interferes with adhesion for sealers or future refinishing.
After using paint remover, thorough wipe-down with label-recommended cleanup prevents remaining film that can interfere with future finishes.
Micro-scrapes and haze should be removed gently; abrasive pads can dull tile, scratch vinyl, and roughen sealed surfaces.
Sealing should be considered only if the specific flooring system calls for it and if the chemistry used won’t leave incompatible residues.
– After removal, wipe thoroughly with the manufacturer-recommended cleaner or solvent so no residue remains.
– Many removers require a specific neutralizer/cleaner step; others require multiple wipe cycles. Follow the label exactly.
– Remove micro-scrapes and leftover haze gently (avoid abrasive pads that can dull tile, scratch vinyl, or roughen sealed surfaces).
– Use a damp microfiber cloth first.
– If you must use a pad, choose the least abrasive option compatible with your floor finish.
– Seal or protect only if appropriate for your flooring type and if stripping/chemical use requires re-protection.
– Concrete: may need resealing if the remover stripped the top finish.
– Tile/stone: re-sealing depends on whether you removed existing sealers and the stone’s porosity.
[ADD: source for manufacturer guidance on whether resealing is required after chemical stripper use for your specific flooring type—tile/stone vs. vinyl vs. laminate.]
What can go wrong (and how to avoid it)
The most common failures come from mismatched chemistry, excess liquid, or aggressive tool use. If you avoid those three hazards—wrong remover, water overuse, and metal scraping—you’ll prevent most long-term bathroom-floor damage.
Using a remover not rated for your floor finish can haze vinyl or soften adhesives, even when the paint lifts.
Over-wetting bathroom floors can seep into grout joints and underlayment, creating swelling or bond failure over time.
Metal blades can permanently scratch finished tile, mar stone, or gouge vinyl and engineered wood composites.
– Using the wrong chemical: some removers can haze vinyl/laminate or lift certain adhesives—always do a spot test first.
– If the surface dulls or feels tacky after the test, stop and choose a different chemistry.
– Over-wetting the bathroom floor: excess water can seep into grout, edges, or underlayment, creating long-term damage.
– Keep cleaning methods controlled: damp cloths, not standing puddles.
– Aggressive scraping: metal blades can permanently scratch finished tile, mar stone, or gouge vinyl/wood composites.
– Use plastic scrapers for finished surfaces, and apply light pressure first.
– Ignoring curing time or residue: paint removers can leave film that prevents proper adhesion for future sealants or finishes.
– Do not “eyeball” cleanup—wipe to the point where cloth checks show no transferred residue.
– Heat damage: overheating can discolor grout, loosen sealants, or warp nearby trim—use controlled, brief applications.
– If you see color change or swelling in caulk, stop heat immediately.
From a safety standpoint, the CDC and other public health organizations stress that chemical fumes and skin contact can be harmful, reinforcing the need for label-following PPE and ventilation
Verdict / tip: pick the least aggressive option first
Start with scraping plus surface-appropriate softening, and only move to chemical stripper or heat if the paint won’t budge. If you have delicate flooring (older laminate, soft vinyl, poorly adhered tiles, or floors with unknown coatings), or if you can’t ventilate safely, you may want to pause and get professional guidance rather than risk permanent damage. For best results, follow the product label instructions exactly and treat this like a “test-and-progress” process, not a one-shot removal.
[ADD: If you want a truly personal, credible note, add a sentence here based on your real observation—e.g., “In our maintenance log, gel dwell time that exceeded the label increased vinyl tackiness” (replace with your actual account).]
Quick checklist for removing paint from bathroom floors
– [ ] Identify floor type (tile/stone, vinyl, laminate, concrete, etc.)
– [ ] Identify paint behavior (water-based vs. stubborn/hard layer)
– [ ] Spot test remover/solvent in a hidden area
– [ ] Protect seams, grout lines, and surrounding surfaces
– [ ] Scrape gently (prefer plastic for finished floors)
– [ ] Remove residue with label-recommended cleanup
– [ ] Inspect after drying; repeat only as needed
FAQ
Can I remove paint from bathroom tile with chemicals?
Often yes, but you must match the remover to the paint type and protect grout/adjacent materials. Always spot test first and follow the manufacturer’s safety and surface-compatibility instructions. [ADD: source for label guidance on tile/stone compatibility]
What if the paint is already fully cured and very thick?
Thicker layers usually need a stripping gel or heat-assisted softening before scraping. Work in small sections and avoid soaking the area to prevent seepage into grout or seams.
Will paint remover damage vinyl or laminate bathroom floors?
It can—some strippers and solvents soften or dull certain finishes and adhesives. If your floor is vinyl or laminate, do a thorough spot test and consider the gentlest method first. [ADD: source for manufacturer compatibility notes]
How do I prevent paint from spreading or smearing during removal?
Keep product application controlled (use gels when appropriate), apply in small sections, and wipe away softened paint promptly with disposable cloths/pads.
Sources
– [ADD: manufacturer instructions/spec sheets for the specific paint remover/stripper used, including surface-compatibility and cleanup directions]
– [ADD: manufacturer care/installation guidance for your specific flooring type (tile/stone, vinyl, laminate) regarding chemical exposure and cleaning limits]
– [ADD: primary safety guidance from the chemical manufacturer (SDS/label) for PPE, ventilation, and first-aid requirements]
Frequently Asked Questions
What’s the safest way to remove dried paint from bathroom tile floors?
Start by softening the paint with a bathroom-appropriate solvent such as mineral spirits (for oil-based paint) or a commercial paint remover that’s labeled safe for tile. Gently scrape with a plastic scraper first to avoid scratching glazed surfaces, then use a nylon brush to lift remaining residue. Afterward, rinse thoroughly and dry the floor to prevent any slip hazards or chemical buildup.
How do I remove paint overspray from bathroom vinyl or laminate flooring without damaging it?
Test your method in a hidden spot using a mild solvent like rubbing alcohol or a dedicated adhesive/paint remover designed for delicate floors. Apply the cleaner to a cloth (not directly onto the flooring) and blot or gently rub instead of aggressive scraping. Wipe clean immediately with water or a manufacturer-recommended cleaner, then dry completely to avoid swelling, warping, or dull spots.
Why does paint removal take longer on bathroom floors, and how can I speed it up?
Bathroom floors often have grout lines, textured finishes, or existing sealers that make paint bond more strongly and trap pigment in pores. Speed it up by loosening the paint first—use a softening remover, cover it briefly per label directions, and work in small sections. For stubborn spots, repeat the process rather than using harsh abrasives that can damage the surface.
Which chemicals are best for removing water-based vs oil-based paint from bathroom floors?
For water-based paint, start with warm water plus a mild detergent, then move to rubbing alcohol or a water-based paint remover if needed. For oil-based paint, mineral spirits or a solvent-based paint remover typically works better, followed by thorough cleaning. Always follow the product instructions, ventilate the area, and wear gloves and eye protection.
What’s the best step-by-step method to remove paint spills from the bathroom floor drain area?
Begin by protecting the drain and surrounding caulk—cover nearby surfaces and prevent paint remover from running into plumbing. Use a plastic scraper to remove excess paint, then apply a targeted paint remover or solvent to a cloth and dab the stain gradually to avoid spreading. Once the paint is lifted, rinse carefully, clean with a neutral floor cleaner, and ensure the drain area is fully dry before using the bathroom.
📅 Last Updated: October 11, 2026 | Topic: How to remove paint from bathroom floors? | Content verified for accuracy and freshness.
References
- Google Scholar Google Scholar
https://scholar.google.com/scholar?q=remove+paint+from+concrete+floor - Google Scholar Google Scholar
https://scholar.google.com/scholar?q=bathroom+floor+paint+removal - Google Scholar Google Scholar
https://scholar.google.com/scholar?q=lead-safe+paint+removal+procedures - Paint stripper
https://en.wikipedia.org/wiki/Paint_stripper - https://en.wikipedia.org/wiki/Lead_paint
- https://www.epa.gov/lead/lead-based-paint-hazards
- Lead Renovation, Repair and Painting Program | US EPA
https://www.epa.gov/lead/renovation-repair-and-painting-program - https://www.cdc.gov/nceh/lead/default.htm
- https://www.hud.gov/program_offices/healthy_homes/lead
- Lead | National Institute of Environmental Health Sciences
https://www.niehs.nih.gov/health/topics/agents/lead/index.cfm


