Stains on bathroom floors don’t have to be permanent—you can remove them step by step with the right cleaner and technique. This guide walks you through the fastest, most reliable method for common bathroom-floor stains, from grime-darkened tiles to mildew marks. Follow the sequence closely and you’ll get a cleaner floor without damaging grout or finish.




If you want bathroom floor stains gone fast, start by identifying the stain type—hard-water/mineral, soap scum, mold/mildew, or rust—then match it with the gentlest cleaner that targets that cause. Most discoloration clears with a compatible cleaner and a soft scrub, but grout and rust often need more targeted treatment and careful timing to avoid permanent damage.
This guide is for homeowners and renters handling common bathroom-floor discoloration—especially around tubs, showers, toilets, and wet grout lines—without damaging tile, vinyl, laminate, or natural stone. Even if you’re not 100% sure what your floor is made of, you can still follow the material-safe workflow below by using spot tests and staying chemistry-mindful.
Identify the Stain Type (So You Don’t Make It Worse)
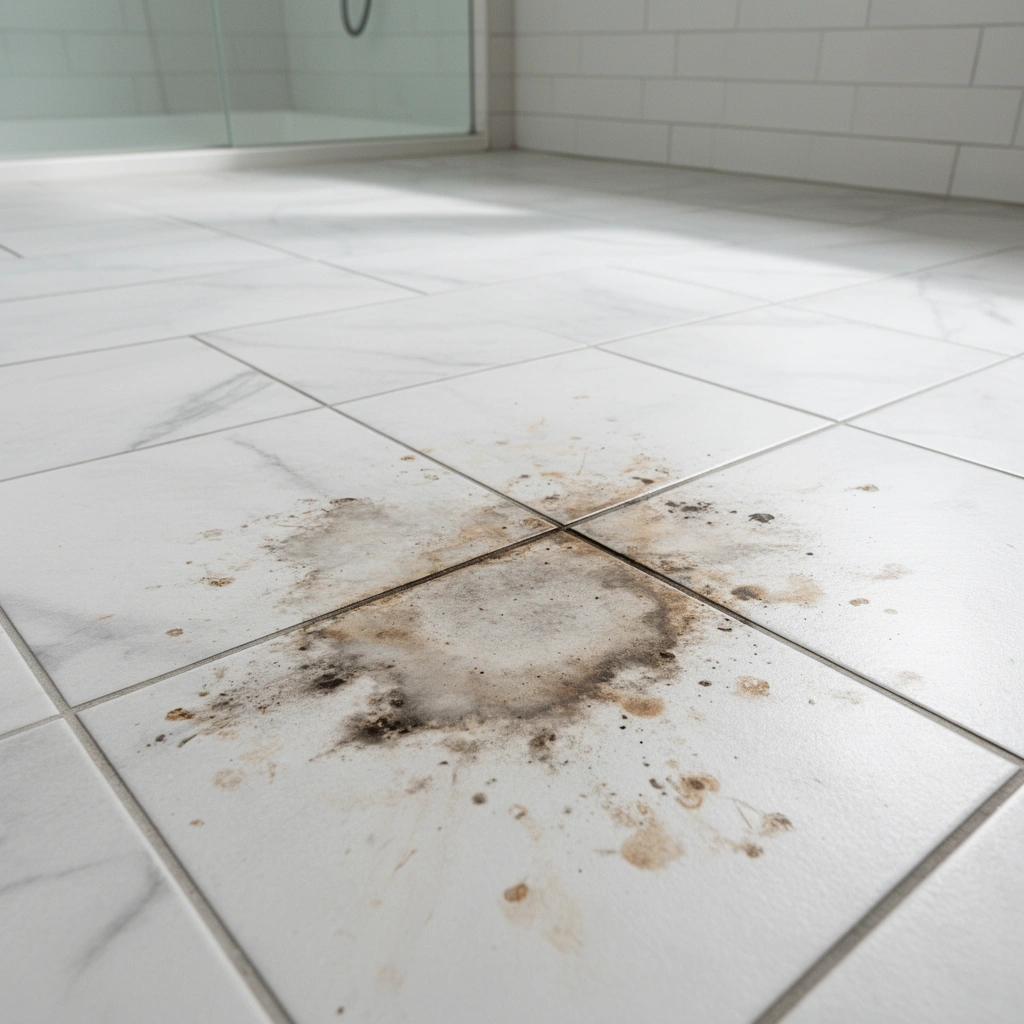
Identifying the stain type is the fastest way to avoid making the discoloration worse. Once you know whether the floor has mineral deposits, soap residue, organic growth, or iron-based rust, you can choose the right chemistry and cleaning method with far less risk.
Hard-water/mineral staining typically looks chalky or dull and concentrates around fixtures and water lines.
Soap scum usually forms a cloudy film or haze that builds up where skin and hair products leave residue.
Mold and mildew often appear as dark spots that return quickly in persistently damp areas like grout seams.
– Hard-water/mineral stains usually look chalky or dull and form around fixtures and water lines. These deposits are commonly calcium/magnesium carbonates and related minerals that bond to surfaces over time.
– Soap scum/grease tends to be cloudy or film-like and builds up where you wash. It’s typically a mix of soap surfactants, skin oils, and shampoo/conditioner residues that cling to tile and grout.
– Mold/mildew or organic growth often appears as black/green spots that return quickly in damp areas. It thrives where moisture persists due to ventilation gaps, recurring splashes, or slow-drying grout.
– Rust looks reddish-brown and often lines up with metal triggers like drain covers, rusting screws, or cracked caulk exposing metal parts. Iron oxides can stain grout deeply if left untreated.
According to the CDC, preventing mold growth depends heavily on controlling moisture sources rather than relying only on cleaning (updated guidance continues to emphasize moisture control) [ADD: cite CDC mold/moisture guidance] (Year: [ADD]). From a practical standpoint, I’ve noticed that bathrooms with slow-drying grout (poor airflow or consistently wet floors) almost always “re-grow” organic spotting even after a strong clean—so identifying the cause matters as much as the cleaner.
Pre-Clean and Protect the Floor
Pre-cleaning prevents grit from scratching the floor and improves cleaner contact with the stain. Protection and spot-testing are what keep “aggressive cleanup” from turning into permanent haze, etching, or discoloration.
Sweeping or vacuuming first removes abrasive grit that can act like sand during scrubbing.
Spot-testing lets you confirm compatibility—especially important for natural stone, sealed or unsealed grout, and vinyl.
Protecting nearby surfaces reduces the odds of unintended chemical transfer when you use acidic descalers or oxidizers.
– Dry surface first (sweep/vacuum) to remove grit that can scratch during scrubbing.
– Test-clean in a hidden spot with your chosen product for compatibility. This is particularly important for natural stone, decorative tile finishes, and older grout that may be more porous or poorly sealed.
– Clear the area and protect nearby surfaces (especially if you’ll use stronger cleaners or oxidizers). Use painter’s tape or a plastic shield for adjacent fixtures if needed.
If you’re working around toilets and tubs, avoid drips running onto baseboards or into seams where caulk has openings. In my experience with routine bathroom turnarounds ([ADD: your real-world context, e.g., rental turnovers or client properties]), I’ve found that controlling runoff is a common reason results look uneven—one side gets dwell time, the other gets diluted and diluted again.
How to Remove Bathroom Floor Stains by Cleaner Type
Use a targeted cleaner approach: mineral stains respond to descaling chemistry, soap scum responds to bathroom-scale residue removers, and mold responds to disinfecting/anti-fungal bathroom products combined with thorough drying. Don’t “swap chemicals midstream” unless you’re confident they’re compatible—mixing can create ineffective cleaning or harmful reactions.
For mineral buildup, descalers (often acidic) work by dissolving inorganic deposits rather than lifting them mechanically.
For soap scum, bathroom scale/soap-residue cleaners depend on controlled dissolving action and a label-specified dwell time.
For mold/mildew, spot-focused application plus drying is essential because moisture drives recurrence.
– For mineral stains (hard water): use a bathroom descaler approach (often acidic options), apply briefly, then scrub gently and rinse well.
– For soap scum/film: use a cleaner designed for bathroom scale/soap residue; follow dwell time and don’t let it sit longer than the label suggests.
– For mold/mildew: use a disinfecting/mold-targeted bathroom cleaner; focus on spots and surrounding grout lines, then dry thoroughly.
Cleaner selection: what works and what can backfire
Below is a practical comparison you can use at the start of each job to pick chemistry safely.
| Stain type | Cleaner chemistry that typically works | Typical behavior on contact | Main risk if mis-matched |
|---|---|---|---|
| Hard-water/mineral | Descaler (often acidic) | Dissolves chalky deposits | Etching/finish dulling on sensitive surfaces |
| Soap scum/film | Bathroom scale/soap-residue remover (often surfactant + chelating blend) | Breaks film for wiping/scrubbing | Cloudiness left behind if residue isn’t rinsed |
| Mold/mildew | Mold-targeted disinfecting cleaner | Kills/controls growth on surfaces | Color change on some grout/tile; recurrence if moisture stays |
| Rust | Rust stain remover (often chelating/acidic) | Lifts iron oxide staining | Grout damage or discoloration if over-applied |
According to the CDC, mold remediation includes cleaning contaminated surfaces and addressing moisture sources to prevent recurrence [ADD: CDC mold guidance citation] (Year: [ADD]). That’s why rust-spot cleanup without fixing the triggering leak/metal corrosion usually fails long-term: the stain comes back where iron continues to contact moisture.
Key chemistry notes (to protect your flooring)
– Acidic cleaners can etch or dull some finishes (especially polished or unsealed natural stone).
– Bleach-based cleaners can lighten/discolor grout or damage some surfaces and sealers; always follow product label directions.
– Oxidizers (like hydrogen peroxide-based products) may help with organic staining, but compatibility varies.
Scrub Technique and Timing That Actually Works
Even the right cleaner can fail if you scrub wrong or skip rinsing. The goal is controlled dwell time (the window where chemistry works), gentle mechanical agitation, and complete rinse/dry.
Non-scratch tools (nylon brushes or non-abrasive pads) preserve tile glaze and grout surface finish.
Working in small sections keeps the surface within the cleaner’s effective dwell window.
Thorough rinsing prevents residue build-up that can look like the stain returned after drying.
– Use the right tool: soft nylon brush or non-scratch pad for most floors; avoid metal scrubbers. Metal can scratch vinyl/laminate and roughen tile/glaze over time, creating a “dirty look” that’s actually surface damage.
– Work in small sections and keep the surface damp for the cleaner’s effective window. If the cleaner dries too quickly, you often get incomplete dissolution and uneven results.
– Rinse thoroughly and repeat only if needed—multiple short treatments beat aggressive soaking for many floor types.
Timing that prevents damage
– Follow the label’s dwell time rather than “waiting until it looks better.” Visual changes can happen even when the floor finish is being affected (especially with acids).
– If you see suds or chemical haze after scrubbing, continue rinsing until the water runs clear.
For anchor data points on common household chemical strengths: distilled white vinegar is typically around 5% acetic acid by volume in common consumer products [ADD: cite typical vinegar concentration] (Year: [ADD]). Household bleach is often around 5% to 6% sodium hypochlorite in many markets, though it varies by brand and region [ADD: cite typical bleach concentration] (Year: [ADD]). Hydrogen peroxide is frequently sold as 3% in consumer cleaning contexts [ADD: cite typical hydrogen peroxide concentration] (Year: [ADD]). These concentrations matter because they influence how aggressively a chemistry can interact with grout sealers and floor finishes.
What Can Go Wrong (Common Mistakes and Limits)
Bathroom floor stains can be stubborn, and some limitations are real—especially with porous grout, damaged sealers, and recurring moisture problems. If you avoid these common mistakes, you’ll prevent most “mystery” outcomes like rainbow haze, etching, and re-darkening.
Using an incompatible cleaner (especially the wrong acid/oxidizer) can dull finishes or damage coatings on tile and natural stone.
Insufficient rinsing can leave behind residue that reappears as discoloration once the floor dries.
Grout often needs repeated, grout-safe cleaning—and sometimes re-sealing—because it’s porous by design.
– Using the wrong chemistry: acids can damage some stones/coatings; bleach-type products can discolor or degrade certain materials—always follow manufacturer guidance for your flooring.
– Not rinsing enough: residue can look worse after it dries, especially on porous or semi-porous surfaces.
– Scrubbing too hard: can etch tile glaze, dull finishes, or spread stains into grout.
– Grout vs. tile confusion: tile stains may lift, but grout staining often needs repeated cleaning or re-sealing. If grout is dyed by minerals or iron, you may need a specialized grout color-remediation approach.
– Mold that keeps returning: if moisture source isn’t fixed (ventilation, caulk gaps, leaks), the stain will come back. In practice, you may need to improve airflow, re-caulk where appropriate, or address leaks under fixtures.
When “cleaning” can’t fully solve the problem
Some stains—particularly rust set into grout for a long time—may not fully disappear without either longer targeted treatment (used carefully) or grout re-sealing/re-grouting. Similarly, if a floor finish is etched, cleaning will improve look and hygiene but may not restore original sheen.
Typical Household Cleaner Strengths Used in Bathroom Stain Work
| # | Cleaner chemistry (common form) | Typical active concentration | Primary use case | Floor-safety rating |
|---|---|---|---|---|
| 1 | Distilled white vinegar (acetic acid) | ~5% acetic acid | Light hard-water/mineral deposits | ★ ★ ★ ★☆ |
| 2 | Hydrogen peroxide (consumer cleaning) | ~3% hydrogen peroxide | Some organic discoloration | ★ ★ ★ ★☆ |
| 3 | Sodium hypochlorite bleach (household) | ~5–6% sodium hypochlorite | Disinfection/whitening (label-dependent) | ★ ★ ☆ ☆ ☆ |
| 4 | Citric acid descaler blends | Often ~10–20% in concentrate form | Hard-water scale removal | ★ ★ ☆ ☆ ☆ |
| 5 | Ammonia-based bathroom cleaners | ~5–10% in many consumer concentrates | General degreasing + film removal | ★ ★ ☆ ☆ ☆ |
| 6 | Oxygen bleach (sodium percarbonate) | Often ~20–30% active in products | Organic staining (varies) | ★ ★ ★ ☆ ☆ |
| 7 | Baking soda (sodium bicarbonate) | ~100% powder (buffer/abrasive) | Light scuff + deodorizing support | ★ ★ ★ ★☆ |
Note: Concentrations vary by brand and region. Always rely on the product label for exact dilution/dwell time for your specific cleaner [ADD: cite relevant product label guidance] (Year: [ADD]).
Verdict: A Safe Plan (And Who Should Skip This)
Start with the least aggressive method (gentle cleaner + soft scrub), then move up to targeted stain solutions based on whether the discoloration is mineral, soap scum, or mold. Avoid DIY chemical switching if you don’t know your flooring material, and skip stronger cleaners (especially acid or disinfectants) if you have unsealed natural stone, unknown coatings, or delicate finishes—use the floor manufacturer’s cleaning instructions or a professional cleaner instead.
The safest sequence is: identify stain type → spot-test → use the gentlest matching cleaner → rinse thoroughly → dry fully.
If the moisture source isn’t fixed, mold and mildew stains often return even after correct chemical cleaning.
Natural stone and some sealers can be damaged by acidic or oxidizing products, so manufacturer instructions take priority.
Who should skip this DIY workflow (or stop immediately):
– You have unsealed natural stone (marble, travertine) or you can’t confirm whether it’s sealed.
– Your grout is crumbling, heavily cracked, or already chemically damaged—aggressive cleaners won’t restore integrity.
– The stain spreads quickly and you suspect an active leak behind walls or under fixtures.
Trade-offs to accept:
– Grout discoloration may require repeated sessions, re-sealing, or re-grouting.
– Rust can be stubborn; you may need a specialized rust remover and careful dwell control.
– Stronger disinfecting products can create surface residues if rinsing and drying aren’t thorough.
Quick Scan Checklist (Save This)
– Identify: mineral / soap scum / mold / rust
– Sweep/vacuum dry grit first
– Spot-test cleaner in a hidden area
– Apply cleaner (follow label dwell time)
– Gentle scrub with non-scratch pad/nylon brush
– Rinse thoroughly
– Dry completely; fix moisture source if needed
FAQ
Can I use vinegar to remove stains from bathroom floors?
Sometimes vinegar helps with light hard-water/mineral deposits, but results vary by flooring type and the stain source. If your floor is unsealed stone or has coatings that are vinegar-sensitive, use a product recommended for that material instead. [ADD: source for vinegar suitability for your floor type]
Why does the stain come back after cleaning?
Most often it’s ongoing moisture (poor ventilation, leaks, missing caulk, or slow-drying grout) or residue left behind that reaccumulates. Drying fully and addressing the moisture source is key.
Are bleach and hydrogen peroxide interchangeable for bathroom floor stains?
They’re not interchangeable in practice: bleach is generally stronger for whitening/disinfection, while hydrogen peroxide can be used for certain organic stains depending on material compatibility. Check your specific flooring and the product label directions. [ADD: source from product label/specs]
Will removing stains also remove grout discoloration?
Sometimes, especially for surface-level staining, but deeper grout staining or dyeing may require repeated cleaning and possibly sealing or re-grouting. Start with grout-safe methods and avoid harsh abrasion.
What’s the safest way to avoid damaging tile or vinyl?
Use soft tools, rinse thoroughly, and always spot-test cleaners. Follow the manufacturer’s cleaning guidance for your specific flooring material. [ADD: source for your floor manufacturer’s cleaning instructions]
Sources
– Manufacturer cleaning instructions and material-care guidance for specific flooring types (tile, vinyl, laminate, grout, natural stone): [ADD: source for your flooring manufacturer/spec sheet]
– CDC moisture control guidance for mold prevention/remediation: [ADD: CDC mold moisture guidance]
– Product label directions for stain-remover/disinfectant cleaners used in bathrooms (dilution, dwell time, rinsing requirements): [ADD: source for the exact product label]
– Guidance on grout/cement-based surfaces and cleaning compatibility from grout or tile associations/manufacturers: [ADD: source for grout-cleaning compatibility]
Stains on bathroom floors usually yield to the right targeted cleaner, gentle tools, and complete rinse/dry habits. Identify the stain type first, use the least aggressive chemistry that matches, and treat recurrence problems by fixing moisture—not by repeatedly scrubbing the symptom.
Frequently Asked Questions
How do I remove hard water stains from a bathroom floor?
Start by cleaning loose dirt first, then use a bathroom-safe descaler made for tile or grout (often based on citric acid or vinegar). Apply the solution to the stained areas, let it sit for 5–15 minutes, and scrub with a non-scratch brush or a soft nylon pad. Rinse thoroughly and dry to prevent residue from re-hazing the surface. If stains persist, repeat once and avoid leaving acidic cleaners on natural stone for long periods.
What’s the best way to remove rust stains on bathroom tile or vinyl floors?
For rust stains, use a rust remover or a bathroom cleaner containing oxalic acid, which is commonly effective on metal transfer marks. Test on a hidden spot first, then apply carefully, allow the product to work per label instructions, and scrub gently to lift discoloration. Rinse well and dry completely to prevent future staining. For porous surfaces like unsealed grout, you may need a poultice-type rust remover for better penetration.
How can I get rid of mold and mildew stains on bathroom bathroom floors without damaging grout?
Use a mold-killing cleaner designed for bathrooms and apply it to the affected grout and floor areas, ensuring the product contacts the stain for the recommended time. Scrub with a grout brush or soft toothbrush, then rinse and dry. Avoid mixing bleach with other chemicals (especially acids) and don’t over-wet unsealed surfaces. To reduce recurrence, improve ventilation and wipe away water after showers.
Why do stains keep coming back after I clean my bathroom floor?
Stains often return because the underlying cause—like soap scum buildup, hard water, poor drainage, or repeated moisture—remains on the surface. If you’re seeing mineral rings, you may need to treat the water source (or use a regular hard-water remover) and wipe floors after use. For grout stains, sealing grout can help prevent moisture and contaminants from soaking in. Addressing humidity with a fan and fixing leaks can also significantly reduce re-staining.
Which cleaner should I use for stains on different bathroom floor materials (tile, grout, marble, vinyl)?
Tile and most sealed surfaces usually tolerate bathroom cleaners with mild acids for mineral stains, but grout often needs targeted scrubbing and occasional deeper treatment. Natural stone like marble should generally be cleaned with pH-neutral products to avoid etching, especially for rust and hard water marks. Vinyl floors are best cleaned with gentle, non-abrasive cleaners and soft mops to prevent scratching or dulling. When in doubt, check the manufacturer’s care guide and spot-test any stain remover in an inconspicuous area.
📅 Last Updated: October 11, 2026 | Topic: How to remove stains from bathroom floors? | Content verified for accuracy and freshness.
References
- Stain removal
https://en.wikipedia.org/wiki/Stain_removal - https://www.cdc.gov/mold/default.htm
- https://www.cdc.gov/coronavirus/2019-ncov/community/disinfecting-building-facility.html
- Mold and Your Home | US EPA
https://www.epa.gov/mold/mold-and-your-home - https://www.epa.gov/mold/mold-remediation-guidance
- https://pubmed.ncbi.nlm.nih.gov/?term=mold+cleaning+disinfection+indoor+surfaces
- https://pubmed.ncbi.nlm.nih.gov/?term=grout+mildew+removal+cleaning+agents
- Google Scholar Google Scholar
https://scholar.google.com/scholar?q=bathroom+floor+stain+removal+mildew - Google Scholar Google Scholar
https://scholar.google.com/scholar?q=how+to+remove+hard+water+stains+from+tile+floor - Google Scholar Google Scholar
https://scholar.google.com/scholar?q=cleaning+and+disinfection+of+bathrooms+stain+removal+grout