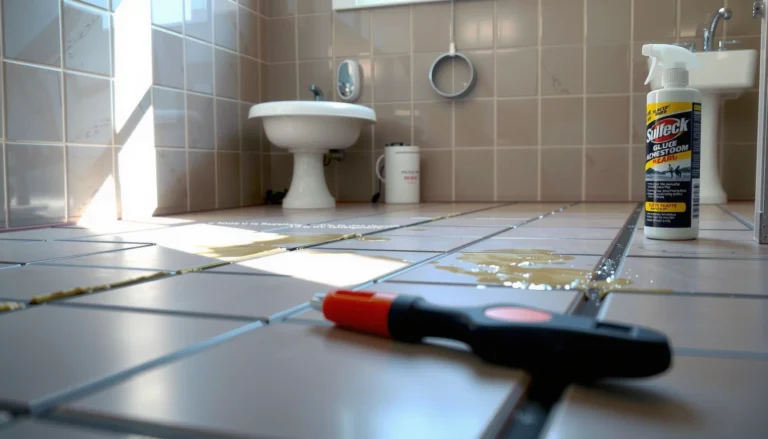

Want slip-resistant bathroom floors that actually prevent falls? The fastest, most reliable path is to prep the surface properly, then install the right slip-resistant flooring material or add a textured, high-traction coating designed for wet conditions. This guide shows the practical steps that deliver measurable grip in real bathroom water—so you get safer footing without guessing.




Slip-resistant bathroom floors come down to three fundamentals: surface texture (traction), the right anti-slip materials, and correct installation/finishing so water doesn’t turn the surface slick. Start by identifying your current floor type, then improve traction first at the wet-entry zones (shower/tub edges and the door threshold) before you decide whether you need a full-surface upgrade like slip-resistant tile or an anti-slip coating.
If you’re trying to reduce bathroom slips without turning the entire room into a renovation, this guide helps you match the safest method to what you already have—tile, vinyl, laminate, stone, or concrete—plus how to prep and maintain it so results last.
If you want slip-resistant bathroom floors, focus on three things: surface texture, correct traction materials, and proper installation. Choose the right approach for your current floor (tile, vinyl, laminate, stone, or concrete) and seal/finish it so it doesn’t become slick when wet. This guide walks you through safer options—from grippy tile choices to anti-slip coatings and floor prep—so you can match the fix to your bathroom.
Who this is for / when it applies:
This is for homeowners and renters who want to reduce slips in bathrooms—especially near showers, tubs, and sinks—without turning the whole room into a maintenance project. It applies whether you’re planning a refresh (anti-slip coatings or treatments) or a bigger update (tile changes or new flooring), and it’s especially useful if your floor is already smooth and gets slippery when wet.
Pick the right traction strategy for your current flooring

The best slip-resistance plan starts by matching your traction method to your existing floor material—because coatings and additives don’t bond equally to every surface. The safest overall approach is also zone-based: treat the areas where water pools and where people step most often, rather than applying the same solution across the entire bathroom.
Here’s why this matters: the wet slip risk depends on both traction (how grippy the surface is when wet) and the water/contaminant conditions (soap residue, body oils, and cleaning chemistry). According to the CDC, one in four adults aged 65+ falls each year in the United States, and bathroom floors are a common setting for slips when floors stay wet or soapy (CDC—Falls facts for adults 65+). While your bathroom slip risk may involve all ages, that statistic supports the idea that small traction improvements in high-risk zones can prevent injuries.
Slip resistance is not “one product fits all”—tile, natural stone, vinyl, laminate, and concrete each require compatible anti-slip methods.
For practical safety gains, prioritize shower entry, tub/shower transitions, and the bathroom door threshold where foot traffic and water exposure overlap.
If your surface is smooth, reducing slip risk usually requires either a texture change (tile/finish) or traction treatments designed to bond to that exact substrate.
Decide based on floor material (and keep the plan realistic)
– Porcelain/ceramic tile: You can often improve grip by choosing textured/matte tile for replacements, using the right grout, or applying a tile-compatible anti-slip finish/coating *after proper cleaning and verification of compatibility*.
– Natural stone (marble, travertine, slate, etc.): Slip issues often come from polished finish and from surface treatments that can change sheen. Many anti-slip coatings are substrate-specific because stone pores and finishes behave differently—so confirm compatibility first.
– Vinyl / LVP / sheet vinyl: Smooth vinyl can feel slippery when wet. Often, the most effective path is replacing with a higher-traction, textured product or using a system designed for resilient flooring (not generic coatings).
– Laminate: Laminate is typically sensitive to moisture at seams. Treatments that change the surface may not address the bigger issue: water intrusion at joints.
– Concrete: Concrete can be made safer with etched surfaces, slip-resistant sealers, and properly chosen topcoats—especially if the current finish is too smooth or glossy.
Use the “zone-first” principle
Treating the whole bathroom equally is rarely necessary—and it can create uneven appearance or uneven wear. Focus first on the highest-risk steps:
– Shower entry / curb edge
– Tub edge
– Bathroom door threshold / transitions (where your foot changes direction and traction briefly drops)
Quick decision map (what to do first)
– If your floor is smooth tile or smooth stone → consider a matte/grip finish upgrade, or replace select tiles with slip-resistant tile rated for wet floors.
– If your floor is vinyl or laminate and feels slick → consider localized solutions first (traction strips/mats), then decide whether replacement to a textured/wet-rated surface is the long-term fix.
– If your floor is concrete → you can often improve traction with proper surface prep + slip-resistant sealer designed for wet areas.
Wet-Area Traction Options by Flooring Type (Practical Safety Fit)
| # | Current flooring | Best first move | Wet traction target | Implementation complexity | Safety likelihood |
|---|---|---|---|---|---|
| 1 | Matte/rough porcelain tile | Confirm wet COF rating; maintain grout condition | ANSI A137.1 wet DCOF ≥ 0.42 | Low | ★★★★★ |
| 2 | Polished porcelain tile | Replace select tiles or switch to anti-slip finish | Aim for wet-rated DCOF performance | Medium | ★★★★☆ |
| 3 | Unsealed/natural stone (honed) | Verify coating compatibility; re-finish if needed | Wet slip-resistance spec per stone system | Medium | ★★★☆☆ |
| 4 | Polished stone | Avoid “generic” coatings; plan textured refinishing | Wet-rated anti-slip system only | High | ★★☆☆☆ |
| 5 | Textured sheet vinyl | Add mats; use compatible cleaner only | Use product testing/claims for wet use | Low | ★★★☆☆ |
| 6 | Smooth LVP / vinyl click | Use strips/mats first; evaluate replacement if persistent | Wet-safe system per LVP manufacturer | Low-Med | ★★★☆☆ |
| 7 | Sealed concrete | Resurface/etch; apply slip-resistant sealer | Use wet-rated sealer spec | High | ★★★☆☆ |
Improve grip the “right way”: slip-resistant tile, finishes, and textures
The best-performing slip-resistant upgrades create traction by changing the surface finish—especially for tile and stone—rather than relying on “slick-proofing” sprays. If you’re upgrading tile, choose wet-rated, matte, textured options and install them with wet-area compatible thinset and grout.
This section is where you get the biggest long-term safety effect for bathrooms that see heavy water exposure. For ceramic/porcelain tile, slip performance is often communicated using dynamic coefficient of friction measures. For example, according to ANSI A137.1, the standard for wet surfaces includes a wet dynamic coefficient of friction (DCOF) requirement of 0.42 or higher for certain applications (ANSI A137.1 (slip resistance/wet DCOF requirements)). That threshold is a useful benchmark when comparing tile options.
For tile replacements, wet-area slip resistance improves most reliably when you select a tile finish that is specifically rated for wet floors.
Matte and textured surfaces reduce the “water film” effect that makes smooth floors feel slippery.
Choose tile finishes that hold traction when wet
Look for:
– Matte or anti-slip (structured) surfaces rather than glazed gloss
– Raised texture or engineered patterns that “break” the water film
– Wet-rating claims from the tile manufacturer (or documentation that references recognized testing)
Avoid relying on:
– Highly polished “decor” tile finishes
– Sealers designed only for appearance that can increase sheen under wet conditions
Use wet-area compatible setting materials and grout
Even great tile can fail slip-safety if the system is wrong. Follow these principles:
– Use the proper thinset mortar and installation method for your tile type and substrate.
– Ensure grout is fully cured and maintained; weak/dirty grout joints can undermine consistent traction and cleanliness.
– Confirm that any grout sealer is compatible with slip safety goals (some sealers make surfaces look great but can increase slickness when wet).
Consider localized tub/shower accessories
When slips happen at a predictable step (like stepping over a tub lip), accessory solutions often outperform whole-room changes:
– Slip-resistant tread strips designed for wet environments
– Tub or stair inserts that match the wet-area use case
These options are especially useful if you’re in a rental and want reduced slip risk without permanent changes to flooring.
A practical tradeoff view (tile vs. localized accessories)
| Approach | What it improves most | Typical fit | Key downside |
|---|---|---|---|
| Replace with slip-resistant tile | Permanent wet traction across the treated area | Full remodels / high risk bathrooms | Higher cost and disruption |
| Add slip-resistant inserts/strips | The exact “step point” where slips occur | Existing floors that are otherwise fine | Doesn’t change traction everywhere |
| Apply a tile-compatible anti-slip finish | Surface traction without full replacement | Targeted refresh | Requires strict prep and can wear over time |
Treat existing floors with anti-slip coatings (and do the prep correctly)
Anti-slip coatings can work, but their effectiveness hinges on surface prep, correct product-substrate compatibility, and realistic expectations about maintenance. If the floor isn’t cleaned to remove soap scum and oils—or if the product isn’t designed for that exact material—traction improvements can be minimal or short-lived.
In real bathrooms, the biggest enemies of slip-resistant performance are contaminants (soap residue, body oils, hard-water deposits) and surface incompatibility (coatings applied to the wrong finish type). Coatings also depend on how well they bond after proper degreasing, and many manufacturer instructions require specific etching/primers for adhesion.
Coatings fail most often because the floor wasn’t prepared exactly as the label requires—cleaning and any required etching are not optional steps.
Anti-slip coatings are usually substrate-specific, so you should verify compatibility with your exact floor type and finish before applying.
Prep the surface like adhesion matters (because it does)
A reliable workflow typically includes:
1. Deep-clean to remove soap scum, oils, and residue.
2. Degrease with the chemical specified (or an approved equivalent).
3. If the label requires it, etch or profile the surface for bonding.
4. Let the floor dry fully to the product’s cure requirements.
If you skip steps, you risk:
– Reduced bond strength
– Coating peeling or uneven wear
– Traction that doesn’t match what the product claims
Apply only to surfaces the manufacturer supports
Anti-slip treatments may differ for:
– Porcelain/ceramic tile vs. natural stone
– Sealed vs. unsealed stone
– Glazed vs. unglazed finishes
– Painted/previously coated floors
A helpful way to stay safe is to write down:
– Floor type (e.g., porcelain tile vs. travertine)
– Current finish/sealer (if known)
– The coating’s stated compatibility list
Plan maintenance upfront
Traction treatments can wear as they’re cleaned and exposed to moisture. Instead of guessing, schedule re-treatment based on the product documentation. Also note that stronger traction may:
– Slightly change appearance (sheen/haze/color shift)
– Make deep-cleaning harder if textured micro-features trap grime
Appearance testing is non-negotiable
Especially on natural stone and light-colored tile, test in an inconspicuous spot first and evaluate:
– Dry look vs. wet look
– Any color shift
– Ease of cleaning after several days
Use mats, strips, and safer accessories where water pools
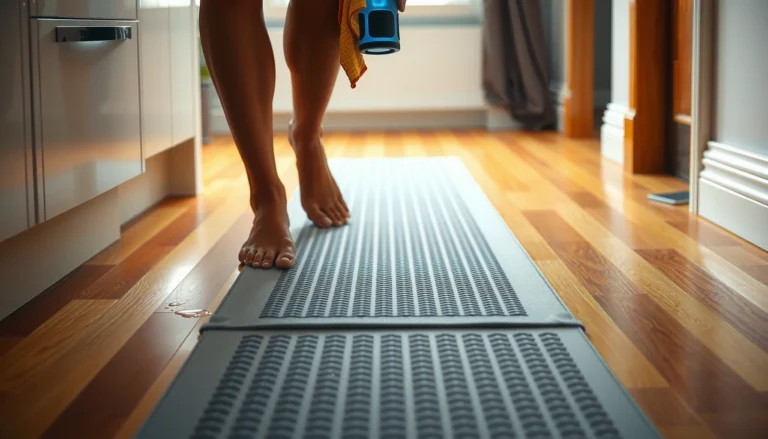
Mats and strips reduce slip risk fast because they focus traction where people actually place their feet during wet-entry moments. They’re also often the most renter-friendly solution and the easiest to reverse later.
If you’re trying to reduce slips near a shower/tub, a door threshold often becomes a “traction transition” point—your foot moves from dry to wet and friction changes quickly. Many accessibility guidelines also warn against raised/abrupt transitions; for example, the ADA Standards include expectations that thresholds be low enough to limit tripping hazards (commonly framed as a maximum 1/4 inch vertical change for certain conditions) (2010 ADA Standards for Accessible Design—threshold/crucial edge guidance). Even if your goal is not accessibility compliance, reducing abrupt changes supports better safety.
Slip-resistant mats are most effective when they’re placed at wet-entry points and chosen for wet-floor traction, not just “general” rubber backing.
Anti-slip strips are useful for thresholds and transitions where small areas create the highest risk.
Choose mats designed for wet floors (not just bathroom decor)
Look for:
– Traction top surface made for wet conditions
– Drainage and rinseability (so soap residue doesn’t build up)
– Non-slip backing that stays stable without trapping moisture in unwanted areas
Placement tips:
– Inside shower areas (only where allowed by your shower setup)
– Immediately outside tub/showers
– Where you step after exiting with wet feet
Use strips/tape for localized traction
Anti-slip strips are ideal when:
– Your floor is otherwise stable and you just need extra grip at a couple steps
– You have smooth tile transitions or a step-down area
Best practice: apply to clean, dry surfaces and follow cure/dwell times. If a strip fails due to poor adhesion, the problem can become worse (it can peel and create a snag or edge).
Don’t hide structural issues with “accessories”
Mats and strips help, but they don’t solve:
– Loose flooring (movement changes how traction behaves)
– Cracks, unevenness, or subfloor movement
– Poor drainage that leaves water standing longer than expected
If the bathroom floor feels uneven or shifts underfoot, address that first.
What can go wrong (and how to avoid it)
Slip-resistance failures usually come from poor surface prep, wrong-product compatibility, or the assumption that traction fixes can compensate for damaged or unstable flooring. Many coatings improve grip but may also reduce slickness less than expected if cleaning habits keep the floor contaminated.
Even the best anti-slip product can underperform when soap residue, oils, or hard-water deposits remain on the surface.
Some treatments change appearance (haze, altered sheen, or color shift), so testing is essential—especially on natural stone.
Common failure modes to watch
1) Bonding problems
– Cause: floor not cleaned/degreased (or required etching not done)
– Result: coating can wear unevenly or peel
2) Compatibility mistakes
– Cause: coating applied to an unsupported surface type or finish
– Result: discoloration, reduced traction, or incompatibility with your existing sealer
3) Texture + cleaning mismatch
– Cause: the surface holds grime more easily
– Result: traction becomes inconsistent as residue builds
4) Structural issues
– Cause: cracked/uneven floors or subfloor movement
– Result: traction accessories can’t stabilize foot placement
Pros/cons comparison: treatment vs. replacement vs. accessories
| Option | Pros | Cons |
|---|---|---|
| Slip-resistant tile or finish replacement | Most durable traction improvement when you choose wet-rated finishes | Higher cost; more disruption |
| Anti-slip coating on existing surface | Can refresh traction without full demolition | Requires exact prep; traction can wear and needs maintenance |
| Mats + strips | Fast, inexpensive, reversible; targets high-risk zones | Must be kept clean; doesn’t fix underlying floor issues |
Verdict / tip: what to do first, and who should skip DIY treatments
Start with the simplest, highest-impact change: improve traction at wet-entry areas with slip-resistant mats or strips, while you decide whether you need a longer-term solution (anti-slip coating or replacing with slip-resistant tile). DIY anti-slip coatings can work, but only if you can follow the label precisely and you’re comfortable with surface prep; if your floor type isn’t explicitly supported by the product, skip it and ask a flooring contractor or use a method matched to your material.
– Downsides to expect: some solutions may require periodic re-treatment, and textured surfaces can feel different underfoot and can hold grime if you don’t clean them properly.
– Skip DIY treatments if: you have unknown floor composition, widespread damage/looseness, major cracking/unevenness, or you can’t commit to careful prep and cure times. In those cases, traction won’t compensate for the root cause.
Quick checklist (save this before you start)
– Confirm your flooring type: [tile / stone / vinyl / laminate / concrete]
– Focus areas: [shower entry / tub edge / door threshold]
– Choose method that matches the surface: [slip-resistant tile finish / coating / strips / mats]
– Follow label prep exactly: [cleaning + degrease/etch if required]
– Test in a hidden spot if appearance matters
– Plan for upkeep: [re-application / mat cleaning]
– Fix the root issue first if the floor is uneven or damaged
FAQ
Will anti-slip coatings make my bathroom floor feel rough?
They can. Many products improve traction by adding micro-texture or changing surface properties, so the floor may not feel as smooth as before. If you’re sensitive to texture underfoot, consider mats or localized strips first.
Are slip-resistant mats enough, or do I need to treat the floor?
For many bathrooms, mats handle day-to-day risk at the places people actually slip. But if you’re dealing with frequent soaking, heavy soap residue, or a consistently slick surface, adding a floor-level solution (tile finish changes or a coating) can help.
Can I use the same anti-slip product on tile and natural stone?
Not safely without checking compatibility. Anti-slip products are typically designed for specific surface types; using the wrong one can lead to poor adhesion, discoloration, or reduced effectiveness. Always verify the manufacturer’s intended substrates.
How often do I reapply anti-slip treatments?
It depends on the product and foot traffic/cleaning intensity, and it should be based on the manufacturer’s maintenance guidance. If the label doesn’t specify a recoat schedule, [ADD: ask the product manufacturer or check the installation/maintenance sheet].
Sources
– Manufacturer instructions and maintenance/spec documentation for each slip-resistant product you use: [ADD: product-specific label/manual document title(s)]
– Tile and flooring material guidance from manufacturers regarding wet-area suitability and recommended finishes: [ADD: manufacturer doc titles for slip/wet recommendations]
– Anti-slip system documentation for installation/curing and surface prep requirements: [ADD: coating system installation/maintenance document titles]
– ANSI A137.1—American National Standard for Ceramic Tile (wet DCOF requirements)
– 2010 ADA Standards for Accessible Design—threshold/edge guidance
– CDC—Falls facts for adults 65+ (bathroom/indoor fall risk overview)
In the end, the safest slip-resistant bathroom floors are the ones that combine correct traction for your exact material with disciplined prep and realistic upkeep. Start with mats or strips in wet-entry zones, then upgrade your surfaces only if your floor type and finish are compatible with the traction method you choose—because consistent grip matters more than any one-time treatment.
Frequently Asked Questions
What is the best way to make a bathroom floor slip-resistant without replacing it?
Start by improving traction with a slip-resistant bathroom floor coating, bath floor anti-slip paint, or a surface-applied anti-slip treatment. If your floor is tile or sealed stone, use a manufacturer-approved anti-slip additive or textured clear coating designed for wet areas. You can also reduce risk immediately with properly installed non-slip bath mats and rugs, but make sure they have a grip backing and are rated for bathroom use.
How can I make my tile bathroom floor safer when it gets wet?
Use a slip-resistant grout sealer or apply a textured anti-slip sealer made for tile in wet bathrooms to increase grip on the surface. Consider adding slip-resistant bathroom floor coating systems that include fine aggregates for traction while still being water-resistant. If your tiles are glazed and very smooth, options like professional mechanical scuffing plus an anti-slip topcoat can help the coating bond and improve traction.
Which anti-slip products work best for bathrooms with kids or elderly people?
Look for anti-slip floor treatments specifically labeled for “wet” or “bathroom” conditions and that meet relevant slip-resistance standards. Textured coatings with embedded grit, anti-slip epoxy systems, and anti-slip floor paint formulated for high-moisture areas generally perform well. For immediate protection, pair the floor treatment with properly sized non-slip mats at the shower entrance and sink area, ensuring they are cleaned regularly to prevent soap scum from reducing traction.
Why do bathroom floors become slippery even when they look clean?
Wet floors can feel slippery due to the combination of water, soap residue, shampoo, oil-based body products, and normal bathroom cleaning chemicals. Smooth surfaces like glossy tile or natural stone can have low friction when wet, and grime can create a thin film that reduces slip resistance. Regular cleaning with the right bathroom floor cleaner, followed by a slip-resistant coating or sealer, helps maintain traction over time.
How do I choose slip-resistant bathroom floor tiles or upgrades during a renovation?
Choose tiles or materials designed for wet areas with a slip-resistant rating (often expressed as a coefficient of friction) and consider a textured or matte finish instead of glossy surfaces. For bathrooms, porcelain and properly rated textured ceramic tiles typically provide better traction than smooth, polished stone unless the stone is treated for slip resistance. If you’re upgrading existing surfaces, ask whether an anti-slip bath floor treatment is compatible with your tile type and current sealers to ensure the finish stays effective.
📅 Last Updated: October 11, 2026 | Topic: How to make slip-resistant bathroom floors? | Content verified for accuracy and freshness.
References
- https://en.wikipedia.org/wiki/Slip_resistance
- https://www.ada.gov/files/2010-stds.pdf
- https://www.osha.gov/slips-trips-and-falls
- https://www.cdc.gov/homeandrecreationalsafety/falls/adultfallsprevention.html
- https://www.cdc.gov/steadi/preventing-falls.html
- https://www.cdc.gov/niosh/topics/slips/
- Falls
https://www.who.int/news-room/fact-sheets/detail/falls - https://pubmed.ncbi.nlm.nih.gov/?term=slip-resistant+flooring+traction+wet+surfaces
- Google Scholar Google Scholar
https://scholar.google.com/scholar?q=slip-resistant+bathroom+flooring+wet+traction - Google Scholar Google Scholar
https://scholar.google.com/scholar?q=anti-slip+flooring+slip+resistance+guidelines+standards