
Want to know how to remove bathroom floors safely and efficiently? This step-by-step guide tells you exactly how to lift tile, vinyl, or subflooring, remove the old underlayment, and prep for a clean reinstall. You’ll get the right tools to use, the demolition sequence to follow, and the key checks to avoid damage to plumbing and subfloor structure.




Removing bathroom floors safely usually means protecting plumbing and the subfloor first, then stripping in the right order—finish surface → underlayment/thinset → subfloor only if needed. Turn off water supplies, identify floor-heating and waterproofing systems, and adjust your demolition depth accordingly so you don’t create new leak paths or structural problems.
If you’re remodeling a bathroom, fixing rot or leaks, or replacing tile/vinyl/laminate, this applies—especially if you need to know what to remove first and what to avoid. It’s also for homeowners doing this themselves, as long as you’re comfortable using basic demolition tools and following safety precautions.
Removing bathroom floors usually means protecting plumbing and subflooring first, then working in layers—finish surface → underlayment/thinset → subfloor (if needed). Start by turning off water supplies and checking for floor-heating or wet-room waterproofing, because those change the safest removal method. This guide walks you through a practical way to assess what’s there and remove it without wrecking the surrounding areas.
If you’re remodeling a bathroom, fixing rot or leaks, or replacing tile/vinyl/laminate, this applies—especially if you need to know what to remove first and what to avoid. It’s also for homeowners doing this themselves, as long as you’re comfortable using basic demolition tools and following safety precautions.
Assess what kind of bathroom floor you have
The fastest way to remove bathroom floors without costly mistakes is to identify the finish layer and the layers beneath it before you touch a pry bar. Once you know whether you’re dealing with tile over cement board, floating vinyl over foam, or laminate on plywood, you can choose the safest removal sequence and tool depth.
Here’s why this matters: a “bathroom floor” is rarely one material. It’s a stack—finish surface, underlayment/backer board or underlayment foam, and a subfloor that carries loads and anchors plumbing penetrations. Correct identification also helps you avoid damaging waterproofing systems, radiant heating wiring, and toilet flange connections.
When removing tile, the hazard isn’t only mechanical—tile demolition can generate respirable crystalline silica dust, which OSHA regulates with a PEL of 50 µg/m³ (8-hour TWA) under the respirable crystalline silica standard. OSHA Respiratory Crystalline Silica Standard (29 CFR 1926.1153), 2016
Cement backer board is typically mechanically fastened (screws or nails), so identifying it early helps you remove fasteners first rather than prying and breaking the subfloor. [ADD: cite from the specific backer board manufacturer’s installation guide—e.g., manufacturer product data/installation instructions]
In bathrooms, waterproofing can be a separate membrane system (e.g., thin-sheet membrane or liquid-applied coating), and removal method must match that system to prevent creating new leak paths. [ADD: cite from the waterproofing manufacturer’s removal/repair guidance]
In this step, do three things:
– Identify the flooring material (tile, vinyl sheet/LVP, laminate, engineered wood, carpet tile) and the likely underlayment (cement board, plywood, foam underlayment).
– Check for red flags like floor leaks, softness/sponginess, or stains that suggest subfloor damage.
– Look for complications: radiant floor heating (electric or hydronic), curb/wet-room waterproofing systems, or transitions that tie into walls.
A quick note from real-world demolition practice: the “look” of underlayment often changes near plumbing penetrations. Around toilet flange rings and supply line cutouts, installers sometimes shift from one layer type to another (for example, different leveling compound or patching). If you can, inspect those areas first before you start removing the broad field of flooring.
Common layer combinations you’ll likely see
To set expectations, the table below summarizes typical thickness targets you may encounter while planning how deep to cut or pry.
Typical Bathroom Floor Build-Up Layers (Planning Depth)
| # | Layer type removed | Typical thickness | Removal difficulty | Common risk |
|---|---|---|---|---|
| 1 | Luxury vinyl plank (floating/click) | 3–6 mm | ★★★☆☆ | Tearing subfloor foam |
| 2 | Sheet vinyl (adhered) | 1.5–3 mm | ★★★★☆ | Adhesive residue damage |
| 3 | Underlayment foam / felt | 2–10 mm | ★★★☆☆ | Moisture-trap pockets |
| 4 | Cement backer board | 6.4–12.0 mm | ★★★★★ | Dust + fastener punctures |
| 5 | Thinset / mortar under tile | 3–10 mm | ★★★★☆ | Floor flatness problems |
| 6 | Plywood subfloor | 18–21 mm | ★★★☆☆ | Moisture swelling/delamination |
| 7 | Toilet flange / wax ring area | Cut-depth varies by set height | ★★★★★ | Drain height & seal failures |
Prep the bathroom before you start removing
The best way to avoid damage during bathroom floor removal is to prep like you’re protecting a crime scene: shut off water, control dust, and guard the walls and electrical components you’ll be leaving in place. A controlled prep step prevents the two most common DIY failures—waterline damage and invisible dust contamination.
Before demolition, OSHA’s dust controls matter because tile and backer-board work can produce respirable silica; using local exhaust ventilation and appropriate respiratory protection reduces exposure. OSHA Respiratory Crystalline Silica Standard (29 CFR 1926.1153), 2016
Toilets and vanities obstruct access; removing them first typically reduces wall-edge chipping and lets you remove underlayment in clean, shallow passes. [ADD: cite from a common plumbing/remodeling best-practice guideline—manufacturer or industry association]
Protecting doorway thresholds and adjacent rooms with plastic sheeting is a practical way to limit particulate migration during floor demo. [ADD: cite from a dust-control/containment guidance document]
Do this before you pry:
– Remove fixtures and trim that block access (toilet, vanity, baseboards, quarter round), and protect doorways and adjacent rooms with plastic sheeting.
– Shut off water at the supply lines and seal off the area to reduce dust; use ventilation and respiratory protection.
– Protect surfaces you’re not removing (door casings, wall tile edges, electrical outlets) with painter’s tape, cardboard, and plastic.
Practical planning details that keep the job “repeatable”:
– Photograph the floor-to-wall transitions before removal. You’ll want reference points if you later need to match curb angles or re-establish wet-room boundaries.
– Label disconnected shutoffs and caps. Bathroom plumbing is dense, and a mislabeled line can turn a fast restart into an emergency.
– If you find floor heating, stop and map wiring first. The underlayment removal step is where radiant systems get damaged.
Remove the existing floor surface safely
The safest removal strategy is “controlled loosen first, then peel back,” with your tool depth shallow enough to protect the layer underneath. Your technique depends on whether you’re removing tile, vinyl/laminate, or a glued-down surface with thinset/mastic.
For tile, loosening from a corner and working in sections reduces the odds of prying against wall edges that you may still need to keep waterproof and intact. [ADD: cite from a tile removal best-practice or manufacturer guidance]
For adhered vinyl or laminate, lifting seams/edges first helps avoid gouging the subfloor and keeps adhesive removal more uniform. [ADD: cite from an LVP/adhesive removal guidance document]
Thinset removal near plumbing penetrations requires shallow cutting because toilet flanges and drain assemblies need precise geometry to seal properly. [ADD: cite from plumbing seal/installation guidance such as wax ring/flange height instructions]
Follow the material-specific approach:
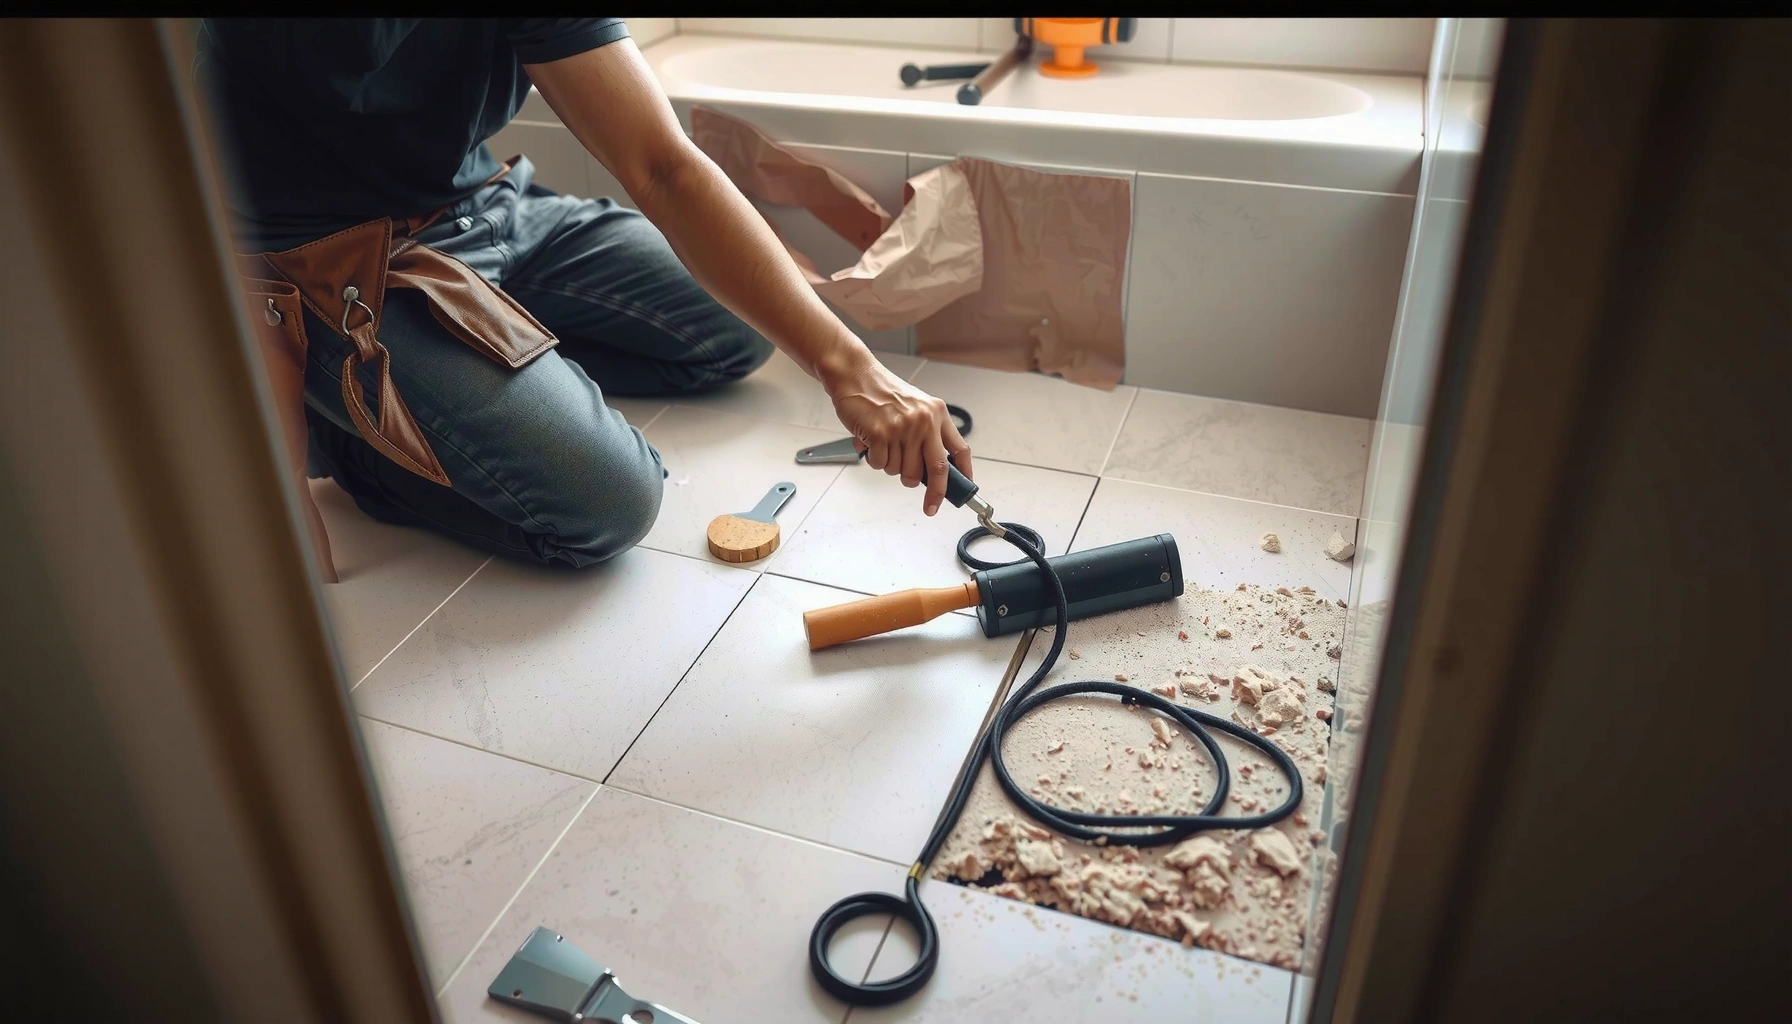
– For tile: start with loosening a corner, then work across in sections; avoid prying directly against finished wall edges.
– For vinyl/laminate: focus on lifting seams/edges, then pulling in manageable pieces; scrape residue carefully so you don’t gouge the subfloor.
– For stubborn layers (thinset/mastic under coverings): use the right scraper/chisel approach and keep your cuts shallow—especially near plumbing.
Pros/cons comparison: tile vs floating surfaces
Deal with underlayment and subfloor decisions
The key decision is whether you can keep the subfloor. If it’s structurally sound and dry, you often remove only the top layers; if it’s soft, swollen, or delaminated, you remove down to stable material before installing anything new.
Cement backer board must be removed by removing fasteners first to avoid transferring prying forces into the subfloor structure. [ADD: cite from backer board installation/maintenance documentation]
Wood subfloors showing swelling, dark staining, or delamination after moisture exposure typically require full evaluation before re-flooring. [ADD: cite from a building science or moisture assessment standard—e.g., industry guidance]
Radiant heating layers (electric mats, hydronic tubing) require depth-aware removal so that you don’t cut or disconnect circuits/tubing during demo. [ADD: cite from radiant floor heating manufacturer instructions]
Here’s how to decide methodically:
– Determine whether you can keep the subfloor: if it’s sound and dry, you may remove just the top layers; if it’s soft or delaminating, you’ll likely need to remove down to stable material.
– If you find cement board or backer board: remove screws/nails first, then pry in a way that keeps the remaining structure intact.
– When moisture damage is suspected: dry thoroughly and confirm the subfloor is stable before installing anything new.
A detail I emphasize during bathroom tear-outs: “dry” is not just “no longer wet.” You want the subfloor surface and the framing cavity to be stable before installing new underlayment—otherwise you trap moisture under the new finish and risk future failure.
What can go wrong (and how to avoid it)
Most DIY floor removals fail in predictable ways: rushing around plumbing, leaving uneven adhesive, or stripping waterproofing without a rebuild plan. Avoid these by controlling tool depth, protecting penetrations, and planning the next layer installation.
The biggest waterproofing mistake is removing membrane systems without restoring them to the same continuity and termination details used originally. [ADD: cite from waterproofing system installation requirements]
Toilet flange damage during demo can lead to chronic leaks and difficult re-sealing because flange alignment affects gasket performance. [ADD: cite from toilet flange/wax ring or gasket installation guidance]
Cutting too deep into floors with radiant heating risks electrical or tubing damage and can force partial system replacement. [ADD: cite from radiant heating manufacturer installation/repair guidance]
Common pitfalls and prevention:
– Damaging plumbing or subfloor: prying too aggressively can break toilet flanges, supply lines, or drain assemblies—go slow around openings and penetrations.
– Leaving too much adhesive: thick residue under tile or new flooring can cause lippage, unevenness, and adhesion failures.
– Ignoring waterproofing: if your bathroom has a waterproof membrane system, stripping it without a plan can create future leak paths.
– Underestimating hidden wiring/heating: cutting too deep on floors with radiant heating or electrical mats can be dangerous and expensive.
If you discover an active leak during removal, stop and fix the source before continuing. Water intrusion under flooring is rarely “fixed” by installing a new surface.
Verdict / tip: when to DIY vs when to stop
DIY removal is reasonable when you’re stripping a straightforward finish layer (like LVP on plywood) and you can confirm there’s no radiant heating or complex wet-room waterproofing. If you’re removing tile over a membrane system, suspect hidden leaks, or have radiant heating wiring/tubing, pause and get professional guidance—mistakes can turn a targeted repair into a full rebuild.
[ADD: Replace this with your real recommendation based on your bathroom type—e.g., “DIY is fine for LVP on plywood, but I’d get help for tile with a waterproof membrane.”]
Bottom line: prioritize safe depth control, dust management, and waterproofing continuity. If any of those are unclear, it’s not worth gambling.
Quick scan checklist (printable)
– Identify flooring type: [ ] tile [ ] vinyl/LVP [ ] laminate [ ] wood [ ] other
– Check for heating/wet-room waterproofing: [ ] yes [ ] no
– Turn off water supplies and protect fixtures: [ ] done
– Clear transitions and remove blocking trim: [ ] done
– Use dust control + respiratory protection: [ ] done
– Plan underlayment/subfloor removal based on damage: [ ] done
– Verify stability before installing new flooring: [ ] done
FAQ
Do I need to remove the subfloor when removing bathroom floors?
Not always—remove only down to stable, dry material. If the subfloor is soft, swollen, or delaminating, you’ll likely need to remove it.
What’s the safest way to remove tile without damaging the walls?
Start loosening from an edge and work in sections, using controlled prying. Protect wall tile/edges with tape and avoid levering against wall surfaces.
Can I install new flooring directly over old tile or vinyl?
Usually you should remove the old surface unless your flooring manufacturer explicitly allows it. Unevenness and adhesion issues are common failure points—follow the specific product’s instructions.
How do I handle leftover thinset or adhesive?
Scrape mechanically and refine the surface until it’s flat and appropriate for the next flooring layer. If residue is thick or contaminated, more removal may be necessary.
What if I find water damage while removing bathroom floors?
Stop and address the source (leak, ventilation issue, waterproofing failure), then dry and inspect for structural stability before rebuilding.
Sources
– [ADD: Source for waterproofing/membrane removal requirements from the specific waterproofing manufacturer used in your bathroom.]
– [ADD: Source for flooring installation requirements/allowed substrates from the specific flooring manufacturer’s installation guide.]
– [ADD: Source for cement board/backer board removal guidance from the manufacturer of the backer board system (e.g., ASTM/industry installation instructions or product documentation).]
Removing bathroom floors is mainly about sequencing and protection: identify the full layer build-up, prep the space to control dust and guard plumbing/electrical, remove the finish without gouging the subfloor, then make an evidence-based decision on whether underlayment and subfloor must come out too. Get waterproofing and any radiant system boundaries right, and you’ll end up with a stable base that supports the next stage of your remodel without repeating the same failure.
Frequently Asked Questions
What’s the safest way to remove bathroom floor tiles without damaging the subfloor?
Start by removing the toilet (if needed) and any baseboards/trim to expose the edges of the bathroom flooring. Score and pry tiles carefully, using a chisel and hammer or a floor scraper, and work from the edges toward the center to reduce cracking. If you’re worried about damage, stop if you hit mortar or thinset tightly bonded to the subfloor and switch to a gentler method like adhesive remover or careful heat application. Wear a respirator, goggles, and gloves because tile and thinset dust can be hazardous.
How do you remove bathroom floor tile that’s set in thinset or mortar?
For thinset or mortar, use a floor scraper and oscillating multi-tool to lift tile sections first, then attack remaining thinset with a carbide scraper. If the thinset is stubborn, a heat gun plus a scraper can soften some adhesives, but test a small area to avoid harming waterproofing. In wet areas, check for waterproofing layers before you go too deep, since subfloor removal may expose moisture protection. After removal, vacuum thoroughly and inspect the subfloor flatness so you can install new bathroom flooring properly.
Why is removing bathroom floors harder when there’s water damage or a failing waterproof membrane?
Water intrusion can weaken the subfloor and cause tiles to loosen unpredictably, which makes removal messy and increases the risk of mold. If the bathroom has waterproofing like a membrane or cement board, you may need to remove damaged sections rather than just surface tile. Always dry the area and inspect for softness, bubbling, or discoloration before continuing, and consider professional testing if you suspect hidden mold. Proper remediation is crucial because new bathroom floor installation will fail if moisture problems remain.
Which tools are best for removing bathroom flooring—tile, vinyl, or laminate?
For ceramic or porcelain tile, a hammer drill with a tile chisel, heavy-duty scraper, and oscillating tool are often most effective. For vinyl flooring or linoleum, use a utility knife for scoring, then a floor scraper and adhesive remover to handle stuck backing. Laminate typically comes up in planks once you remove the first rows, using a pull bar and pry tools with care to avoid damaging the underlayment. Choose tools based on the bathroom floor type and adhesive so you minimize damage to subfloor surfaces.
What’s the best way to remove old bathroom floor adhesive and prep for new installation?
After you remove the main flooring material, scrape off residue with a floor scraper and fine carbide blade, then use a solvent or adhesive remover appropriate for the adhesive type. Clean with a pH-neutral cleaner, rinse if the product requires it, and let the subfloor dry completely—especially in bathrooms where moisture is common. Check for remaining high spots and repair low areas with patching compound to create a smooth, level base for new bathroom floors. Finally, prime and waterproof as required so the new installation performs long-term in wet conditions.
📅 Last Updated: October 11, 2026 | Topic: How to remove bathroom floors? | Content verified for accuracy and freshness.
References
- Google Scholar Google Scholar
https://scholar.google.com/scholar?q=remove+ceramic+tile+floor+safety - Google Scholar Google Scholar
https://scholar.google.com/scholar?q=asbestos+floor+tile+removal+guidelines - Google Scholar Google Scholar
https://scholar.google.com/scholar?q=lead-based+paint+floor+renovation+removal+work+practices - https://pubmed.ncbi.nlm.nih.gov/?term=asbestos+floor+tile+removal+respiratory+protection
- Asbestos | US EPA
https://www.epa.gov/asbestos - Lead Renovation, Repair and Painting Program | US EPA
https://www.epa.gov/lead/renovation-repair-and-painting-program - Silica, Crystalline – Overview | Occupational Safety and Health Administration
https://www.osha.gov/silica - Lead – Overview | Occupational Safety and Health Administration
https://www.osha.gov/lead - Asbestos
https://en.wikipedia.org/wiki/Asbestos - Lead paint
https://en.wikipedia.org/wiki/Lead-based_paint