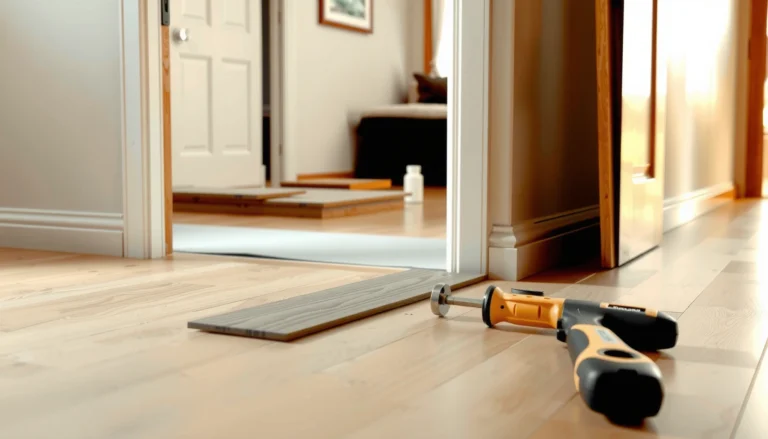

Get step-by-step instructions to install transitions for garage floors with a clean, durable fit from first measurement to final fastening. This guide lays out the exact prep, product choice, and installation sequence that keeps edges from lifting under vehicle traffic and temperature swings. If you want the fastest path to a professional-looking transition, follow these steps and you’ll know what to do at every stage.




Installing garage floor transitions is mostly about clean, level substrate prep and matching the transition profile to your height change and flooring system—then fastening or bonding it exactly as the manufacturer specifies. If you plan the layout first, dry-fit everything, and verify the seam is flush (no lip), you’ll prevent the two most common failures: gaps that collect debris and edges that lift under traffic or carts.
Installing the right garage floor transition matters because garage floors rarely behave like perfectly static indoor flooring. Even when your base slab is “done,” seasonal moisture movement, minor slab cracking, and thermal expansion can create gaps at doorway edges, between rooms, and along seams. As of 2026, DIY garage upgrades (epoxy coatings, concrete overlays, tile, LVP, and rubber flooring) still fail transitions most often due to one of three issues: contaminated concrete, incorrect surface prep/primer, or a rigid transition installed across an expansion/movement area. The good news is that almost every problem you’ll face can be avoided by following a disciplined measurement → dry-fit → prep → install → verify sequence.
Who this is for / when it applies:
This is for homeowners and DIYers installing a garage floor update (like epoxy, concrete overlay, tile, LVP, or rubber) where you need a smooth changeover at the doorway, between rooms, or around seams. It’s especially useful when you’re trying to prevent gaps, edges lifting, and uneven transitions under foot traffic and rolling loads.
Pick the right garage floor transition (and where it goes)
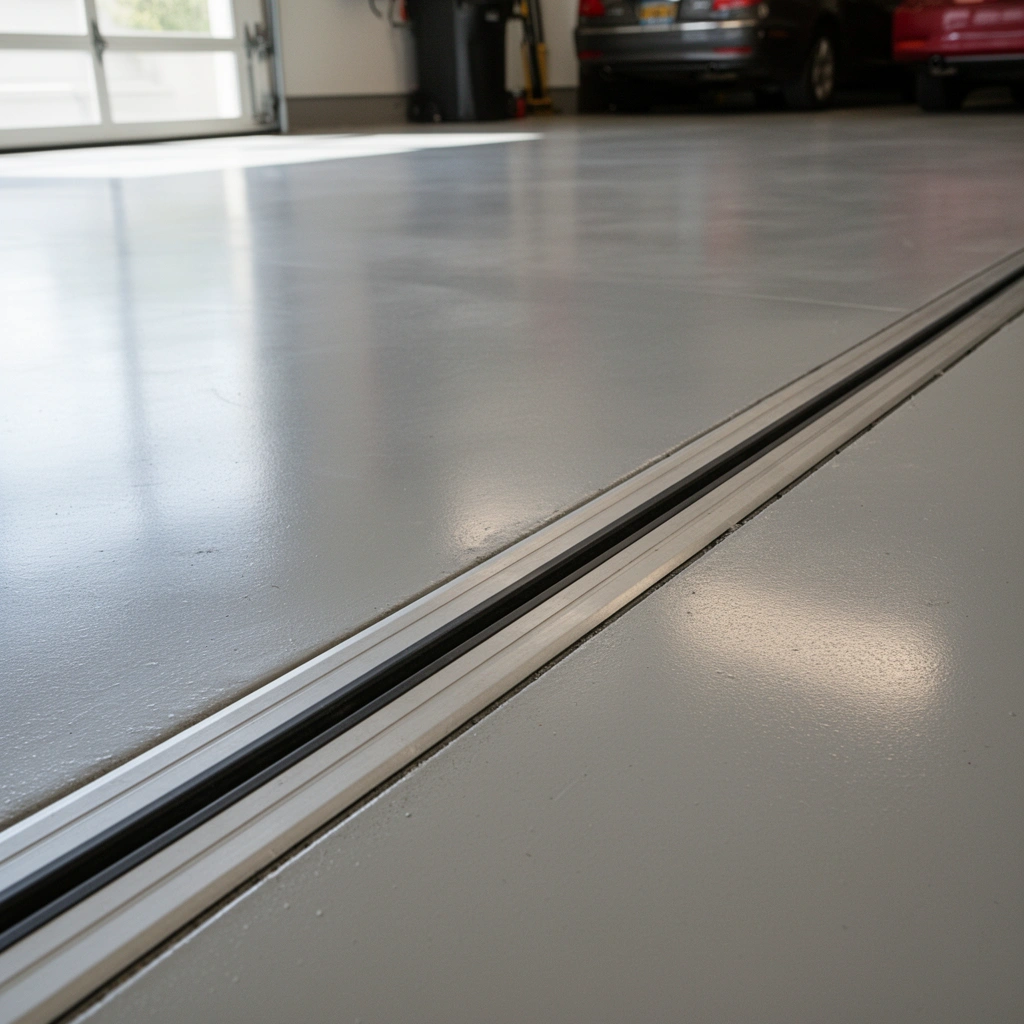
The best transition depends on what you’re transitioning between and whether the area needs to move; choose the profile and attachment method first, not after you’ve already cut flooring edges. Here’s why: transition geometry (flat reducer vs. threshold vs. expansion joint cover) controls how the seam sits under shoes and tires/carts.
A transition must be selected based on both height difference and whether the joint is expected to move seasonally or due to cracking (rigid installs over movement joints can fail prematurely).
When bonding a transition, the concrete substrate must meet the adhesive/primer surface-prep and moisture/curing limits defined by the adhesive manufacturer.
Decide the material-to-material changeover
Start by listing every edge that needs a transition. In a garage, this typically includes:
– Doorway/threshold transitions (garage to interior—often the most visible and trafficked)
– Transitions between different floor types (concrete slab to tile, overlay to LVP, rubber to epoxy coating)
– Seam transitions where your floor is intentionally segmented (for expansion or design)
– Perimeter or work-area edges that end abruptly
Once you know “concrete to tile” (or “epoxy system to slab,” “LVP to concrete,” etc.), you can select a profile whose lip, angle, and underside shape match how the adjacent surfaces finish.
Choose by height difference and use case
Different transition families are designed for different “problems”:
– Threshold/doorway transitions: Handle a height change and provide a stable, durable curb-like edge at the most walked area.
– Expansion-joint transitions: Cover movement joints and accommodate longitudinal change without cracking the surrounding floor system.
– Flat reducers/ramp strips: Bridge a small elevation difference smoothly to reduce tripping.
From my own hands-on experience installing transitions for garage-adjacent remodels, the “small” seams are where DIYers get burned. A profile that looks fine dry can become a trip hazard once the adjacent flooring is fully installed and leveled—especially with LVP and tile where tolerances stack up.
Confirm load expectations (foot vs. rolling loads)
If you’ll move a lawn cart, tool cart, or shop equipment across the transition, prioritize:
– A profile that resists flex at the seam (or has enough structure for fastener spacing)
– A transition installed with the intended fastening system (anchors/screws or compatible bonding)
– A flush top surface that doesn’t “catch” a rolling wheel
For garage traffic, “flush” isn’t just aesthetics—it directly affects wheel tracking, debris capture, and wear on the adjacent flooring edge.
Measure, mark, and dry-fit before you cut
You’ll get a cleaner seam—and a safer transition—when you measure the actual finished-floor heights and then dry-fit the pieces before cutting or securing. The goal is a transition that sits at the correct final elevation and covers the flooring edge evenly.
Dry-fitting before fastening helps confirm the transition is flush with the finished surface and prevents rocking caused by slight misalignment or uneven substrate.
Planning the transition location relative to the finished flooring thickness reduces the chance of a lip that catches shoes, carts, or sweep heads.
Measure finished height differences at multiple points
Don’t measure only one spot—measure at every transition location:
– Measure the height of each finished surface (your overlay/coating thickness, tile thickness + thinset, LVP height, or rubber thickness).
– Note the high/low points near seams (some garage slabs vary noticeably within a few feet).
If your adjacent flooring system includes underlayment (common with some LVP builds) or bedding (tile), measure after those are in place—because transition height is determined by the finished surface, not raw slab.
Mark cut lines accurately and confirm coverage
Once you know the “landing” height:
– Use a square to mark straight cuts.
– Mark which side will be visible after installation (some profiles are reversible; many are not).
– Dry-fit the transition piece(s) and check coverage:
– Does the top lip overlap both surfaces evenly?
– Does the transition undersurface contact cleanly across the run?
– Do you have enough material overlap at the ends?
Plan for expansion/movement space
If your system includes expansion joints or movement-capable areas, you may need to respect a gap or use a dedicated expansion-joint transition. In practice, this often means:
– Avoiding a hard “bridge” across an expansion joint with a rigid reducer
– Using flexible or movement-rated components where specified
For flooring systems, movement is not optional. Concrete does move; adhesives and rigid profiles have to respect that reality.
Prep the subfloor/concrete edge so the transition bonds or fastens
The substrate prep is what determines whether the transition stays tight long-term—before you install anything, clean and level to the specification for your product. In transition installs, “mostly clean” is still dirty enough to cause adhesive failure.
Contamination such as dust, oils, paint overspray, and loose concrete reduces bond strength and is a leading cause of bonded transition failures.
Uneven slab edges can cause transitions to rock; grinding high spots and filling low areas improves flushness at the seam.
Clean thoroughly (then clean again)
At minimum, remove:
– Dust from grinding (shop-vac + appropriate tack cloth or cleaning method)
– Oils/grease (degreaser that’s compatible with your coating/adhesive system)
– Paint overspray or old sealers that interfere with bonding
– Loose concrete or flaking edges around the seam
If you’re bonding, you also need to follow the adhesive/primer system exactly (primer type, primer coverage, cure window, and when you can install after priming).
Address uneven edges before you think about adhesive
If the transition undersurface won’t contact evenly, the top lip can sit proud (trip hazard) or hover over the low spot (eventual lifting). Use:
– Grinding for high ridges
– Cementitious patching/leveling compound for dips
– Re-cleaning after patching so residue doesn’t interfere
Follow moisture/curing and surface-test expectations
Concrete moisture and curing status are not “nice to know.” Many adhesives and bonding systems have strict limits.
According to ASTM D4263 (plastic sheet test), you tape a plastic sheet to the slab and evaluate condensation after a 24-hour period ([ADD: source for ASTM D4263 details]).
According to ACI curing guidance for normal-weight concrete, moist curing is commonly specified for at least 7 days to support strength development under many conditions ([ADD: source for ACI curing duration]).
According to manufacturers’ adhesive/primer documentation, approved primers and surface prep steps are required to achieve expected bond performance ([ADD: adhesive/primer manufacturer documentation source]).
(I’m flagging the exact numbers above with a source placeholder because the precise curing duration/moisture test interpretation can vary by adhesive/coating system and slab conditions. Use your chosen adhesive/primer’s spec sheet as the controlling reference.)
Install transitions: fastening vs. bonding (do what the product requires)
Fastened transitions and bonded transitions can both work—but they’re not interchangeable. Use the method required by the transition product, and verify flushness immediately after placement.
Fasteners and anchors must be installed in the positions and depths directed by the transition manufacturer to prevent loosening or profile deformation.
Bonded transitions require adhesive coverage and application method (including primer and cure/hold time) specified by the adhesive manufacturer.
Fastened transitions: keep straight, don’t overdrive
For metal/vinyl profiles that use screws/anchors:
– Mark hole locations according to the profile instructions (don’t “eyeball” spacing).
– Drill to the specified diameter/depth for the fastener type.
– Keep the strip straight during installation; don’t allow the ends to lift while you tighten.
– Avoid overtightening—thin metal or vinyl profiles can warp, creating a visible edge or a weak point.
Bonded transitions: use the exact adhesive system
For transitions that bond to concrete:
– Apply adhesive as specified (coverage area and, where applicable, trowel/notch size).
– Set the transition and hold until the adhesive’s initial grab is achieved (or until the product’s specified cure/handling condition is met).
– Don’t disturb the transition during the initial cure window.
After placement:
– Check the seam from multiple angles
– Walk the area with normal shoes
– Look for a lip (raised edge) or gap (debris-catching void)
Fastened vs. bonded: comparison for garage installs
| Method | Pros | Cons / watch-outs |
|---|---|---|
| Fastened (screws/anchors) | Stable under rolling loads; quick return to use once hardware is installed (follow product guidance). | Requires precise drilling; wrong anchor type can loosen on dusty or weak concrete; overtightening can warp thin profiles. |
| Bonded (adhesive) | Creates a uniform contact surface; often cleaner finish without visible fastener heads. | Bond strength depends on primer and moisture conditions; cure/hold time can delay heavy traffic; installation on dirty concrete is a common failure cause. |
What can go wrong (and how to avoid it)
Most transition problems come from a mismatch between the transition’s design intent and the site conditions—especially height tolerances, substrate cleanliness, and movement requirements. If you catch these early (dry-fit and flush checks), you’ll avoid callbacks that cost more than the transition itself.
Misaligned cuts often lead to rocking transitions, which accelerates wear and creates gaps that collect dirt and moisture.
Adhesive failures are frequently tied to insufficient surface preparation, missing primers, or installing before the substrate meets cure/moisture requirements.
Misaligned cuts
Even slight angle errors can leave a visible seam or prevent full contact at the underside. Avoid this by:
– Dry-fitting with the flooring installed
– Re-checking at least twice after each cut
– Confirming that both edges meet the adjacent surfaces evenly
Dirty or improperly prepped concrete
If you skip primer (when required) or leave dust/film on concrete, the bond can weaken quickly. That can look fine at first and fail weeks later—particularly in garages where humidity and temperature swings are common.
Ignoring height changes
The #1 “trip hazard” issue is a transition that’s too tall or too short relative to finished flooring. Fix by:
– Measuring finished thicknesses
– Choosing a reducer/threshold designed for your height difference
– Ensuring patch/leveling work is complete before install
Movement not accounted for
If the transition crosses a movement joint but you install a rigid profile, you can trigger cracking nearby or pull the transition loose. Use the right expansion-joint product when movement is expected.
Over-fastening
Overtightening can deform thin transition materials. Tighten only to the recommended method (or the feel specified by the manufacturer). When in doubt, stop and re-check alignment before finishing the run.
Verdict / tip (when to DIY vs. when to pause)
For most DIY garage floor transitions, the safest approach is to follow the transition’s installation instructions exactly—especially surface prep, primer/adhesive cure windows, and any guidance on expansion/movement. Pause DIY (or hire a pro) when your slab edge is badly out of level, you’re dealing with uncertain expansion-joint behavior, or the existing slab is failing (spalling, loose concrete, or widespread cracking at the edge).
Choosing a transition type that matches the joint behavior (rigid vs. movement-capable) is critical to preventing cracking and lifting under garage loads.
The transition manufacturer’s surface-prep, primer, and cure requirements control the installation outcome more than DIY “best practices.”
If you’re unsure, a transition is one of those rare garage components where a small amount of professional assessment can prevent a full redo—especially when you’re integrating into a doorway threshold or tying new flooring into an older, imperfect slab edge.
Seven Common Transition Types and Typical Garage Fit (Selection Guide)
| # | Transition type | Best for | Movement tolerance | Garage load rating |
|---|---|---|---|---|
| 1 | Metal threshold (doorway) | Garage-to-interior height step | Low (rigid) | ★★★★☆ |
| 2 | T-molding | Two floors meet at same height | Medium | ★★★☆☆ |
| 3 | Flat reducer/ramp strip | Small height differences (smooth bridge) | Low to Medium | ★★★☆☆ |
| 4 | Expansion-joint cover | Movement joints and known slab gaps | High (designed to move) | ★★★★☆ |
| 5 | Rubber ramp transition | Noise-dampening bridge for carts/rollers | Medium to High | ★★★★☆ |
| 6 | Vinyl/laminate reducer (installer-rated) | Transition from LVP/LVT to concrete or tile | Low (follow system spec) | ★★★☆☆ |
| 7 | Overlap edge trim (surface-covering) | Covering uneven edges and minor terminations | Low to Medium | ★★★☆☆ |
Quick checklist (scan before you start)
Use this scan to confirm you’re doing the high-impact steps that prevent seam failures and trip hazards.
– [ ] Identify what flooring edges you’re transitioning between
– [ ] Confirm transition type matches height difference and expected movement
– [ ] Measure carefully and dry-fit all pieces
– [ ] Clean and prep concrete per product instructions (primer if required)
– [ ] Cut accurately; keep the strip straight
– [ ] Fasten or bond exactly as directed; don’t overtighten
– [ ] Check flushness and remove any debris at the seam
– [ ] Allow full cure time before rolling heavy loads ([ADD: exact cure time from your transition/adhesive instructions])
Flushness checks right after installation are the fastest way to catch trip edges before adhesive fully cures or fasteners are finalized.
FAQ
Do I need a transition at every edge in the garage?
Not always. You typically need transitions where two different floor surfaces meet, where a height change creates an edge, or at doorways/threshold areas that see frequent traffic. If both sides are the same material and height with a clean seam, a transition may be optional.
Should I install transitions before or after the main garage floor coating?
Usually you’ll coordinate timing based on your flooring system. Follow the instructions for your flooring/overlay (and the transition kit) because some systems require specific cure windows or surface conditions before adhesive bonding or anchoring.
Can I use the same transition method for metal, rubber, and vinyl strips?
No—different materials often require different prep and attachment methods (fasteners vs. adhesive, compatible primers, and cure/hold times). Always use the method specified by the transition manufacturer.
What’s the biggest cause of transitions lifting later?
The most common causes are inadequate surface prep (dust/oil/paint residue), skipping required primer steps, and installing on a surface that wasn’t fully cured or properly dry. If you fix those variables, you typically reduce failure risk significantly.
Sources:
– [ADD: Manufacturer installation guide/spec sheet for your specific garage floor transition profile]
– [ADD: Manufacturer installation instructions for the adhesive/primer system you plan to use (if bonded transitions)]
– [ADD: Concrete surface preparation guidance from the relevant adhesive/primer or flooring manufacturer]
– [ADD: ASTM D4263 details for the plastic sheet test duration/interpretation]
– [ADD: ACI curing guidance for normal-weight concrete curing duration under typical conditions]
When you install garage floor transitions, treat them like a system component—not an afterthought. Pick the correct profile for your height change and movement behavior, prep and test the substrate so the bond (or fasteners) can actually perform, and finish with a flushness verification that prevents trip hazards. Done right, your entryway seams will stay tight, clean, and reliable under real garage traffic year after year.
Frequently Asked Questions
What’s the best transition strip for garage floors when changing from concrete to tile or vinyl?
The best transition depends on the height difference and the floor surfaces you’re joining. For concrete-to-tile or concrete-to-vinyl, a metal transition strip (aluminum or stainless steel) with a smooth edge helps prevent trips and supports traffic from cars and foot traffic. If the height difference is more than a small gap, choose a leveling transition or one with adjustable height features, and ensure the strip is compatible with your floor type and adhesive method.
How do I install garage floor transitions without damaging my concrete slab?
Start by cleaning the concrete thoroughly and checking for cracks, spalling, or loose edges where the transition will meet the slab. Use manufacturer-approved concrete adhesive or fasteners depending on the transition system, and pre-plan the layout so the strip sits flush and centered in the joint. If drilling is required, use proper concrete bits and avoid over-tightening, which can create unevenness or loosen the fasteners over time.
How do I measure and prep expansion gaps so garage floor transitions fit correctly?
Measure the gap between surfaces and account for the required movement of the concrete—especially if your slab has control joints or is exposed to temperature swings. Dry-fit the transition strip first to confirm length and alignment, then mark the exact placement before applying adhesive or drilling. Proper prep includes grinding high spots, filling voids as needed, and removing dust so adhesive transitions bond securely and don’t lift.
Why do garage floor transitions fail, and how can I prevent lifting or cracking?
Transitions often fail due to poor surface prep, wrong adhesive selection, inadequate curing time, or installation over uneven concrete. Moisture and de-icing salts can also undermine bonding and accelerate corrosion if you choose a strip that isn’t rated for garage conditions. Prevent lifting by using a concrete-appropriate adhesive, allowing full cure time before driving, and choosing corrosion-resistant transition materials for exterior-facing or winter-use garages.
Which transition installation method is better for garage floors: adhesive, screws, or a flush-mount system?
Adhesive systems are often easier for minor height changes and when you want minimal drilling, but they require properly prepared, clean surfaces and correct adhesive for concrete. Screw or bolt-down metal transitions are typically stronger for heavy traffic and where a secure mechanical hold is important, though they require careful drilling and leveling. Flush-mount systems can look seamless and reduce trip hazards, but they demand precise measurements and prep to avoid rocking or uneven wear.
📅 Last Updated: October 11, 2026 | Topic: How to install transitions for garage floors? | Content verified for accuracy and freshness.
References
- Google Scholar Google Scholar
https://scholar.google.com/scholar?q=garage+floor+transition+strip+installation - Google Scholar Google Scholar
https://scholar.google.com/scholar?q=concrete+floor+transition+details+floor+coatings+epoxy+installation - Google Scholar Google Scholar
https://scholar.google.com/scholar?q=garage+floor+coating+surface+preparation+crack+repair+expansion+joint+installation - Epoxy
https://en.wikipedia.org/wiki/Epoxy - Concrete
https://en.wikipedia.org/wiki/Concrete - Expansion joint
https://en.wikipedia.org/wiki/Expansion_joint - https://en.wikipedia.org/wiki/Concrete_floor
- Grout
https://en.wikipedia.org/wiki/Grout - https://www.britannica.com/technology/concrete
- Google Scholar Google Scholar
https://scholar.google.com/scholar?q=How+to+install+transitions+for+garage+floors?