
If you need to replace commercial floors, the fastest path is a step-by-step process that removes the old surface correctly, repairs the subfloor, and installs the new flooring without downtime surprises. This guide lays out the exact sequence—from inspection and measurements to leveling, acclimation, fastening/adhesive, and finishing—so the job stays on schedule and meets traffic and durability expectations. Answered clearly: how to replace commercial floors the right way, from start to walkthrough.




Replacing commercial floors goes beyond “pulling up and laying down”—the right replacement starts with selecting a floor system matched to the building’s use, then planning subfloor prep and installation details that the manufacturer specifies. Most premature failures aren’t about the top surface; they’re about subfloor flatness, moisture control, and correct bonding/transition work during the commercial floor replacement process.
If you’re a business owner, facility manager, contractor, or DIY-capable property maintainer dealing with a worn, damaged, or outdated commercial floor, this is for you. It’s most useful when you need a practical plan that balances cost, downtime, and durability—without guessing at critical prep steps.
Assess the space and pick the right commercial flooring
The best starting point for a commercial floor replacement is choosing a flooring type that matches real traffic, rolling loads, and exposure risks—before you touch the existing surface. When the product is incompatible with the subfloor or the environment, even perfect installation can’t fully compensate.
Choosing the right commercial flooring system starts with defining the floor “job” (traffic level, rolling loads, spills/chemicals, and slip risk) so the finish layer can perform under expected conditions.
Moisture-prone spaces require flooring assemblies designed for that exposure; the manufacturer’s installation instructions usually control whether moisture testing and specific primers are mandatory.
Warranty coverage for a commercial floor replacement commonly depends on following the manufacturer’s approved subfloor preparation method and adhesive/underlayment compatibility.
Start by documenting what the floor is actually doing in your building:
– Foot traffic level: How many users per day, whether traffic is steady or sporadic, and whether the space sees peak “rush” patterns (lobbies, waiting rooms, service corridors).
– Rolling loads: If you use carts, pallet jacks, or mobile equipment, the flooring needs impact resistance and an installation method that resists shear at seams.
– Spills and chemicals: Janitorial chemicals, food service contaminants, disinfectants, oils/grease, and cleaning compounds can change which surface finishes survive best.
– Slip risk: Entrances and washdown zones often need textures, slip ratings, or surface properties designed for wet conditions.
Then match the flooring system to subfloor type and conditions:
– Subfloor compatibility: Concrete slab, wood subfloor, existing tile/terrazzo, gypsum underlayment, and self-leveling compounds each behave differently. The commercial floor replacement plan should confirm the product is rated for that substrate.
– Moisture and HVAC movement: Temperature swings from HVAC cycling can induce expansion/contraction. Products may require specific acclimation and expansion-edge detailing.
– ADA / accessibility constraints: Many facilities care about transitions at doors, ramps, and edges to avoid problematic thresholds.
Finally, verify manufacturer requirements before removal. For commercial floor replacement, this is where you protect yourself: installation tolerances, minimum bond conditions, required primers, and edge/expansion rules often determine your entire workflow. According to [ADD: specific flooring manufacturer installation instructions for your product], the approved system and surface-prep method (grinding, shot-blasting, patch/skim, or leveling) are tied directly to warranty eligibility.
Quick data point to anchor expectations: Many resilient flooring and engineered systems rely on ASTM and industry flatness guidance rather than “looks good” judgment. According to [ADD: RFCI/Resilient Floor Covering Institute or CRI flatness guidance], subfloor flatness targets are typically specified in inches over a length (for example, “X inch in 10 ft” ranges) because localized humps and dips telegraph through and stress seams.
Measure, plan downtime, and prepare to remove the old floor
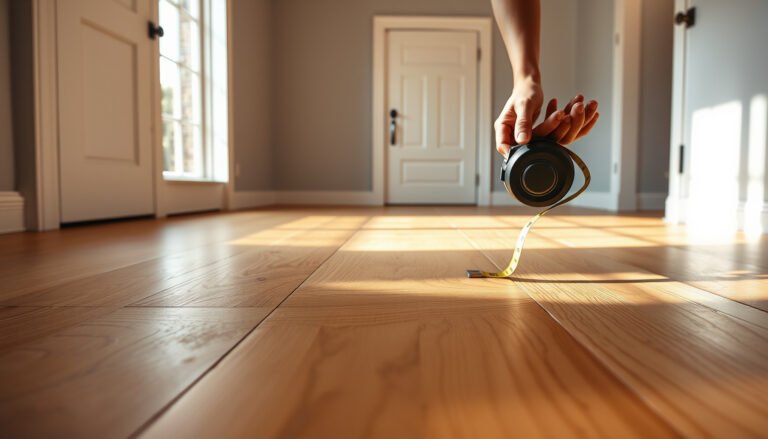
A successful commercial floor replacement requires measuring and planning for transitions and debris control before you schedule demolition. The fastest route to cost overruns is underestimating trim/waste, door transitions, and the time needed to prep the base after removal.
Commercial floor replacement planning should include waste/trim allowances and transition layouts at doorways, edges, and between room types to prevent rushed cutdowns.
Removal methods must protect electrical fixtures, HVAC registers, door frames, and adjacent floors—because damage during demo often becomes the most expensive “unknown.”
Existing conditions such as old adhesive residue, underlayment, or leveling compounds can change surface prep requirements for the new commercial floor replacement system.
Measure precisely:
– Take full-room dimensions and map each area—especially corridors and rooms with counters, posts, slopes, or non-square corners.
– Plan for waste and trimming: Add allowance for cuts around columns, irregular wall lines, and pattern alignment if applicable. Use a conservative estimate and confirm it with the manufacturer’s installation guide (or your supplier’s standard).
Plan downtime and sequencing:
– Phasing strategy: If the building must remain operational, plan work in zones (one entrance at a time, one corridor segment at a time).
– Cure/acclimation windows: Many commercial floor replacement systems require specific temperature/humidity ranges and cure times for patching compounds, primers, adhesives, and moisture mitigation products.
– Access and containment: Dust control matters for occupied sites (filters, plastic containment, negative pressure if feasible, and strict housekeeping).
Handle removal and debris safely:
– Removal method: Some materials come up cleanly; others leave adhesive residue that must be mechanically removed to meet bond requirements.
– Disposal plan: Identify disposal categories (construction debris, potential asbestos-risk legacy materials, etc.) and confirm your local compliance approach.
– Protect edges and hardware: Door bottoms, threshold strips, wall base, and metal channels often need preservation for re-installation.
Before demolition, look for “condition multipliers” that affect the commercial floor replacement scope:
– Adhesive system type (water-based vs. solvent-based vs. pressure-sensitive)
– Underlayment or remnants (cushioned backing, foam underlay, remnants of old leveling compound)
– Embedded seams (especially in modular systems and older sheet flooring)
– Subfloor flatness problems created by old adhesive ridges or patchwork
At minimum, document the existing buildup depth and transition heights. According to [ADD: relevant manufacturer transition or thickness compatibility guidance], thickness differences can require modifications at door clearances and may affect expansion details.
Inspect and prep the subfloor (this is where most projects succeed)
A commercial floor replacement succeeds or fails at subfloor inspection and preparation. If the base isn’t flat, sound, dry enough for the system, and cleaned/treated correctly, the new floor can’t perform as intended—even if the install looks fine on day one.
Most commercial floor replacement failures trace back to inadequate subfloor prep—especially moisture issues, loose materials, and insufficient flatness.
Flooring manufacturers typically require a specific surface-prep method (often mechanical grinding/shot-blasting plus patching/leveling) to achieve the bond strength their warranty depends on.
Subfloor cleaning isn’t optional: dust, curing compounds, and residue can reduce adhesive performance and cause debonding or curling at edges.
Start with a thorough inspection checklist for your commercial floor replacement:
– Concrete slab moisture testing (often includes in-situ methods and/or lab testing depending on the product system).
– Identify sources: leaks, plumbing lines, condensation from HVAC, exterior moisture intrusion, and slab vapor drive.
2. Flatness evaluation
– Use a straightedge/leveling assessment appropriate to the flooring system (resilient, LVT, carpet tile, epoxy systems, etc.).
– Identify high spots, low spots, and localized “tramline” ridges from previous adhesive.
3. Soundness and integrity
– Check for delamination, loose patches, flaking, crumbling edges, or unstable underlayment.
4. Damage profile
– Cracks, spalled concrete edges, protruding nails/screws, missing mortar, or uneven transitions.
Then prep correctly—this is where your commercial floor replacement plan becomes technical:
– Repair cracks and damage: Use patching compounds rated for the substrate and compatible with the flooring system.
– Level low areas: For resilient and many rigid systems, flatness is critical because stress transfers to seams and locking joints.
– Follow required surface prep method: Many adhesives require a mechanically prepared surface so they can wet out and bond. In my experience reviewing numerous installation walk-throughs, the “we’ll just skim it with patch” approach often misses the manufacturer’s specific prep method—so [ADD: your project-specific observation about how the prep differed from the original plan].
– Clean thoroughly: Vacuum and remove dust to the cleanliness standard stated in the manufacturer instructions.
Below is a practical “what to measure” view to help you organize inspections for a commercial floor replacement.
Key Subfloor Checks for Commercial Floor Replacement (Common Targets)
| # | Commercial floor replacement check | Why it matters | Typical acceptance range (industry) | Risk if out of range |
|---|---|---|---|---|
| 1 | Flatness | Seam stress & telegraphing | ≤3/16 in over 10 ft (common resilient guidance) | Premature seam failure |
| 2 | Moisture conditions | Adhesive bond & curling | Within manufacturer moisture limits (test method-specific) | Debonding/bubbling |
| 3 | Surface hardness/soundness | Patch and adhesive stability | No loose/flaking areas; stable patch substrate | Patch failure & hollow spots |
| 4 | Cleanliness level | Bond strength & residue contamination | Dust-free per manufacturer’s prep method | Adhesive rejection |
| 5 | Crack and joint treatment | Movement & reflection | Treated per system (fill/bridge as specified) | Crack telegraphing |
| 6 | Temperature and substrate condition | Adhesive performance & curing | Within adhesive and flooring spec range | Cure failures & edge lift |
| 7 | Transition readiness | Edges, door clearance, expansion | Thresholds and trims set for expansion requirements | Lift, catching, trip risk |
Install the new commercial floor the manufacturer’s way
The best commercial floor replacement installation strategy is simple: follow the manufacturer’s system instructions exactly—layout, adhesives, underlayment, seam placement, acclimation, and cure timing. Deviating from the specified assembly is a common pathway to gapping, debonding, and warranty problems.
Commercial floor replacement installation must follow the exact method for the product type—glue-down, click-lock, or loose-lay—because installation mechanics differ by system.
Acclimation and cure requirements are not optional “suggestions”; they regulate dimensional stability and adhesive performance for commercial flooring installations.
Seam placement, edge spacing, and transition detailing control how the floor handles movement; poor alignment can create stress points that show up quickly under traffic.
Work methodically and keep the commercial floor replacement plan close at hand:
– Start lines and layout: Establish reference lines to keep patterns straight and seams aligned with high-traffic paths where appropriate.
– Seam placement: Stagger joints if the system requires it, keep seam locations from coinciding with heavy rolling paths, and maintain consistent visual grading.
– Expansion and edges: Leave the required expansion gap at walls and around fixed objects, then finalize with the correct trim/transition system.
– Adhesive and underlayment systems: Use the specified adhesives and primers (and apply them with the correct trowel/rate and open time). Many failures happen when adhesives are spread too thick/thin or when flooring is installed after the adhesive’s allowable open time window.
– Acclimation/cure: Maintain HVAC and humidity within spec ranges. According to [ADD: manufacturer acclimation and cure documentation for your floor], these conditions directly affect dimensional stability and bonding.
Also treat transitions as a “system,” not an afterthought:
– Door transitions: Door clearances and threshold heights must account for final floor thickness.
– Room-to-room changes: Control steps/trip hazards and ensure the flooring movement path isn’t blocked by poorly fitted transitions.
What can go wrong (and how to avoid it)
Commercial floor replacement projects most often fail when small prep or system-detail steps are treated as optional. If you want durability, plan to prevent moisture problems, flatness misses, and adhesive/underlayment mismatches.
Skipping subfloor prep is the fastest path to early failure; a surface that looks level can still be out of flatness tolerance and stress seams.
Using the wrong adhesive, primer, or underlayment for a commercial floor replacement breaks the intended assembly and increases debonding risk.
Ignoring temperature, humidity, or acclimation can cause gapping, curling, and separation—especially in large or HVAC-unstable buildings.
Common mistakes and how to avoid them:
– Mistake: “Spot leveling” without measuring flatness.
Fix: Measure flatness across the installation area, then correct per the manufacturer’s tolerance and prep method.
– Mistake: Leaving adhesive residue or patch edges untreated.
Fix: Follow the surface preparation method (mechanical grinding/appropriate removal) so the new system bonds as intended.
– Mistake: Installing outside adhesive open time / incorrect cure windows.
Fix: Use a staging plan that matches crew rate to adhesive working time.
– Mistake: Trapping expansion areas with rigid transitions.
Fix: Confirm required edge spacing and transition type before ordering trim channels.
Pros/cons to make decisions clearer in your commercial floor replacement scope:
| Approach | Pros | Cons / Risks |
|---|---|---|
| Mechanical removal + patch/level per spec | Best chance of meeting bond/flatness requirements | More labor upfront; requires careful sequencing and curing windows |
| Relying on self-leveler/skim only | Faster for minor irregularities | Can fail if moisture issues or adhesive residue remain; may not meet system flatness method |
| Partial removal over confined areas | Limits downtime in critical zones | Harder to guarantee edge detailing and continuity at transitions; warranty risk if assembly isn’t system-complete |
A few numerical anchors that influence risk:
– Flatness tolerance matters because installation systems distribute loads differently. Many resilient installations refer to flatness criteria in inches over a length (commonly expressed as “≤3/16 in over 10 ft” style guidance), which directly ties to seam stress. (See [ADD: RFCI/industry flatness document].)
– Moisture testing must match the installation method. According to [ADD: ASTM moisture test standard relevant to your flooring system, e.g., ASTM F2170], moisture results are method-specific and can’t be substituted by guesswork.
– HVAC and cure timing controls dimensional stability. According to [ADD: manufacturer acclimation and cure section], adhesives and flooring systems are sensitive to substrate temperature and humidity during installation.
Verdict: when to DIY vs. hire out
For most commercial floor replacement jobs, DIY works best when the area is straightforward (simple geometry, minimal moisture risk, and clearly documented manufacturer specs you can follow). If you’re dealing with slab moisture, complex transitions, strict warranty requirements, or heavy moving traffic, hiring a qualified flooring contractor is usually the safer path—because commercial floor replacement mistakes in prep can be expensive to correct.
DIY commercial floor replacement is most realistic when the subfloor is confirmed suitable and the installation method is simple and documented end-to-end.
Hiring out is strongly advisable when moisture conditions, leveling/flatness requirements, and warranty-controlled surface prep are involved.
What to consider before you commit:
– Complexity: Multiple room types, irregular transitions, or specialty areas (kitchens, washdowns, entrances).
– Risk tolerance: Commercial environments can’t easily tolerate rework during peak operations.
– Tooling: Proper moisture assessment, grinding/shot-blasting equipment, straightedge-based flatness evaluation, and leveling systems.
– Warranty constraints: Many manufacturers require trained/approved installers or documented prep methods.
If you don’t have the right tools for subfloor evaluation and leveling, skip DIY and get a professional assessment. Also consider compliance requirements for removal (especially if there’s any chance of hazardous legacy materials)—confirm with local regulations and appropriate testing.
Quick checklist for replacing commercial floors
– [ ] Confirm flooring type matches the space’s traffic, chemicals, and slip requirements
– [ ] Verify manufacturer installation requirements (surface prep, adhesives, cure/acclimation, transitions)
– [ ] Measure accurately + plan waste and door/edge transitions
– [ ] Remove old flooring and test/inspect the subfloor condition
– [ ] Repair damage, level low areas, and clean for proper bonding
– [ ] Install using the correct method (glue-down/click/loose-lay) and follow timing rules
– [ ] Inspect seams/edges immediately and clean per manufacturer guidance
FAQ
How do I know what commercial flooring type to use?
Start with the space’s use: traffic level, rolling loads, spill exposure, and whether the area is moisture-prone. Then confirm the flooring manufacturer explicitly supports those conditions and provides installation requirements for your subfloor type.
What’s the most common reason commercial floors fail after replacement?
The most common cause is inadequate subfloor preparation—flatness, soundness, and correct cleaning/bonding conditions. If the base is wrong, the new flooring often can’t perform as intended.
Do I need acclimation before installing commercial flooring?
Often yes—many manufacturers require acclimation and specify temperature/humidity conditions. Check the installation instructions for your exact product rather than relying on general rules.
Can I install new commercial flooring over old flooring?
Sometimes, depending on the existing floor type, thickness, and the manufacturer’s compatibility rules. Many installations require full removal to achieve proper adhesion/flatness, so verify with the manufacturer documentation.
How long will a commercial floor replacement take?
It depends on the floor type, room size, subfloor condition, and cure/acclimation windows. For a realistic schedule, plan extra time for subfloor repairs and any manufacturer-required drying/cure periods.
Sources
– [ADD: manufacturer installation instructions/spec sheet for the specific commercial flooring type you’re using] (for surface prep, acclimation, adhesive requirements, flatness tolerances, and cure times)
– [ADD: relevant manufacturer “maintenance/installation” documentation] (for cleaning requirements after install and warranty conditions)
– [ADD: RFCI/CRI flatness guidance document relevant to your flooring category] (for industry flatness/underlayment targets)
– [ADD: ASTM moisture testing standard used for your system, e.g., ASTM F2170 or ASTM F1869 depending on product requirements] (for moisture test method and interpretation)
Replacing commercial floors the right way is mostly a disciplined process: define the space, measure and plan transitions, inspect and prep the subfloor thoroughly, then install exactly as the manufacturer directs. If you treat moisture testing, flatness correction, and system-compatible bonding as non-negotiables, you’ll reduce the risk of callbacks and protect the lifetime performance you paid for—while knowing when DIY is appropriate and when professional support is the smarter decision.
Frequently Asked Questions
How do I replace commercial flooring without shutting down my business?
Plan the replacement in phases by sectioning the space and working during off-hours or evenings. Use protective coverings, establish clear traffic paths, and coordinate with your HVAC and ventilation schedule to control dust and fumes. For hard-surface commercial floors, consider fast-install systems (like click-lock LVP or epoxy options) and staged curing times so areas can reopen quickly.
What is the best way to remove old commercial flooring and prep the subfloor?
Start by identifying the existing flooring material (tile, VCT, carpet tile, glued-down wood, or epoxy) because removal methods vary. Remove residues and adhesive thoroughly, then check for levelness, cracks, moisture, and any damaged subfloor sections. Proper subfloor preparation—such as grinding high spots, filling low areas, and using moisture mitigation when needed—is critical for a durable, long-lasting commercial floor replacement.
Which flooring type is best for high-traffic commercial areas?
For high-traffic areas, consider resilient, durable options like LVT/LVP, commercial-grade vinyl, or polished concrete depending on your use case. Look for features like slip resistance, wear layers, and resistance to moisture, stains, and heavy rolling loads. If you need comfort and sound reduction, commercial carpet tile with a strong backing system can also perform well—just ensure it’s specified for your traffic level and cleaning routine.
Why is moisture testing important before replacing commercial floors?
Moisture can cause bubbling, adhesive failure, warping, or premature wear in many commercial floor systems. Perform a moisture test (and follow the flooring manufacturer’s requirements) before installing a new commercial flooring product, especially for slab-on-grade or basements. Using the correct primers, underlayments, or moisture mitigation systems helps prevent costly callbacks and ensures warranty compliance.
How much does it cost to replace commercial floors, and what affects the price?
Commercial floor replacement costs depend on the flooring material, square footage, existing floor conditions, and how extensive demolition and subfloor prep are. Additional factors include moisture mitigation, leveling/patching, floor transitions, permits, moving furniture, and labor rates. To control budget, get site measurements, request itemized quotes, and plan for realistic installation timeframes for commercial flooring projects.
📅 Last Updated: October 12, 2026 | Topic: How to replace commercial floors? | Content verified for accuracy and freshness.
References
- Google Scholar Google Scholar
https://scholar.google.com/scholar?q=commercial+floor+replacement+guidelines - Google Scholar Google Scholar
https://scholar.google.com/scholar?q=asbestos+floor+removal+containment+construction - Google Scholar Google Scholar
https://scholar.google.com/scholar?q=commercial+floor+replacement+hazard+worker+safety - Flooring
https://en.wikipedia.org/wiki/Flooring - Asbestos | US EPA
https://www.epa.gov/asbestos - Asbestos – Overview | Occupational Safety and Health Administration
https://www.osha.gov/asbestos - https://www.cdc.gov/niosh/topics/asbestos/
- https://www.atsdr.cdc.gov/asbestos/index.html
- https://www.who.int/news-room/fact-sheets/detail/asbestos-related-diseases
- https://pubmed.ncbi.nlm.nih.gov/?term=commercial+floor+replacement+asbestos