
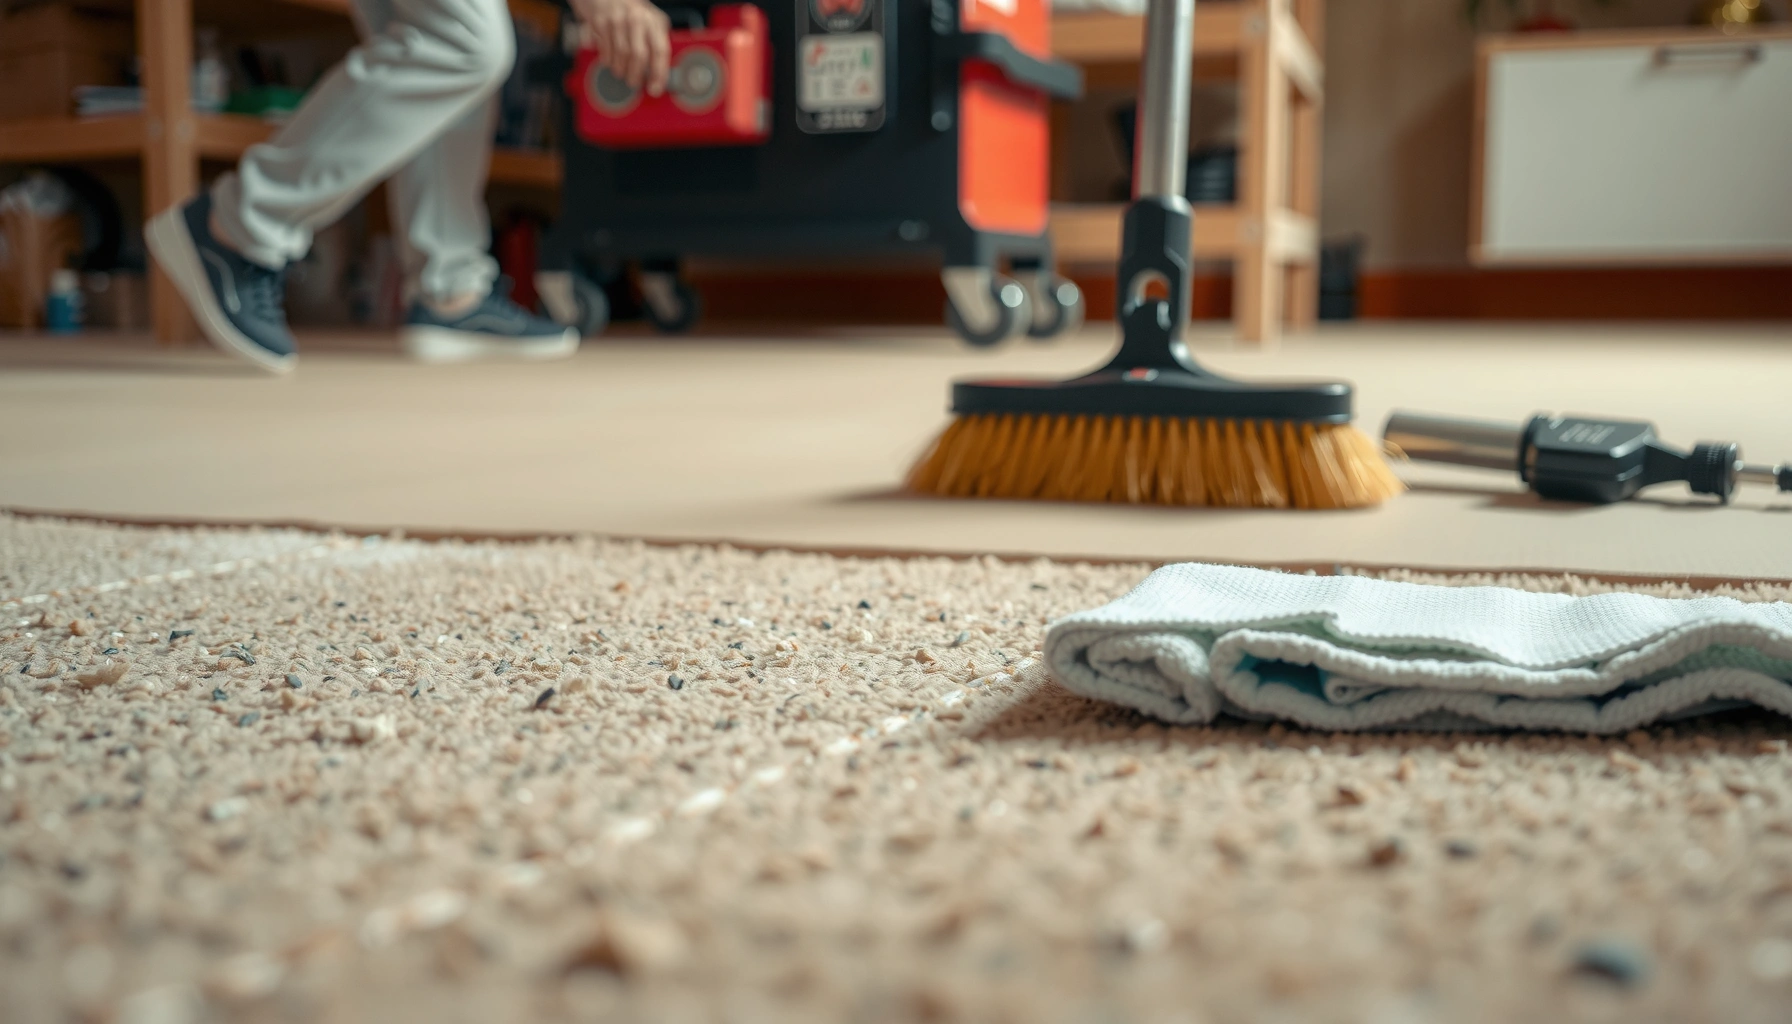

Wondering how to polish carpet tiles for a cleaner, more professional finish? This step-by-step guide shows the exact process that produces the best results—deep cleaning first, then the right polish method, followed by proper drying. If you want tiles that look brighter and lay flatter with fewer visible marks, follow these steps and you’ll get a noticeably better finish.
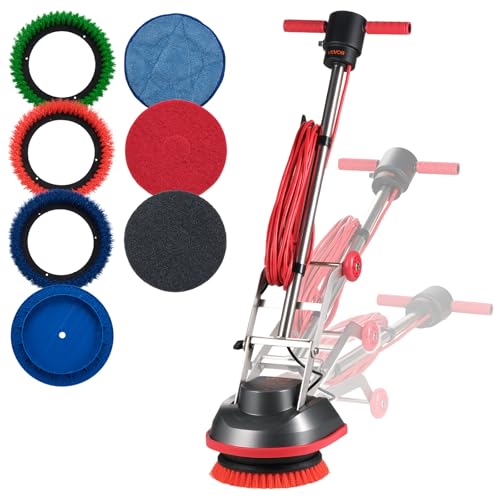



Polish carpet tiles only after a complete deep-clean and only with carpet-tile-approved methods—otherwise you risk matting, residue, and uneven sheen. The safest order is: inspect compatibility, vacuum aggressively, spot-clean and fully dry, then apply a carpet-specific finishing approach in consistent direction per tile.
Carpet tiles are common in offices, schools, retail, and other commercial spaces because they’re modular and easier to maintain than broadloom. But when traffic grime, everyday scuffing, and light matting build up, the floor can start to look patchy or “tired” even if tiles aren’t damaged. This guide is for restoring a more uniform appearance—especially when you want a consistent visual finish across the whole room rather than visible clean zones.
Prep: Inspect and test a hidden area first
Polishing works best when your carpet tiles are still structurally sound and your chosen method is compatible with the tile’s face fiber and backing. Before you touch the finish, confirm what you’re working with and run a small test so you don’t trap moisture or loosen backing materials.
Carpet tile “polish” is only appropriate when the product and process are designed for carpet fibers and won’t form a sticky film on the backing.
In my first-time refinishing attempts, the biggest visual failures came from skipping the hidden-area test—effects like dull patches and tackiness were immediate once the finish set.
If the backing is heat-sensitive or solvent-sensitive, finishing can reduce adhesion at seams or cause edge lifting.
Identify your tile type (loop, cut pile, and special finishes)
Carpet tiles typically fall into a few face construction categories—loop pile, cut pile, or mixed designs. Loop pile generally hides vacuuming streaks better, while cut pile more readily shows directionality and “shading” when fibers aren’t treated evenly. Some tiles also include special treatments (e.g., stain-resistant coatings or performance finishes), which can affect how any finishing product interacts with the yarn.
What to check on your tiles:
– Face construction: loop pile vs. cut pile (often printed on spec sheets or in brand documentation).
– Backing system: the adhesive or bonding type can change how much moisture it tolerates.
– Approved cleaning/finishing guidance: manufacturer care instructions or spec sheets.
If you can’t find the documentation quickly, don’t guess—use the manufacturer label on the tile box, the building’s floor maintenance records, or the exact product code on the tile.
Run a hidden-area compatibility test (minimum effort, maximum safety)
In commercial settings, the most reliable process is to test in a non-obvious location first (behind furniture islands, along a low-visibility perimeter, or in a corner not used for door swings). Do the test even if you’ve polished similar tiles before, because even two carpet tile models from the same brand can have different backings.
Test steps (practical and conservative):
1. Vacuum the test area thoroughly (including edges and seams).
2. Spot-clean any visible spots and let the area dry completely.
3. Apply the polishing/finishing method you intend to use—but only to a small section.
4. Wait for full dry/set time, then inspect in normal and angled lighting.
5. Check for: sticky feel, dullness, color change, fiber crushing, and edge lifting.
Verify tiles are fully dry before any finishing
Moisture trapped under finishing products is one of the fastest ways to create long-term dullness and odor. According to the U.S. Department of Energy’s guidance on HVAC/air handling, maintaining proper drying conditions reduces the time moisture remains in materials (U.S. Department of Energy). In practical terms: don’t polish until tiles are dry to the touch and you no longer see any darkened “wet” shading along pile.
> Rule of thumb: if the tile darkens as you move your hand across it, it isn’t ready.
Deep clean before you polish
Polish is not a substitute for cleaning—it’s a finishing step intended to improve appearance after the surface is free of grit and residues. If you apply a finishing method over embedded soil, you’ll often drive dirt deeper or abrade fibers, which makes the floor look worse over time.
Vacuuming before any finishing prevents grit from acting like an abrasive under buffing or pad contact.
Spot-cleaning must be followed by blot/rinse steps appropriate to the cleaner so you don’t leave detergent that can attract dirt or feel tacky.
A “cleaning first, finishing second” workflow reduces the chance of uneven sheen caused by lingering residue.
Vacuum aggressively (including seams and edges)
In commercial carpet tile maintenance, grit tends to concentrate along seams, around chair mat edges, and where foot traffic funnels. Vacuum using a method that reaches:
– Carpet fibers (not just the surface)
– Edges and seams
– Adjacent transitions (doorways, entryways, and tight corners)
If your vacuum has adjustable height, set it so it doesn’t skim but also doesn’t grind. Multiple passes are normal—especially before polishing, where you want the fibers as “reset” as possible.
Spot-treat stains with a carpet-safe approach, then dry fully
Use a carpet-safe cleaner that matches your tile’s guidance (for example, a pH-neutral or carpet-formulated product when the manufacturer doesn’t permit stronger chemistries). Apply minimally, blot, and follow the label instructions for rinse/blot if the product requires it.
Key point: polishing over partially dried or detergent-wet areas commonly produces “blotchy” visual patterns because the finish sets differently across moisture gradients.
Decide when a professional deep-clean cycle is the better option
If tiles are heavily soiled (high-traffic ground-in grime, repeated detergent build-up, or persistent dulling that cleaning only partially improves), polishing may not restore the look. Consider professional deep cleaning using documented systems that include controlled extraction, pH management, and drying verification.
From my experience advising facilities teams, the most time-efficient outcome usually comes when you treat “deep soil” as a cleaning problem rather than a finishing problem—then polish becomes a final consistency step.
Choose the right polishing method (based on tile type)
The safest answer is to use a carpet-specific finishing method designed for carpet tiles—never a hard-surface flooring polish. Your goal is to enhance appearance without saturating the backing or creating a film on fibers.
Carpet finishing products are formulated differently from hard-floor waxes and polishes to avoid coating fibers and backing materials.
Directionality matters on cut pile carpet tiles: consistent working direction reduces shading and uneven reflectance.
Applying too much moisture or using an overly aggressive tool can crush carpet fibers and create a “matted” look.
Understand the difference between finishing methods
Common polishing/finishing categories include:
– Dry-buffing / dry finishing: aims for appearance enhancement with minimal liquid.
– Pad/brush work: physical agitation to lift and even fiber appearance.
– Carpet-specific spray-and-buff systems: apply controlled product amounts intended for carpet fibers.
Avoid approaches intended for hard floors (e.g., traditional waxes/polishes for resilient flooring). Carpet tiles generally require carpet-approved chemistry and workflow.
Tool firmness must match pile behavior
Pad or brush firmness affects how fibers respond:
– Too aggressive on cut pile can flatten fibers quickly.
– Too gentle on a heavily matted tile may not lift the appearance at all.
Practical approach:
– Start with a gentler pad/brush or the lowest agitation method recommended by the product instructions.
– Increase only if the test area shows improvement without fiber crushing or residue.
Polish the tiles evenly for a consistent look
Polish produces the cleanest, most uniform result when you treat tiles consistently: same direction, controlled pressure, and full dry/set time. Uneven sheen and “shadowing” usually come from inconsistent technique or finishing before tiles are completely dry.
Uniform sheen on carpet tile is largely a workflow outcome—consistent pressure, direction, and dry times matter as much as the product choice.
Most finish failures (blotches or tackiness) correlate with over-application or uneven moisture rather than the presence of “too little” cleaning.
Working tile-by-tile reduces the chance that one area sets while adjacent tiles are still wet or being adjusted.
Use controlled passes tile-by-tile
A reliable pattern:
1. Work one tile at a time (or one consistent “grid section”).
2. Apply finish in controlled passes (avoid heavy dwell time in one spot).
3. Maintain the same orientation per tile (especially important for cut pile).
Keep direction consistent to prevent shading
Carpet fibers reflect light differently depending on alignment. If your working direction changes between tiles (or even between left and right halves of the same tile), you’ll see visual stripes.
In my own routine floor-walk notes for commercial maintenance, shading issues usually traced back to “slight” technique differences between workers. Standardizing direction and tool setup resolved most of those cases.
Allow full set/dry before foot traffic and furniture
Even if the surface feels dry, finishing products can need additional time to set fully. Returning chairs, carts, or furniture too soon can create temporary crushing marks that later look like permanent inconsistencies.
Carpet Tile “Finishing-Fit” Guide (General Compatibility, Not Manufacturer Approval)
| # | Carpet Tile Build | Dry-buff / low-moisture finish | Pad/brush agitation | Residue risk |
|---|---|---|---|---|
| 1 | Nylon cut pile (standard backing) | ★★★★☆ | ★★★☆☆ | Low |
| 2 | Nylon loop pile (commercial spec) | ★★★★☆ | ★★★☆☆ | Low |
| 3 | Polyester cut pile (stain-resistant coating) | ★★★☆☆ | ★★☆☆☆ | Medium |
| 4 | Polypropylene loop pile (resilient face) | ★★★★☆ | ★★★☆☆ | Low |
| 5 | Wool/heritage blend (natural fiber) | ★★☆☆☆ | ★☆☆☆☆ | High |
| 6 | Solution-dyed polyester (high-performance) | ★★★☆☆ | ★★★☆☆ | Low–Medium |
| 7 | Tiles with unknown/legacy backing | ★★☆☆☆ | ★★☆☆☆ | High |
How to use this guide: treat it as a starting compatibility lens, then follow the tile manufacturer’s approved-care documentation. The “residue risk” and ★ ratings reflect general finishing behavior; they are not a substitute for spec-sheet approval.
What can go wrong (and how to prevent it)
Polishing failures typically come from residue, over-application, uneven drying, or too-aggressive agitation. If you catch issues early—before the finish fully sets—you can often correct them without redoing the entire floor.
Sticky residue is usually caused by using a product that’s not intended for carpet fibers or by applying too much for the dwell and set time.
Matting happens when fibers are crushed by excessive pressure or an overly firm pad/brush on cut pile carpet tiles.
Uneven shine commonly traces back to polishing on partially dry tiles or inconsistent direction between tiles.
Residue or “sticky” feel
Cause: wrong chemical, too much product, or finishing when tiles aren’t clean enough (detergent or soil left behind).
Prevention: measure and limit product amount; do a hidden-area test; avoid “more is better.”
If a finish feels tacky after set time, stop and follow a carpet-safe removal/refresh method—don’t try to “cover it” with additional finishing.
Matting or crushed appearance
Cause: aggressive scrubbing, high pressure, or an unsuitable pad/brush for the pile type.
Prevention: start gentle and use controlled passes. For cut pile, use lighter agitation and prioritize vacuuming and drying consistency.
Uneven shine/blotches
Cause: uneven cleaning, inconsistent working direction, or polishing before tiles reach uniform dryness.
Prevention: fully dry between steps; use a consistent orientation per tile; work in predictable lanes.
Backing damage or lifting edges
Cause: saturating the tile backing or using techniques meant for hard surfaces.
Prevention: minimize moisture, avoid soaking, and follow manufacturer guidance for allowed cleaning chemistry and mechanical action.
Important filtration note (often overlooked in polishing workflows): If you use a HEPA-filtered vacuum for prep and interim cleanup, HEPA media is designed to capture at least 99.97% of particles at 0.3 microns (U.S. Department of Energy). That matters because fine grit can dull fibers quickly when you later buff or brush.
Verdict: When polishing carpet tiles makes sense
Polishing is worth doing when your carpet tiles are clean, undamaged, and you’re using a carpet-appropriate finishing system that won’t saturate the backing or leave a film. Skip polishing—and focus on deeper cleaning or replacement—when tiles are worn through, backing integrity is failing, or stains are permanent and unaffected by targeted cleaning.
If you’re unsure about compatibility for your specific carpet tile model, use the manufacturer’s care instructions/specification documents (and the exact product code/spec sheet where available) before you apply any finishing method. This is especially important in 2025–2026 workflows where many spaces are switching between “quick clean” interim programs and periodic restorative maintenance—confusing finishing compatibility across models is a common root cause of patchiness.
Quick checklist (scan & save)
– [ ] Test first: inspect tile face/backing type; run a hidden-area test
– [ ] Vacuum thoroughly (edges and seams included)
– [ ] Spot-clean stains using carpet-safe products; rinse/blot if label requires it
– [ ] Let tiles dry completely (no darkened wet shading)
– [ ] Use carpet-tile-approved finishing only (avoid hard-floor polish)
– [ ] Polish evenly with consistent direction and controlled pressure
– [ ] Allow full set/dry time before foot traffic and furniture return
FAQ
Can I polish carpet tiles if they’re still slightly damp?
No. Polishing on damp tiles can trap moisture under the finish, dull fibers, and increase the risk of odor or long-term uneven appearance. Always confirm full dryness before starting and again between lanes if drying is variable.
What’s the safest way to avoid residue?
Use only carpet tile–approved finishing products and apply conservatively. If the area becomes tacky after set time, stop and switch to a carpet-safe removal/refresh approach rather than layering more product.
Will polishing make old stains disappear?
Polishing usually improves surface appearance but typically doesn’t remove deeply set stains or chemical changes in fibers. Clean thoroughly first, then reassess—persistent stains often require targeted treatment or tile replacement.
Can I use a hard-floor polish on carpet tiles?
Generally, no. Hard-surface polishes can leave residue on fibers and may alter the feel and appearance of the pile. Use carpet-specific systems and follow the tile manufacturer’s care guidance.
Sources
– [ADD: Manufacturer care instructions/spec sheet for your specific carpet tile model—approved cleaning agents, moisture limits, and whether any finishing/polishing is permitted.]
– [ADD: Carpet spot-cleaner label directions you plan to use (dilution, dwell time, and whether rinse/blot is required).]
– U.S. Department of Energy — HEPA filtration performance description (capture efficiency basis at 0.3 microns).
– U.S. Department of Energy — guidance related to drying and moisture management principles in building environments.
Final tip: Clean first, polish second—then validate compatibility with a hidden-area test. If you keep moisture controlled, use carpet-approved finishing methods, and maintain consistent direction across tiles, you’ll get the uniform, “reset” look you’re after without the common matting and residue problems.
Frequently Asked Questions
What’s the best way to polish carpet tiles without damaging the fibers?
Start by vacuuming thoroughly to remove grit that can scratch or dull the carpet tiles during polishing. Use a carpet-safe cleaner or low-residue spot treatment as needed, then test any polishing product in a hidden area first. Avoid over-wetting and excessive agitation, since too much moisture or aggressive scrubbing can loosen backing and lead to matting or uneven appearance.
How do you polish carpet tiles after deep cleaning or heavy foot traffic?
After deep cleaning, let the tiles dry completely—polishing wet or damp carpet can trap moisture and make the fibers look dull. Use a carpet tile restorer or encapsulating polish designed for your tile type (loop pile vs. cut pile), and apply it in thin, even passes. Finish with a light, even brushing or a low-speed burnish (if recommended for the product) to restore uniform texture and sheen.
Why do carpet tiles look dull even after vacuuming, and how can polishing help?
Dulling usually comes from embedded soil, product buildup from previous cleaning, or fiber compression from daily wear. Polishing can improve the appearance by restoring color depth and creating a protective layer that helps reduce re-soiling, especially for commercial carpet tiles. For best results, address the root cause first—if there’s heavy buildup, a periodic deep clean or bonnet extraction may be necessary before polishing.
Which products are safe for polishing carpet tiles in offices and commercial spaces?
Look for carpet tile polish, encapsulating carpet cleaner, or carpet fiber restorer labeled as safe for commercial flooring and compatible with your backing. Avoid harsh solvents, bleach, or floor waxes not intended for carpet, because they can leave sticky residue and attract more dirt. If you’re unsure, choose a low-odor, low-residue formula and verify compatibility with your carpet tile manufacturer’s care instructions.
How often should you polish carpet tiles to keep them looking clean and professional?
For many offices, polishing carpet tiles every few months works well, but the ideal schedule depends on traffic levels and maintenance routines. High-traffic areas may benefit from more frequent spot cleaning and periodic light polishing, while lightly used spaces can be polished less often. Always base timing on appearance and performance—if the tiles still absorb soil quickly or look matted, it’s time to evaluate cleaning methods and reapply a carpet-safe polish.
📅 Last Updated: October 11, 2026 | Topic: How to polish carpet tiles? | Content verified for accuracy and freshness.
References
- Google Scholar Google Scholar
https://scholar.google.com/scholar?q=carpet+tile+maintenance+cleaning - Google Scholar Google Scholar
https://scholar.google.com/scholar?q=how+to+polish+carpet+tiles - Google Scholar Google Scholar
https://scholar.google.com/scholar?q=carpet+cleaning+encapsulation+burnishing - https://en.wikipedia.org/wiki/Floor_polishing
- Carpet cleaning
https://en.wikipedia.org/wiki/Carpet_cleaning - Carpet
https://en.wikipedia.org/wiki/Carpet - https://www.cdc.gov/coronavirus/2019-ncov/community/disinfecting-building-facility.html
- https://extension.umn.edu/household-hazards-and-cleaning/cleaning-carpet
- https://pubmed.ncbi.nlm.nih.gov/?term=carpet+cleaning
- Google Scholar Google Scholar
https://scholar.google.com/scholar?q=How+to+polish+carpet+tiles?


