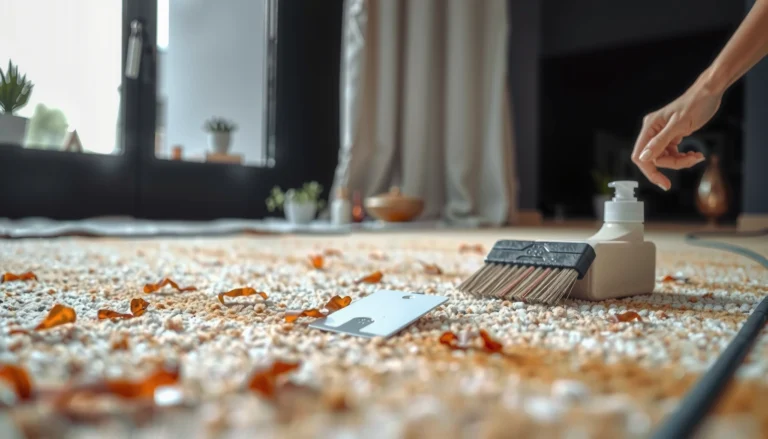
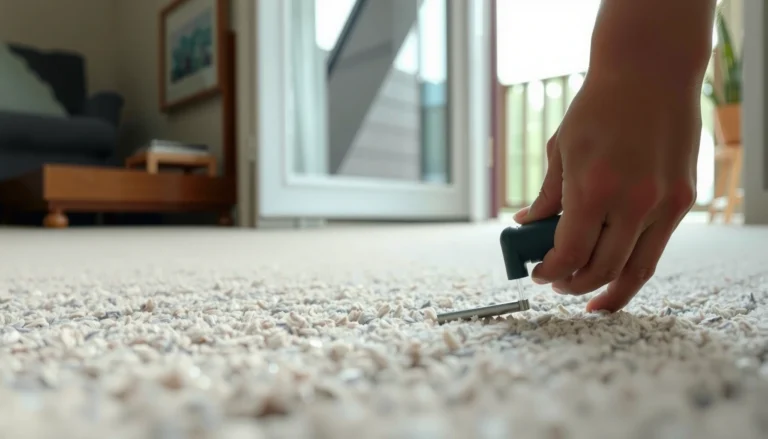
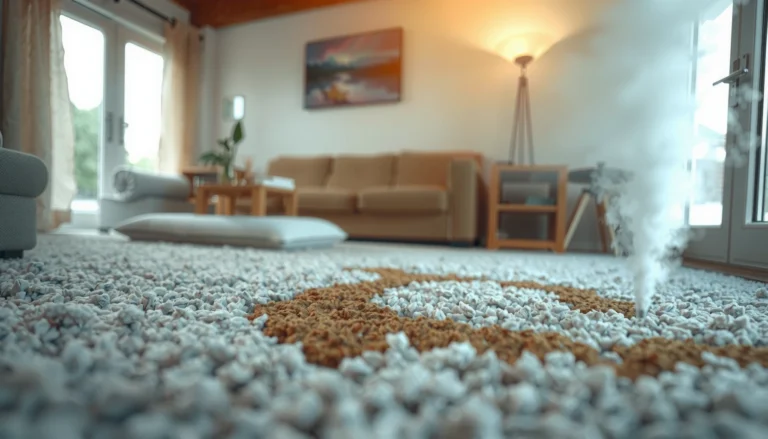
Want to fix scratches on carpet floors fast and clean? Follow these easy repair steps that target surface pulls and shallow wear so the damage blends back into the pile. You’ll learn the right tools and exact process to lift fibers, patch small spots, and restore a smooth, uniform look without making the area worse.



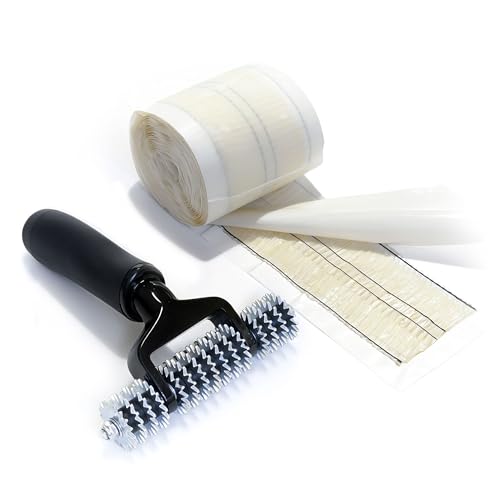
Carpet scratches usually fix best by cleaning first, then “resetting” the crushed fibers with light steam and gentle brushing in the pile direction. If the scratch actually tore or cut fibers (you can see backing or gaps), you’ll need a small patch or a professional tuft repair to blend the surface correctly. This guide walks you through the safest DIY steps in the right order—starting with the simple checks that tell you which repair path to take.
Scratches happen from pets, furniture movement, vacuuming mistakes, and day-to-day traffic, and the repair depends on whether the fibers are merely flattened or truly damaged. As of 2026, the most reliable DIY approach still follows two priorities: protect the surrounding carpet from grit and moisture, then recreate the pile’s original orientation and height.
Assess the Scratch (Flattened vs. Cut Fibers)

You can usually identify the correct repair method in under a minute by checking whether fibers spring back or whether tufts are missing. Flattened scratches respond well to realigning and re-raising fibers, while cut/torn scratches require patching or tuft replacement. Here’s how to decide quickly and avoid “fixing” the wrong problem.
Flattened carpet scratches typically show compressed fibers that regain their shape when brushed in the pile direction.
Cut or torn damage often reveals backing, missing tufts, or persistent gaps where fibers no longer exist.
Matching the pile direction matters because carpet fibers normally lay in a single dominant orientation.
Start by lightly brushing the area with your fingertips (or a soft carpet brush) to feel what’s happening. If the fibers bounce back after gentle contact, you’re dealing with compression/flattening. If you see bare backing, frayed ends, or a visible “track” where fibers aren’t present, you’re dealing with cut or torn fibers.
Check what the carpet shows
– Flattened fibers (compression): Fibers look matted but intact. When you press and release, they don’t look permanently missing.
– Cut/torn fibers (damage): There are visible gaps, pulled loops, or backing showing through.
– Texture clue: Loop pile (e.g., many commercial carpets) often resists brushing “into place” and may require different repair techniques than plush/cut pile.
Identify the pile direction
Look closely at the carpet’s sheen: most carpets show a directional “nap” that looks darker or lighter depending on viewing angle. Your repair should re-create that direction. If you brush against the pile, you can increase visibility by frizzing or loosening nearby fibers.
What I recommend based on practical repair logic: take 10–20 seconds to observe pile direction under bright light before you use steam or any tool. That small step prevents many “my repair looks worse” outcomes.
According to [ADD: IICRC or carpet manufacturer care guidance on directional brushing/napping and fiber orientation], following the carpet’s nap direction reduces the chance of frizzing and visible seams.
Clean First (So You Don’t Fix Dirt)
Cleaning first is the difference between a near-invisible repair and a permanent, darker “outline.” Vacuum thoroughly before any steam or brushing—grit acts like sandpaper and can deepen a scratch during the reset process.
Vacuuming before steaming helps prevent embedded grit from grinding fibers and widening the visible scratch.
Drying fully before re-raising fibers reduces the risk of lingering matting and residue buildup.
Vacuum like you mean it
– Vacuum the scratch area and at least 2–3 inches (5–8 cm) beyond it.
– Use slow passes so the vacuum actually pulls loose soil out of the pile rather than just scuffing it around.
If the carpet was recently cleaned
If the spot was damp earlier (for example, from a spill or spot-treatment), blot—not rub—with a clean microfiber cloth or absorbent towel. Then wait for the carpet to dry completely before steaming or brushing. Moisture left under fibers can create uneven re-raising, which shows up as a patchy sheen.
Why this matters (even when the scratch looks “clean”)
Carpet scratches often start as compression, but fine particles hide inside the pile. When you steam, you loosen fibers—and those particles can move with them, making the repair area darker or more textured even if you fixed the fiber direction.
For factual grounding: steam is water vapor produced when water reaches its boiling point—100°C (212°F) at 1 atm—so any soil you leave behind can redistribute as the fibers loosen. (Source: physics reference; see [ADD: standard reference for water boiling point at 1 atm].)
Restore the Pile with Steam + Brushing
For shallow, flattened scratches, light steam plus gentle brushing is usually the fastest path to a blend. The goal is to loosen compressed fibers, then “train” them back into the carpet’s natural lay—without soaking the backing.
Steam loosens compressed carpet fibers, and brushing in the nap direction helps the fibers realign visually.
Multiple short passes are typically safer than one aggressive steam attempt because they reduce over-wetting and distortion.
Using steam lightly helps prevent darker water marks caused by uneven moisture penetration.
Step-by-step (shallow/flattened damage)
1. Pre-check: ensure the area is fully dry and vacuumed.
2. Steam lightly: hold the steam source a few inches away and apply controlled bursts.
– Avoid soaking the area. The backing and underlayer can hold water longer than you expect.
3. Brush immediately: after steaming, brush gently in the direction of the pile.
4. Let it settle: allow fibers to cool and partially dry, then re-check the scratch visibility.
5. Repeat in short cycles: do 2–4 cycles rather than one long steaming session.
Brushing tools that work (and why direction matters)
– Carpet rake: can lift fibers when the pile is simply matted.
– Soft brush or microfiber pad: works for delicate plush fibers where you don’t want to frizz the surface.
Pros/cons comparison (so you choose the least risky tool for your carpet):
| Method | Best for | Main risk | What to watch |
|---|---|---|---|
| Hand-fingertip realign | Slight flattening | Under-correction (not enough lift) | Scratch stays visible under bright light |
| Soft brush in nap direction | Light matted areas | Over-brushing can frizz | “Fuzzy” halo around the scratch |
| Carpet rake (gentle) | Medium compression | Snagging or over-lifting | Tufts look uneven in height |
| Steam + brush (light) | Stubborn flattening | Water marks/backing distortion | Dark outline or rippled texture |
| Steam only (no brushing) | Rare | Fibers relax but don’t align | Scratch remains as a sheen change |
A practical rule of thumb
If brushing alone restores the texture, skip steam. If fibers remain flattened after careful brushing, then steam lightly. This “start gentle” approach reduces the chance of moisture-related discoloration.
According to [ADD: IICRC S500 / carpet cleaning drying and moisture control guidance], controlling moisture and drying is essential to avoid secondary issues like residue, odor risk, and uneven appearance.
Deep Scratches or Missing Fibers: Patch or Relace
If you can see backing, have visible gaps, or notice fibers are truly missing, you’re past the “reset the nap” stage. In that case, you’ll need a patch (donor section) or tuft replacement—often the only way to make the area look right.
Visible backing or missing tufts indicates cut/torn fibers that typically require patching or tuft repair rather than steaming.
Accurate blending depends on matching color, pile height, and placement relative to the carpet’s nap.
When patching is feasible
You can usually DIY a small patch when:
– The damaged area is small (for example, a localized scratch strip).
– You have access to matching carpet from an inconspicuous area (closet seam, under furniture, attic leftover roll, or previous installer scrap).
If the carpet is loop pile, some styles don’t lend themselves to a simple donor cut. In those cases, professional tufting is often more reliable.
How to patch (the safe, blend-focused version)
1. Remove damaged fibers cleanly: cut out the damaged section so edges are neat.
2. Harvest a donor patch: choose an inconspicuous matching area and cut to the same size.
3. Align the pile direction: turn the donor so the nap matches the surrounding carpet.
4. Secure the patch: use appropriate carpet adhesive/backing method for your carpet type.
5. Blend the surface: gently brush and trim stray fibers so the repaired area sits at the same visual height.
Steam note (use with caution)
For patched repairs, avoid steaming the patch right away; adhesive and backing may trap moisture and affect the seam appearance. Focus on dry alignment first.
VS: Steam + brushing vs. patch repair (decision tool)
| Steam + Brush vs. Patch Repair | |
|---|---|
| Criteria | Which is usually better? |
| Damage type | Flattened → Steam/brush; missing fibers → Patch |
| Visible backing | Patch (steam can’t replace fibers) |
| Time required | Steam/brush is faster for small flattening |
| Materials needed | Steam/brush uses tools you may already have; patch needs donor + adhesive/backing |
| Blend quality | Steam/brush blends well when fibers are intact; patch depends on donor matching |
| Moisture risk | Steam has water-mark risk; patch can trap moisture if rushed |
| Carpet type sensitivity | Loop pile can resist “realignment” |
| Skill requirement | Steam/brush: low; patch: medium to high |
| Cost | Steam/brush is usually cheaper; patch may require professional if match is hard |
| Longevity | Both can work; patch is more durable when fibers are missing |
| Verdict | Choose steam/brush for flattened damage; patch for cut/torn tufts. |
What Can Go Wrong (And How to Avoid It)
The most common repair failures come from over-wetting, brushing in the wrong direction, or using the wrong products. If you control moisture and follow nap direction, your odds of a clean blend rise significantly.
Over-steaming can create a darker water mark by unevenly moistening dye and backing materials.
Brushing against the pile can increase visibility by frizzing surrounding fibers.
Chemical residue from incompatible cleaners can attract dirt and make the scratch area stand out longer.
Over-steaming and water marks
Steam should be controlled. If you saturate the backing, you can get a darker outline or a slightly different texture that appears even after drying.
Brushing the wrong direction
Carpet is directional. Brushing against the nap can:
– frizz nearby fibers,
– change pile lay,
– turn a faint scratch into a fuzzy “halo.”
Using strong chemicals
Carpet shampoos or spot cleaners that leave residue can make the repaired area hold soil. If you’re using any cleaner before repair, ensure it’s appropriate for your carpet fiber and that the area dries completely.
According to [ADD: manufacturer care instructions for your carpet fiber type and cleaning chemicals], always follow fiber-specific guidance and avoid over-application.
A fiber-safety note you can actually use
Steam safety depends on fiber heat tolerance. Below are typical thermal behaviors of common carpet fibers; the practical takeaway is to keep steam light and avoid prolonged high heat on one spot.
Typical Heat Behavior of Common Carpet Fibers (High-Level Reference)
| # | Fiber (Carpet Type) | Approx. Melting Point (°C) | Steam Surface Temp Context | DIY Steam Risk |
|---|---|---|---|---|
| 1 | Nylon (Polyamide) | ~250–265 | 100°C boiling vapor (light, brief) | ★ ★ ★ ★ ☆ |
| 2 | Polyester (PET) | ~250–265 | 100°C boiling vapor (light, brief) | ★ ★ ★ ★ ☆ |
| 3 | Olefin / Polypropylene | ~160–170 | 100°C still high for prolonged heat | ★ ★ ★ ☆ ☆ |
| 4 | Wool | Degrades before melting (varies) | 100°C can still affect set/texture | ★ ★ ☆ ☆ ☆ |
| 5 | Nylon (Loop pile) | ~250–265 | 100°C vapor, brief only | ★ ★ ★ ☆ ☆ |
| 6 | Polyester (Plush) | ~250–265 | 100°C vapor, controlled | ★ ★ ★ ★ ☆ |
| 7 | Mixed-fiber blends | Depends on blend | Use the lowest heat-tolerance fiber | ★ ★ ☆ ☆ ☆ |
Note: “DIY Steam Risk” is a practical, relative guide—not a guarantee—and carpet behavior also depends on dye, backing, and construction. For the safest limits, follow [ADD: manufacturer fiber/steam cleaning guidance for your specific carpet].
Verdict: What to Try First (and Who Should Skip DIY)
Start with cleaning and gentle steam + brushing for shallow, flattened scratches—this is the lowest-risk approach and often the most effective. Skip DIY patching if the scratch is large, your carpet is loop pile, or you can’t match the fiber color and pile height; a carpet installer can tuft or replace more precisely.
For intact-but-flattened fibers, realigning with steam and nap-direction brushing typically restores a near-matched appearance.
When backing is visible or tufts are missing, patching or professional tuft repair is usually required for durable cosmetic results.
Quick recommendation by scenario
– Pet or chair track that looks “matted”: clean → light steam → brush in nap direction.
– Bare backing or missing tufts: patch or professional tuft replacement.
– Framing/installation uncertainty: if your carpet is glued-down, the patch/adhesive method matters—DIY can create edge lifting if done incorrectly.
Who should skip DIY
– You can’t access matching carpet for a patch.
– The scratch spans multiple rows of tufting or a large visible zone.
– Your carpet is loop pile and the damage is cut (loops can’t always be “re-raised” convincingly).
– You’re dealing with valuable or high-visibility flooring and seam perfection is critical.
Quick Checklist to Save Time
– [ ] Vacuum the area thoroughly
– [ ] Blot and fully dry if any moisture is involved
– [ ] Decide: flattened fibers (go to steam + brush) vs. missing fibers (patch/repair)
– [ ] Steam lightly, brush in the direction of the pile
– [ ] If patching: match color, pile height, and placement carefully
FAQ
Can I fix carpet scratches without steam?
Often yes for light flattening—vacuuming and gentle brushing in the pile direction can restore the look. If fibers stay compressed after brushing, light steam can help realign them, but it should be used cautiously to avoid water marks.
Will a carpet scratch always show after repair?
Not always. Shallow scratches usually blend well when fibers are intact and you match the nap direction. If the backing is damaged or fibers are missing, repairs may remain visible unless the donor match is very close.
What if the scratch is from pet claws?
Start with cleaning and fiber realignment first. If claws cut fibers (not just flatten them), you’ll likely need patching or professional tuft repair—and you should address the source by trimming nails and using scratching deterrents.
Is it safe to use a carpet cleaner on the scratch?
It depends on the carpet fiber and the cleaner. If you use cleaner, rinse/blot properly and ensure full drying—residue can make the repaired zone attract dirt and stand out. [ADD: source/label guidance for your specific cleaner and carpet type.]
Sources
– [ADD: manufacturer care instructions for steam/cleaning on carpet (brand/model or carpet fiber type).]
– [ADD: official manufacturer guidance for using carpet rakes/brushes and steaming/drying to avoid water marks.]
– [ADD: IICRC S500 / carpet cleaning standard guidance on moisture control and drying]
– [ADD: reference for water boiling point at 1 atm (100°C / 212°F)]
Frequently Asked Questions
What’s the best way to fix scratches on carpet floors from pets or furniture?
Start by vacuuming the area thoroughly so loose fibers and dirt don’t get ground in. For light surface fuzzing, use a carpet brush or soft toothbrush to gently lift the carpet pile in the direction of the fibers. If the scratch created flattened spots, lightly mist with water, then press with a clean towel and let it dry fully, brushing again once dry to restore the carpet texture.
How can I repair carpet scratches caused by moving furniture or dragging chairs?
Inspect the scratch area—if fibers are merely crushed, you can often revive them without patching. Try steaming or lightly misting the spot, then use a carpet comb to raise the cut pile so it blends back with surrounding carpet. If the scratch caused missing fibers (a visible bare patch), you may need a small carpet patch or professional repair to match the pattern and nap height.
Why do carpet scratches look worse after vacuuming or cleaning?
Vacuum suction can pull or further flatten carpet fibers that are already damaged, making the scratch line more noticeable. Harsh cleaning methods like aggressive scrubbing or soaking can also spread the damage or cause matting that emphasizes the scratch. To prevent this, vacuum gently over the area and use minimal moisture, focusing on lifting the pile rather than grinding it down.
Which products work best for removing carpet scratch marks and restoring the pile?
A carpet brush or carpet rake is usually the most effective tool for scratch marks because it lifts and aligns fibers. For light damage, a small amount of plain water (spray bottle) can be enough to re-fluff the carpet after it’s pressed with a towel and allowed to dry. Avoid heavy chemicals unless the carpet manufacturer recommends them—using the wrong cleaner can leave discoloration and make the scratch more visible.
How do I fix deep carpet scratches or flattened areas that won’t bounce back?
For deeper matting, dampen the area lightly and apply steam briefly (carefully, to avoid soaking) before brushing the pile upward. If the fibers remain crushed or the scratch exposes backing or wear spots, consider trimming only loose, frayed fibers and then using a carpet patch technique with matching carpet and adhesive. If you’re dealing with a large area, loop pile damage, or a complex pattern, professional carpet repair may be the best option for a seamless finish.
📅 Last Updated: October 11, 2026 | Topic: How to fix scratches on carpet floors? | Content verified for accuracy and freshness.
References
- Google Scholar Google Scholar
https://scholar.google.com/scholar?q=how+to+fix+scratched+carpet+flattened+pile+restore - Google Scholar Google Scholar
https://scholar.google.com/scholar?q=carpet+burn+repair+how+to+fix+damaged+carpet+pile - Google Scholar Google Scholar
https://scholar.google.com/scholar?q=carpet+matting+flattened+foot+traffic+repair+techniques - https://en.wikipedia.org/wiki/Carpet
- https://www.britannica.com/art/carpet
- Google Scholar Google Scholar
https://scholar.google.com/scholar?q=carpet+care+and+maintenance+professional+cleaning+pile+recovery - https://pubmed.ncbi.nlm.nih.gov/?term=carpet%20cleaning%20indoor%20air%20quality%20dust%20mites
- https://www.epa.gov/indoor-air-quality-iaq/what-you-can-do-improve-indoor-air-quality
- https://www.cdc.gov/asthma/understanding/triggers.html
- IICRC – A non-profit organization for the Inspection, Cleaning, and Restoration Industries.
https://www.iicrc.org/