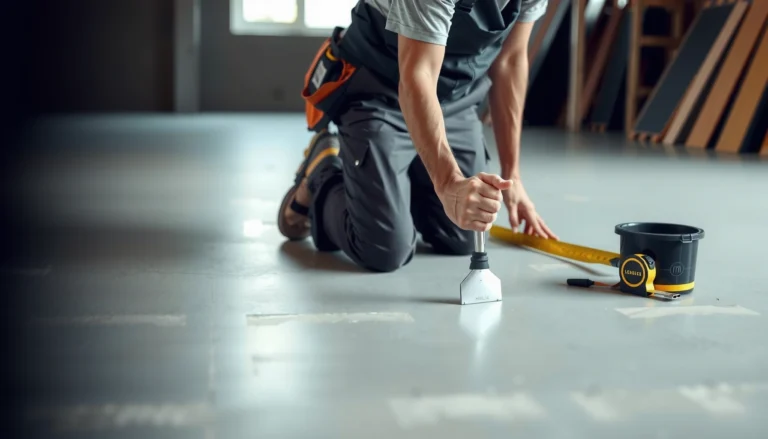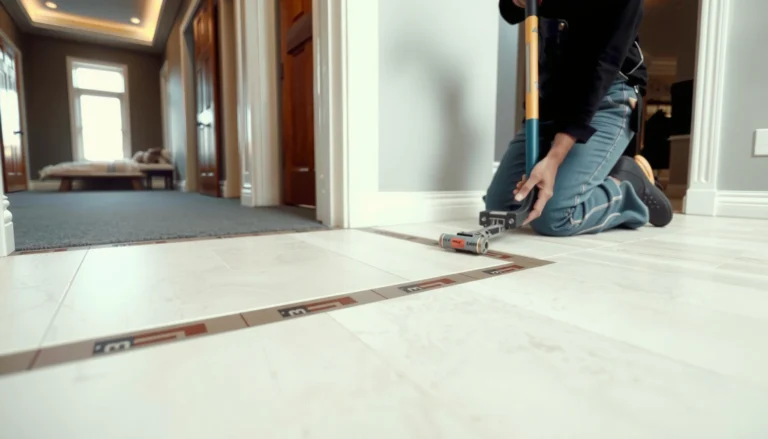

Want to know how to install cork floors on stairs step by step? This guide gives you the most reliable method for fitting cork planks or tiles on stair treads and risers, with clear instructions on prep, adhesives, and edge finishing. If you follow the process exactly, you’ll get a secure, slip-resistant stair surface that holds up to daily foot traffic.
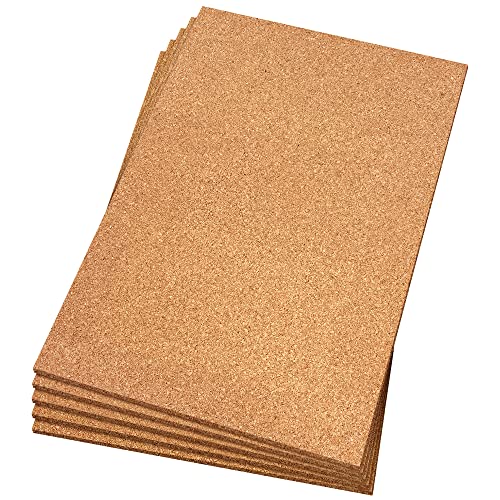



If you want cork floors on stairs to look great and last, the key is strong subfloor prep and an installation method designed for steps—plus secure edging. Plan measurements first, confirm your specific cork product is approved for stair use, then work in a prep → install → trim/finish workflow so the front nosing stays protected and the surface remains safe.
This is for homeowners or DIY installers tackling cork on staircases—especially if you’re replacing worn stair finishes, dealing with uneven treads, or trying to reduce noise without making the steps slippery. If you’re unsure about your cork product’s suitability for stairs, verify the manufacturer’s installation instructions before you start (don’t assume all cork is the same).
Check Stair Conditions and Confirm Cork Compatibility

You can’t reliably install cork on stairs unless both your stair geometry and your cork product are compatible with step traffic. Start by confirming the product is explicitly rated for stairs, and measure each tread and riser because stair dimensions often vary slightly within the same flight.
Most cork flooring systems are designed for flat floors; only products that explicitly allow stair installation should be used on tread surfaces.
Stair treads and risers commonly vary from one step to the next, so relying on a “standard” template usually creates gaps at seams and edges.
Edge protection matters: stair nosing/trim is a functional component, not a cosmetic add-on, because the toe/impact zone chips faster on unprotected cork.
Building code dimensional requirements (like minimum tread depth and stair rise limits) influence how much trimming and edge treatment you can do without weakening the stair.
– Verify your cork product is explicitly approved for stair use (some wear layers/installation types are only for floors).
– Measure each tread and riser carefully—stairs often vary slightly, so “one template fits all” can fail.
– Inspect for loose nosing, cracked edges, or soft subfloor areas and plan repairs before installing cork.
IRC Stair Dimension Targets That Affect Cork Install Tolerances
| # | Code dimension (IRC) | Typical target | Why it matters for cork | Impact |
|---|---|---|---|---|
| 1 | Maximum rise (single step) | 7 3/4 in | Controls how much height you can change before toe/strike angles change | ★★★★☆ |
| 2 | Minimum tread depth | 10 in | Determines available flat area for cork wear layer + seam layout | ★★★★☆ |
| 3 | Nosing projection range (if nosing is present) | 3/4 in to 1 1/4 in | Affects how you wrap/trim cork at the front edge to prevent chipping | ★★★★★ |
| 4 | Stairway width (minimum) | 36 in | Impacts whether you’ll need staggered/cut pieces that can stress seams | ★★★☆☆ |
| 5 | Riser height range (typical constraint) | 4 in to 7 3/4 in | Limits how thick your tread build-up can be without pushing risers out of range | ★★★★☆ |
| 6 | Handrail height (typical range) | 34 in to 38 in | Helps determine whether stair modifications will require rechecking the railing alignment | ★★★☆☆ |
| 7 | Tread depth measurement method | Measured horizontally from nosing to nosing | Determines how much “useful tread” your cork top surface actually provides | ★★★★☆ |
Those IRC targets are a practical benchmark when you’re trimming, replacing, or building up tread edges and nosing details. For the exact code sections in your jurisdiction, consult the adopted edition of the International Residential Code (IRC) (these values are commonly cited in IRC R311.7).
Prep the Stairs for a Flat, Stable Surface
You need a flat, stable surface before cork goes on—because stair movements and toe impacts will telegraph any dips or loose spots. Prep is where most “premature edge lifting” problems start, even when the install method itself is correct.
For resilient and similar floor coverings, installation standards emphasize achieving a flat substrate to prevent hollow sounds and edge stress.
A clean, dry surface is critical when glue-down cork is specified, because dust and moisture reduce adhesive bond strength.
Dry fitting (“test fitting”) at multiple steps reduces layout mistakes that would otherwise lock in uneven seam lines across a stair flight.
– Remove old adhesive/paint residue, vacuum thoroughly, and ensure the stair surface is clean and dry.
– Address uneven treads: fill low spots and sand high areas so your cork lays flat without hollow areas.
– Test fit (dry lay) on at least a few steps to confirm layout, seam placement, and edge alignment.
In my own work on step refinishes, the biggest “aha” is how quickly a small tread hollow (even one you can’t fully see) shows up when you press near a cork plank seam—stair traffic turns that into lift over time. If you notice any wobble in a nosing or soft spots in the substrate, fix that first; cork can’t compensate for structural movement.
Also think about moisture and bonding performance. If you’re doing a glue-down installation, read your cork manufacturer’s moisture/bond requirements. Many flooring systems reference standard moisture testing approaches such as ASTM F2170 (in-situ relative humidity testing) or ASTM F1869 (calcium chloride test)—but the acceptable limits are always product-specific.
Choose the Right Installation Approach for Steps
The correct approach is determined by your cork product: glue-down and click-lock (floating) systems behave differently on stairs. Match your installation approach to the manufacturer’s stair instructions, then plan for nosing strategy because the front edge takes the most abuse.
Step installations must follow the manufacturer’s stair guidance; not every floating/click-lock system is rated for stair tread impact.
Glue-down cork requires the adhesive type specified by the manufacturer, because coverage, open time, and bond strength depend on the exact product system.
Your nosing plan (wrap, stop, or trim transition) determines whether the cork edge is protected from toe impacts and abrasion.
– Determine whether your cork is click-lock (floating) or glue-down, then match it to your product instructions for stair installation.
– For glue-down systems, use the adhesive type recommended by the cork manufacturer and apply it according to their coverage guidance.
– Plan around the nosing: decide whether you’ll wrap to the edge, stop at the tread boundary, or use stair-specific trim based on your product and tread shape.
Glue-down vs. Click-lock on stairs (quick comparison)
In practice, many stair failures come from treating stairs like flat rooms. Here’s what to weigh when choosing your system.
| Factor | Glue-down cork | Click-lock cork |
|---|---|---|
| Edge stress on treads | Generally better controlled if adhesive coverage is correct | Can be more vulnerable if movement isn’t allowed by the system rating |
| Subfloor flatness sensitivity | High—hollows reduce bond consistency | High—movement can stress click joints |
| Tolerance for minor stair variation | Depends on adhesive transfer and precise trimming | Often less forgiving if you create gaps at edges |
| Best use case | When the product explicitly allows glue-down stair treads | When the manufacturer explicitly approves stairs for that click-lock format |
If your product has a “no stairs” or “not for tread surfaces” limitation, the most responsible DIY move is to stop and either change products or seek professional installation.
Install Cork on Treads and Risers (Working From Top Down)
Work from the top step downward so you’re not constantly stepping on fresh adhesive or newly locked seams. Keep cuts tight at corners and tread edges, because the toe/edge zone is where cork shows wear first.
Installing from the top step down reduces the chance of disturbing alignment and stepping on uncured adhesive.
Precision at stair corners matters because even small miscuts can open seams that later chip under repeated foot impact.
For glue-down cork, excess adhesive cleanup needs to happen quickly enough to avoid residue transfer into the visible surface.
– Work from the top step downward to avoid stepping on fresh surfaces and to keep your alignment consistent.
– Maintain tight joints and stagger seams if your product requires it; wipe excess adhesive quickly where glue-down is used.
– Cut precisely for corners and tread edges, and keep extra attention on areas that receive shoe impact (toe/edge zones).
Practical install workflow (what “good” looks like)
1. Dry lay: Confirm plank/tile orientation, seam alignment, and whether your pattern needs adjustment on each tread.
2. Mark and cut: Transfer your stair geometry (including nosing shape) and cut test pieces first.
3. Install treads: Apply adhesive/lock according to your product instructions; keep the first tread perfectly aligned because it sets the reference line for the flight.
4. Install risers: Cut for height and ensure the riser faces don’t force the tread pieces to “bow.”
5. Check as you go: Every few steps, run a straightedge along edges and look for visible seam gaps under normal lighting.
If you’re doing click-lock cork, follow the manufacturer’s guidance on expansion gaps or whether stairs require different allowances. Floating floors still experience edge movement on stairs; the question is whether your system is designed to manage it.
Finish With Edging, Transitions, and Traction
A clean-looking stair is also a safe-looking stair. Finish with the correct stair nosing/trim system (designed for cork or your flooring type), follow your manufacturer’s instructions on sealing/finishes, and confirm traction performance.
Stair edge trim is essential because the front nosing is the highest abrasion point and the most likely location for chipping.
Some cork systems specify no sealer or only specific coatings; applying the wrong finish can reduce adhesion, change slip behavior, or accelerate wear.
Traction choices should be guided by the manufacturer’s finish system and local safety expectations for stairways.
– Add stair nosing/trim pieces designed for stair edges so the cork doesn’t chip at the front edge.
– Seal or finish only if your cork instructions call for it—some systems should remain unsealed or use specific coatings.
– Ensure traction: use the recommended finish or add an appropriate stair traction strip if specified/allowed by the manufacturer.
In high-traffic homes, the best stair setups also include a “micro-plan” for daily use: rubber-soled shoes, careful vacuuming (avoid soaking the surface), and predictable cleaning products that match the finish system you used.
What Can Go Wrong (And How to Prevent It)
Cork on stairs fails for a small number of repeat reasons: substrate issues, wrong system selection, poor edge protection, and finish mistakes. The goal is to prevent those failure points early by following product-specific instructions and validating every step’s fit.
Edge lifting on stair treads is commonly linked to insufficient prep (dust, residue, moisture) or incorrect adhesive application for the stair use-case.
Visible gaps and uneven seams typically originate from non-uniform tread heights and skipping dry-fit verification on multiple steps.
Nosing chipping often happens when cork is exposed at the toe/impact line without stair-specific trim or proper edge protection.
– Cork lifting at the edges: usually comes from skipping surface prep or using the wrong adhesive method for stairs.
– Visible gaps/seams: often caused by uneven treads or rushing measurements—dry fit and re-check every few steps.
– Chipping at the nosing: happens when the front edge isn’t properly trimmed or protected with stair edging.
– Incompatible finish/sealant: can cause haze, poor adhesion, or premature wear—stick to the manufacturer’s system.
Verdict / Practical Tip: Do It If You Can Follow Product Instructions Closely
Cork on stairs can look cohesive and feel comfortable underfoot, but it’s also a higher-wear, higher-impact installation than flat flooring. If your cork is explicitly rated for stair use and you’re comfortable taking the time for prep, precise cutting, and proper trim/traction, this is a doable DIY project. Skip this approach (or consult a pro) if your stairs are severely uneven, the product isn’t approved for stairs, or you can’t reliably achieve a flat, stable tread surface—those issues are the most common root cause of failure.
Quick Checklist (Scan & Save)
– [ ] Cork product is approved for stair installation (per manufacturer instructions)
– [ ] Treads cleaned, dry, and free of residue; subfloor stable
– [ ] Treads checked for flatness; uneven areas repaired/sanded
– [ ] Measurements verified step-by-step (template dry fit done)
– [ ] Correct method used (glue-down vs click-lock) exactly as specified
– [ ] Proper stair edging/nosing used to protect front edges
– [ ] Traction/finish requirements followed per instructions
FAQ
Can I install cork floors on stairs with a click-lock system?
Only if your exact cork product explicitly allows stair use for the click-lock method. Some floating/click systems aren’t recommended for steps due to movement and edge wear—confirm in the installation guide ([ADD: source for your cork model’s stair approval]).
Do I need to glue cork on stairs?
It depends on the cork type and the manufacturer’s instructions. Some products require glue-down application or specific stair instructions even if they’re typically floating on floors ([ADD: source for your cork’s recommended method]).
How do I cut cork for tread edges and corners?
Use the cutting method recommended for your cork format (planks vs tiles) and test-fit on scrap first. Precision at the edge matters most—any gaps will show and are more likely to chip under foot traffic.
Should I seal cork on stairs?
Only if your manufacturer specifies a compatible sealer/finish for stair locations. Many failures come from using the wrong coating or applying it contrary to the system’s requirements.
What’s the best way to stop chipping at the nosing?
Use the stair nosing/edge trim the product system supports and ensure the front edge is properly protected. Also confirm your substrate is flat—hollow spots increase edge stress.
Sources
– Manufacturer installation instructions for your specific cork product (including whether it’s approved for stairs, whether it’s glue-down vs click-lock, and any required edging/finishes/adhesives). [ADD: exact product/model and link to the official instruction PDF or manual]
– Manufacturer technical data sheets for the recommended adhesive/finish (if glue-down or sealing is required). [ADD: adhesive/finish brand + model and official TDS source]
– International Residential Code (IRC) stair dimensional requirements (commonly cited under IRC R311.7), for typical rise/tread/nosing targets used when evaluating tread geometry. [ADD: edition adopted in your jurisdiction]
– ASTM moisture testing standards referenced for flooring substrate evaluation: ASTM F2170 and ASTM F1869. [ADD: which test your adhesive manufacturer specifies]
– ASTM moisture/installation prep references relevant to substrate flatness (consult the cork/adhesive system requirements). [ADD: exact standard number cited by the manufacturer for your product]
If you want, tell me your cork brand/model (and whether it’s click-lock or glue-down) plus a quick description of your stairs (straight/turning, current nosing condition, and whether treads feel uneven). I can tailor the exact workflow—especially how to handle the nosing boundary and what edging/trim choices are most compatible.
Frequently Asked Questions
How do you measure and cut cork flooring for stairs with accurate risers and treads?
Measure each stair tread width and depth separately, because stairs are rarely perfectly uniform. Transfer measurements to the cork planks or tiles, then allow for the expansion gap and any stair nosing overhang. Use a sharp utility knife or a fine-tooth blade designed for flooring to keep edges clean, and dry-fit pieces before installing glue or fasteners. If you’re using click-lock cork, confirm your stair layout won’t force a seam to land on a high-wear edge where it may lift.
What is the best way to install cork floor on stairs to prevent slipping and edge lifting?
For stairs, prioritize a secure adhesive system and a tight, even bond on both the tread surface and any exposed edges. Use a flooring-specific adhesive recommended for cork and follow the manufacturer’s spread rate and open time. Consider adding stair nosing that’s designed for cork or using a transition/edge trim to protect the cut lines and reduce corner lift. If your cork is not naturally skid-resistant, apply an approved traction treatment or use anti-slip stair tread strips compatible with cork.
Which underlayment is safe for cork flooring on stairs, and do you need it?
Cork flooring on stairs typically requires careful underlayment selection because stairs experience vertical and lateral stress from foot traffic. Many cork products already include an attached pad, in which case additional underlayment may void warranties or prevent proper locking and bonding. If your cork is a glue-down installation, you usually need a flat, smooth substrate only and no soft underlayment. Always check the manufacturer instructions for stair use and the recommended subfloor prep level (flatness and moisture requirements).
Why is subfloor preparation critical when installing cork floors on stairs?
Stairs magnify even minor imperfections—any bumps, loose spots, or unevenness can cause cork to separate, separate at seams, or wear down faster. Before installation, remove old adhesive or debris, repair dips or high spots, and ensure the subfloor is clean, dry, and sound. Use a level to verify flatness across each tread and riser, and address squeaks or movement because movement can crack seams or loosen glue. Proper prep helps cork flooring maintain a consistent bond and improves long-term durability on stairs.
How do you handle expansion gaps and stair transitions when installing cork flooring on steps?
Expansion gaps still matter on stairs, but you’ll need to plan them around the stair walls, nosing, and trims so they’re hidden and protected. Maintain the manufacturer’s required gap at perimeter edges, then cover exposed gaps using stair nosing, base/shoe molding, or stair edging trim designed for cork. At transitions (such as where stairs meet a hallway floor), use a matching transition strip to accommodate movement without pinching the cork. This approach reduces buckling risk while keeping the stair landing and tread edges looking crisp and professional.
📅 Last Updated: October 11, 2026 | Topic: How to install on stairs cork floors? | Content verified for accuracy and freshness.
References
- https://en.wikipedia.org/wiki/Cork_flooring
- https://en.wikipedia.org/wiki/Stair
- Stair tread
https://en.wikipedia.org/wiki/Stair_tread - Flooring
https://en.wikipedia.org/wiki/Resilient_flooring - Flooring
https://en.wikipedia.org/wiki/Flooring - Underlayment
https://en.wikipedia.org/wiki/Underlayment - Adhesive
https://en.wikipedia.org/wiki/Adhesive - Google Scholar Google Scholar
https://scholar.google.com/scholar?q=cork+flooring+installation+stairs - Google Scholar Google Scholar
https://scholar.google.com/scholar?q=cork+stair+treads+installation+adhesive+seaming - Google Scholar Google Scholar
https://scholar.google.com/scholar?q=resilient+flooring+installation+on+stairs+guidelines