
You can install cork floors over existing flooring—if the surface is solid, flat, and properly prepared. This guide tells you when your subfloor can be reused, which existing floors to avoid, and the exact prep steps that prevent drifting, gaps, and squeaks. Get it right and cork goes down faster with less demolition than a full tear-out.
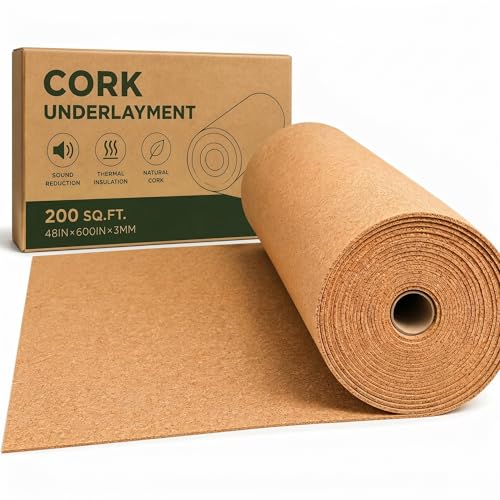



Yes—often you can install cork flooring over an existing floor if it’s solid, flat, and properly prepped, and if your cork manufacturer allows that substrate for your specific product. The real difference-maker is getting the right underlayment (or none), confirming moisture/vapor conditions, and making sure the base can’t move—because cork will reflect problems you ignore today (gaps, telegraphing, and squeaks show up later).
If you’re considering an upgrade to cork without tearing out what’s already there, this approach is most practical when the current surface is stable and sealed (for example, vinyl, laminate, or a well-bonded sealed wood finish). If the existing floor is soft, uneven, or moisture-prone—especially in bathrooms or on damp lower-level slabs—you should pause and plan a different route, typically involving removal or a dedicated moisture-mitigation system.
Check the existing floor’s condition (stability + flatness)

If your existing floor is stable and reasonably flat, cork can install cleanly and stay quiet underfoot. If it’s loose, uneven, or partially detached, the new cork may shift, gap, or wear prematurely—particularly with floating/click installations that rely on an engineered “layered system.”
Cork floors perform best when the subfloor is structurally stable and not prone to movement, because movement transmits through the cork finish and locking edges.
For installations over existing surfaces, the manufacturer’s approved-substrate list effectively defines whether the product is allowed to “sit on” that finish without removal.
Flatness issues can telegraph through cork over time, creating visible lines or weak zones where traffic concentrates.
What “solid” looks like in the real world
Start with physical checks before you buy underlayment or start snapping planks:
– Confirm attachment: Walk the floor and look for lifting edges, bubbling, cracked grout/tiles, or hollow-sounding areas (common with old vinyl tiles, loose laminate, or failing adhesive beds).
– Check for movement: Press on seams and transitions. If the existing layer compresses, wiggles, or “clicks,” treat it as unstable.
– Inspect for damage patterns: Cracks, delamination, or water staining often signal that the substrate has already failed once—cork won’t “fix” the root cause.
From experience with layered flooring systems (and consistent with building-flooring best practices), the worst underlayments and the most expensive cork won’t compensate for a base that flexes at seams.
Flatness: don’t assume “looks level” is enough
Cork installations—especially floating/click systems—need a base that’s flat enough to avoid stress on the locking mechanism and to prevent the planks/tiles from rocking. If your current floor has dips, ridges, or waves:
– High spots can create point loading that stresses seams.
– Low spots can lead to edge lift, tiny gaps, and squeaks.
A practical method: use a straightedge (commonly 6 ft / 1.8 m) and mark problem areas for leveling. Then verify the acceptable tolerance against your cork manufacturer’s flatness specification in the installation manual. (Those limits vary by product, thickness, and click system design.)
Surface type matters more than most people expect
Even when the existing floor is intact, the surface finish can interfere with installation requirements. For example:
– Some cork systems specify a specific underlayment type over certain substrates (especially for floating floors).
– Some adhesive-based cork products require a substrate that meets bonding and porosity expectations—sealed surfaces may reduce adhesion.
If your cork instructions say “approved over sealed subfloors” or provide a short list of compatible existing flooring types, follow that list exactly.
Plan the right installation method for cork over existing floors
The best method depends on what cork system you’re installing and what your current floor is made of. Your substrate choice, underlayment plan, and vapor-control approach should all match the installation method—floating/click, glue-down, or cork tiles with a specified adhesive system.
A floating/click cork floor relies on the underlayment and a stable subfloor to prevent movement at the joints and to manage minor surface irregularities.
Glue-down cork installations typically demand stricter substrate preparation because bond performance depends on clean, compatible surfaces and moisture conditions.
Manufacturers can restrict “approved over” substrates differently for floating versus glue-down products, even when the cork is the same material.
Choose the cork system first (then test the substrate)
Identify your cork category before you plan anything else:
1. Floating/click cork
– Usually “floats” above the subfloor using interlocking edges.
– Most often requires an underlayment system (and frequently a vapor barrier strategy), depending on what your cork product includes and what your existing floor provides.
2. Glue-down cork
– Requires a substrate that supports adhesive performance.
– Over some existing floors, adhesives may not bond well to sealed or low-porosity finishes.
3. Cork tiles with a specified adhesive system
– Often has the strictest requirements for adhesive compatibility, trowel selection, open time, and moisture control.
Match the method to the existing flooring—and the manufacturer’s approvals
A key planning step: check the installation instructions for (a) the underlayment requirement, (b) whether you need a vapor barrier over that existing floor, and (c) whether your existing flooring type is explicitly approved.
> If your cork instructions do not explicitly approve installing over your existing floor type, treat that as “do not proceed.” In practice, that’s the safest interpretation for long-term performance.
Comparison: floating vs glue-down over an existing floor
Below is a practical contrast of how substrate issues usually show up with each approach:
| Criterion | Floating/Click Cork | Glue-Down Cork |
|---|---|---|
| Primary dependency | Underlayment + flatness | Adhesive bond + substrate prep |
| If base moves | Gaps/edge stress | Potential debonding |
| Typical sensitivity to surface finish | Moderate | High |
| Moisture/vapor control | Often essential | Critical for bond |
Prep steps that make or break the job
If you want cork to install straight and stay locked, prep has to be deliberate—not “good enough.” Cleaning, leveling, and planning transitions are the difference between a quiet floor that looks right for years and one that starts failing along seams.
Dust, wax, and residual adhesive can prevent underlayment performance and/or interfere with adhesive bonding in glue-down installs.
Even small surface ridges can create locking-edge stress in floating cork floors and lead to premature joint separation.
Expansion gaps around walls and fixed vertical surfaces reduce buckling risk as the room humidity changes.
Clean thoroughly (and remove what the cork system can’t “hide”)
Start with a full clean pass:
– Vacuum well to remove fine dust.
– Remove wax, polish, paint overspray, grease, and loose adhesive residue.
– If you have a sealed surface (common with some vinyl and laminate), verify whether the cork instructions allow installing over that finish without additional surface prep.
Don’t underestimate how much “invisible” contamination affects layered flooring systems.
Level where needed (don’t just skim high spots)
For flatness issues:
– Scrape high ridges.
– Fill low areas using a floor filler/leveler compatible with your substrate and the underlayment system.
– Keep the filled area smooth and compatible—lumpy patches can be worse than a mild dip.
Also check transitions: stair landings, doorways, and where the cork meets tile or carpet.
Manage expansion gaps and transitions early
Cork behaves like other natural-fiber flooring: it reacts to indoor humidity changes. That’s why proper spacing matters:
– Leave expansion gaps at walls and fixed verticals (doors, columns, hearths).
– Plan how you’ll handle baseboards/shoe molding so the cork has room to move.
– Undercut door jambs when necessary so the planks/tiles can slide into place without pinning.
Moisture and vapor barrier checks (don’t skip this)
You should treat moisture/vapor testing as a required step, not a “maybe.” Cork is sensitive to prolonged moisture exposure, and moisture problems frequently accelerate failures in both floating joints and glue-down adhesives.
ASTM F1869 measures moisture vapor emission rate in lb/1000 sq ft/24h, which helps determine whether a slab is dry enough for certain floor systems.
ASTM F2170 measures in-situ relative humidity (% RH), which is commonly used to assess moisture risk under floor coverings.
Most manufacturer vapor-control requirements are designed to prevent moisture from reaching wood-based or organic materials like cork.
Understand the moisture pathways
Moisture typically comes from:
– Concrete slabs (ground moisture migration, construction moisture)
– Humidity swings in basements or below-grade rooms
– Leaks (plumbing, HVAC condensate, exterior seepage)
Even if your existing floor looks fine, it can trap moisture beneath it—especially sealed surfaces. That trapped moisture can become a long-term issue.
Use the right vapor barrier strategy for your install type
For concrete or lower-level areas (where moisture risk rises), you need to follow the cork manufacturer’s moisture/vapor guidance closely. Many flooring programs rely on standard testing methods:
– ASTM F1869: reports moisture vapor emission rate (lb/1000 sq ft/24h).
Many manufacturers reference limits around 3 lb/1000 sq ft/24h for moisture-sensitive installations, though the acceptable threshold is product-specific.
– ASTM F2170: measures in-situ relative humidity (%).
Common practice sets acceptable limits (often around 75–85% RH, depending on product), but you must use your cork system’s stated requirement.
If your existing floor is sealed and appears to “stop moisture,” don’t assume it does so in both directions. Follow the manufacturer’s instructions for underlayment/vapor barrier placement.
Moisture risk scorecard (quick, practical planning)
Use this table to translate room conditions into the level of caution you should take before installing cork over an existing floor system.
Moisture-Risk Factors When Installing Cork Over Existing Floors (Practical 2026 Guide)
| # | Room/Condition | Primary Concern | Typical Test Method | Install Confidence |
|---|---|---|---|---|
| 1 | Above-grade bedrooms with HVAC | Seasonal humidity only | Moisture check per instructions (often none if wood subfloor) | ★★★★☆ |
| 2 | Concrete slab on main level | Residual construction moisture | ASTM F2170 (RH) or ASTM F1869 | ★★★☆☆ |
| 3 | Basement (below-grade) living space | Ground moisture & vapor drive | ASTM F2170 + vapor barrier per cork spec | ★★☆☆☆ |
| 4 | Kitchen with frequent wet mopping | Surface water exposure | Visual + follow wet-maintenance limits | ★★☆☆☆ |
| 5 | Bathroom or entry with spills | Prolonged moisture events | Follow product wet-area limitations + moisture tests if slab | ★☆☆☆☆ |
| 6 | Existing vinyl over unknown slab history | Trapped moisture under sealed layer | Test slab conditions as applicable | ★☆☆☆☆ |
| 7 | Sealed subfloor with known leak history | Hidden wetting/odor risk | Moisture investigation before install | ★☆☆☆☆ |
What can go wrong when installing cork over existing flooring
Most cork failures over old floors come from a mismatch between the cork system and the condition of the base—not from the cork itself. If you see gaps, squeaks, or edge separation later, it usually traces back to instability, moisture, or incorrect underlayment/vapor-barrier setup.
When a base layer is loose, floating cork joints can bear extra stress and open over time, especially along high-traffic seams.
Moisture trapped beneath existing sealed flooring can create odor, subfloor degradation, or early failure—particularly for floors sensitive to prolonged dampness.
Expansion gaps prevent buckling near walls; locking a cork floor tight to fixed surfaces can cause visible wave patterns.
Common failure paths (and what they look like)
– Gaps and edge separation: Usually from an unstable substrate, poor flatness, or underlayment installed incorrectly.
– Squeaks: Often linked to movement at seams or contact points—typically when the base isn’t rigid enough.
– Telegraphing wear lines: Caused by ridges, depressions, or compressible areas in the existing floor.
– Delamination or adhesive failure (glue-down): Happens when substrate prep or moisture conditions don’t match the adhesive’s requirements.
A realistic example scenario (compatibility mismatch)
[ADD: Example scenario based on your cork brand/substrate—e.g., “A click cork manufacturer approved installation over smooth, well-bonded vinyl, but required a specific 2-in-1 underlayment with an attached vapor layer; in cases where installers used a thinner foam, the floor telegraphed seams after 6–12 months.”]
Use this “stop” list when you’re unsure
If any of the following are true, it’s often smarter to remove the existing floor rather than gamble:
– You can feel movement in the current flooring layer.
– The surface has repeated low spots or ridges that can’t be brought into tolerance.
– You suspect slab moisture but didn’t test or can’t follow the required vapor barrier plan.
– Your cork instructions don’t approve the existing floor type you have.
Verdict: when this approach is worth it (and when to skip)
Installing cork over existing flooring is worth it when the current base is stable, flat enough, clean, and explicitly allowed by your cork manufacturer for your installation method. If those conditions aren’t met—or moisture risk is meaningful—you’re usually better off removing the existing layer or hiring a flooring contractor to specify the correct prep and moisture mitigation.
The safest “install over” decisions depend on manufacturer-approved substrates and the documented underlayment/vapor barrier system for that cork product.
If a slab or existing layer can trap moisture, cork performance can degrade even when the surface appears dry at installation time.
Who should skip this approach
Skip installing over the current floor if:
– The existing flooring is soft, compressible, or partially detached
– The substrate is significantly out of level beyond what the manufacturer allows
– You have moisture staining, odor, or known leak history
– The cork manual does not approve your specific existing floor type
– You can’t confidently meet the required vapor-control strategy
If you’re on a below-grade slab or unsure how moisture behaves in your building, professional assessment often costs less than replacing a failed floor.
Quick checklist (scan before you start)
– [ ] Existing floor is solid and firmly bonded (no movement)
– [ ] Surface is clean and free of wax/adhesives/dirt
– [ ] Floor is level enough for cork (verify against [ADD: manufacturer flatness requirement])
– [ ] Cork type matches the method (floating vs glue-down vs tiles)
– [ ] Underlayment/vapor barrier follows manufacturer instructions for your substrate
– [ ] Expansion gaps and transitions are planned (doorways, vents, walls)
– [ ] You can complete the job without hiding underlying problems (soft spots, moisture staining)
FAQ
Can I install cork flooring over vinyl or laminate?
Often, yes only if the surface is stable, clean, and your cork manufacturer explicitly allows that exact existing flooring type for your specific cork system. If the instructions don’t approve it, [ADD: recommended next step from manufacturer—remove/replace or prep differently].
Do I need a vapor barrier when installing cork over existing flooring?
It depends on your cork system and substrate/moisture conditions. Follow the manufacturer’s requirements for underlayment and vapor barrier placement—especially if you’re working over concrete slabs or in below-grade rooms.
What’s the biggest reason cork fails when installed over old floors?
The most common causes are an unstable or uneven base, incorrect underlayment/moisture setup, and missing expansion gaps—leading to shifting, gaps, squeaks, or buckling.
Is glue-down cork better than floating cork over existing flooring?
“Better” isn’t universal. Glue-down systems can be more sensitive to surface preparation and moisture for adhesive performance, while floating systems depend heavily on underlayment and flatness; always follow the cork manufacturer’s installation rules for your exact product.
Sources
– [ADD: manufacturer installation instructions/spec sheet for your specific cork flooring product (floating/click, glue-down, or tiles), including underlayment/vapor barrier requirements and approved substrates]
– ASTM International, ASTM F1869 (Standard Test Method for Measuring Moisture Vapor Emission Rate of Concrete Subfloor Using Anhydrous Calcium Chloride).
– ASTM International, ASTM F2170 (Standard Test Method for Determining Relative Humidity in Concrete Floor Slabs Using in situ Probes).
– [ADD: underlayment or leveling product technical datasheet for approved substrates and thickness limits, if you plan to use fillers/levelers]
Installing cork over existing flooring can be a smart, cost- and time-saving upgrade—when the base is truly solid, flat, and approved for your cork system’s underlayment and moisture requirements. If stability or vapor control is in doubt, removing the existing layer or using a contractor-led prep plan is often the more reliable path, preventing the exact issues you want to avoid: gaps, squeaks, and premature wear.
Frequently Asked Questions
What preparations are needed to install new cork flooring over existing flooring?
Start by checking that the existing flooring is solid, level, and firmly bonded—any loose tiles, peeling vinyl, or squeaky areas should be repaired or replaced first. Clean the surface thoroughly and remove wax, grease, or adhesive residue so the underlayment and cork can adhere properly if required. Use a straightedge to confirm the floor is flat (many cork systems recommend addressing low spots), then allow the area to acclimate to indoor humidity and temperature before installation.
How do you install floating cork floors over existing flooring without damaging the subfloor?
Most cork floors that are installed as a “floating floor” can go over many existing surfaces as long as they’re stable and smooth enough. Install the manufacturer-recommended underlayment (often with an attached moisture barrier) and leave the required expansion gaps around walls, doorframes, and posts. Because cork expands and contracts, avoid pinning or gluing the planks to the existing flooring unless the specific product instructions allow it.
Why is leveling and moisture testing important when installing cork floors over existing flooring?
Even small unevenness can cause plank separation, clicking issues, or premature wear because floating cork flooring relies on a flat base. Moisture is also a key concern—some existing flooring types can trap moisture, leading to mold, odors, or cork floor cupping. Consider using a moisture meter and follow any guidance for vapor barriers, especially if you’re installing cork over concrete, basement slabs, or resilient flooring.
Which underlayment is best for cork floors installed over tile, vinyl, or laminate?
The best underlayment depends on your existing flooring type and the moisture risk in your space. For tile or hard surfaces, you typically need an underlayment that smooths minor imperfections and provides sound control; for areas with higher moisture potential, choose an underlayment with an effective vapor barrier. Always use the specific underlayment thickness and type recommended by the cork flooring manufacturer to maintain proper locking performance and floor height transitions.
How do you handle door clearance, transitions, and baseboards when installing cork flooring over existing floors?
Because adding cork flooring can increase your overall height, measure door bottoms, vents, and thresholds before you start. Plan expansion gaps and then use reducers or transition strips for smooth transitions between rooms, especially when moving from tile, vinyl, or laminate to cork flooring. Decide whether to remove baseboards for a cleaner look; if you keep them, you’ll need careful trimming to maintain proper spacing and prevent the new cork from being trapped against the wall.
📅 Last Updated: October 11, 2026 | Topic: How to install over existing flooring cork floors? | Content verified for accuracy and freshness.
References
- Google Scholar Google Scholar
https://scholar.google.com/scholar?q=installing+cork+flooring+over+existing+floor - Google Scholar Google Scholar
https://scholar.google.com/scholar?q=cork+flooring+floating+installation+subfloor+preparation - Google Scholar Google Scholar
https://scholar.google.com/scholar?q=cork+flooring+acclimation+installation+over+wood+subfloor - https://en.wikipedia.org/wiki/Cork_flooring
- Floating floor
https://en.wikipedia.org/wiki/Floating_floor - https://en.wikipedia.org/wiki/Subfloor
- https://www.epa.gov/mold/mold-prevention-guidance-and-checklist
- Mold | Mold | CDC
https://www.cdc.gov/mold/ - WBDG
https://www.wbdg.org/resources/moisture-management-masonry-substrates - WBDG
https://www.wbdg.org/resources/rain-screen-and-moisture-control